


John Venema
-
Posts
25,442 -
Joined
-
Days Won
239
Posts posted by John Venema
-
-
18 hours ago, jordancollins said:
Man I hope these are for p3d too
Yes all our in-house developed airports are multi-platform these days, so P3D and XP11.-
 6
6
-
 1
1
-
-
- Popular Post
-
- Popular Post
- Popular Post
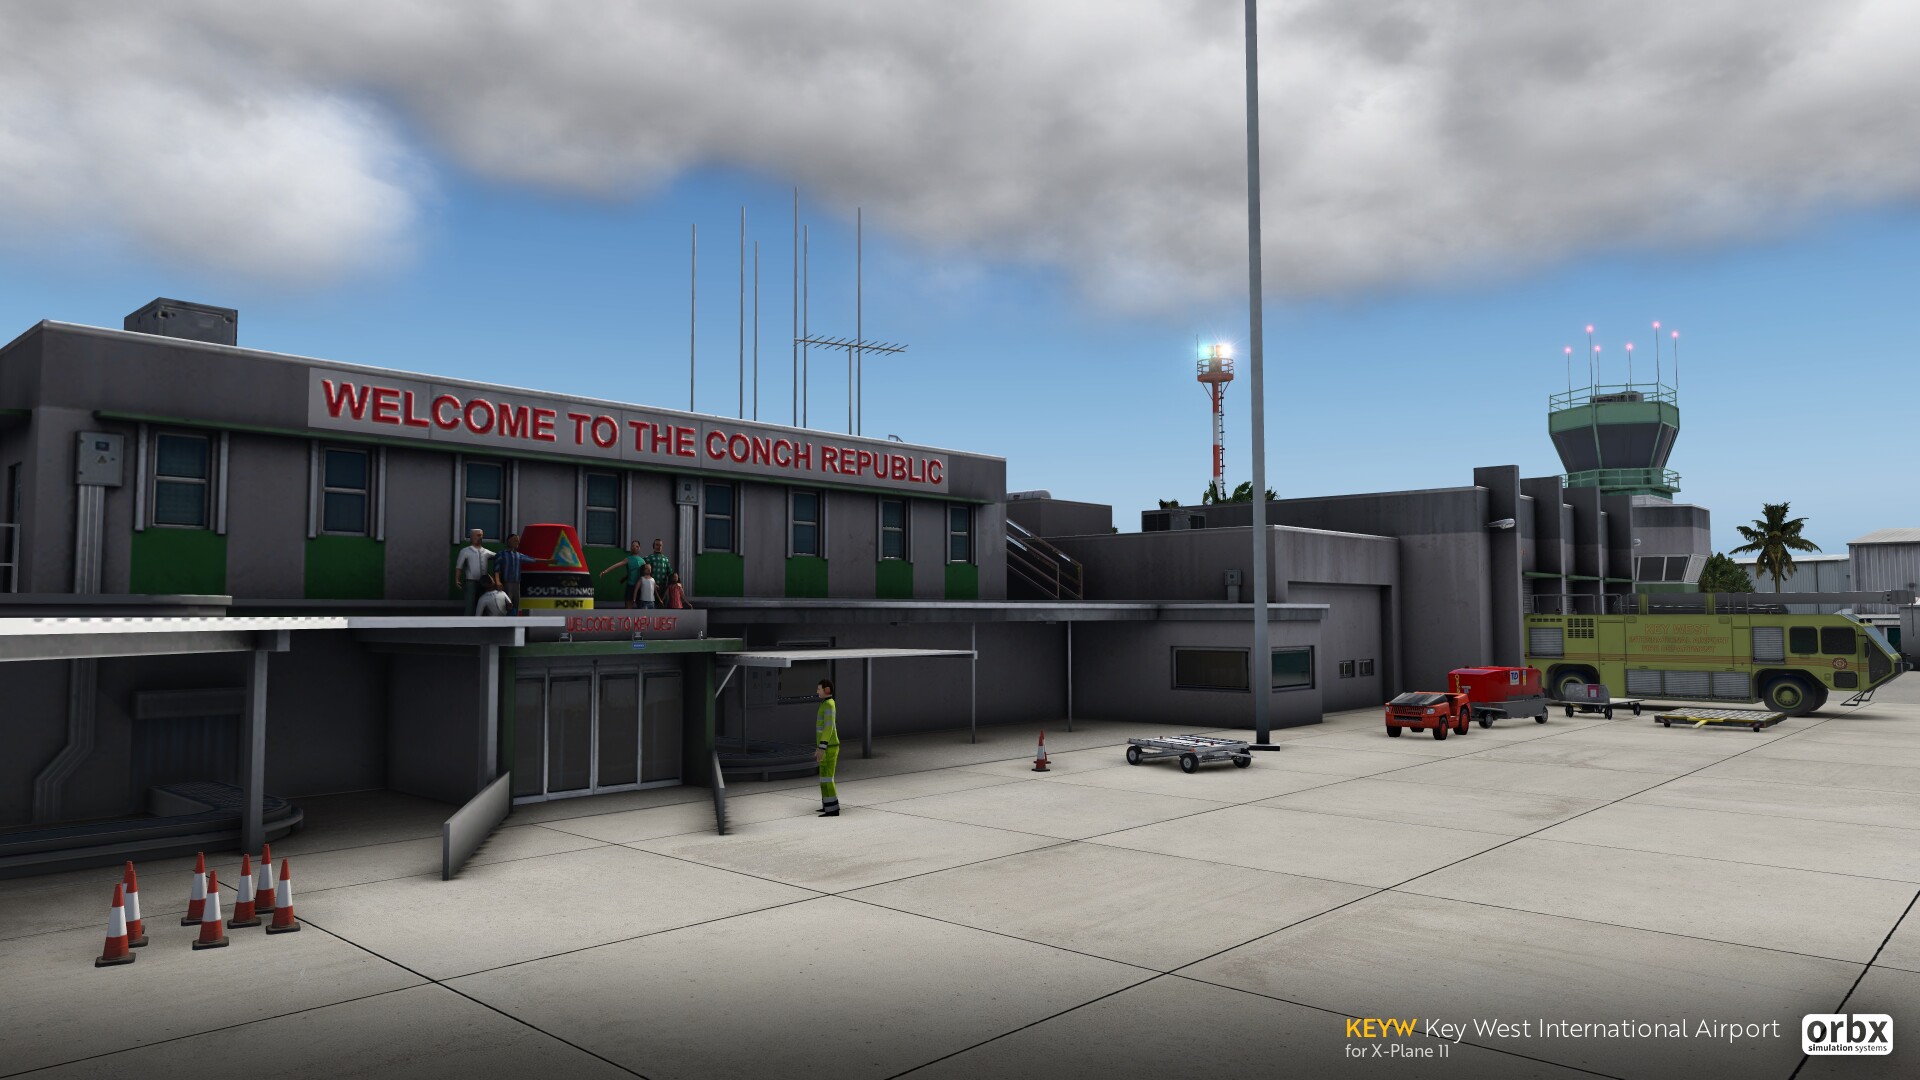
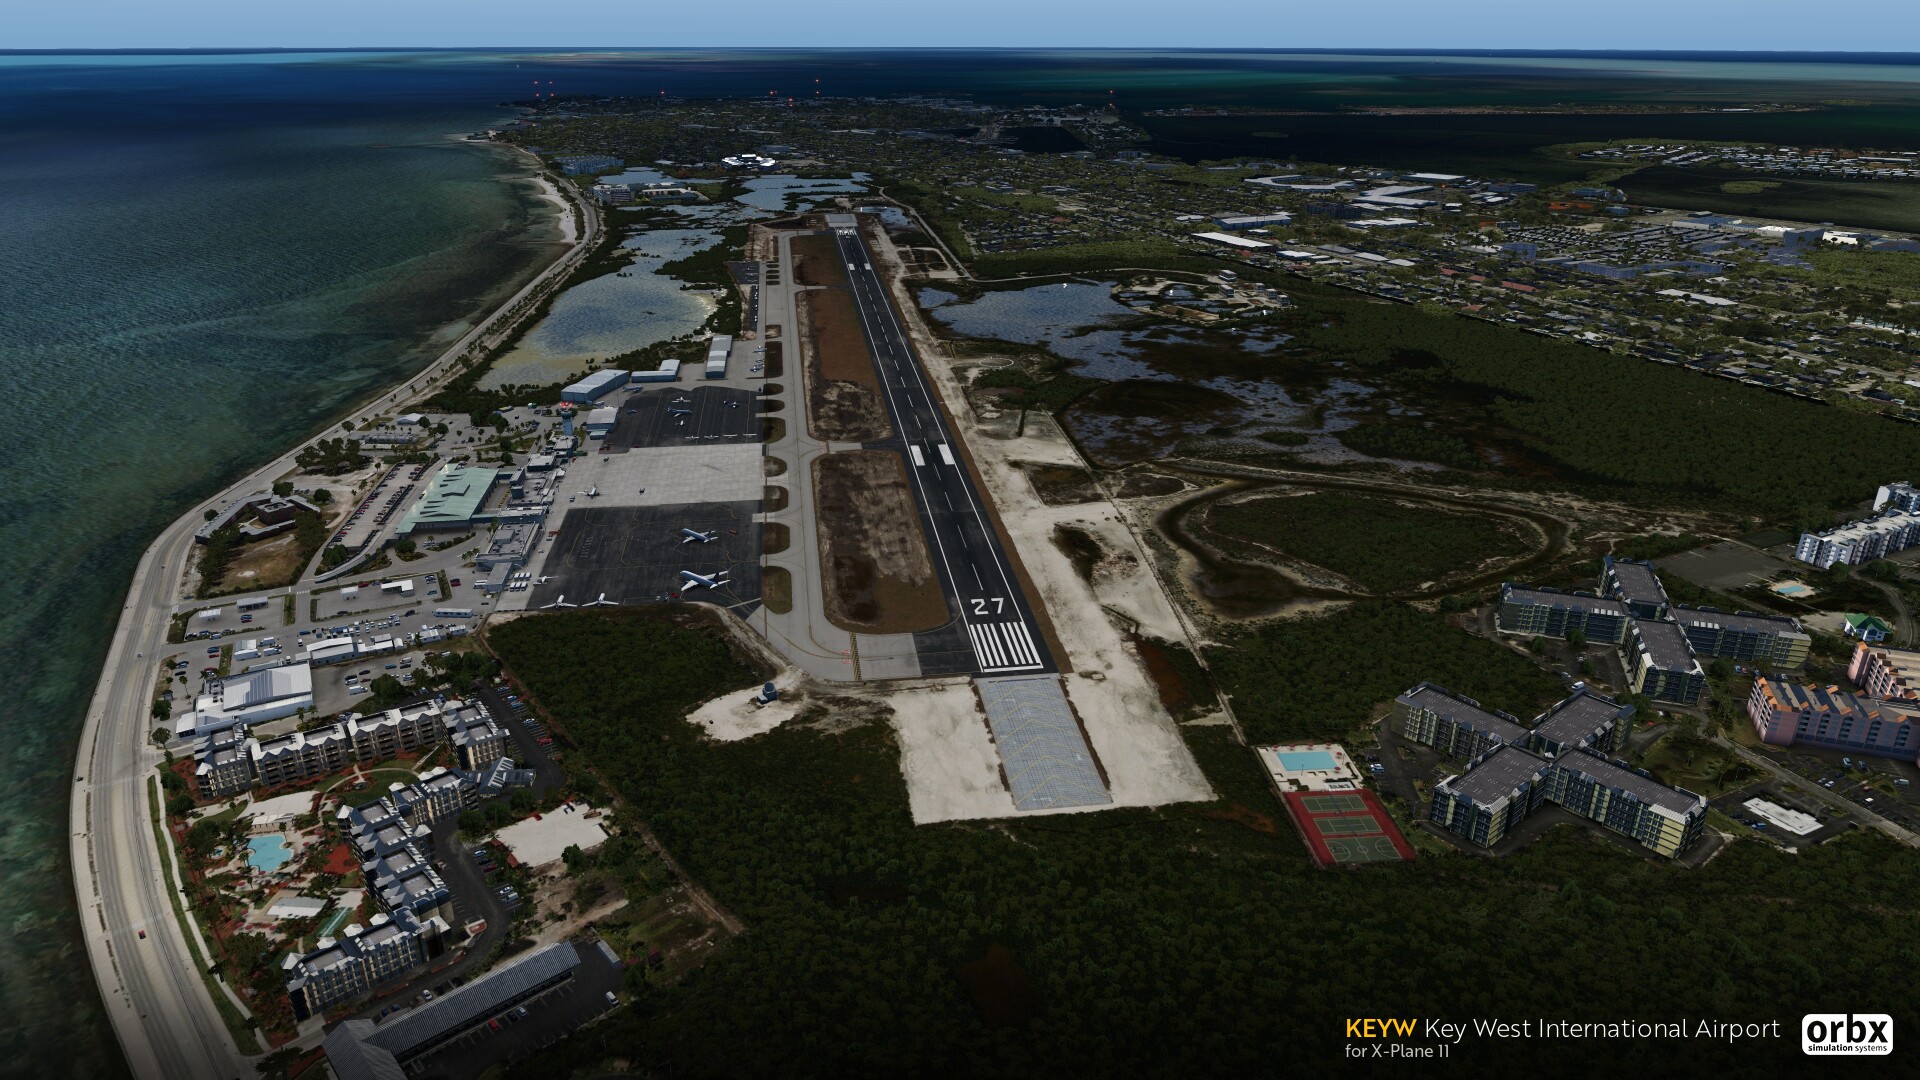
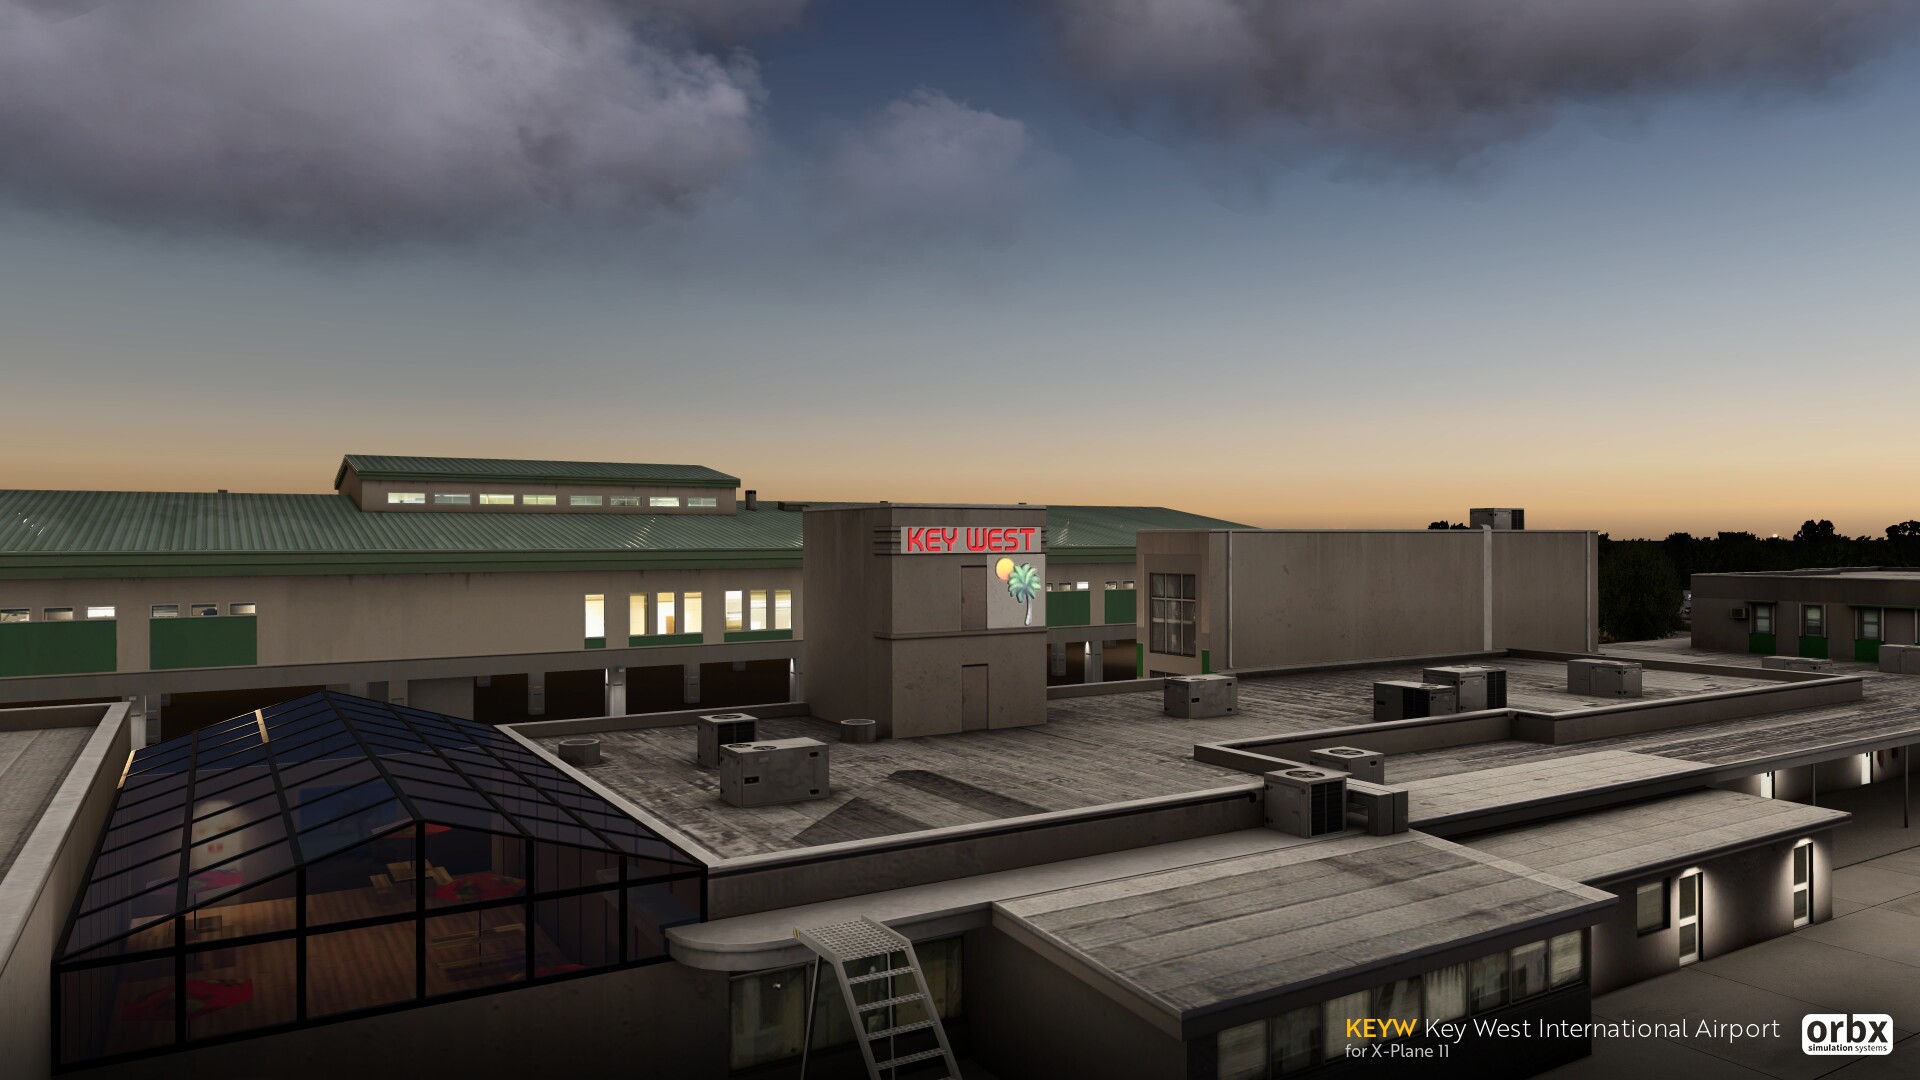
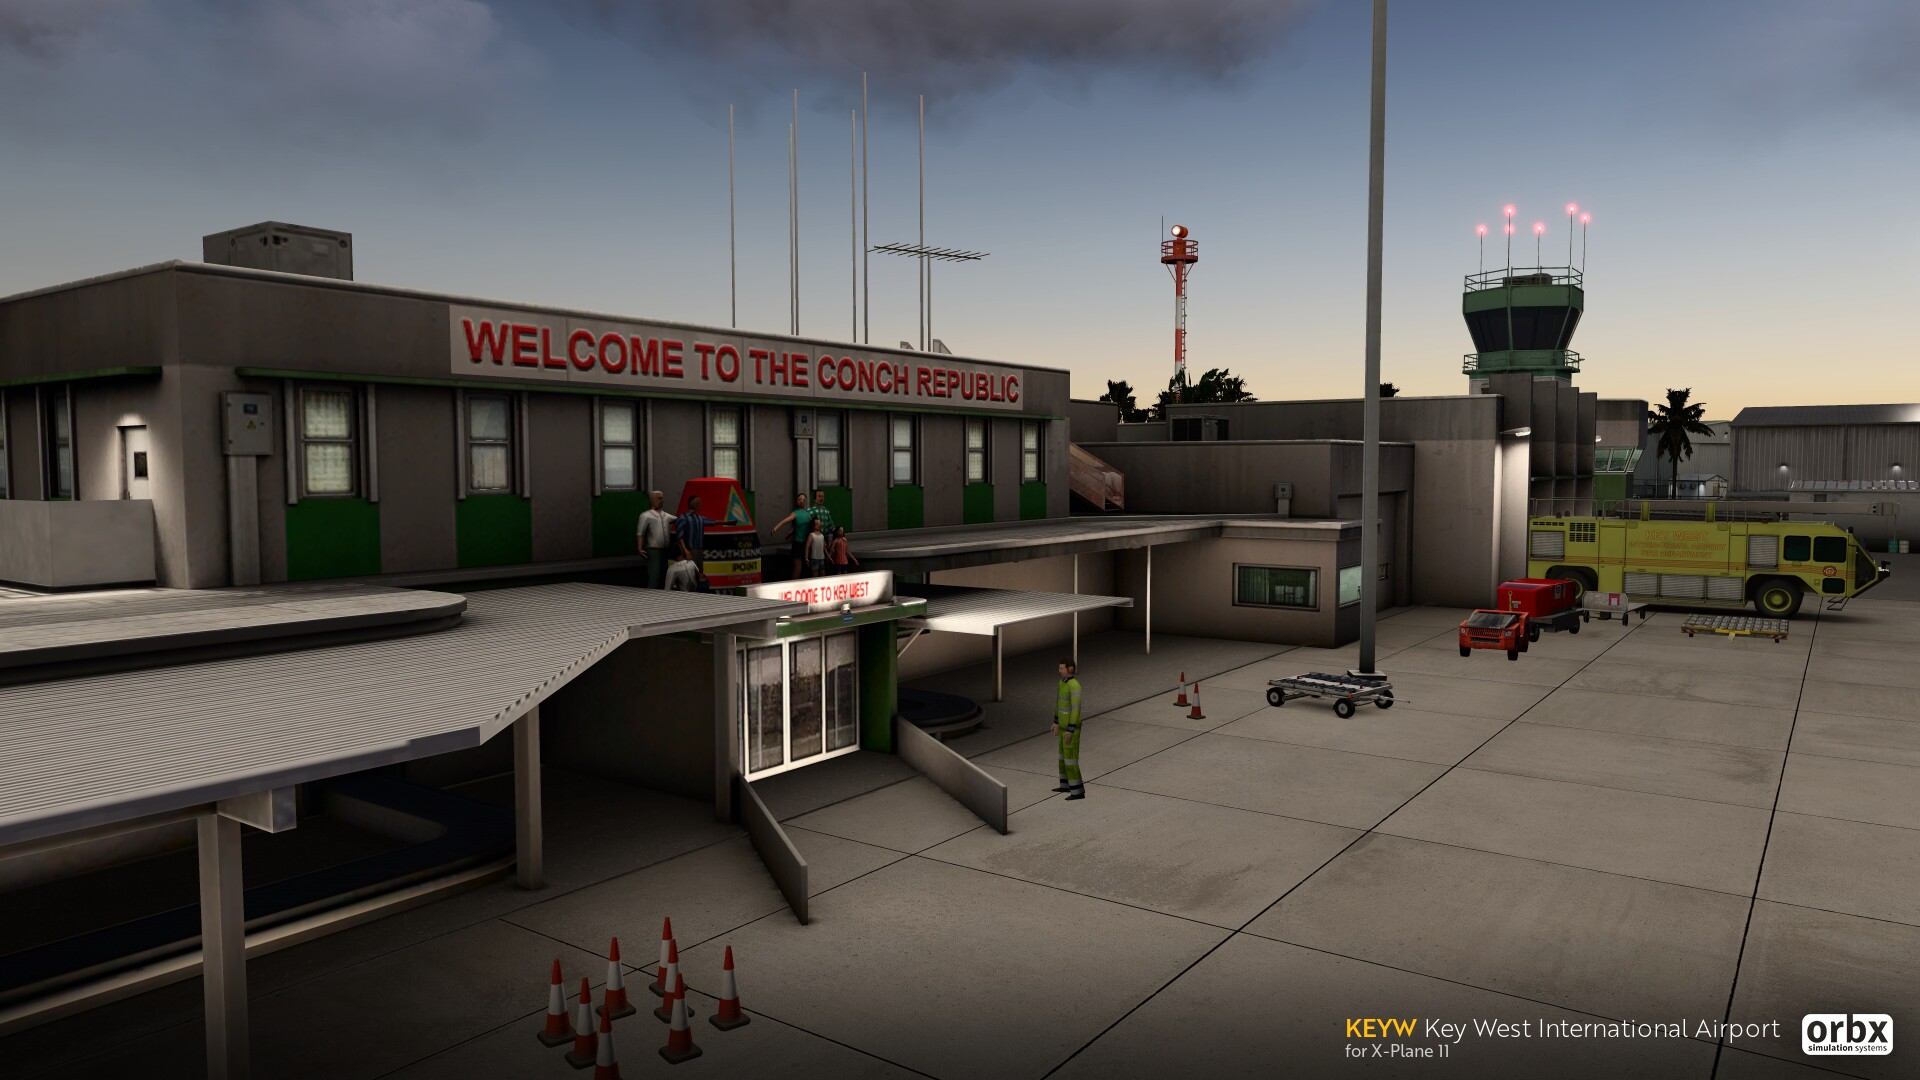
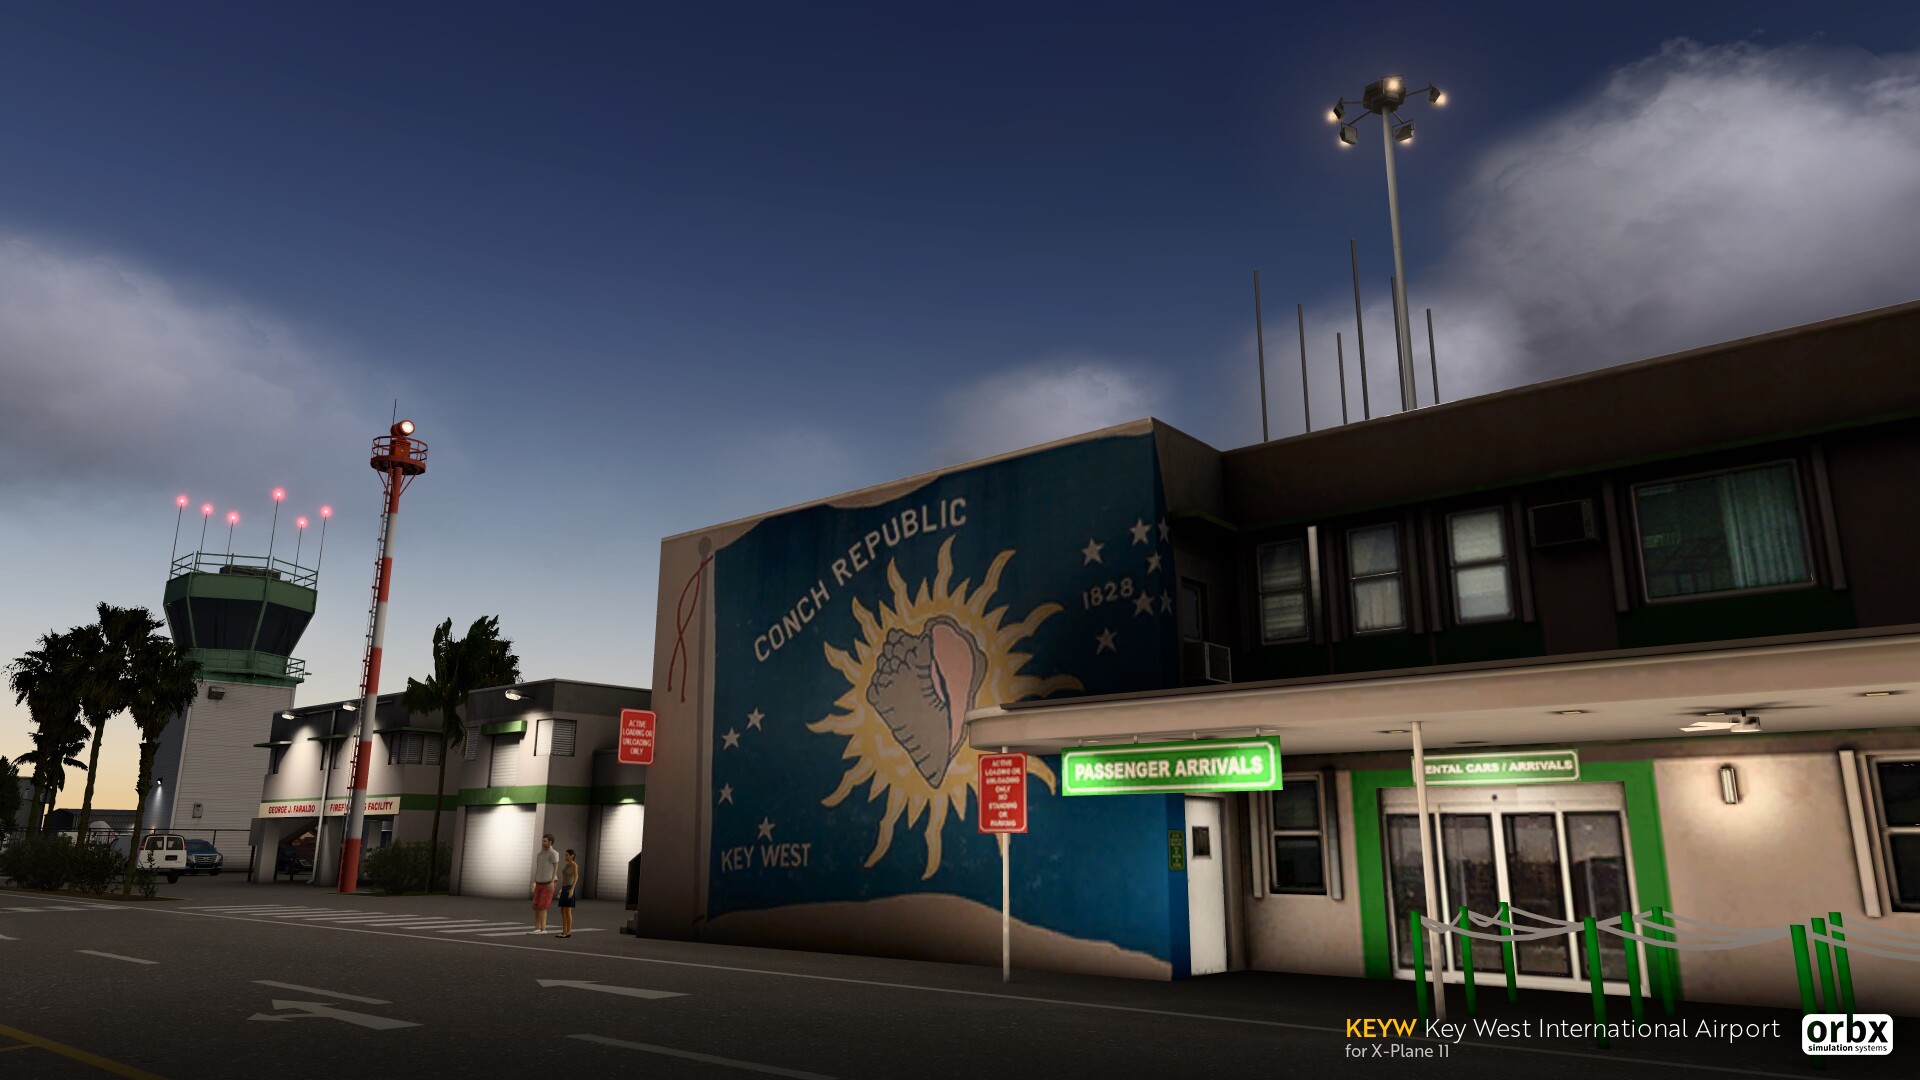
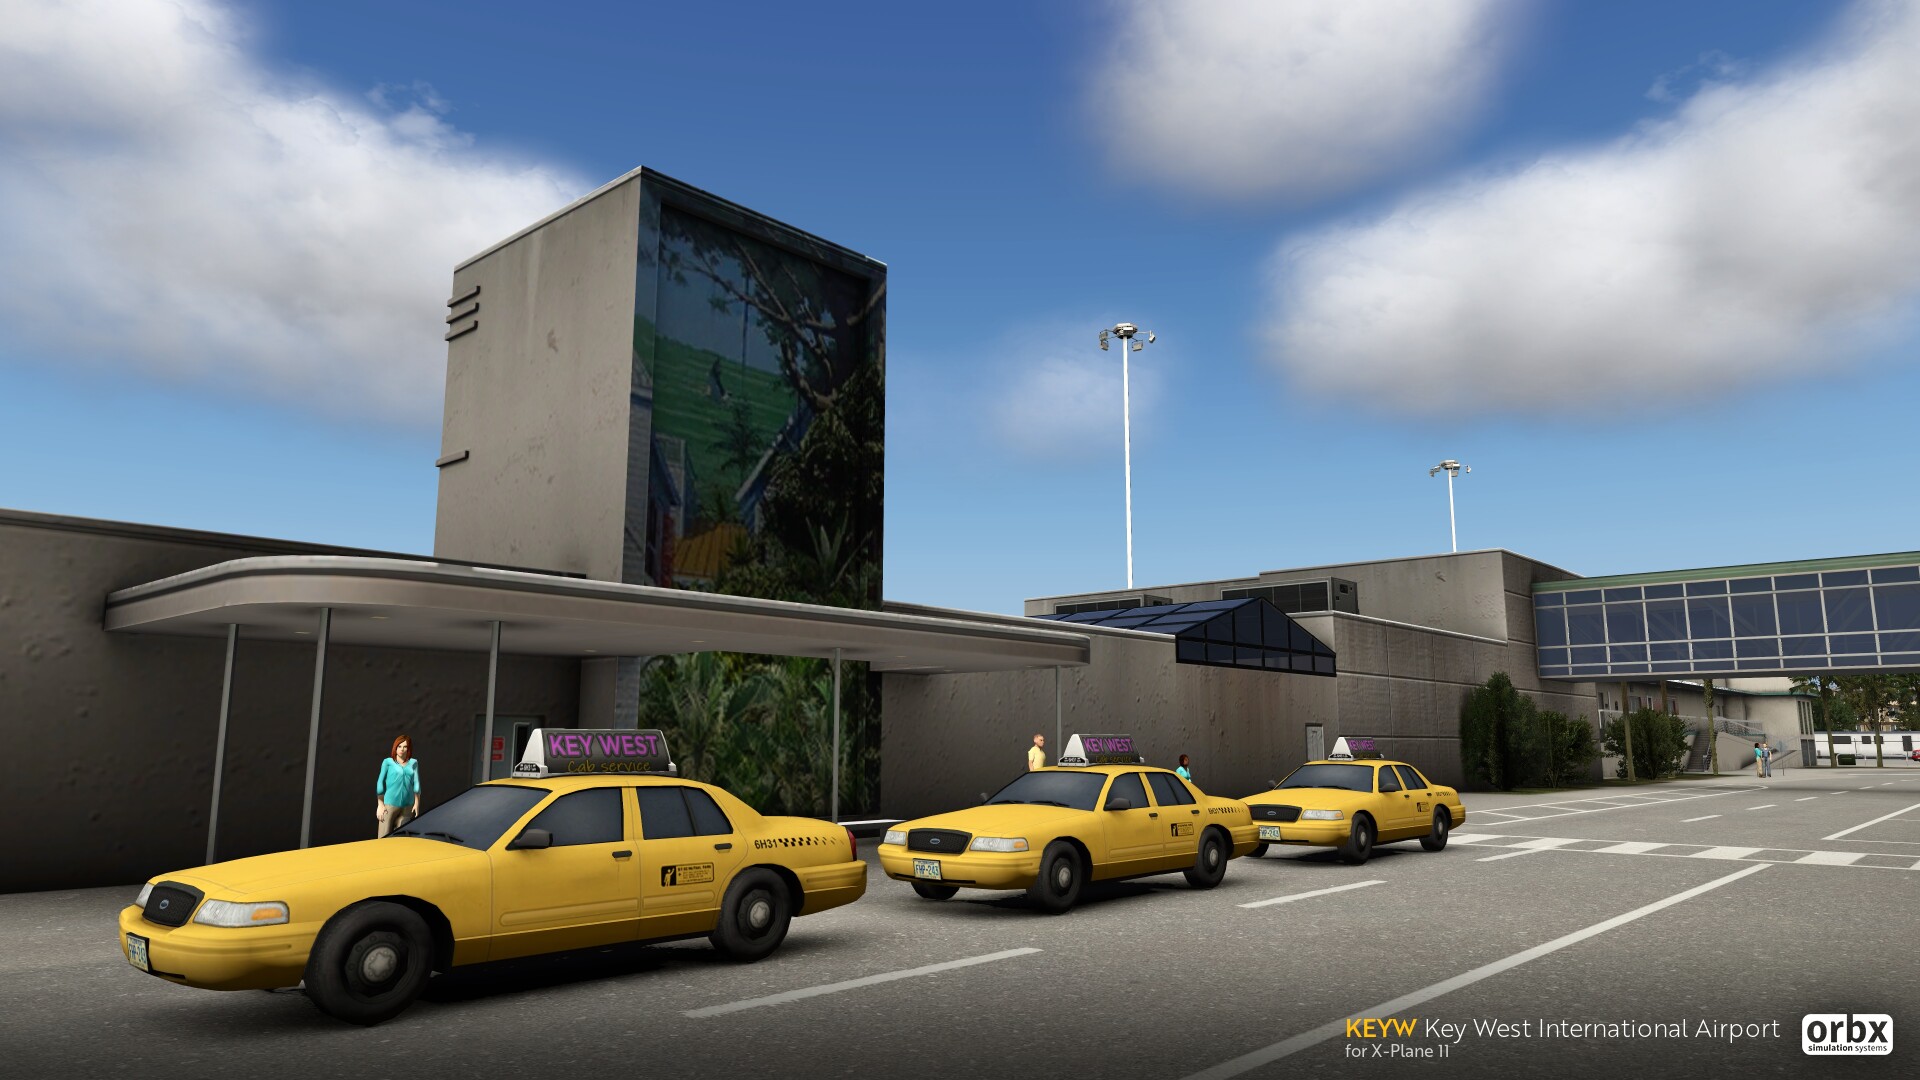
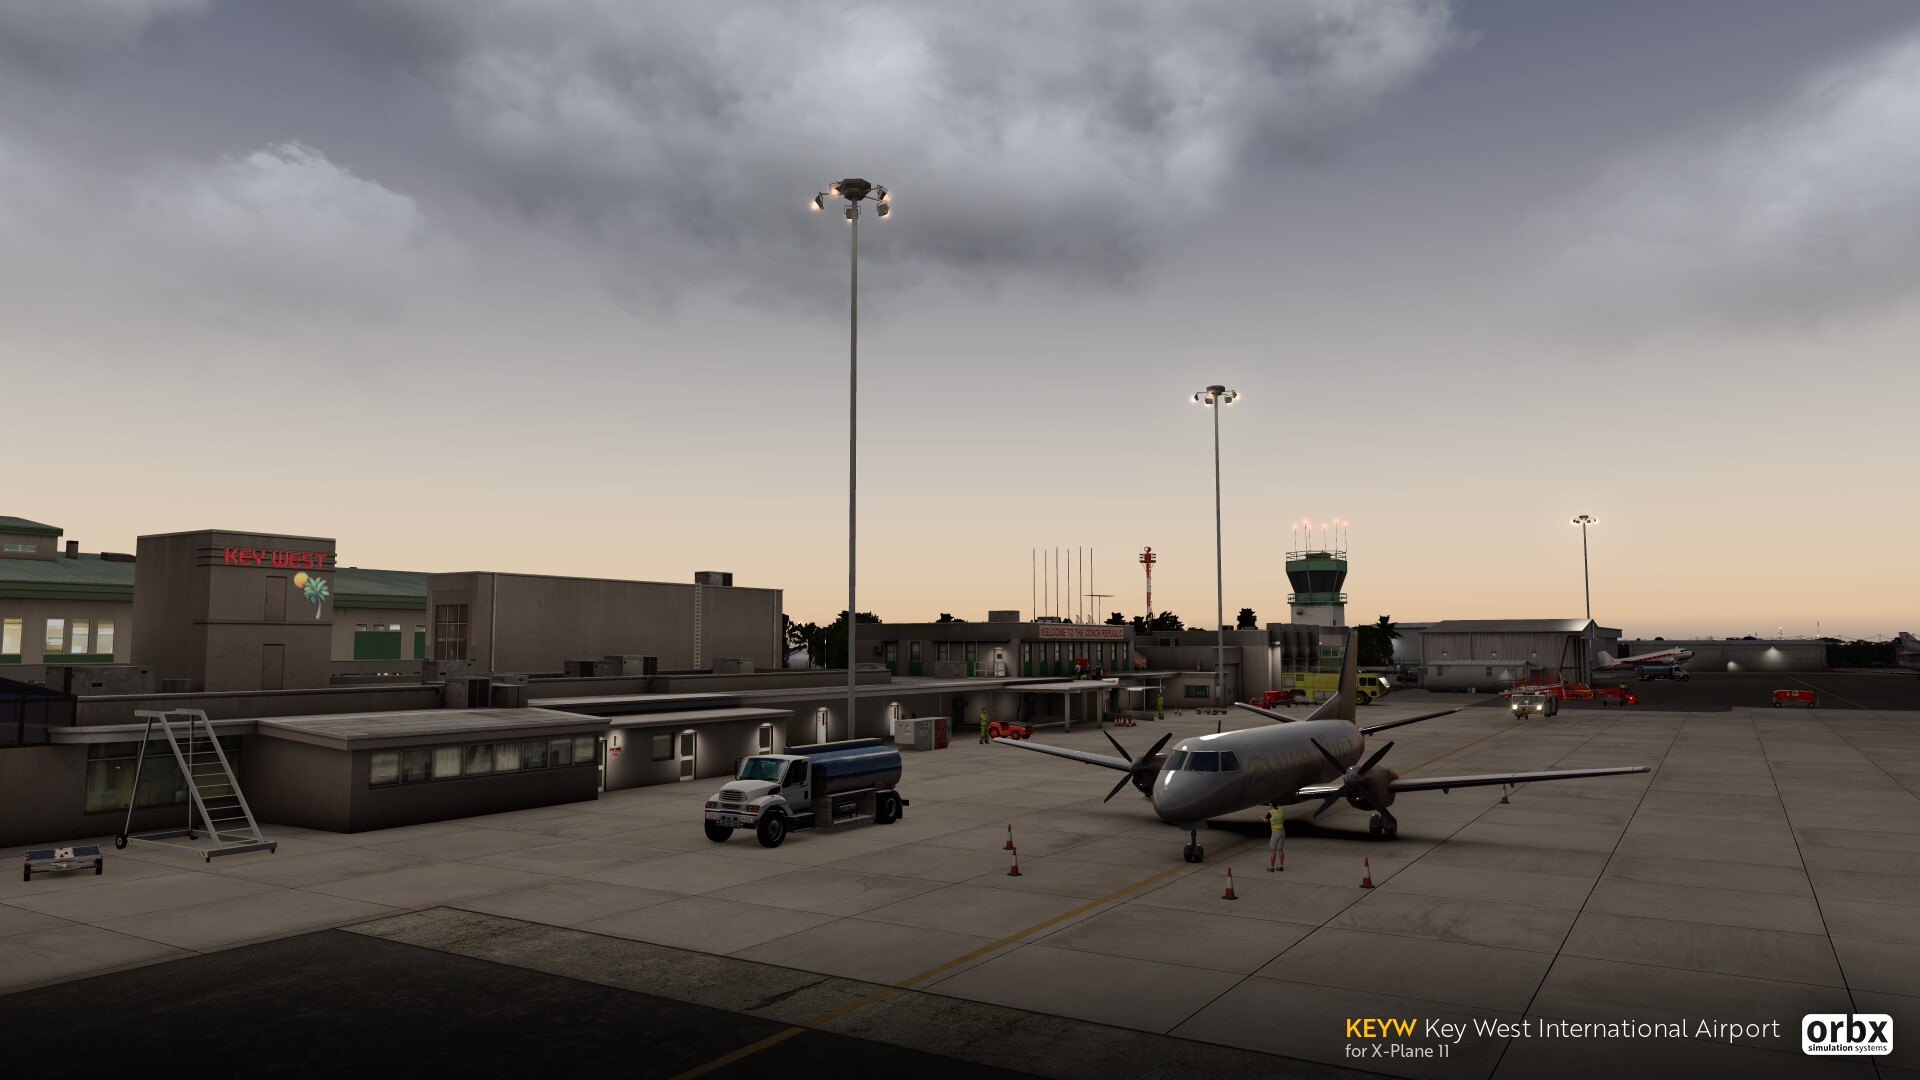
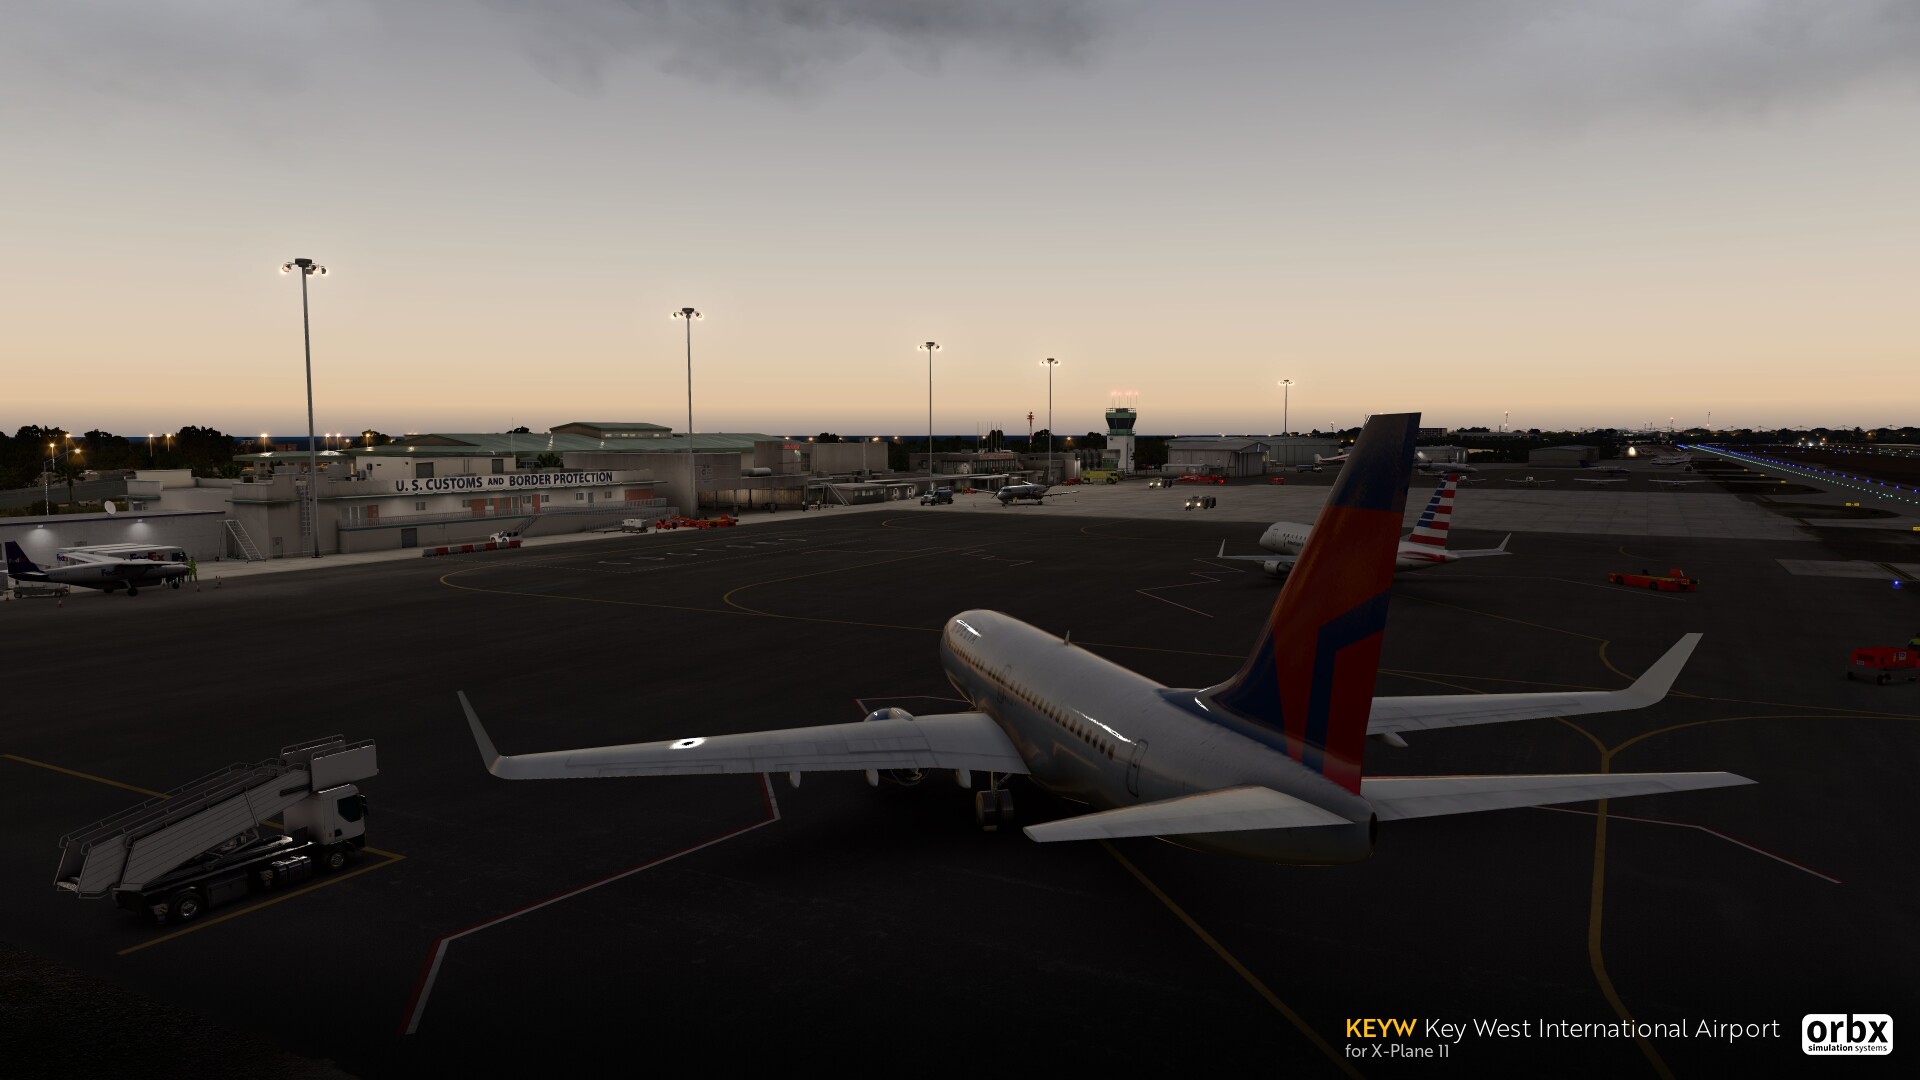
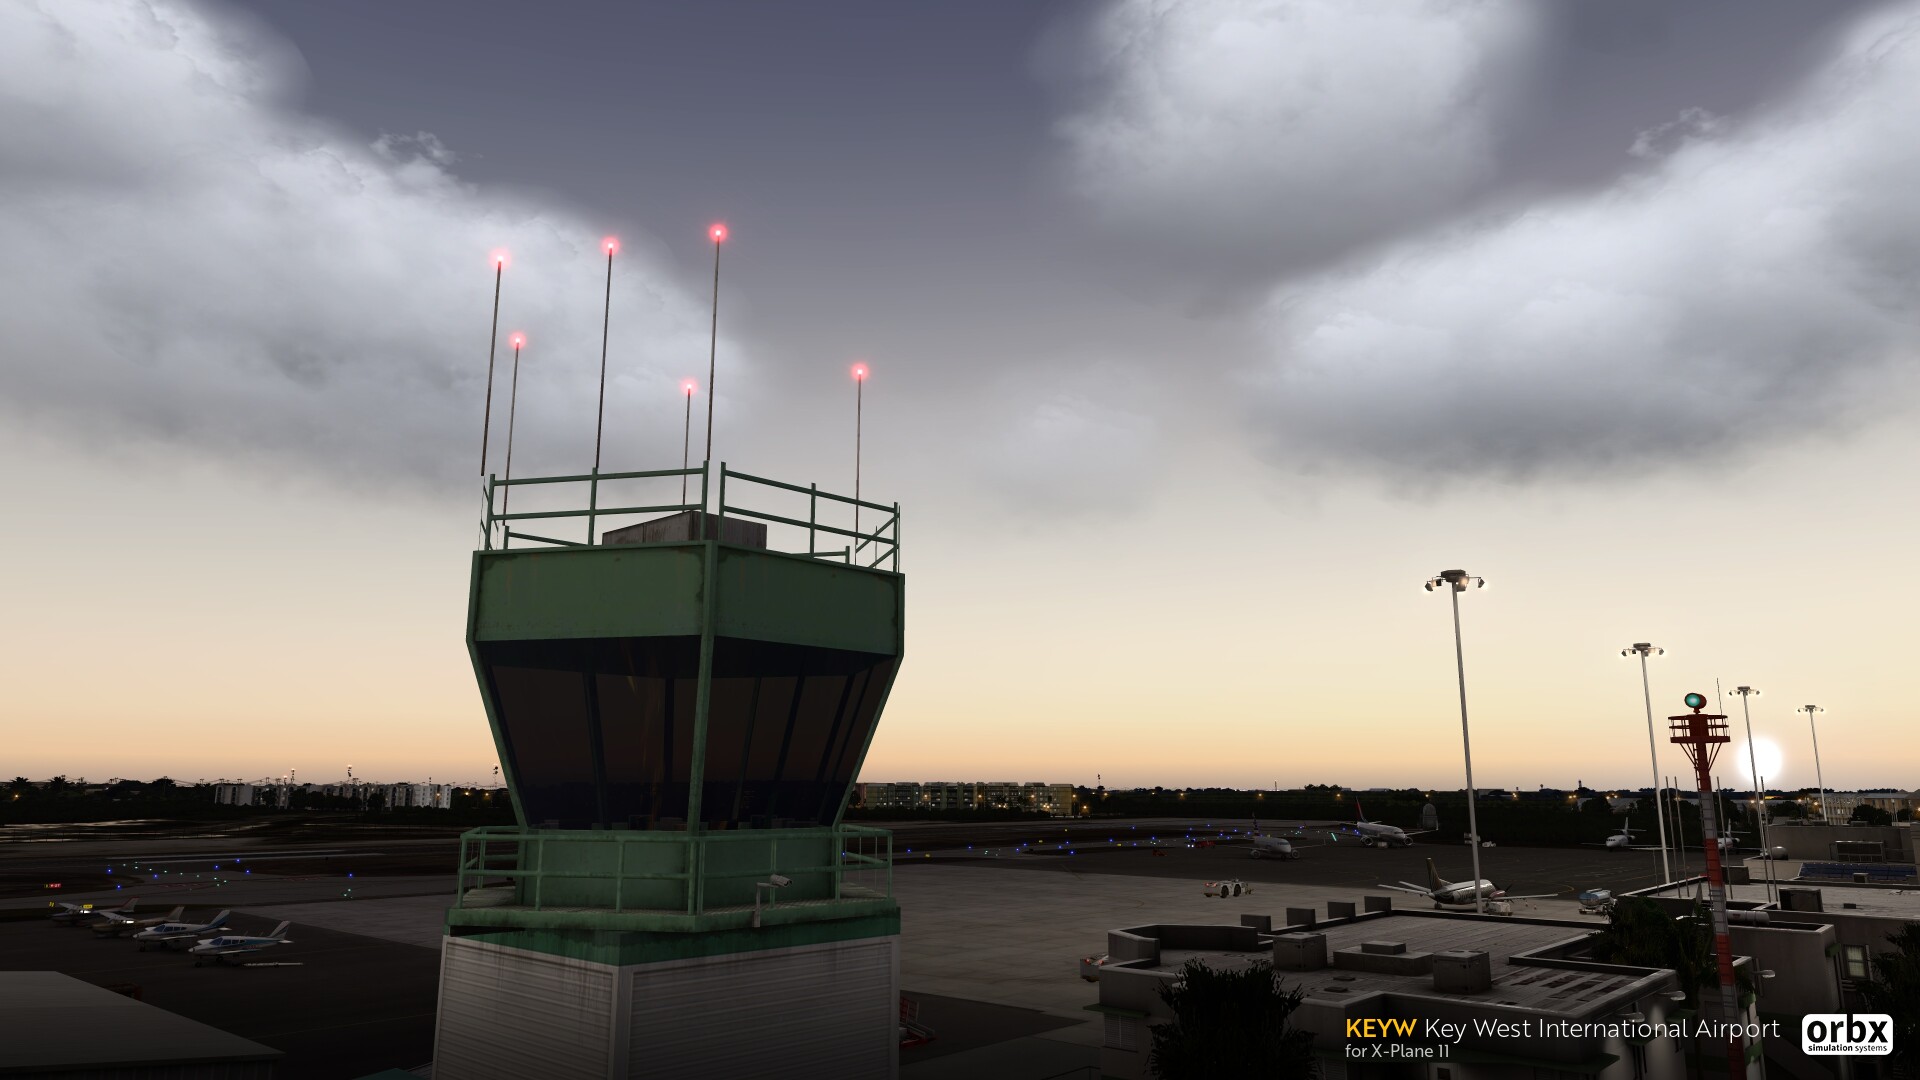
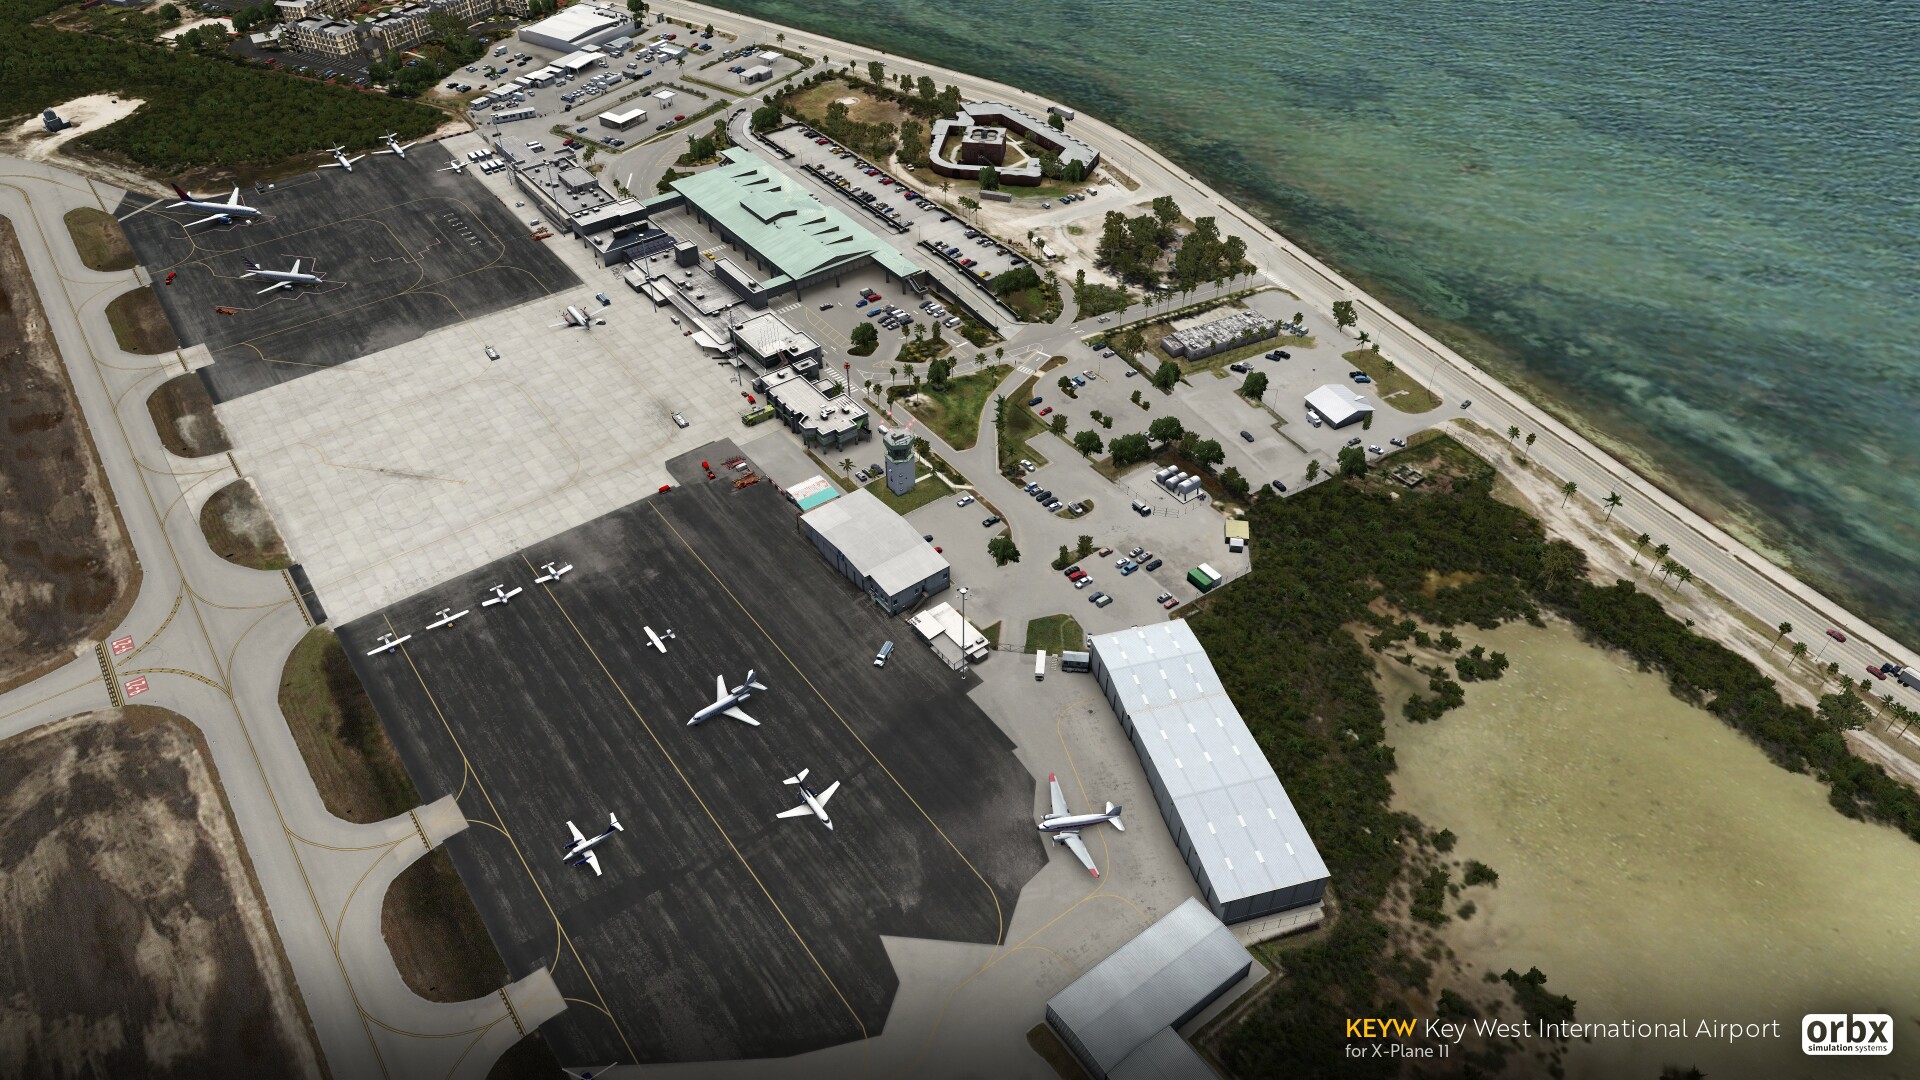
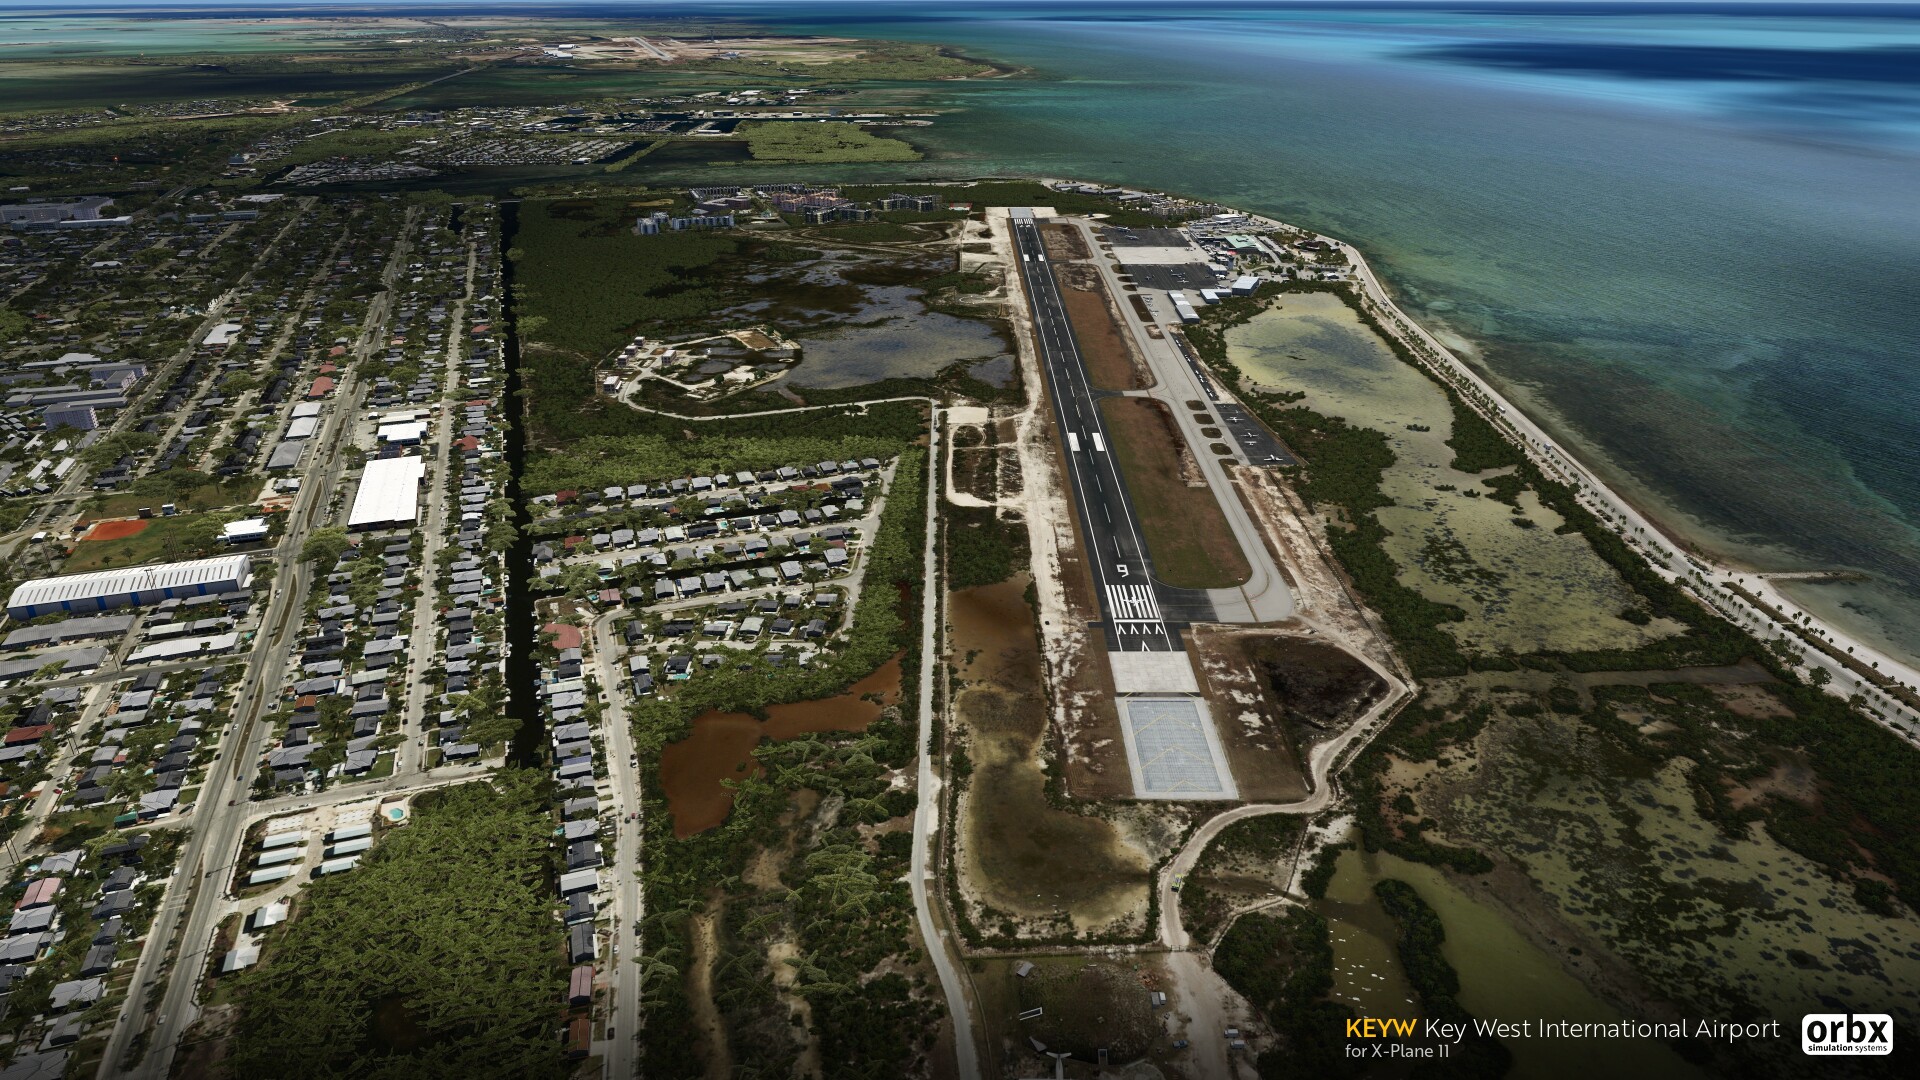
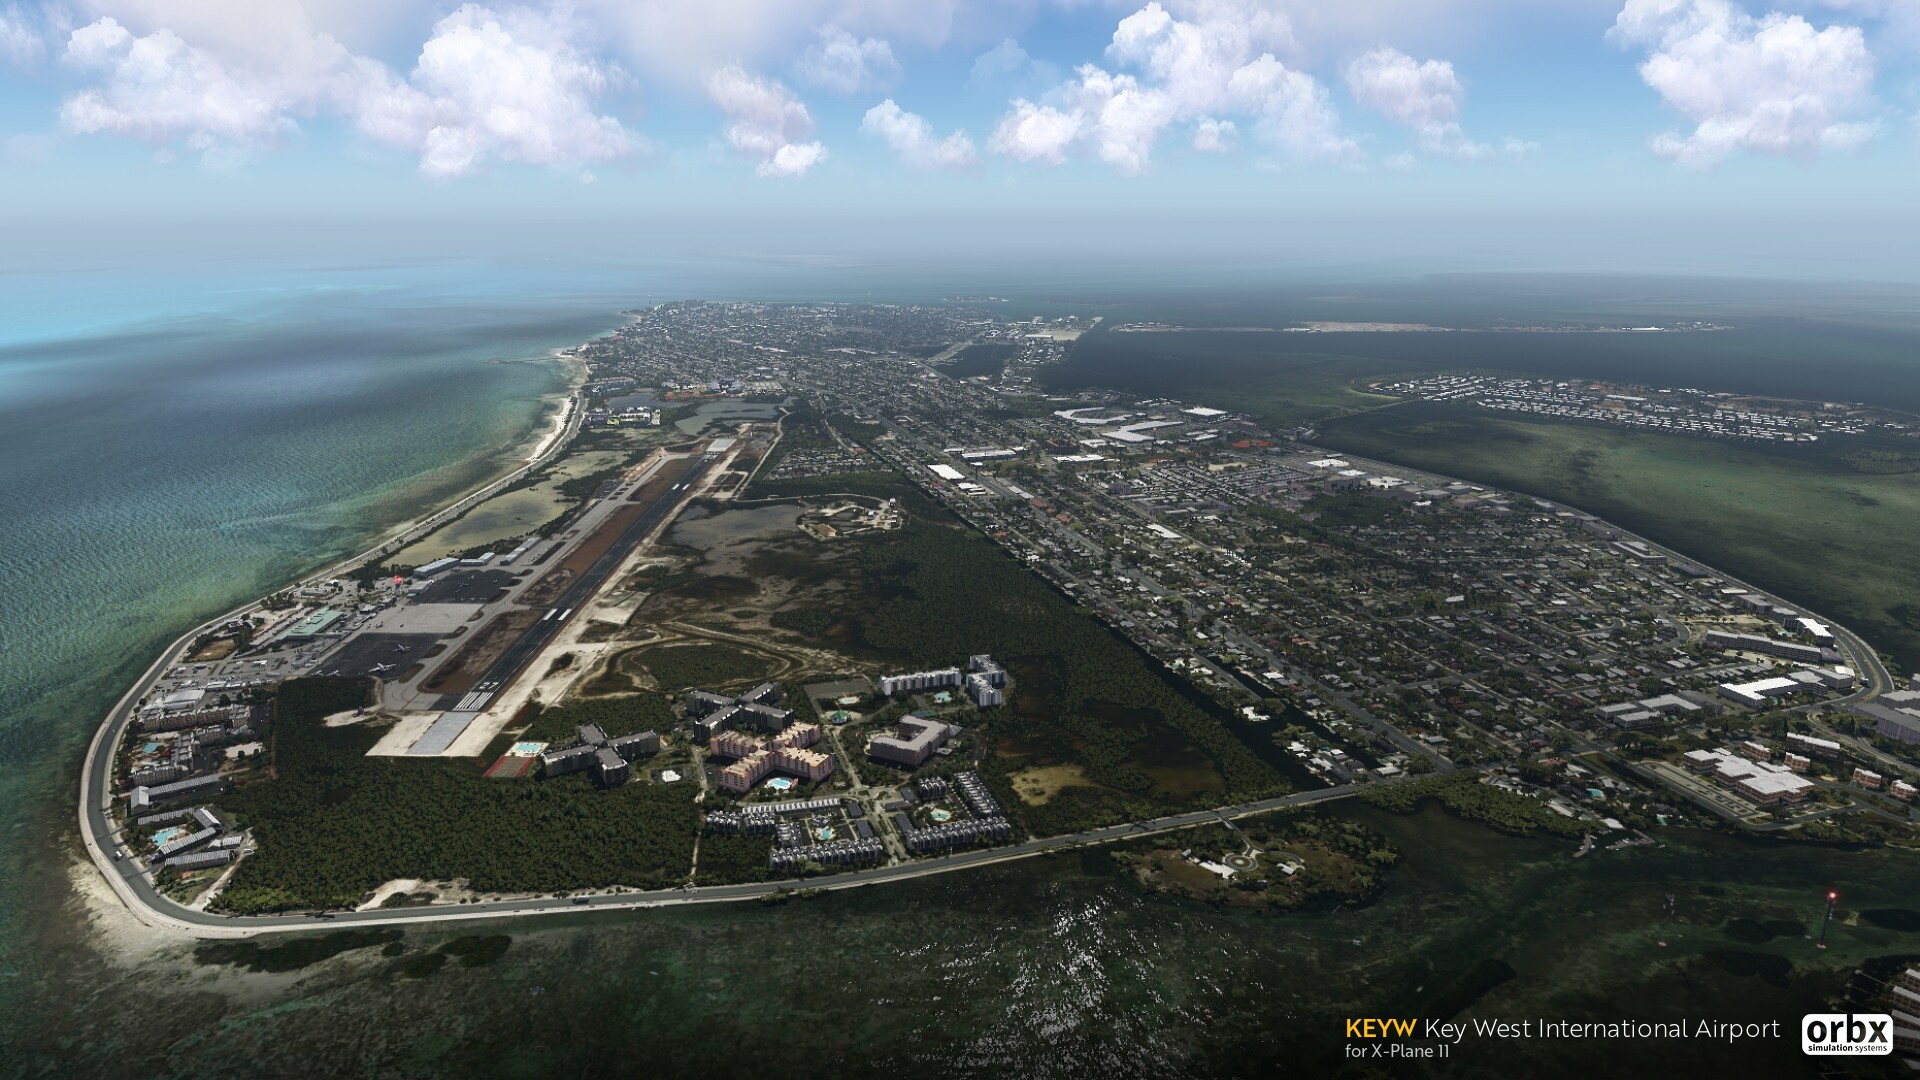
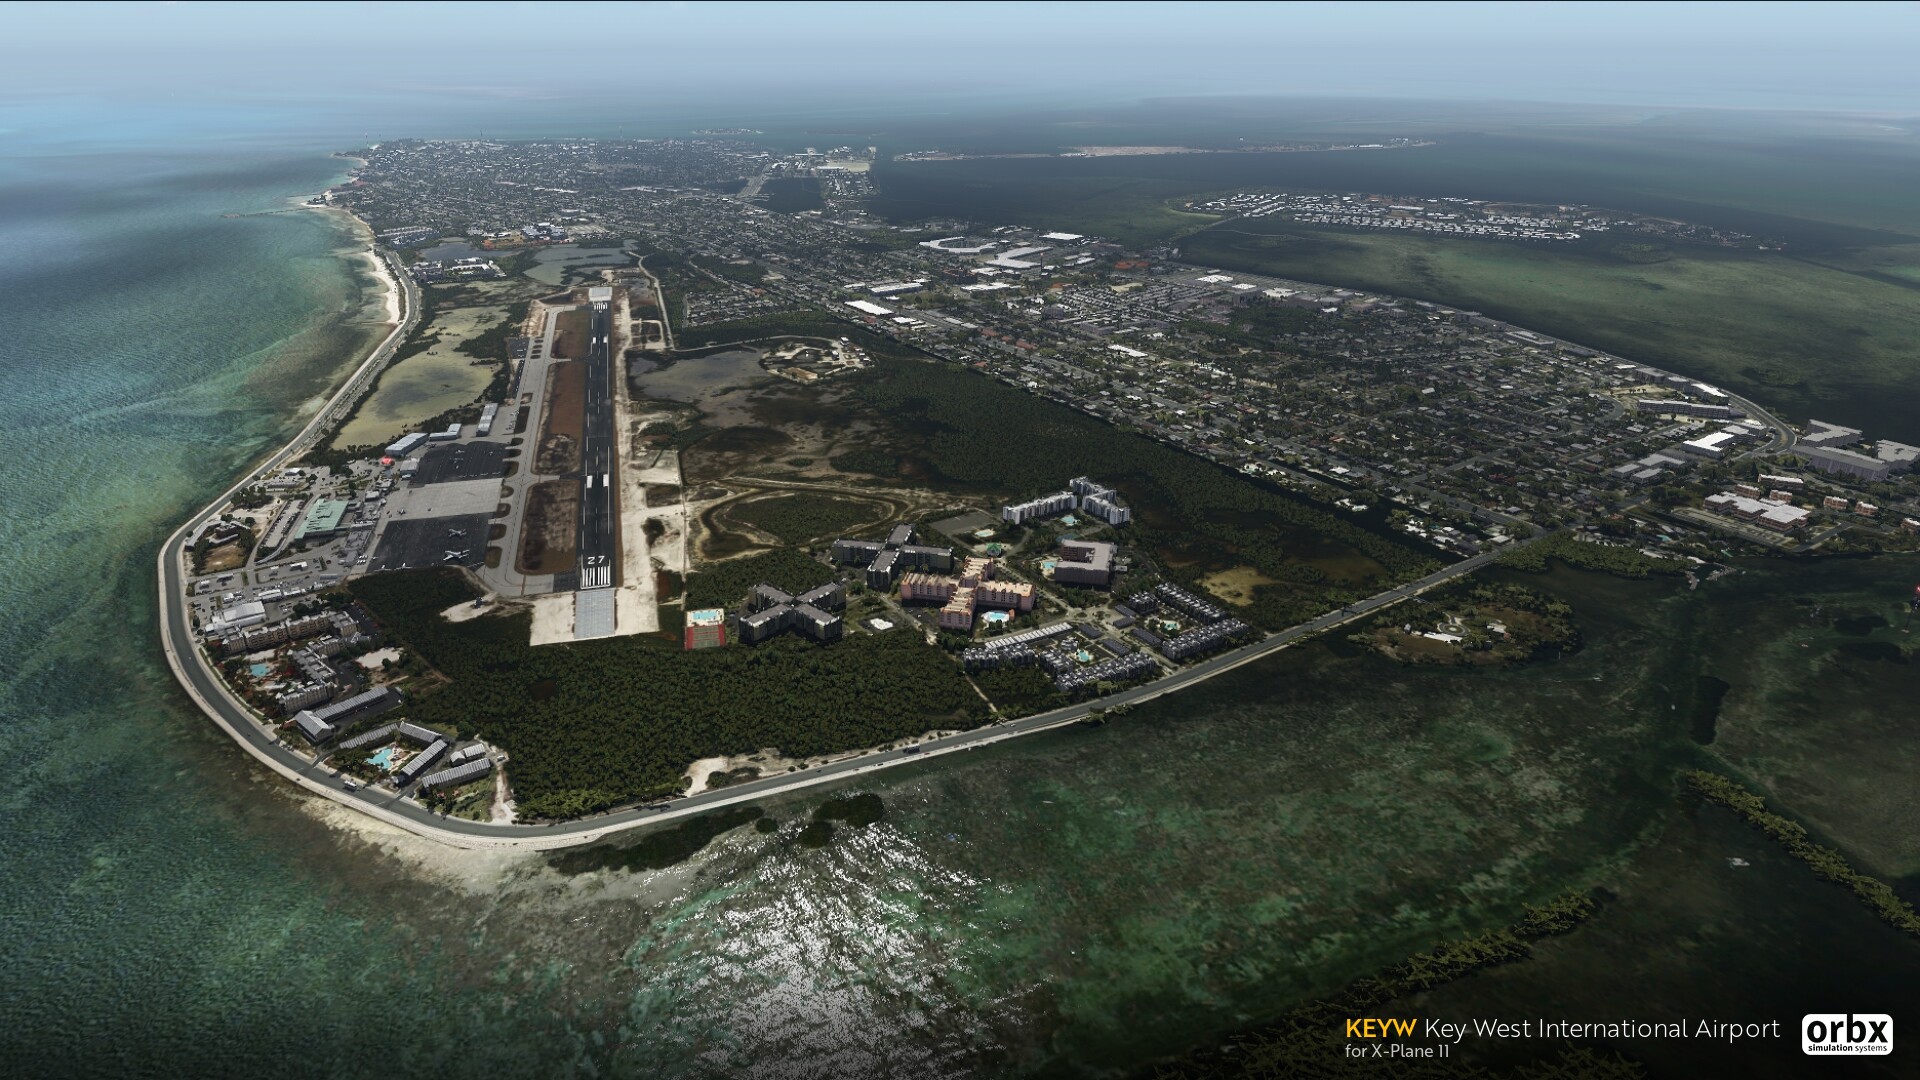
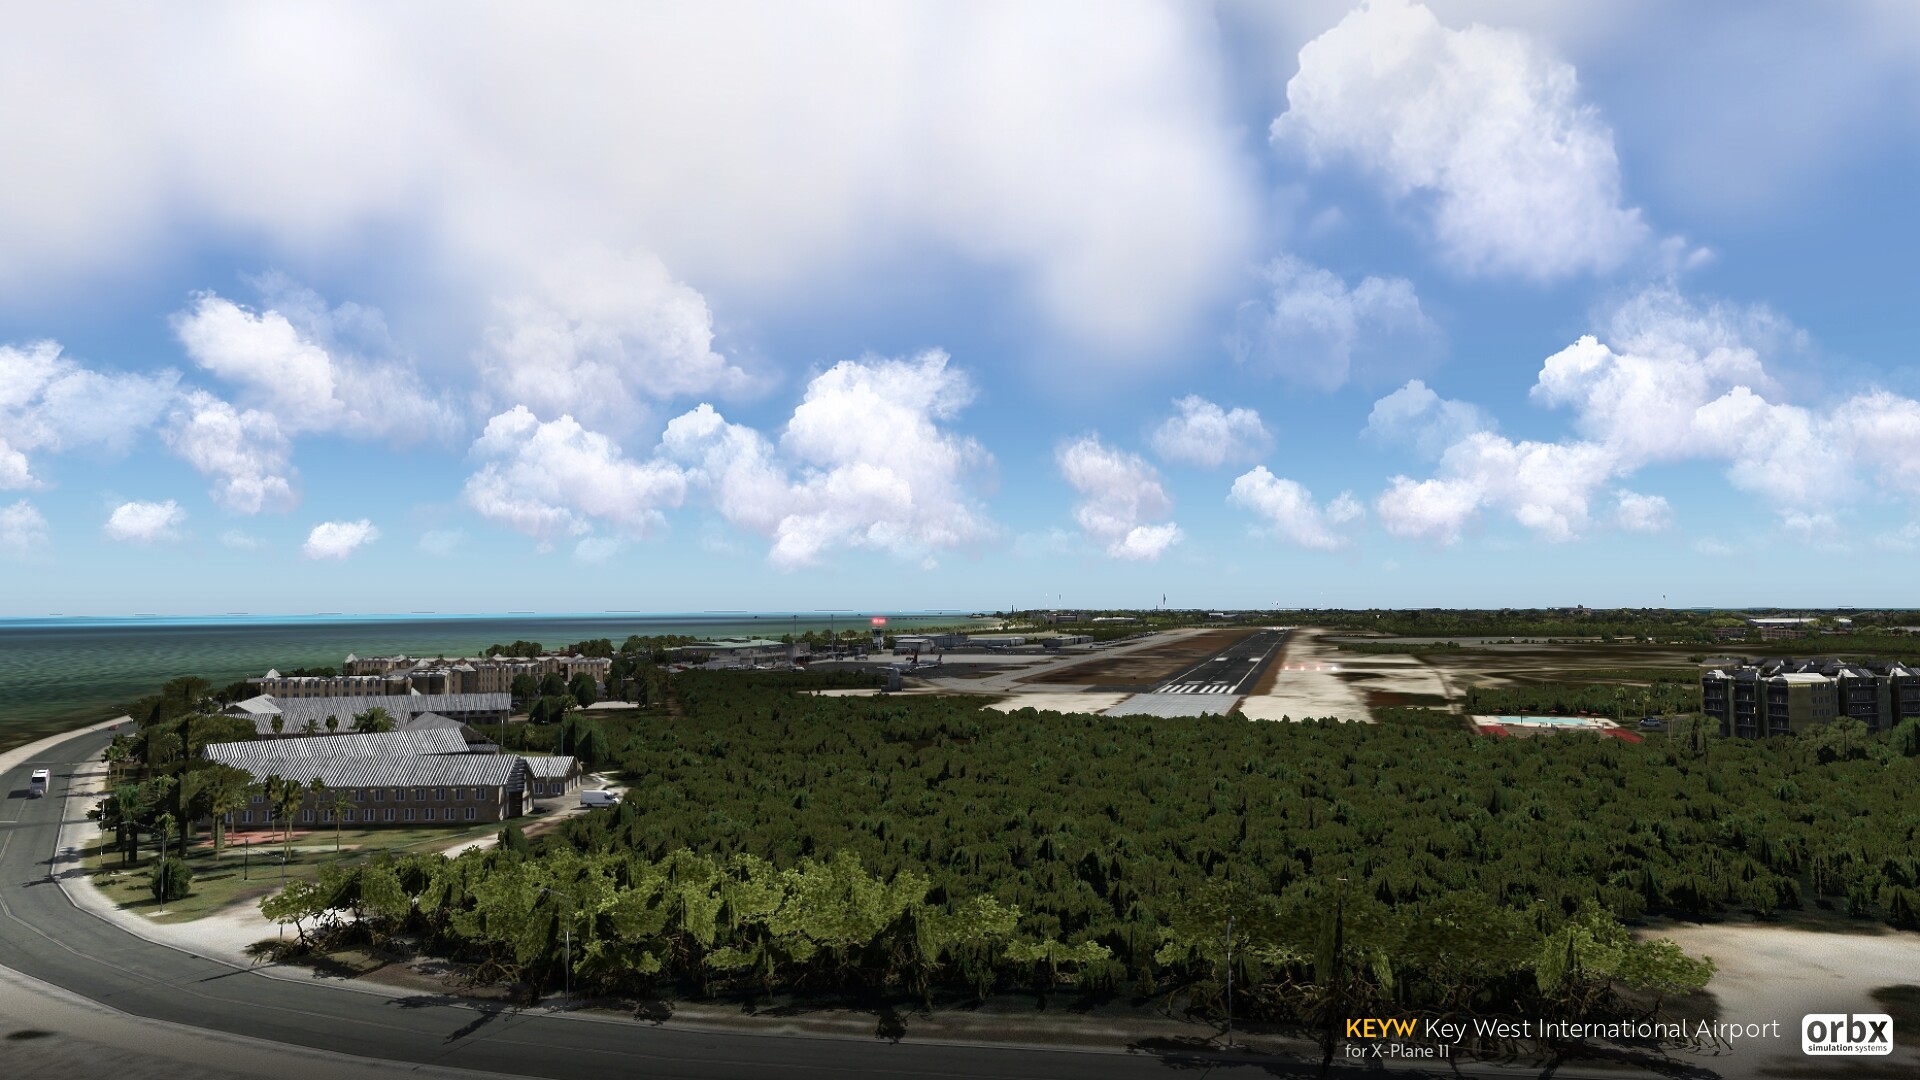
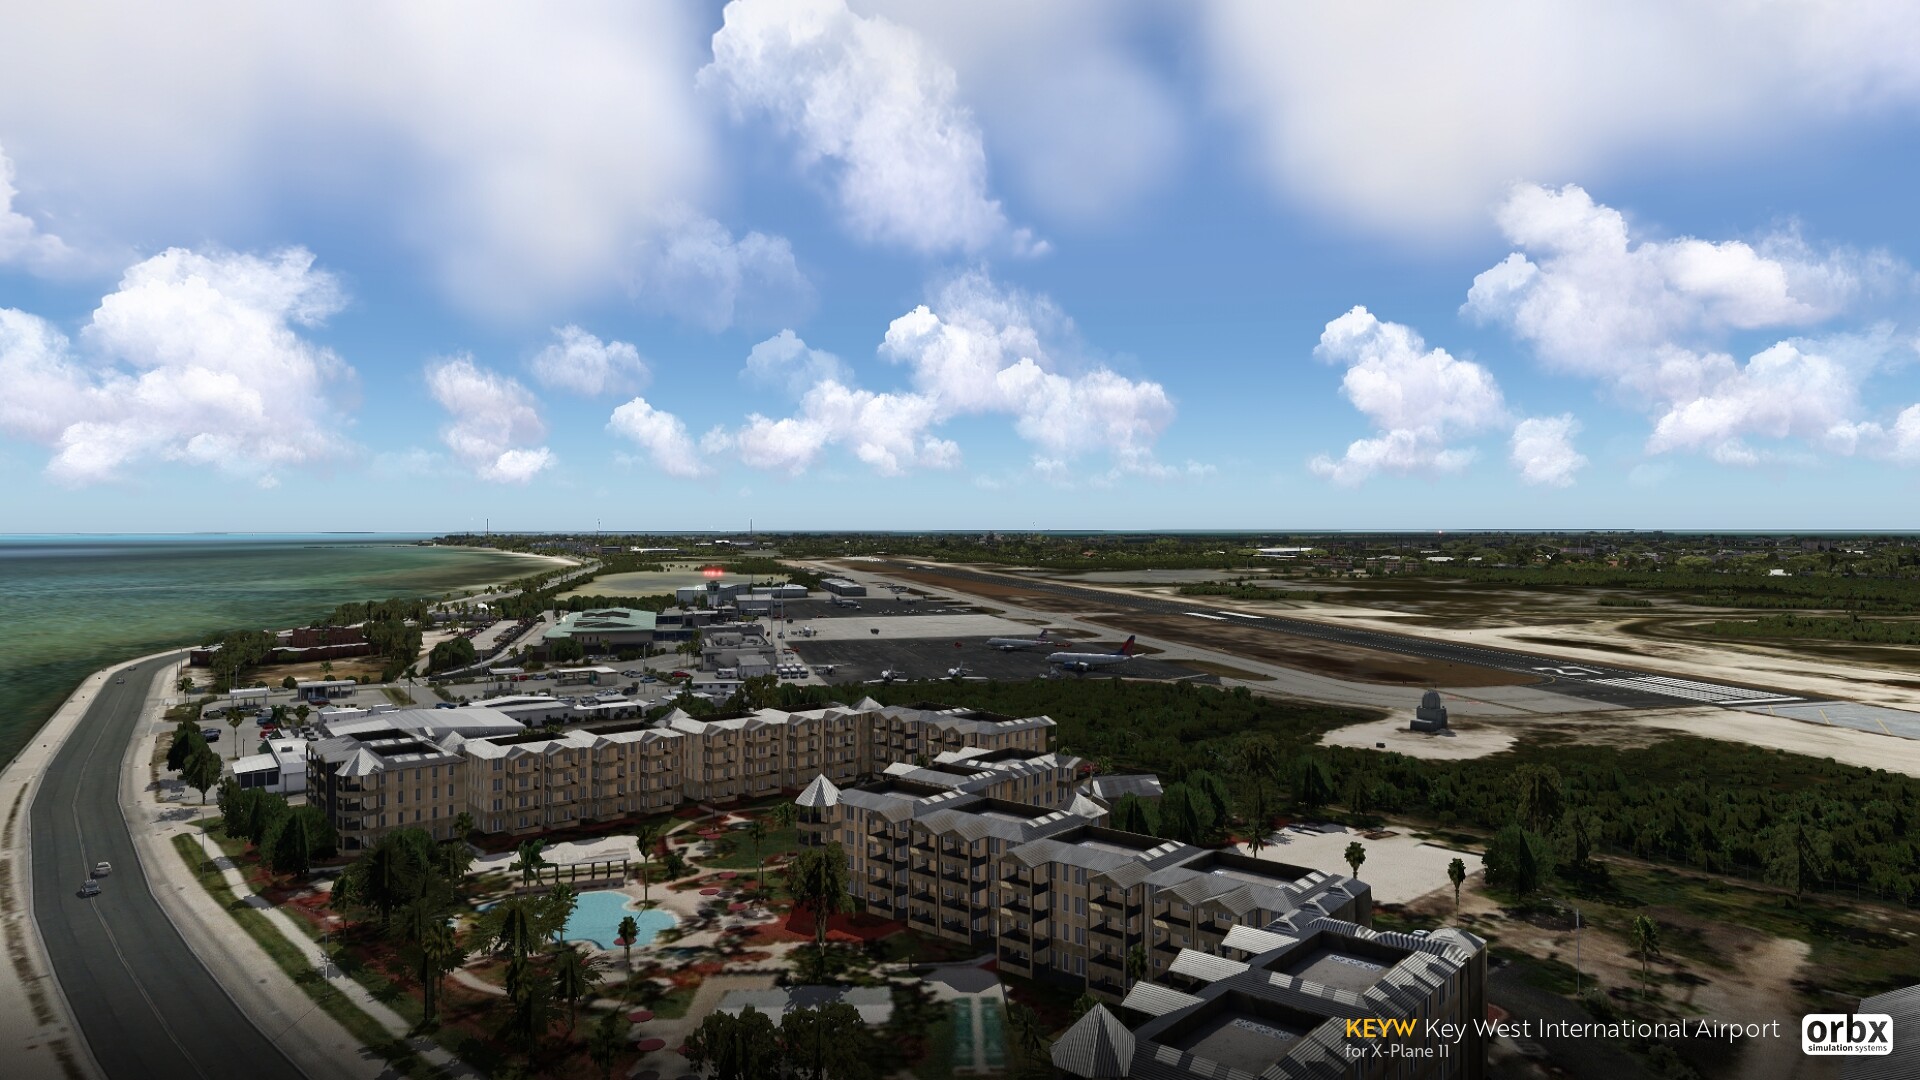
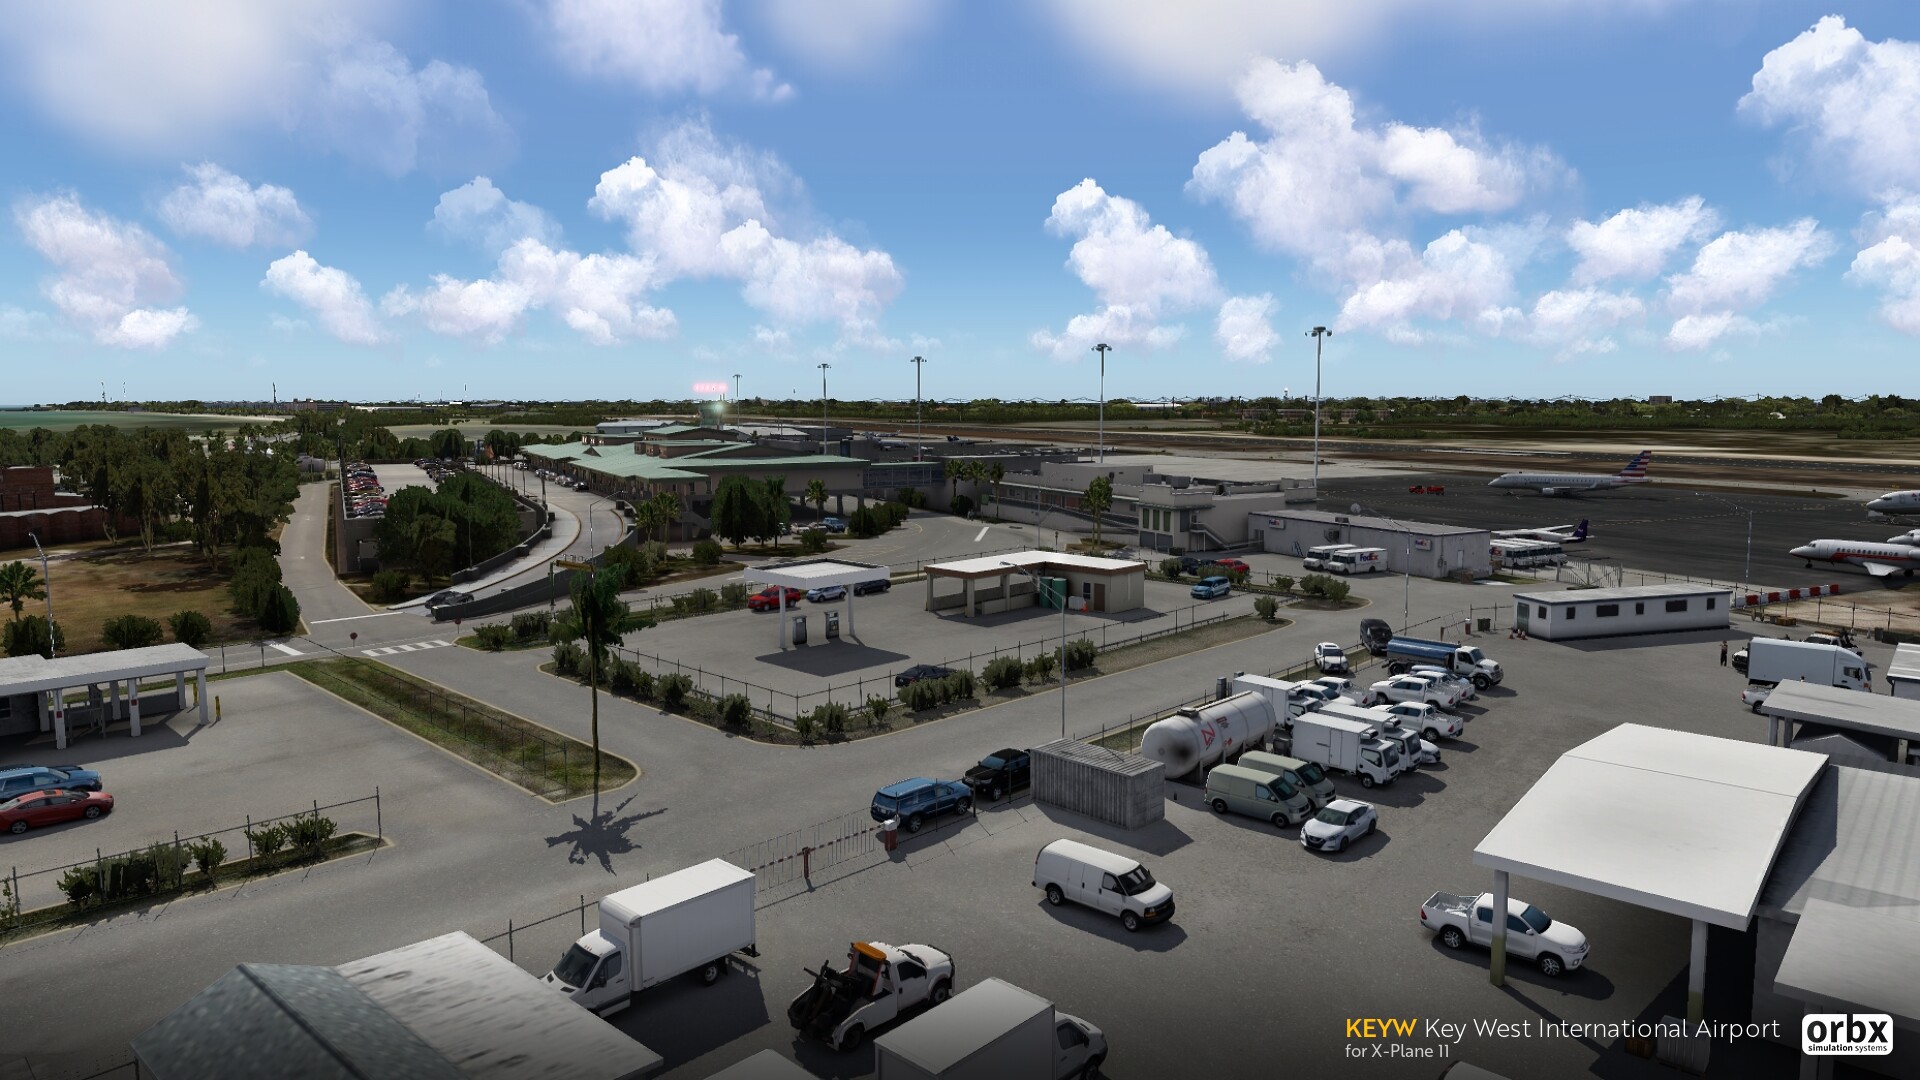
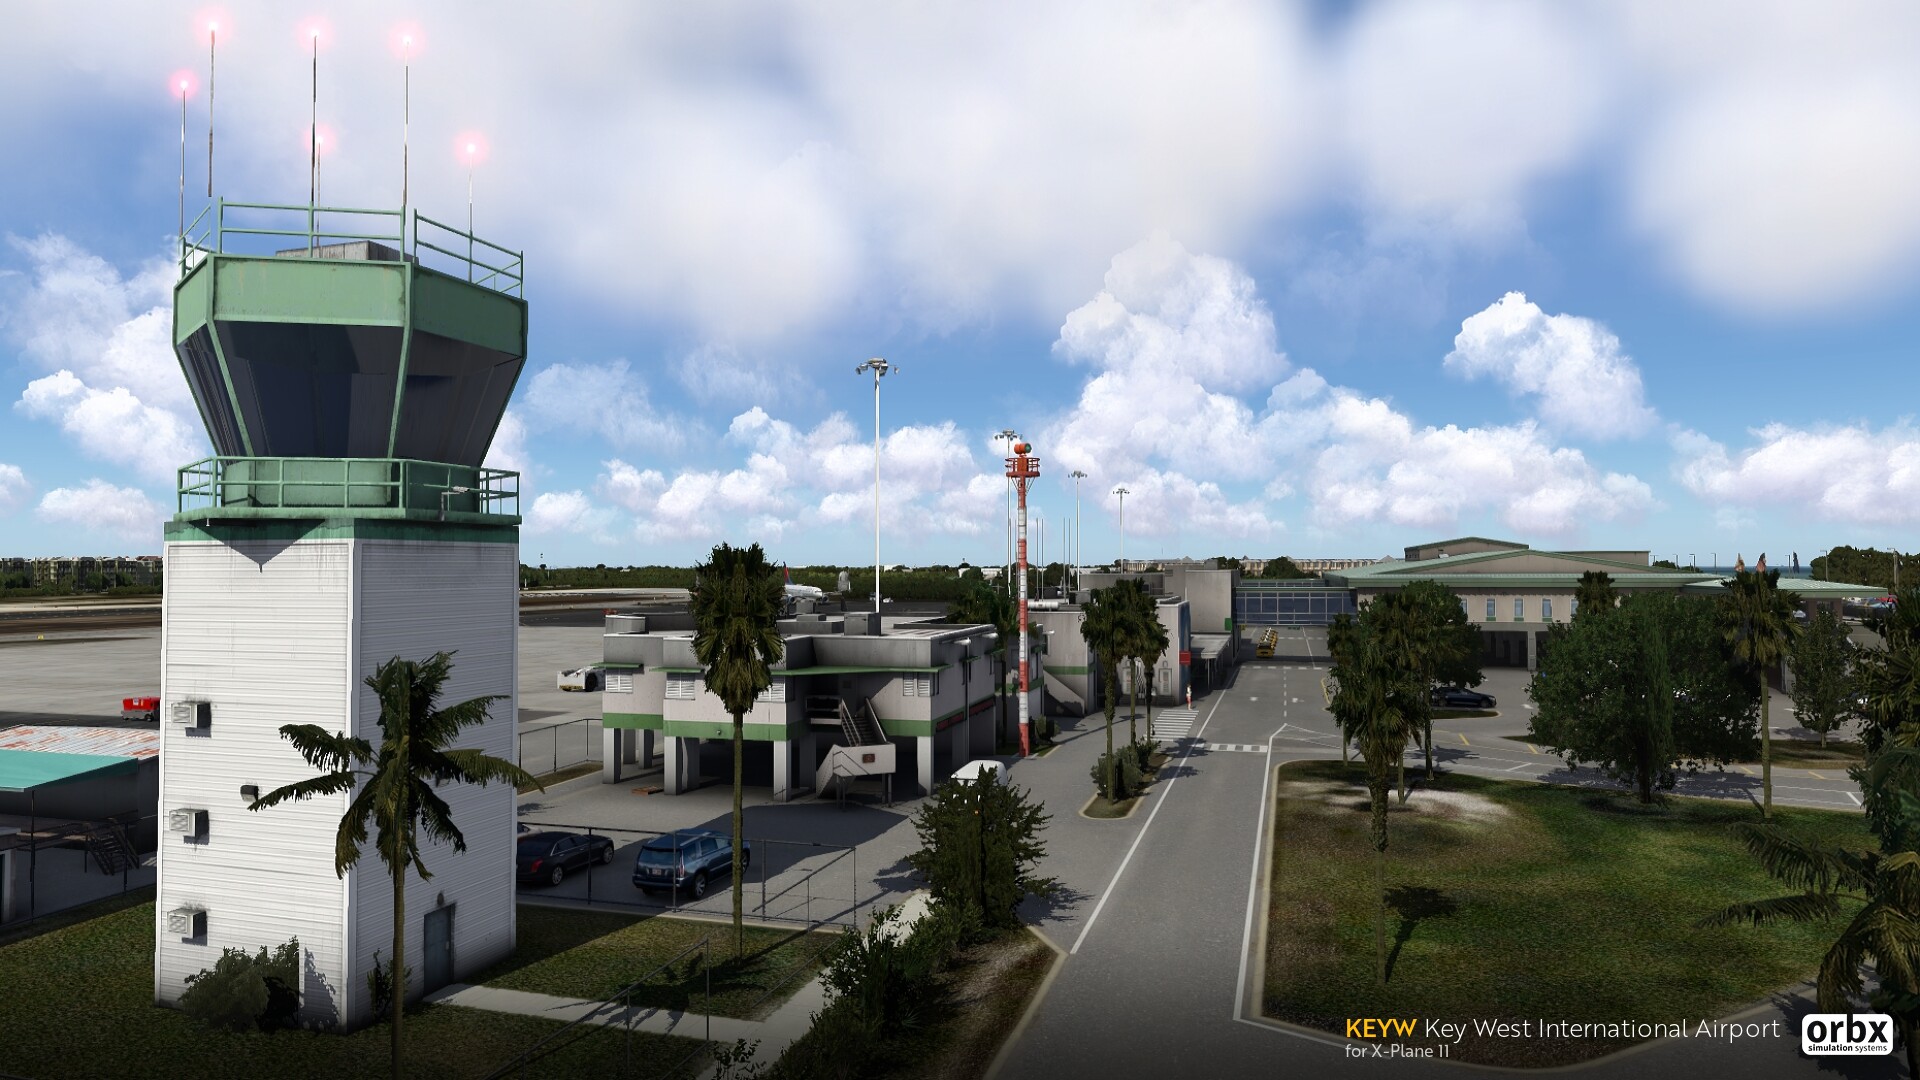
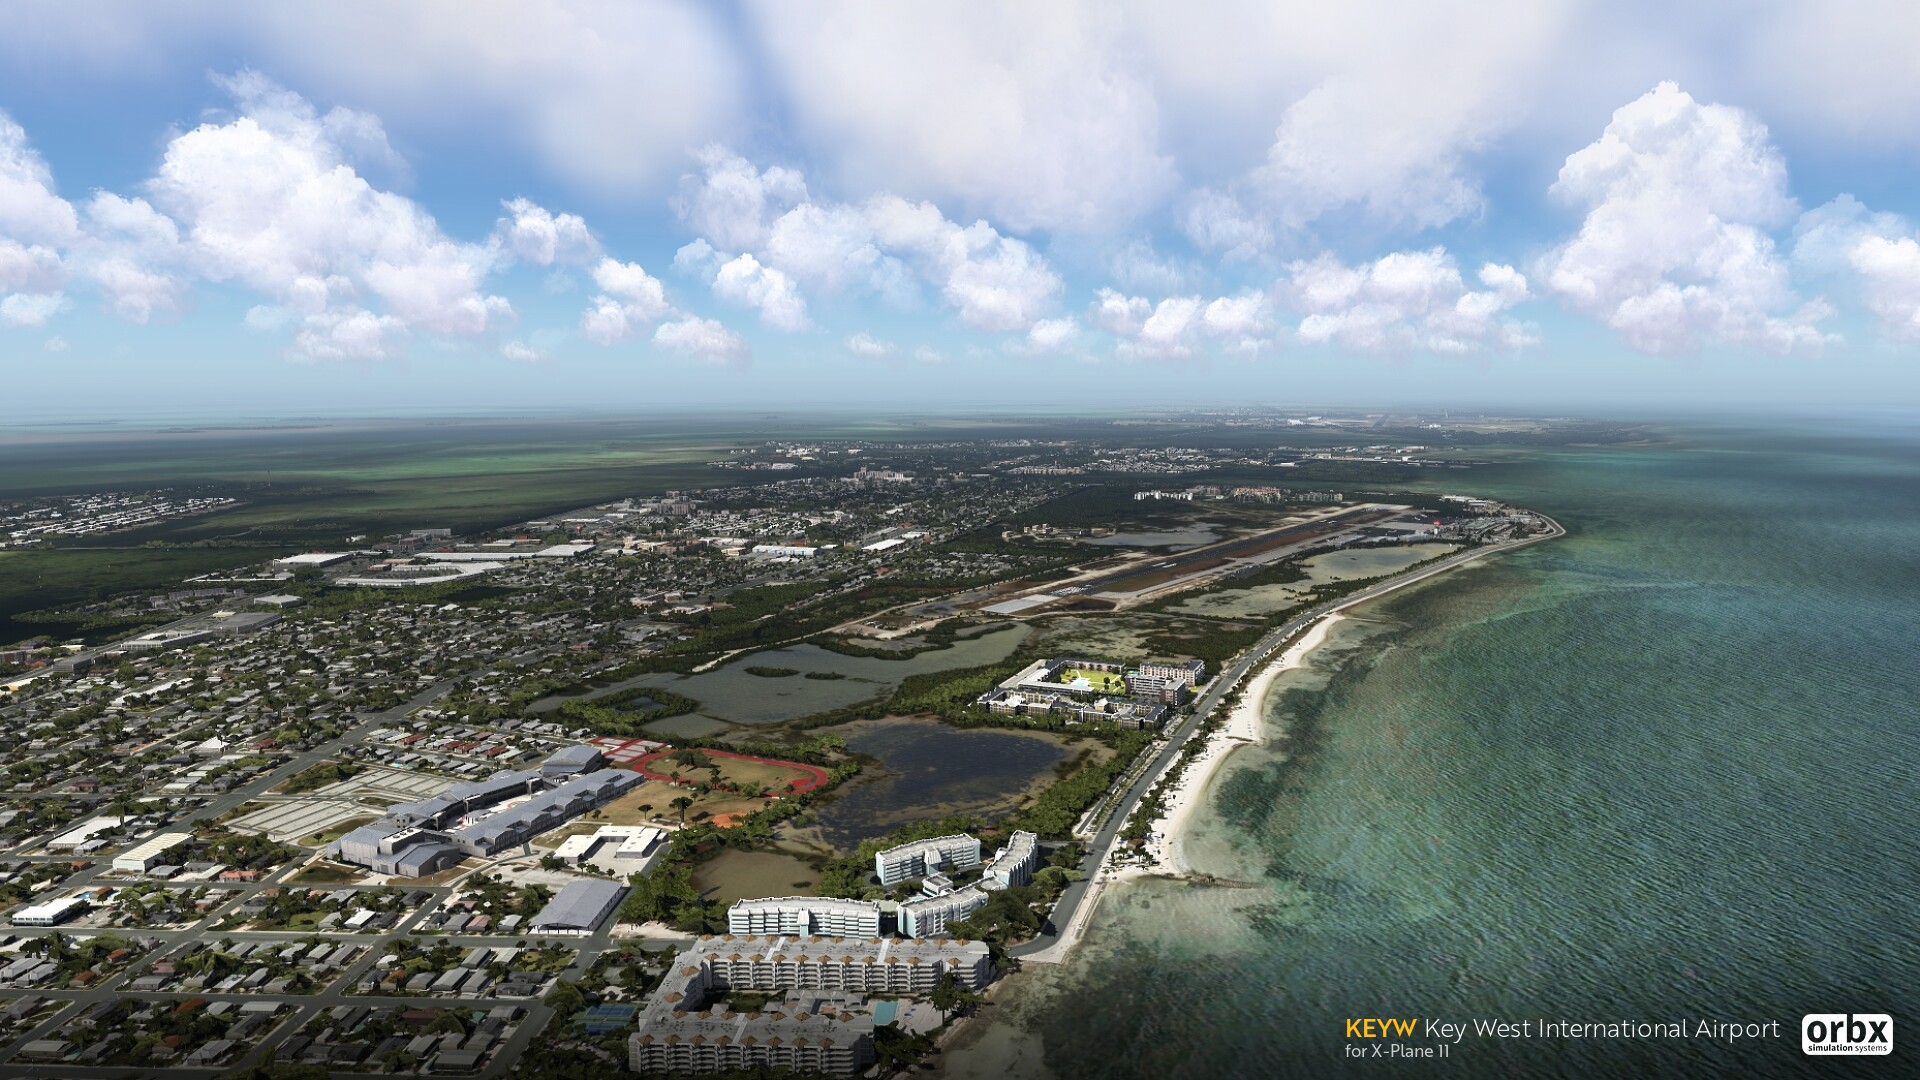
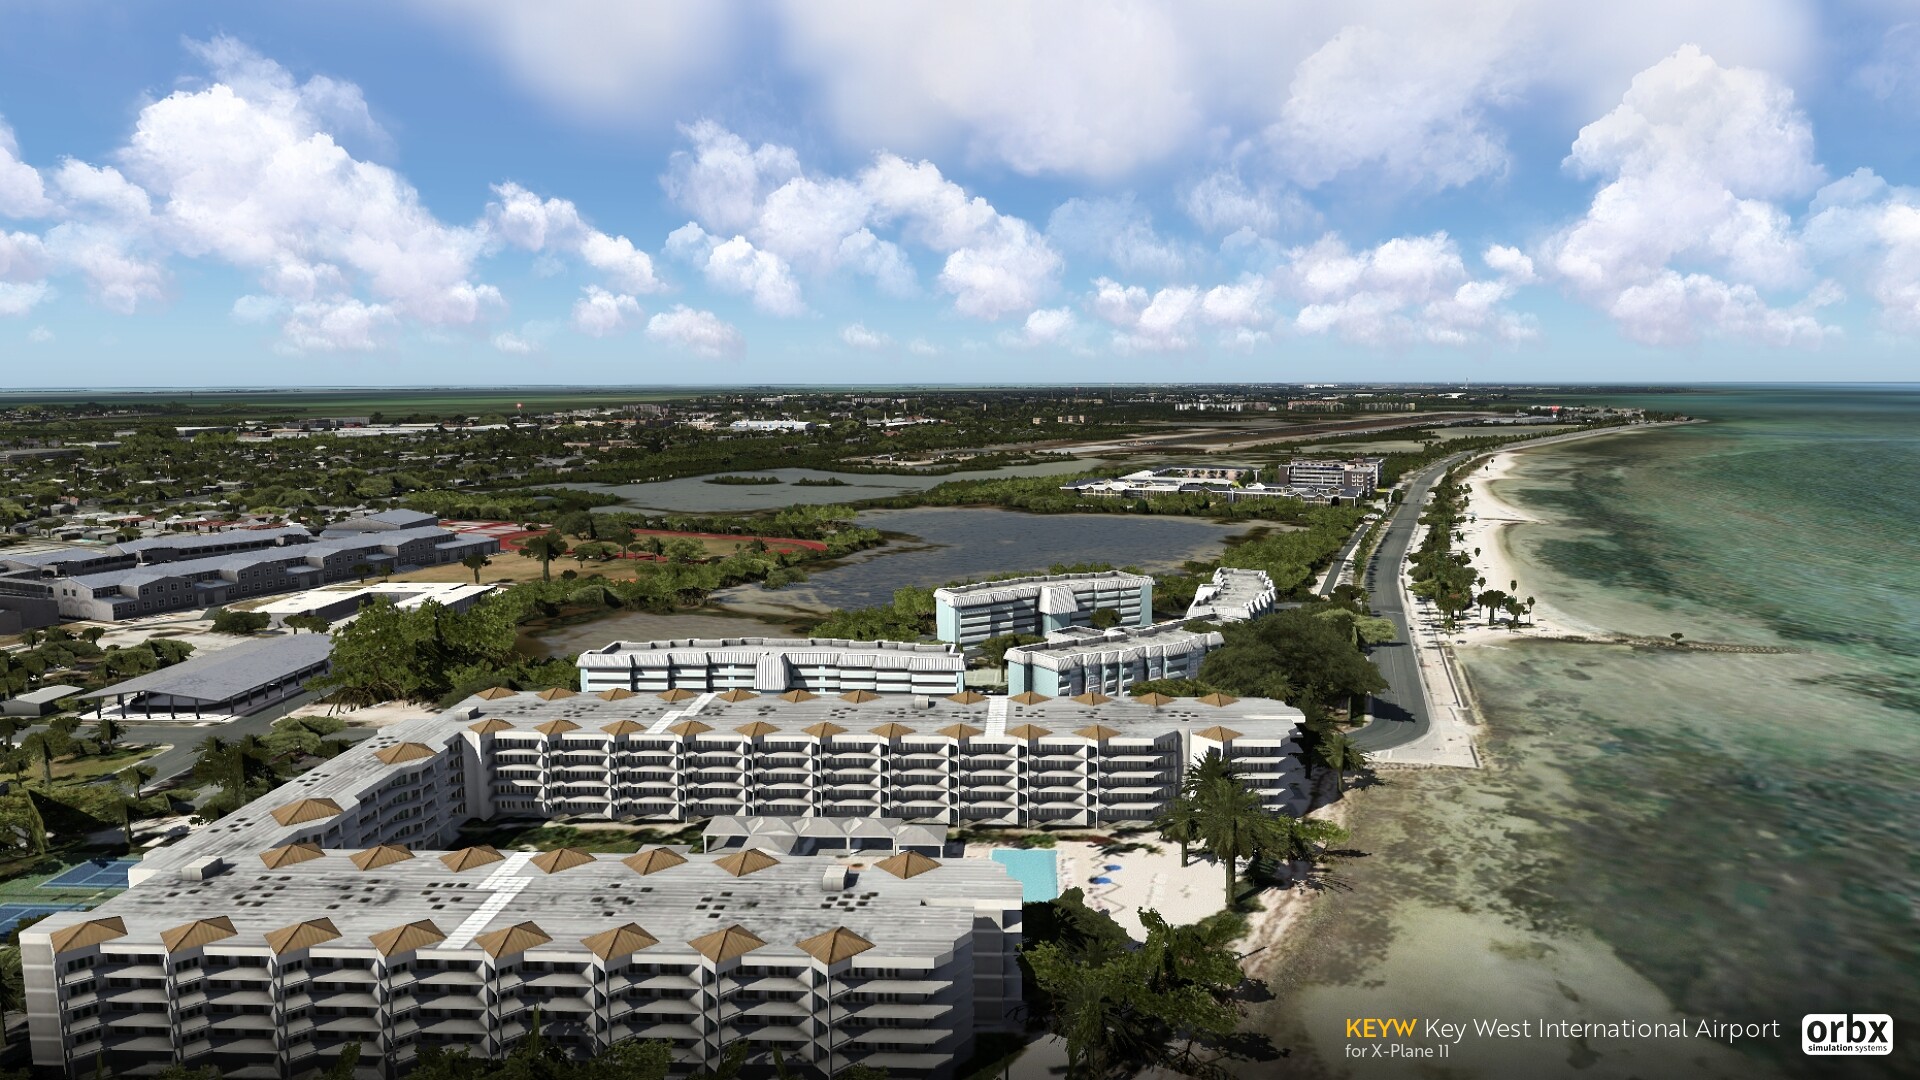
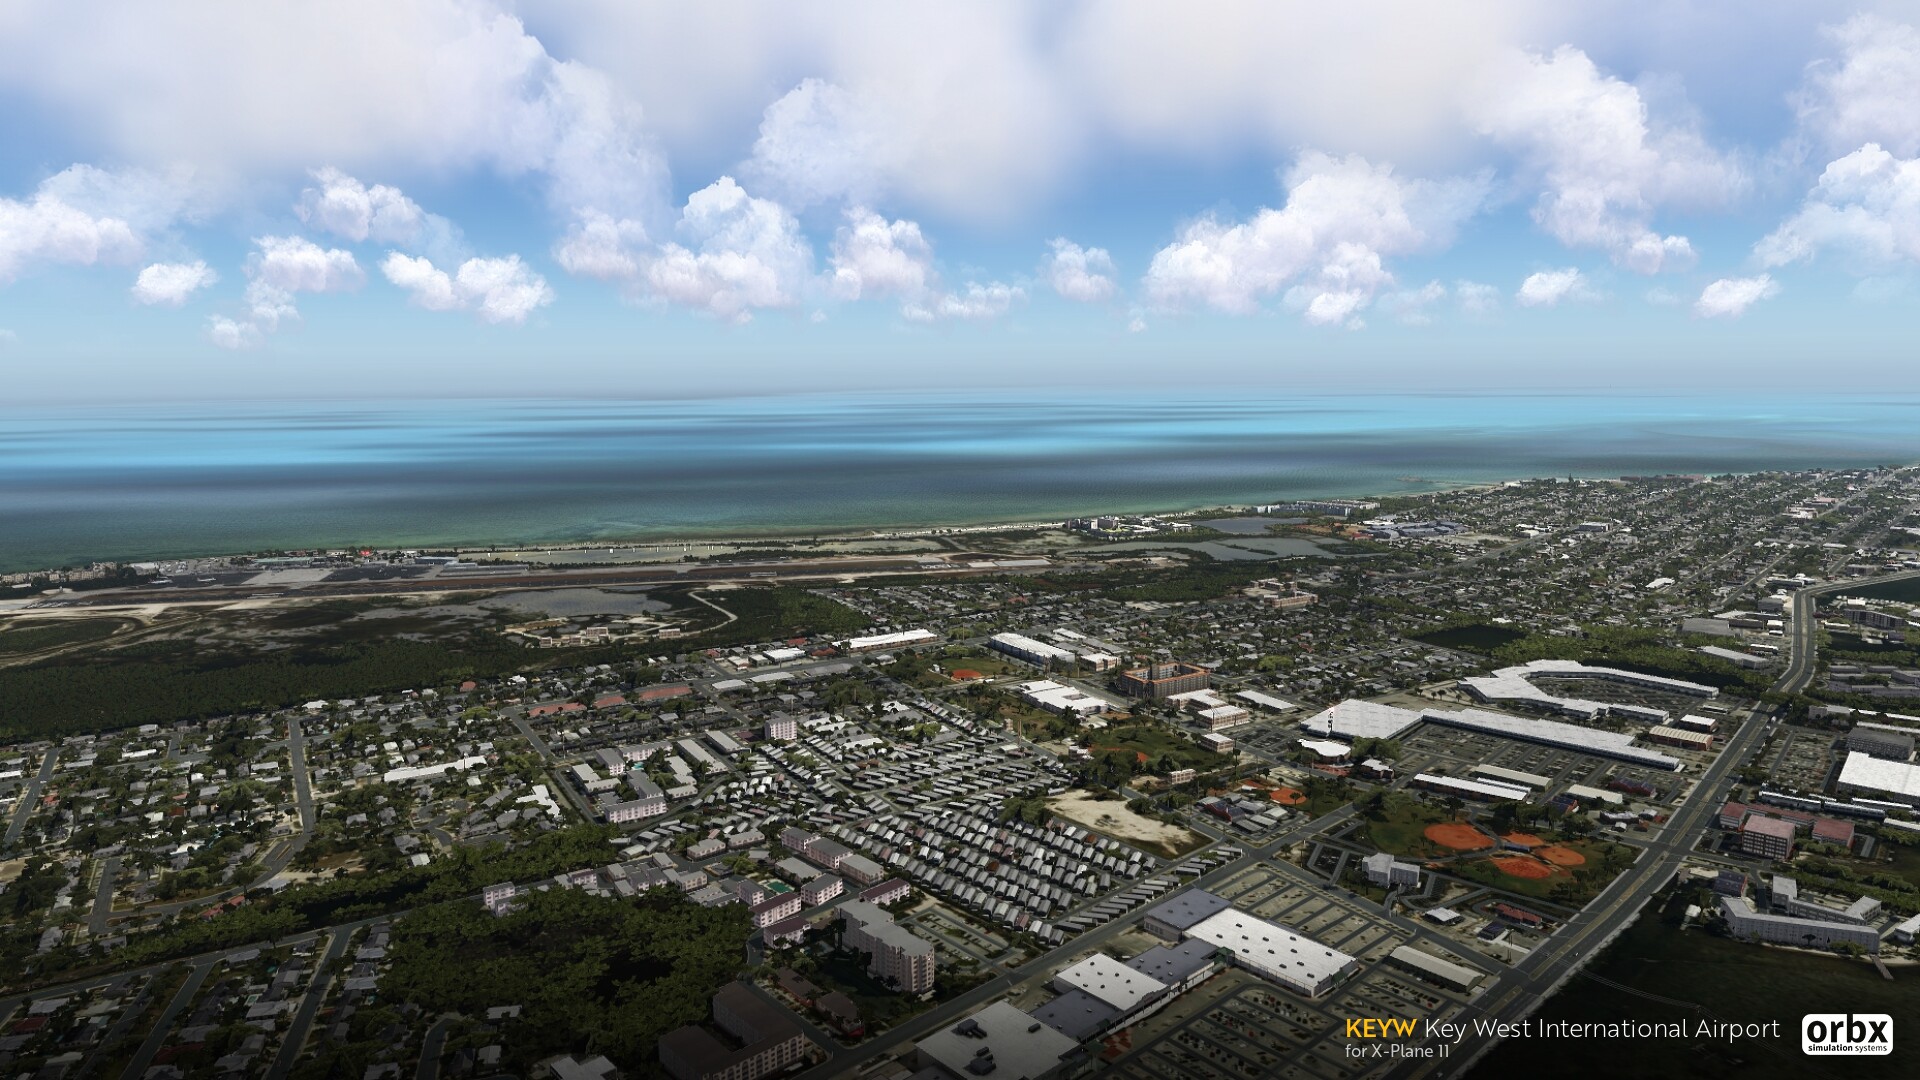
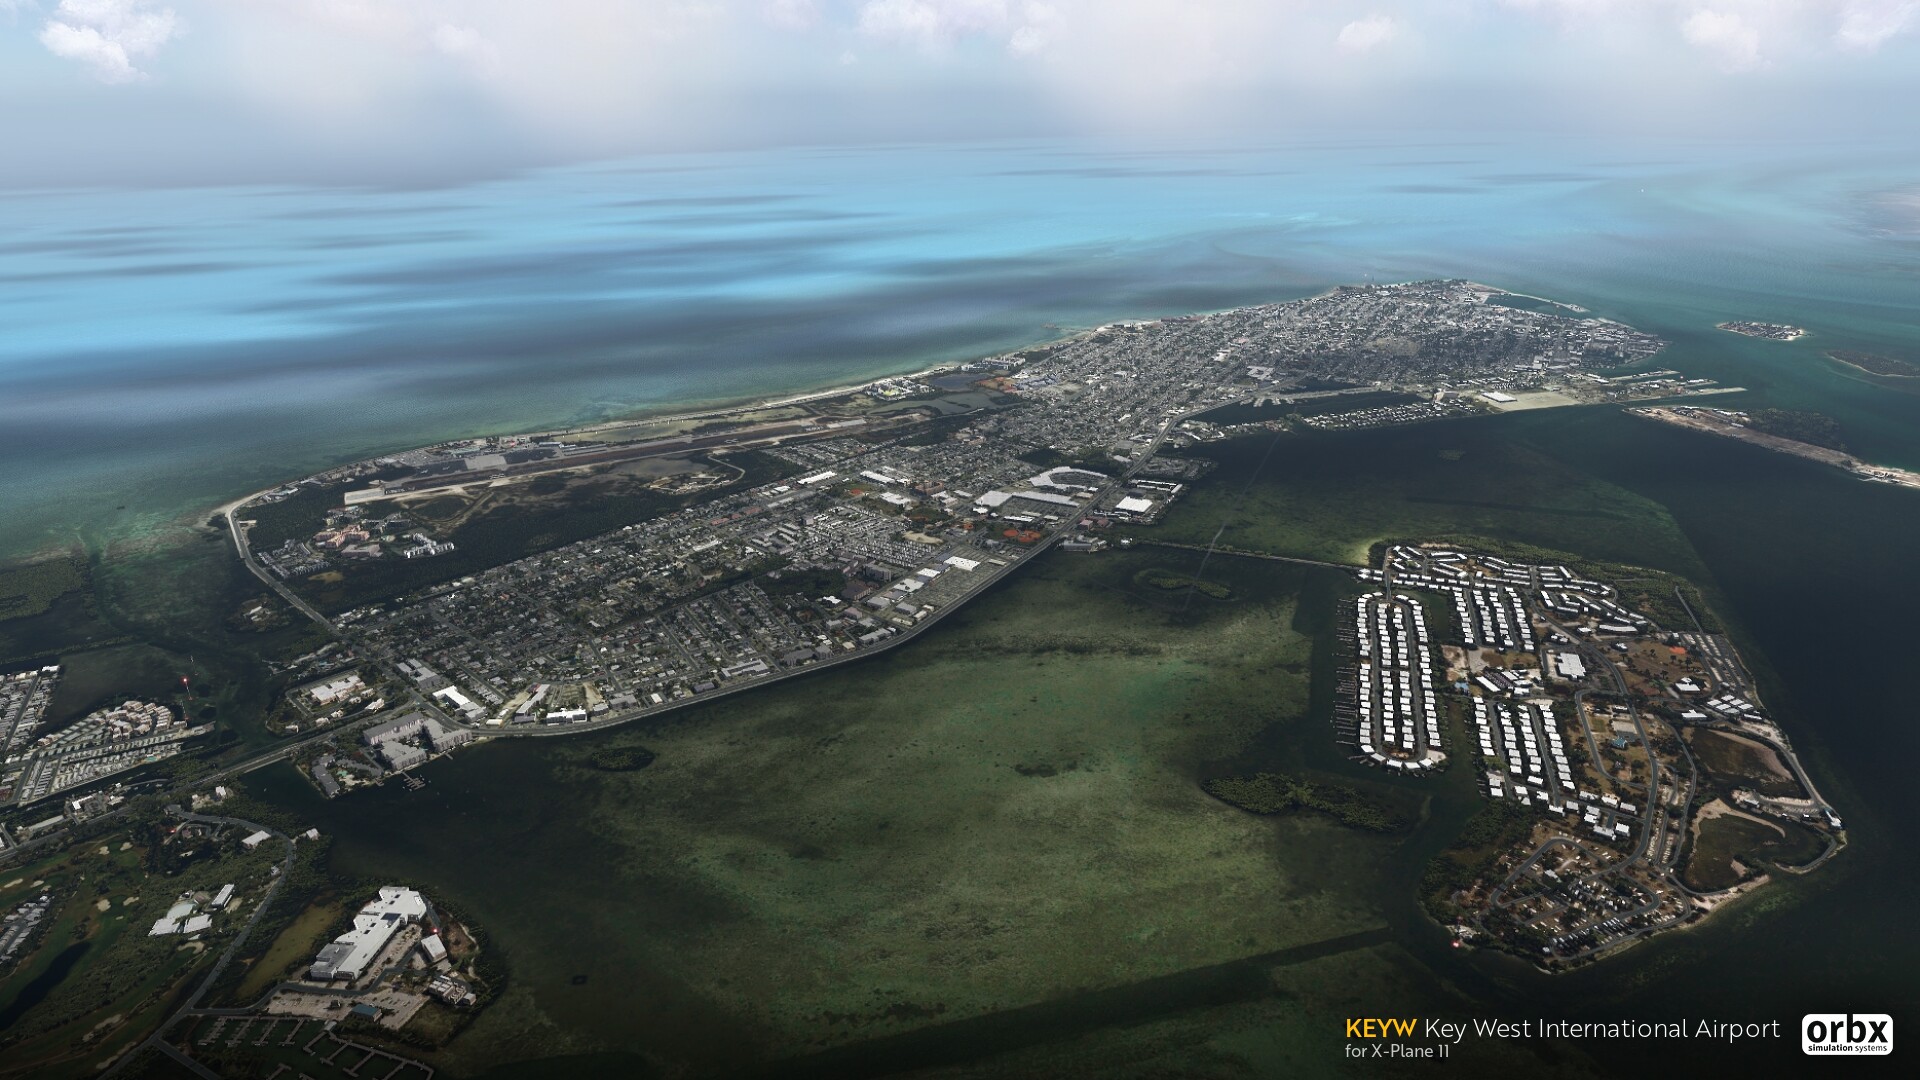
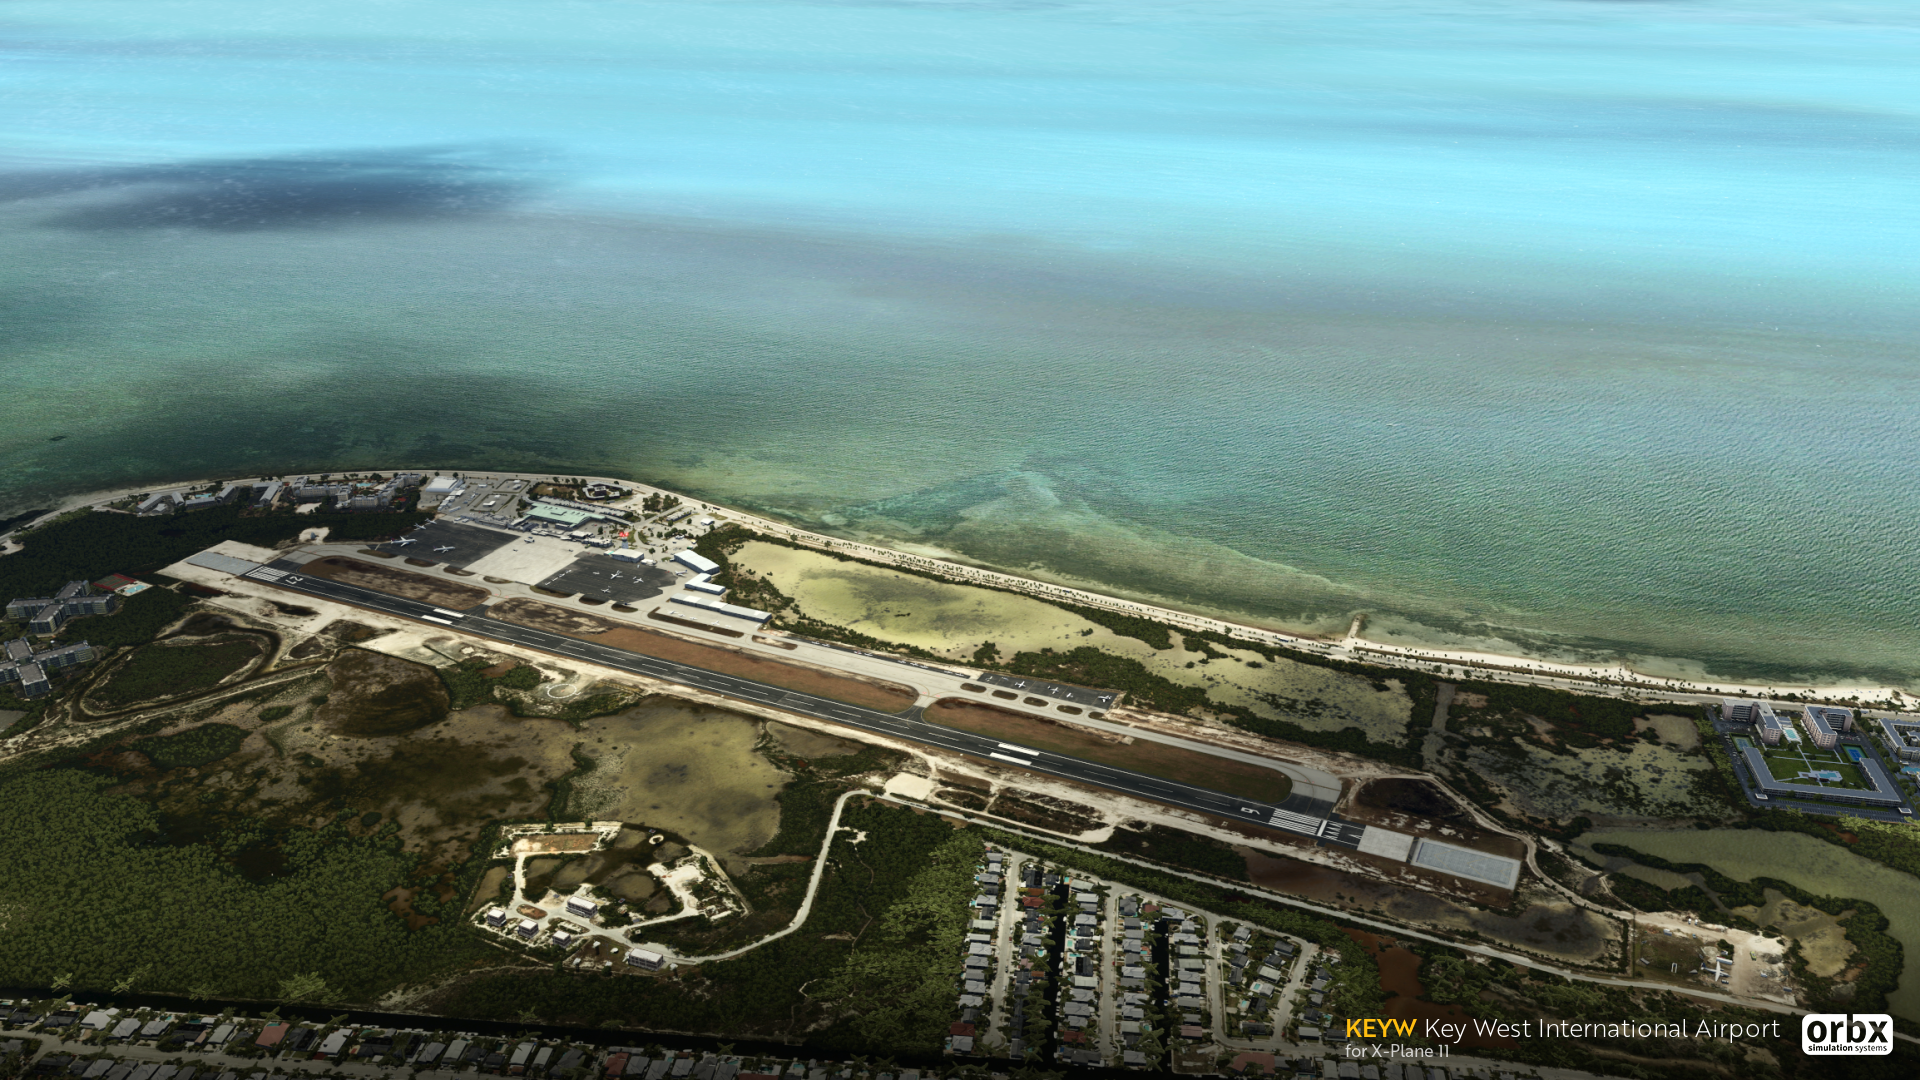
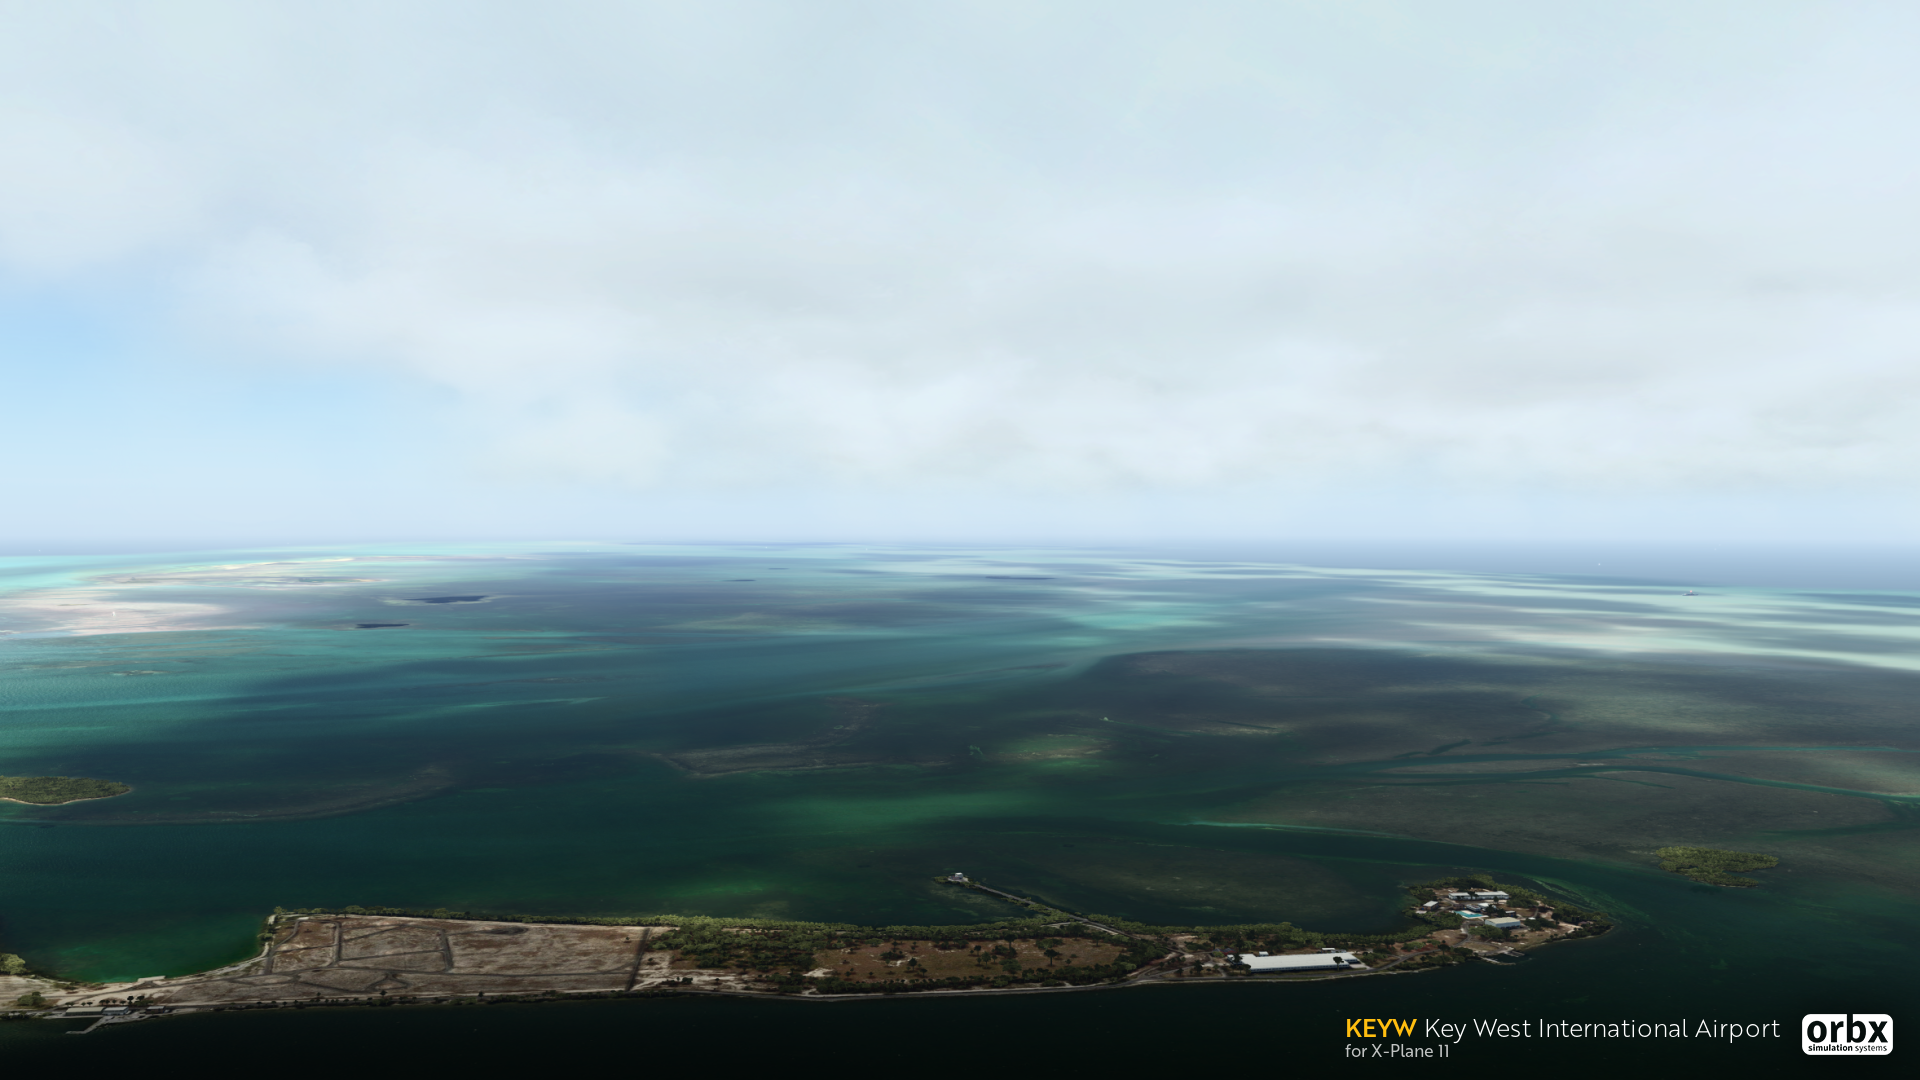
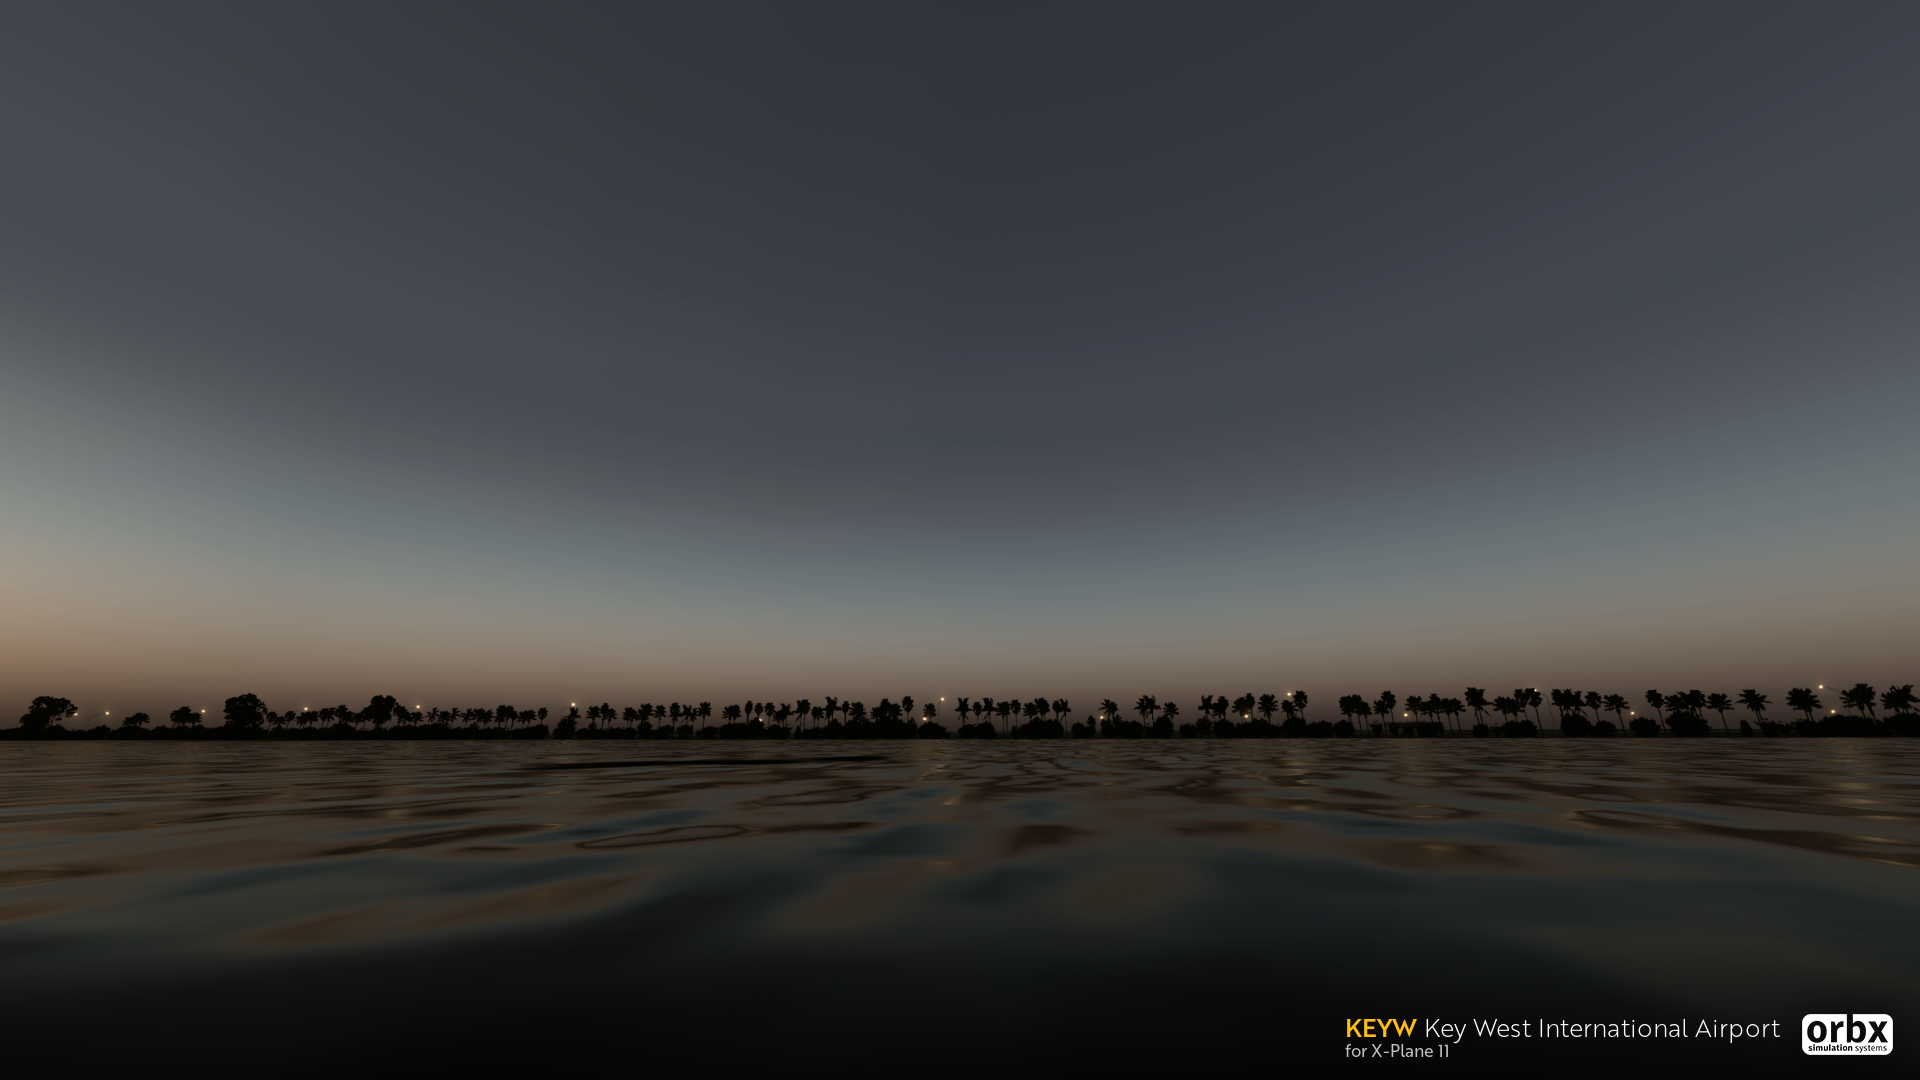
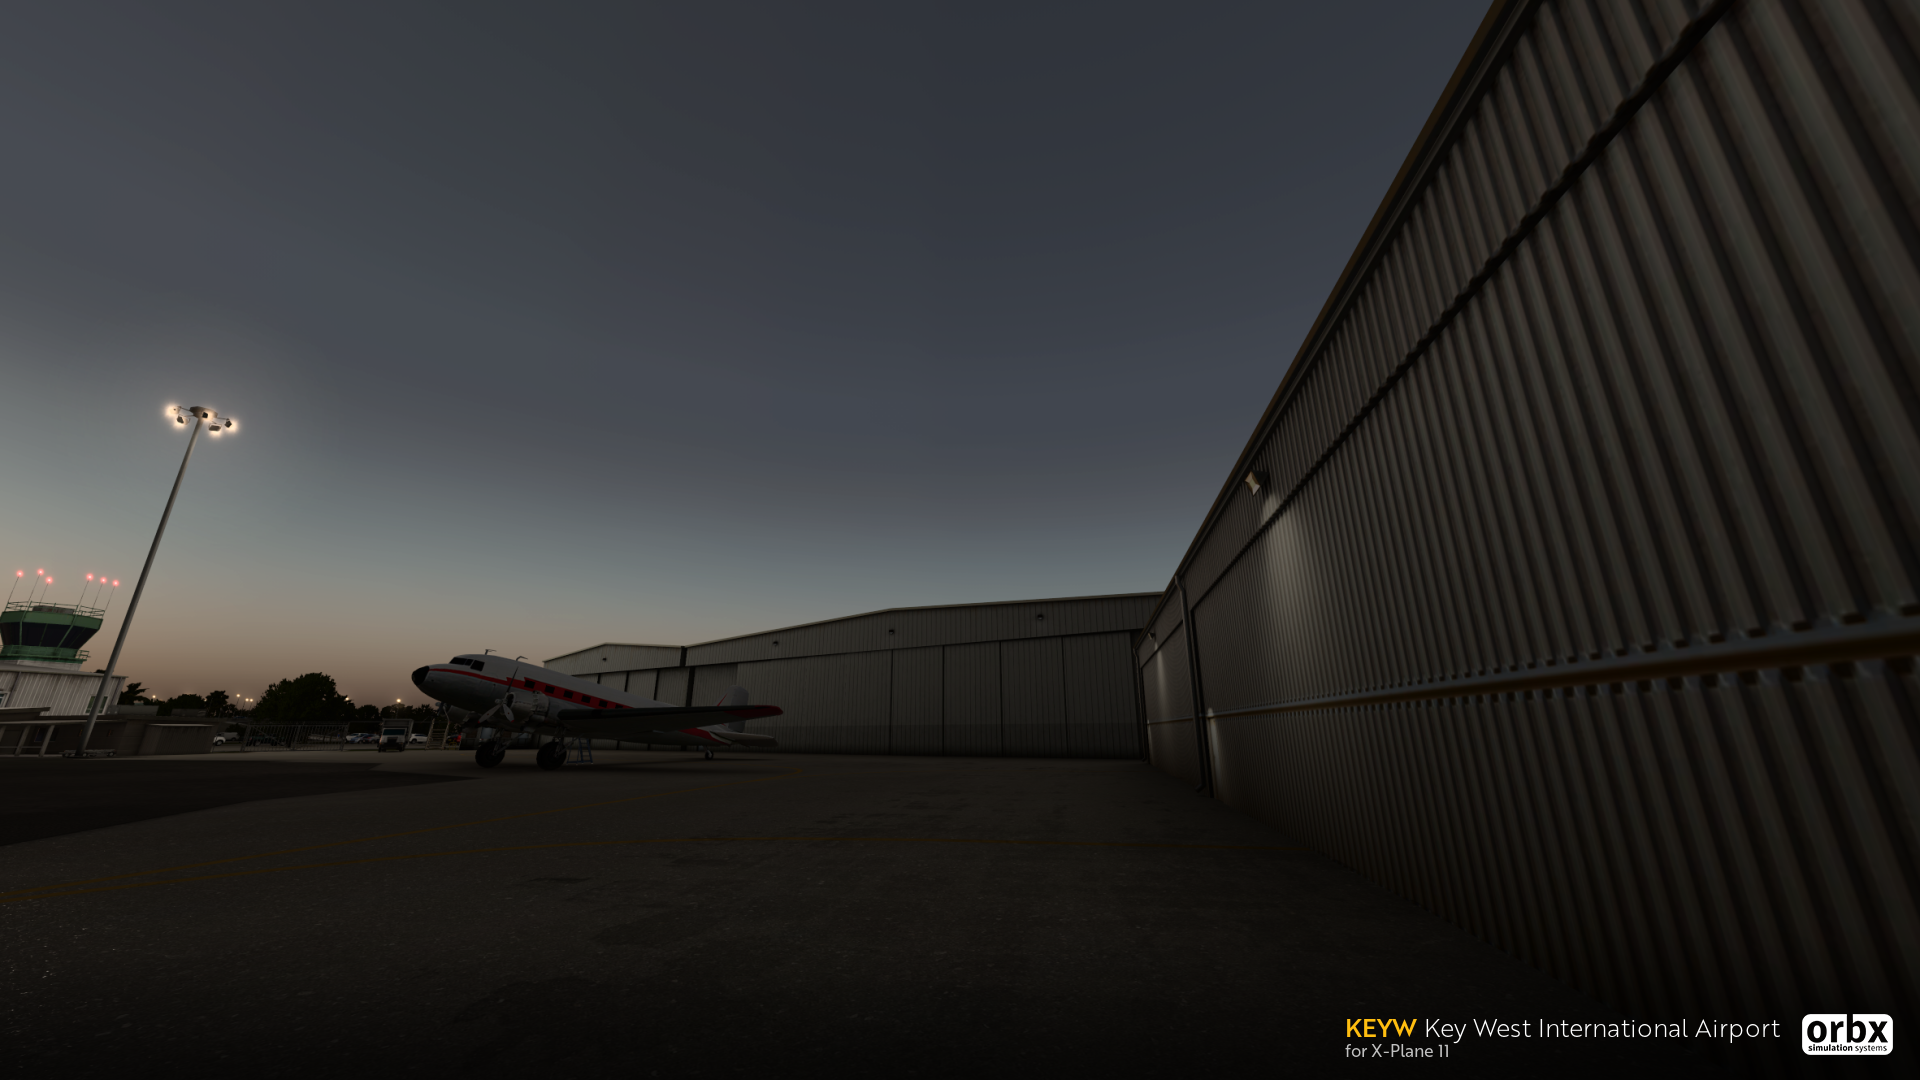
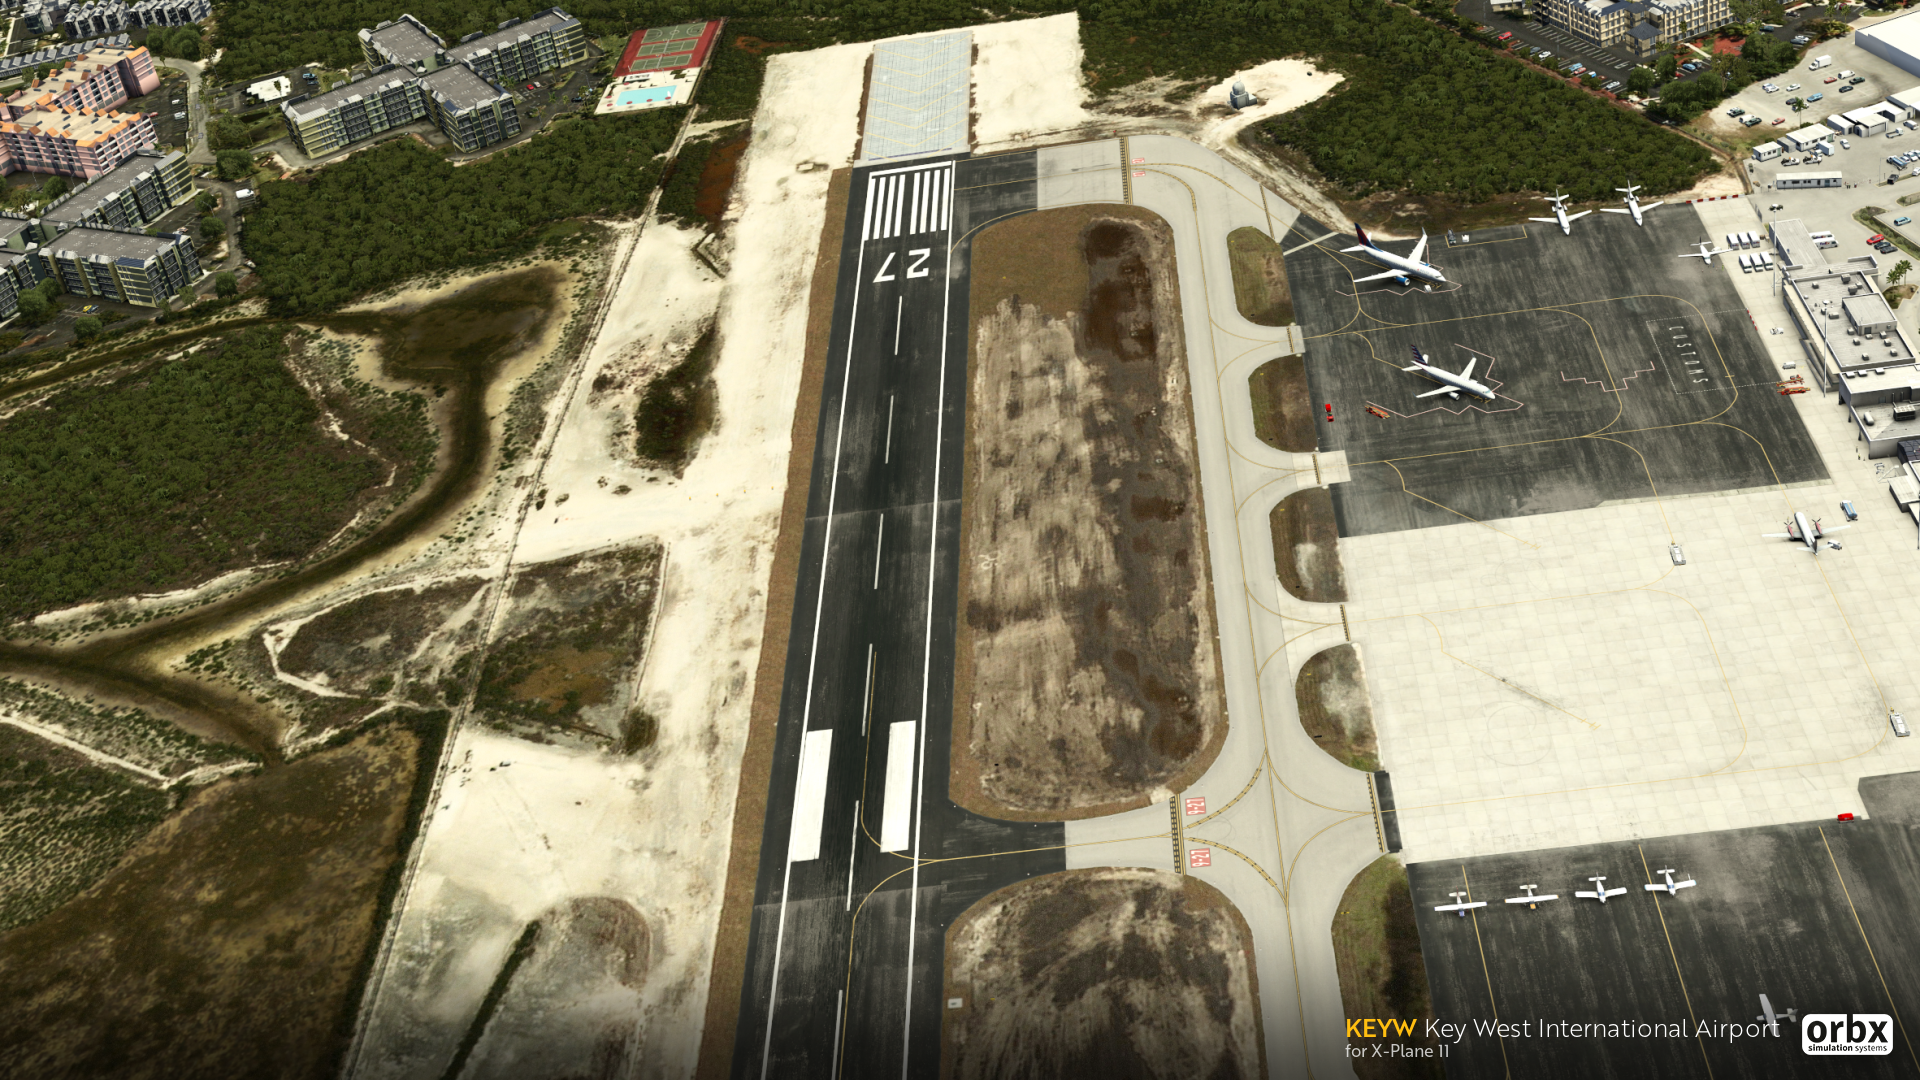
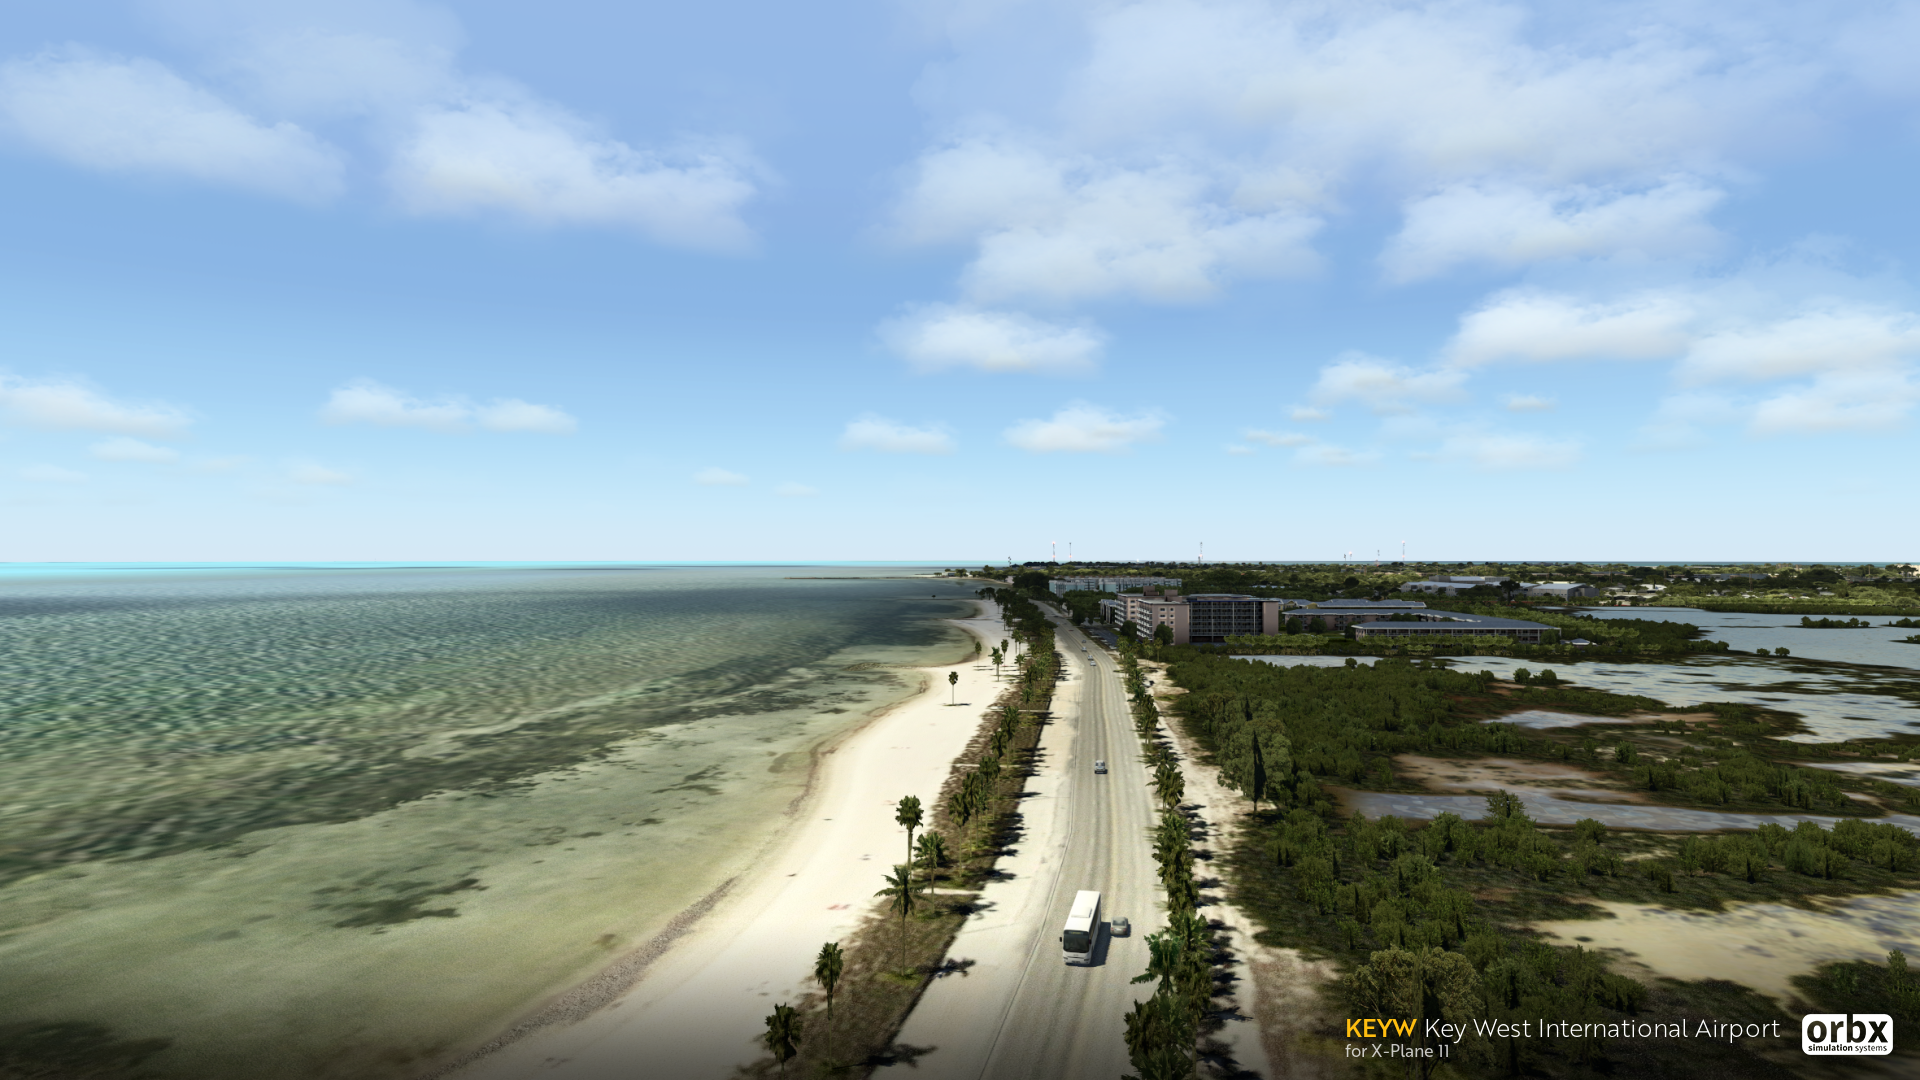
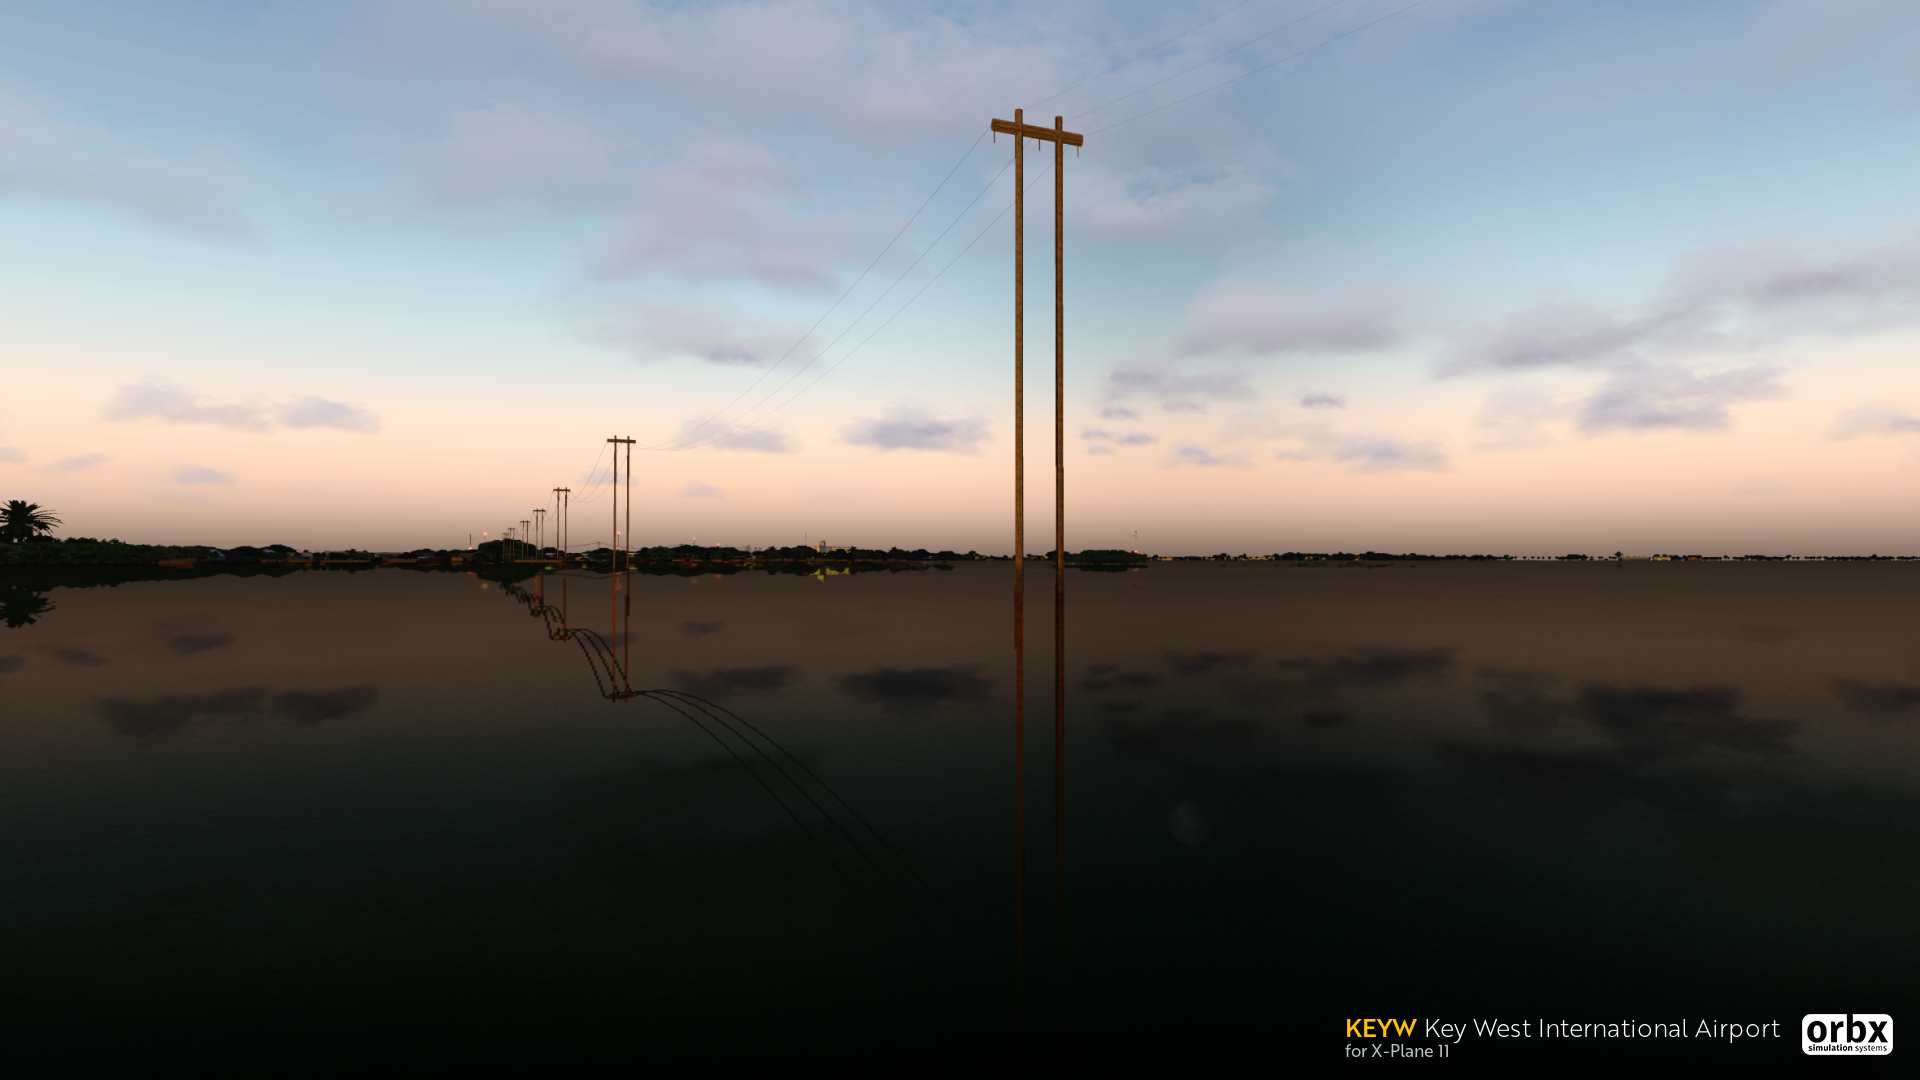
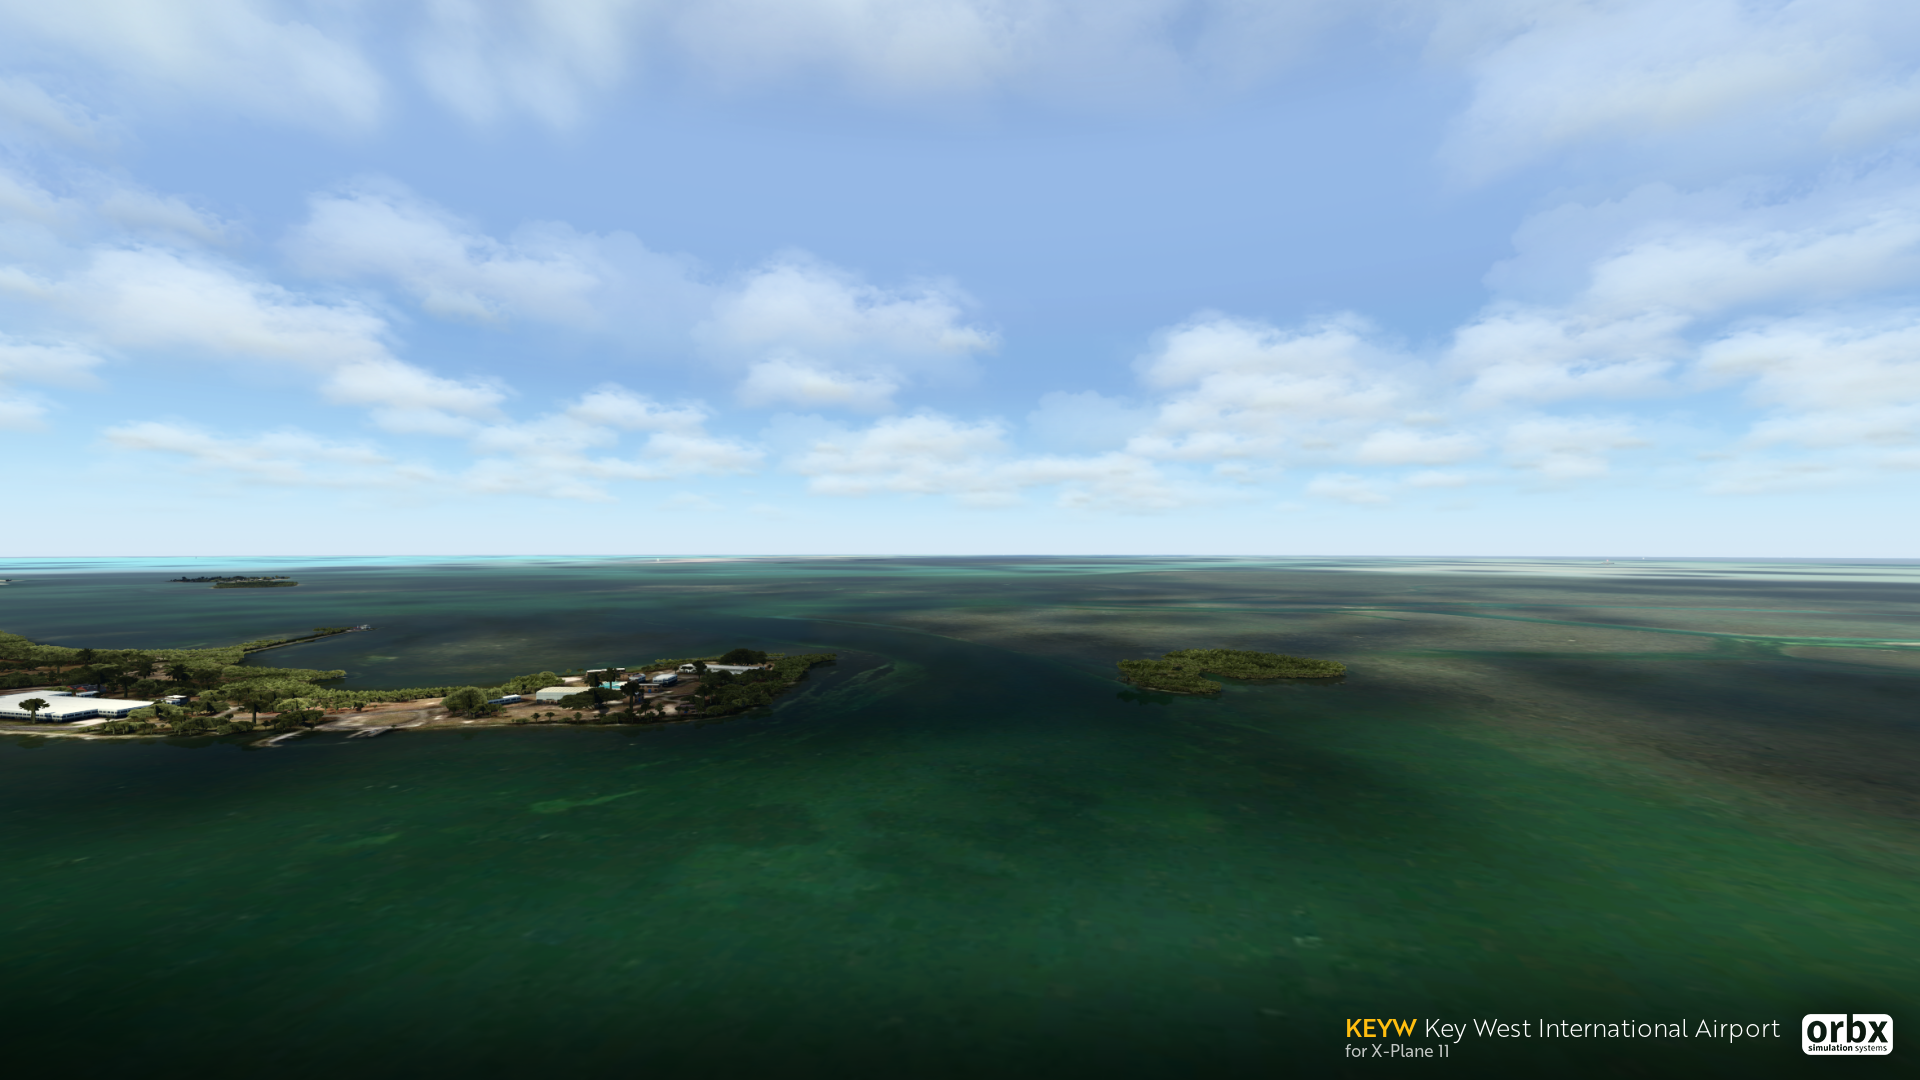
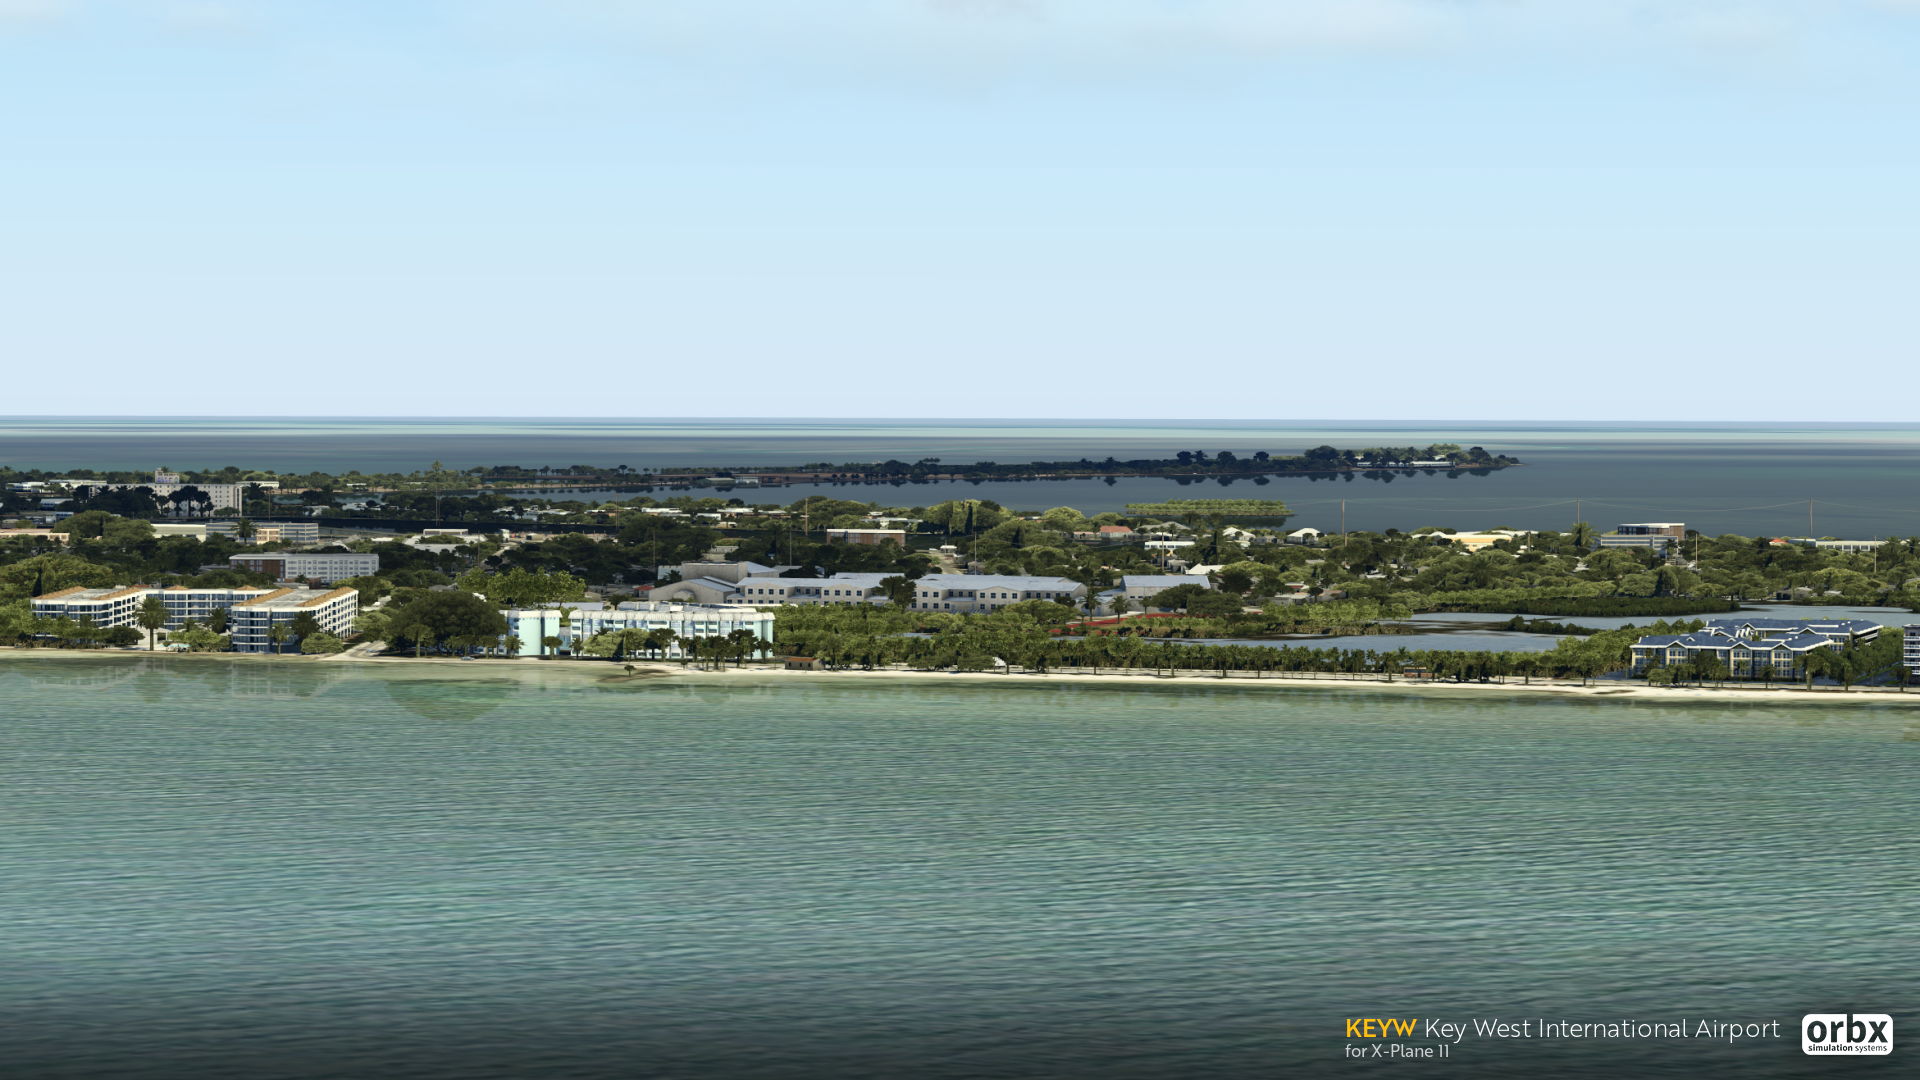
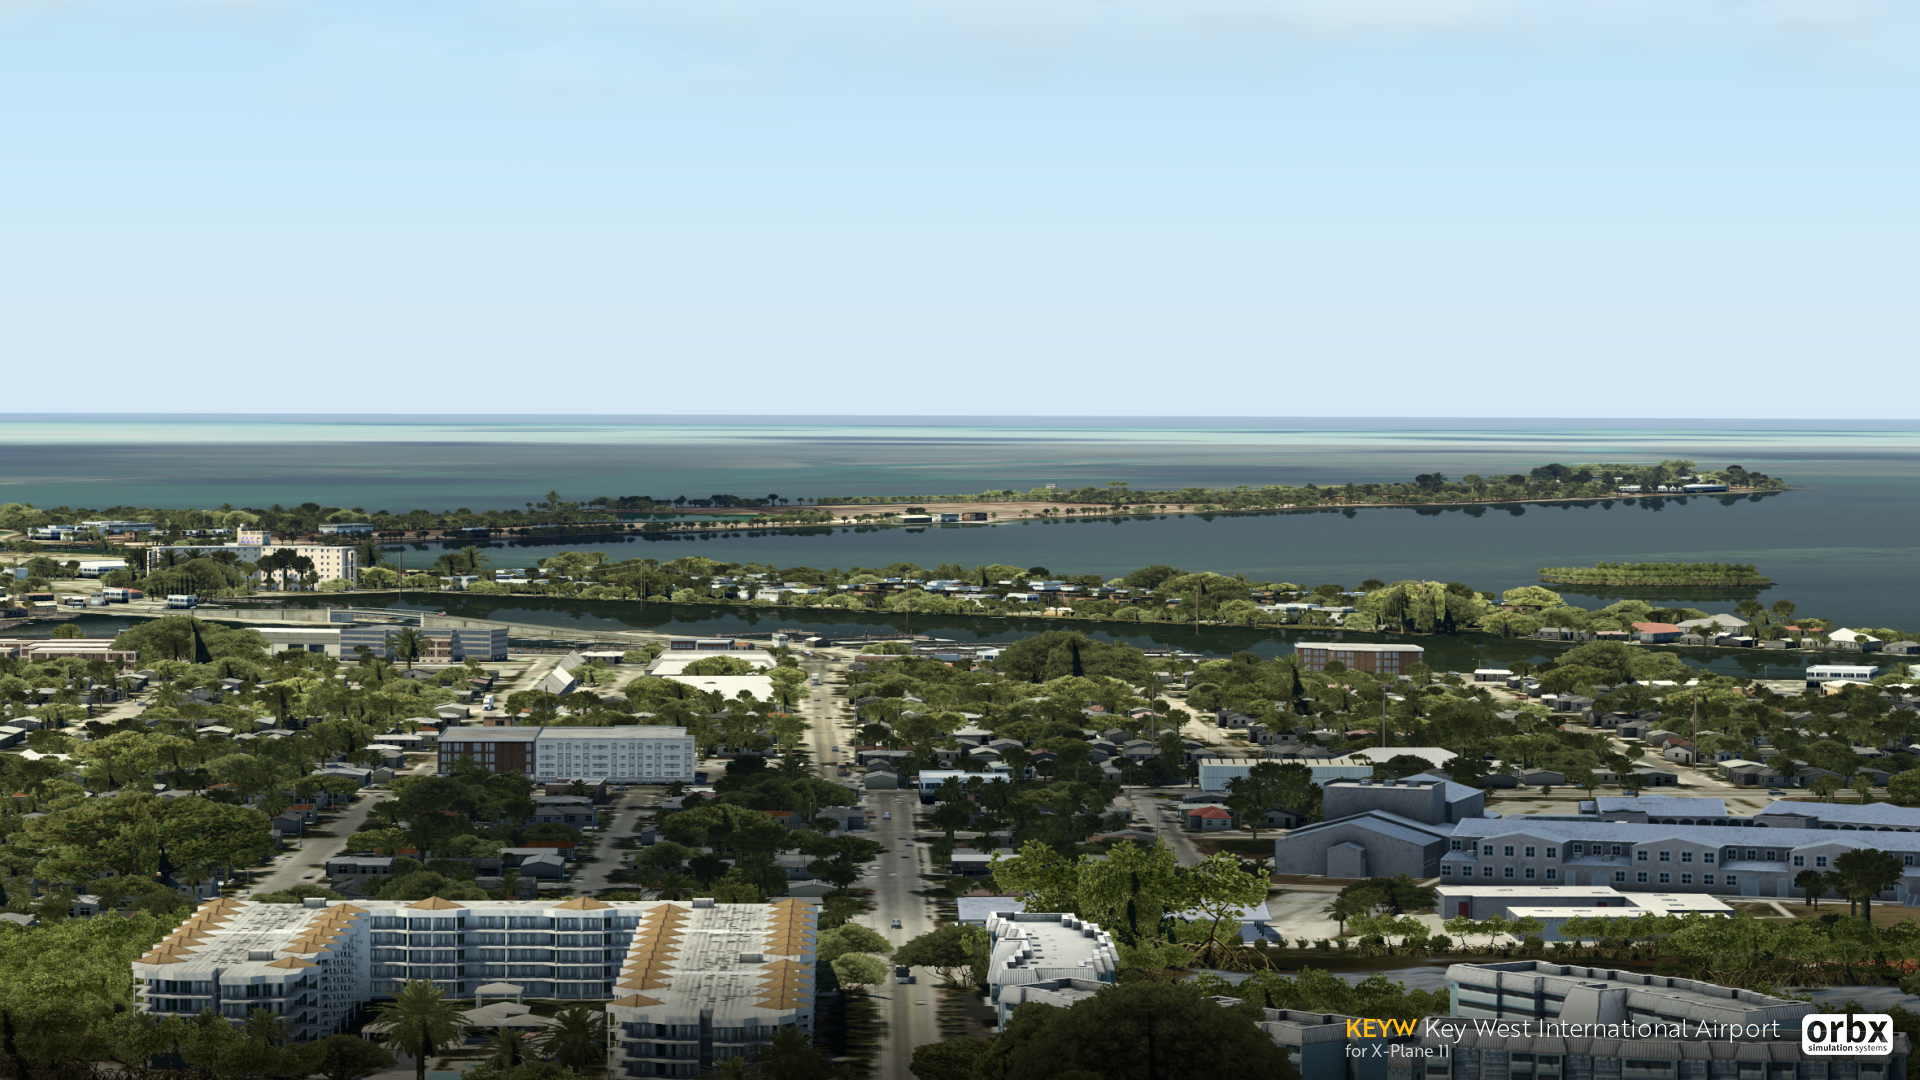
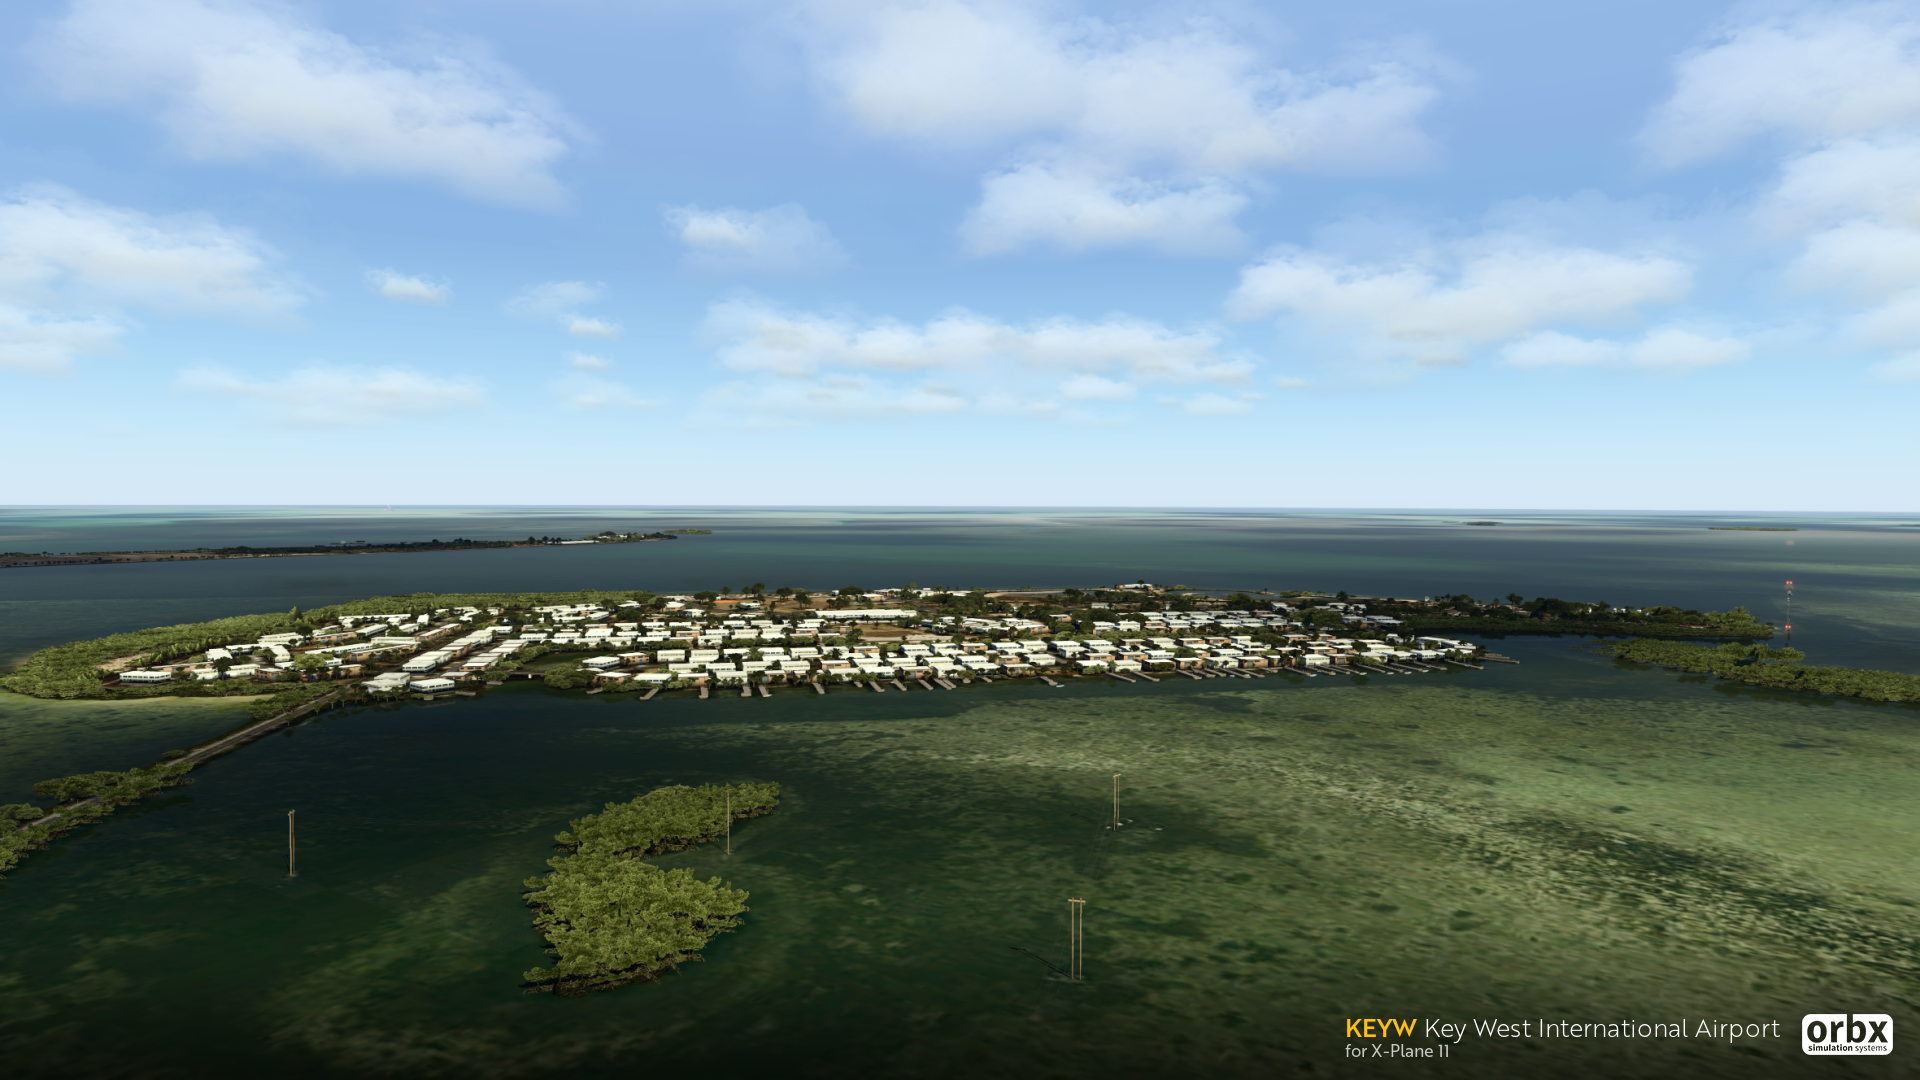
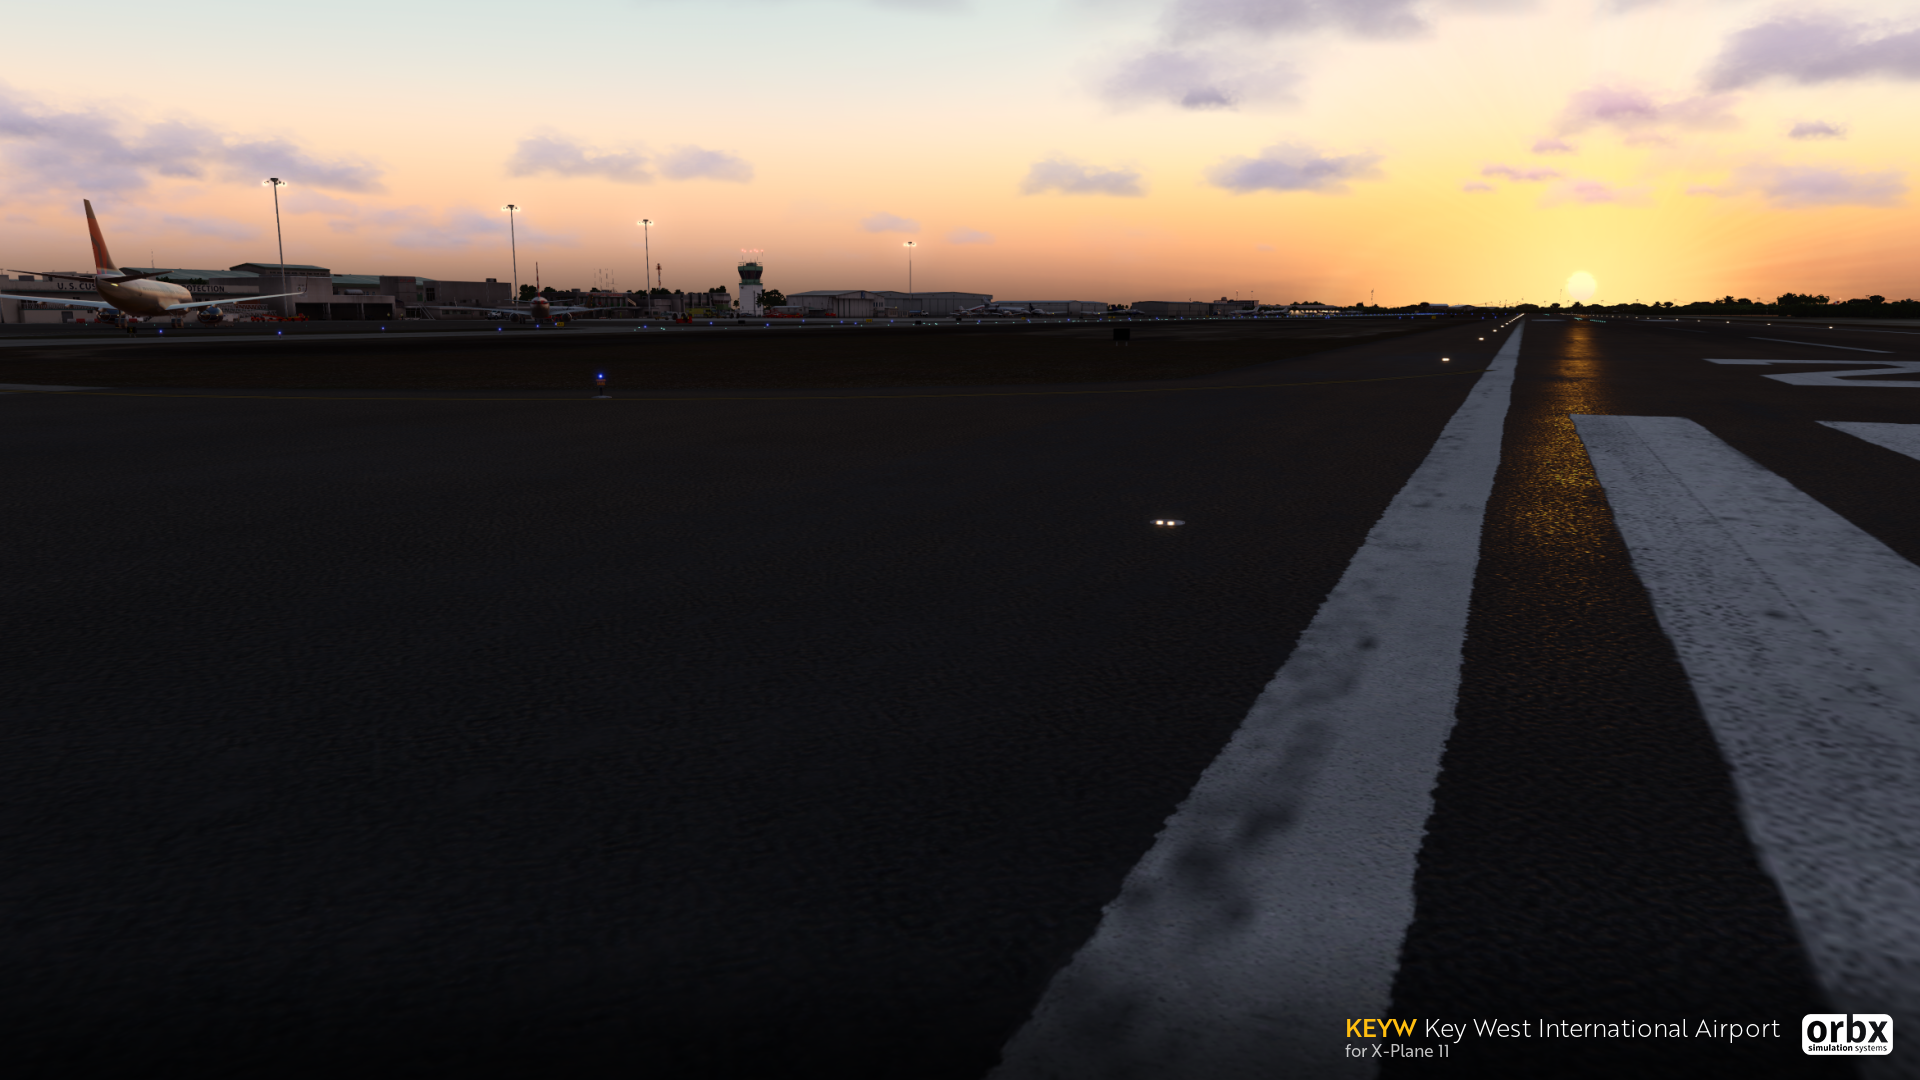
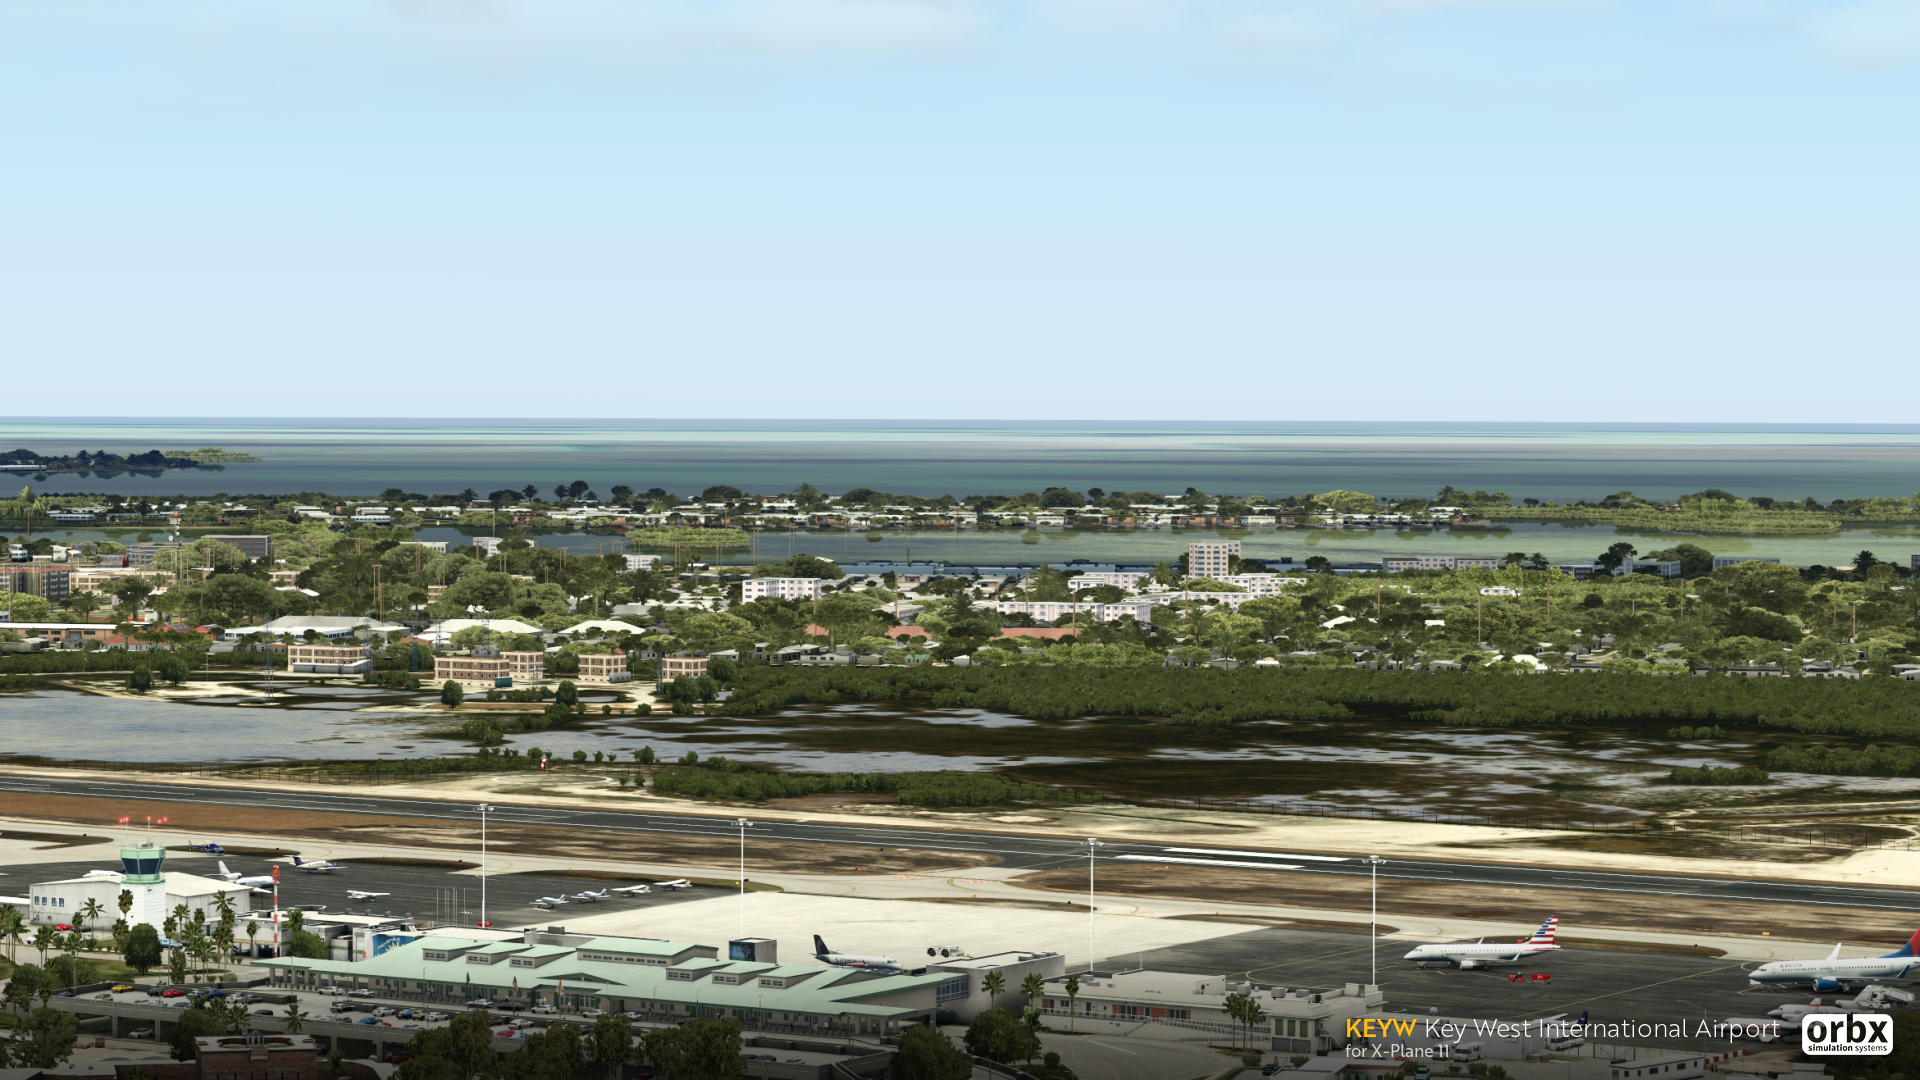
Located closer to Cuba than Miami, Key West benefits from year-round sunshine, tropical delights and stunning sunsets. Key West Airport is sat along the stunning Smathers Beach providing you with great views on the wing as you come into land on the short runway. Watch as the waves roll in and sea sparkle ahead of you.
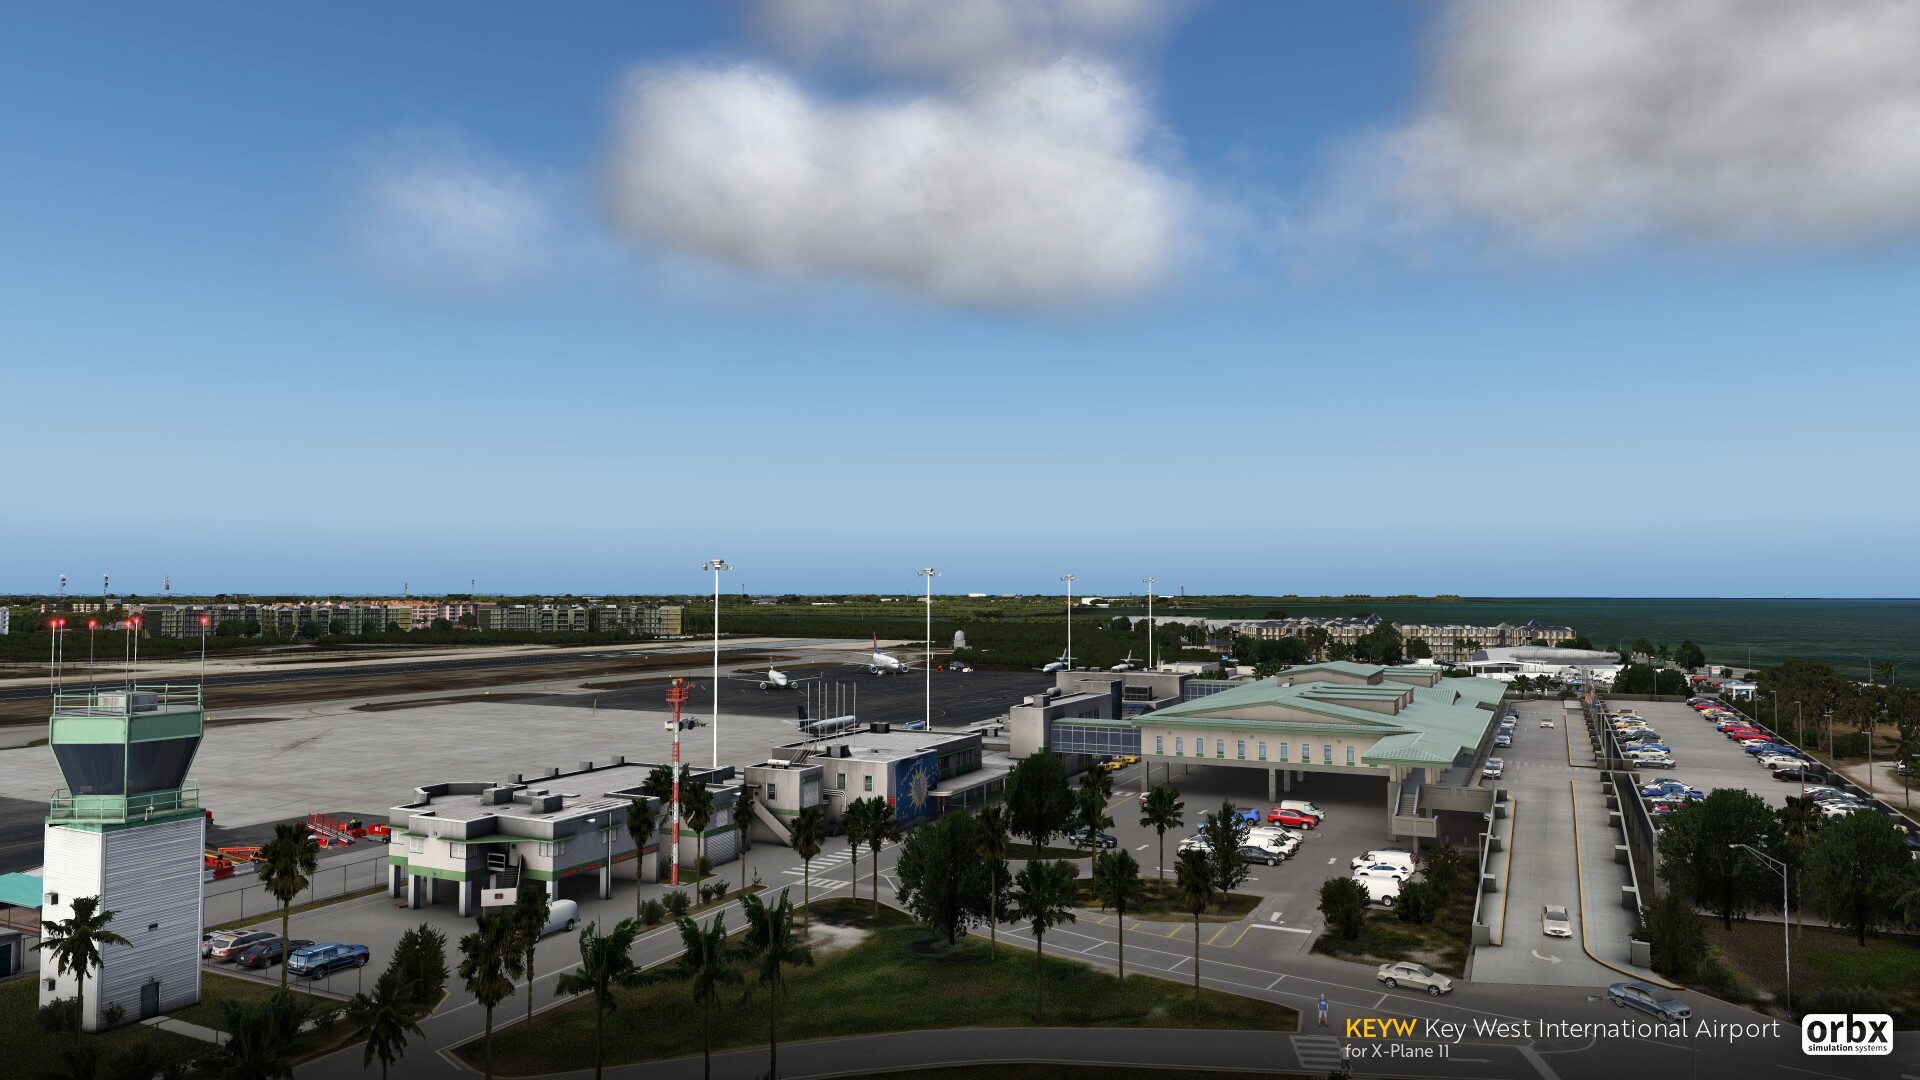
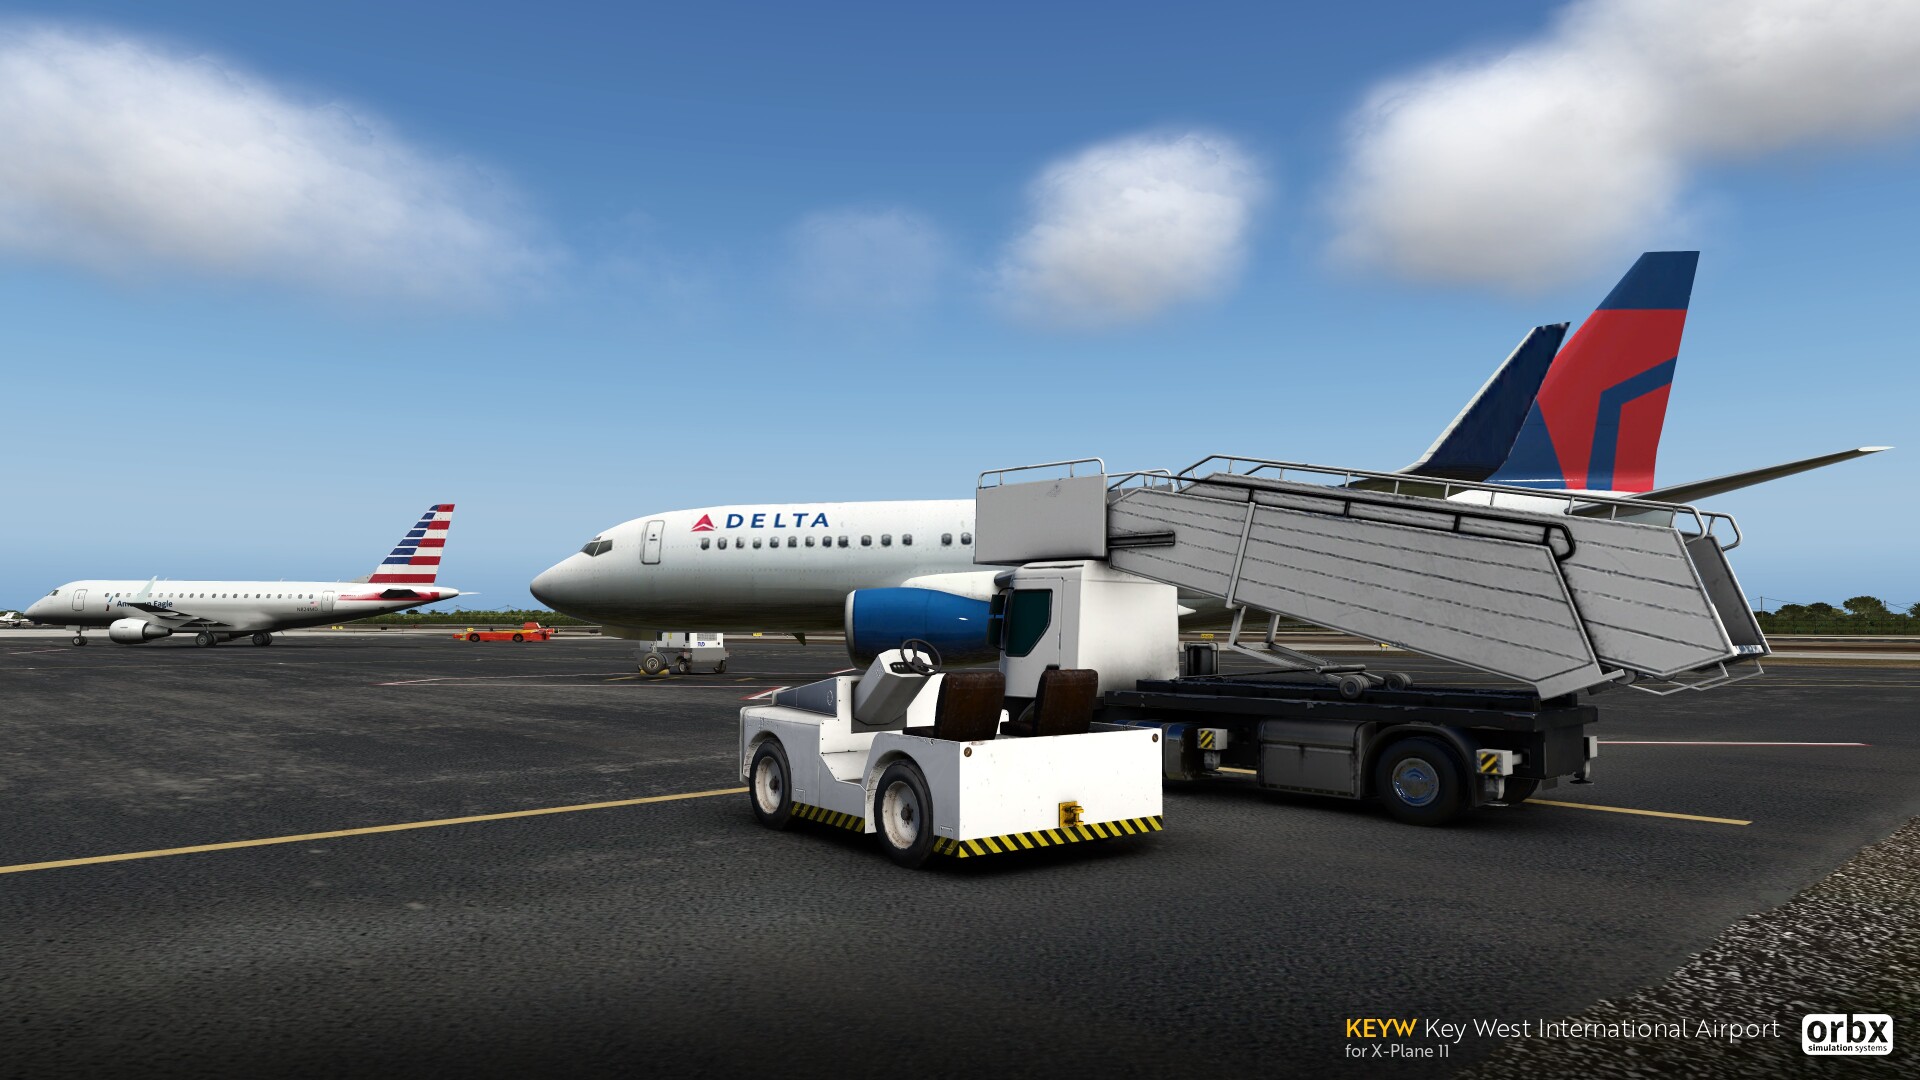
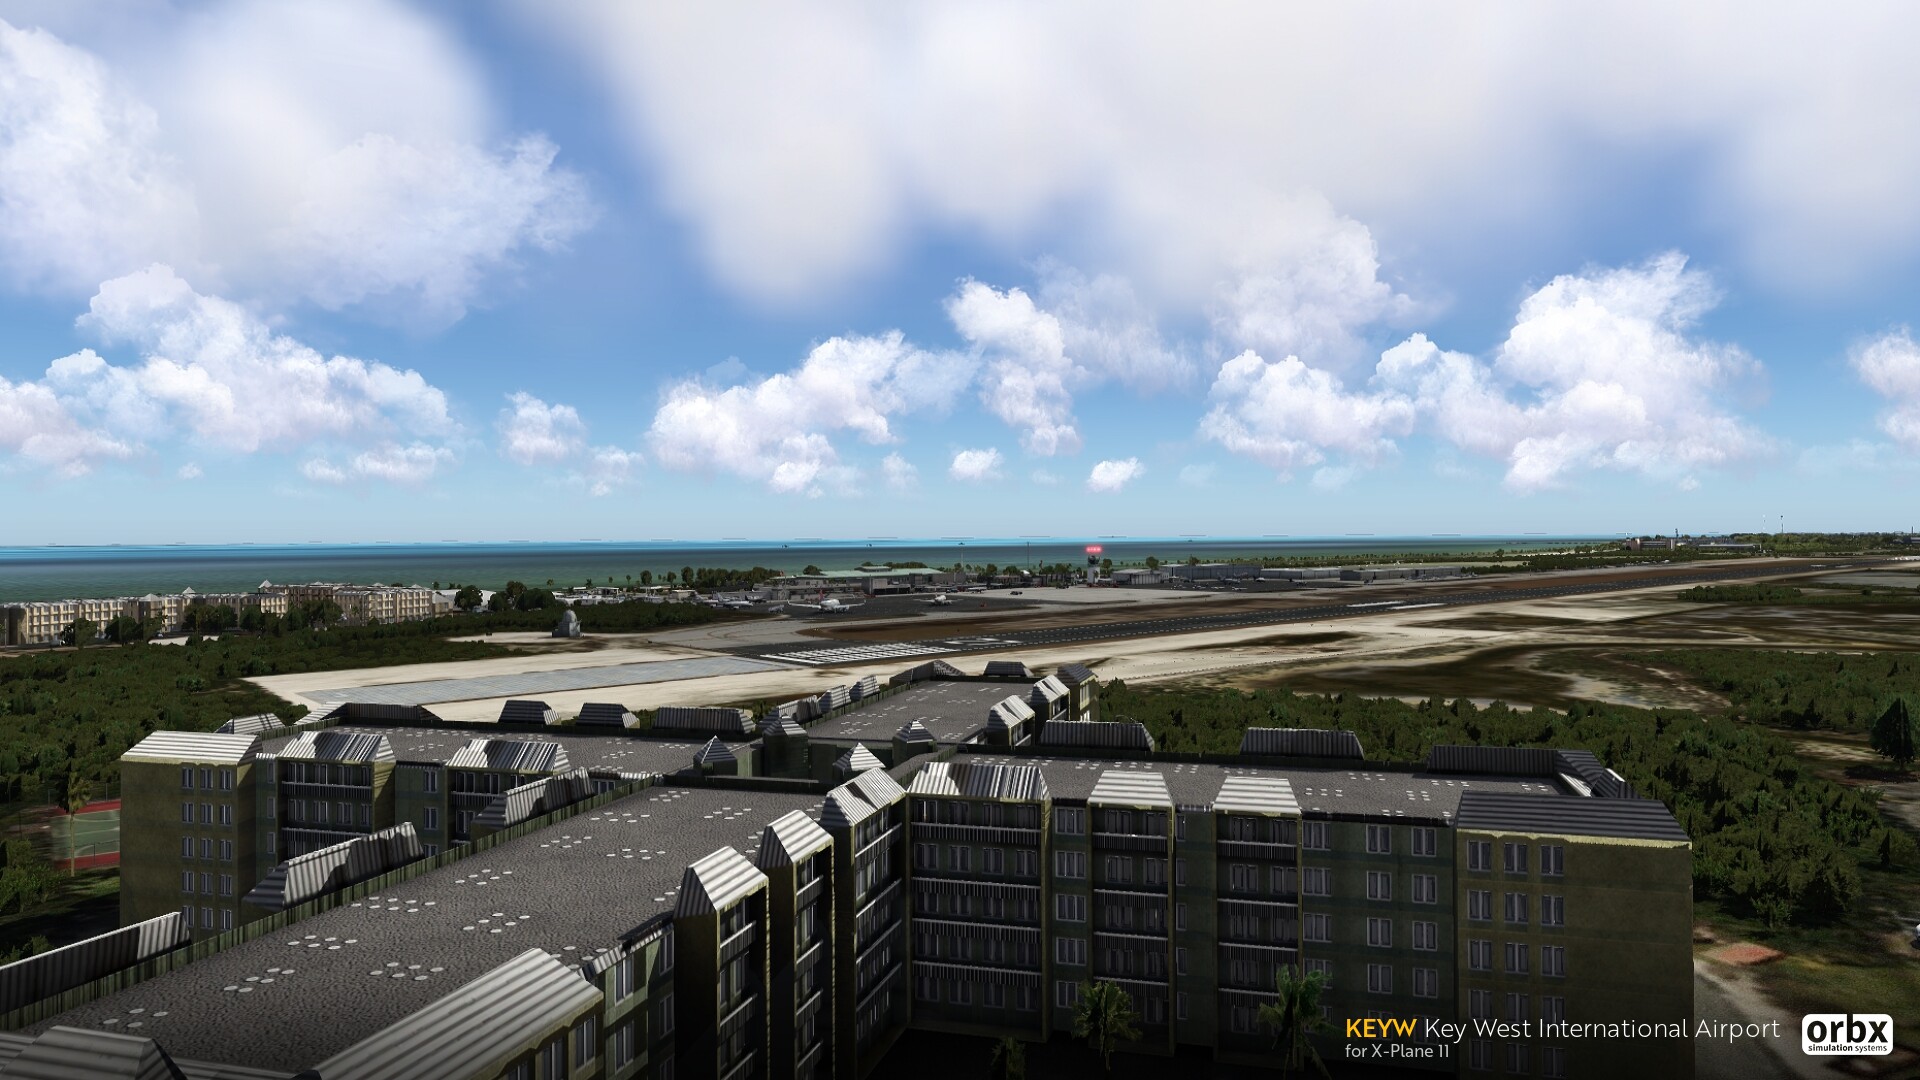
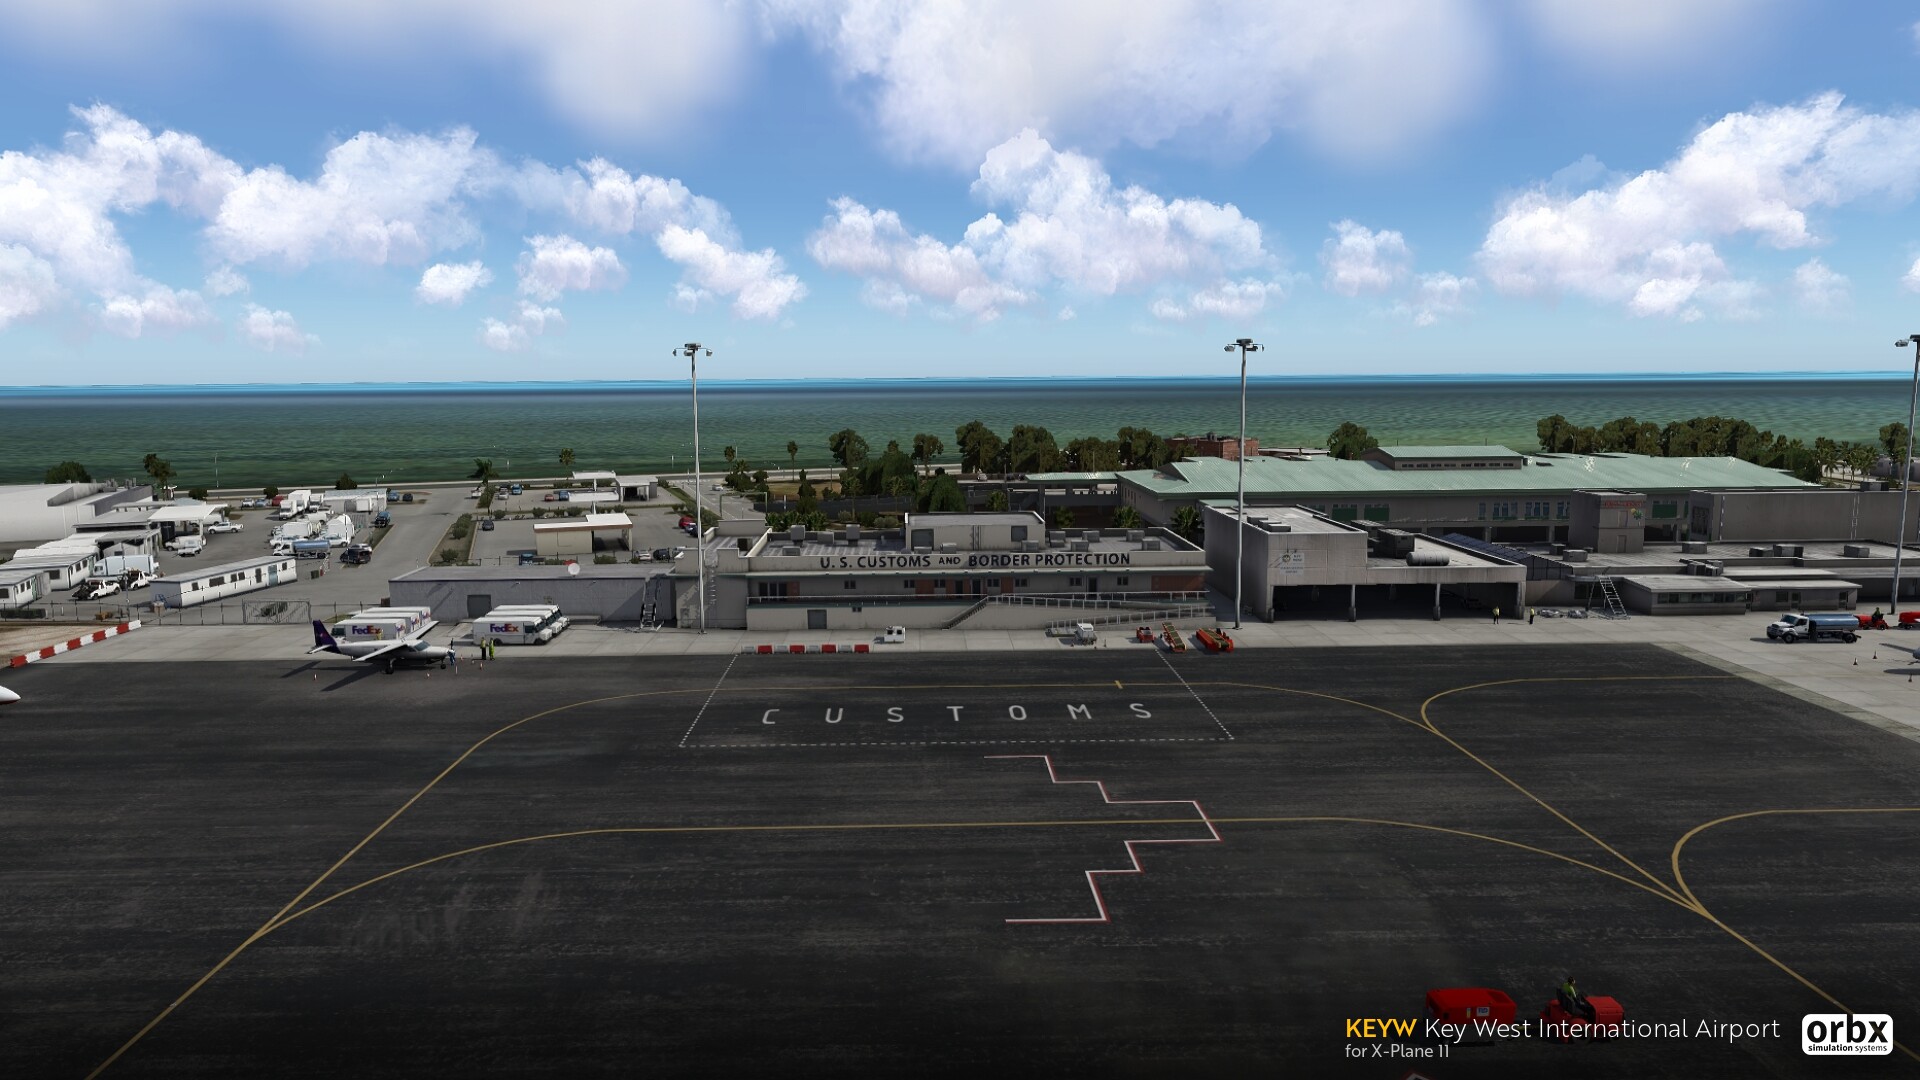
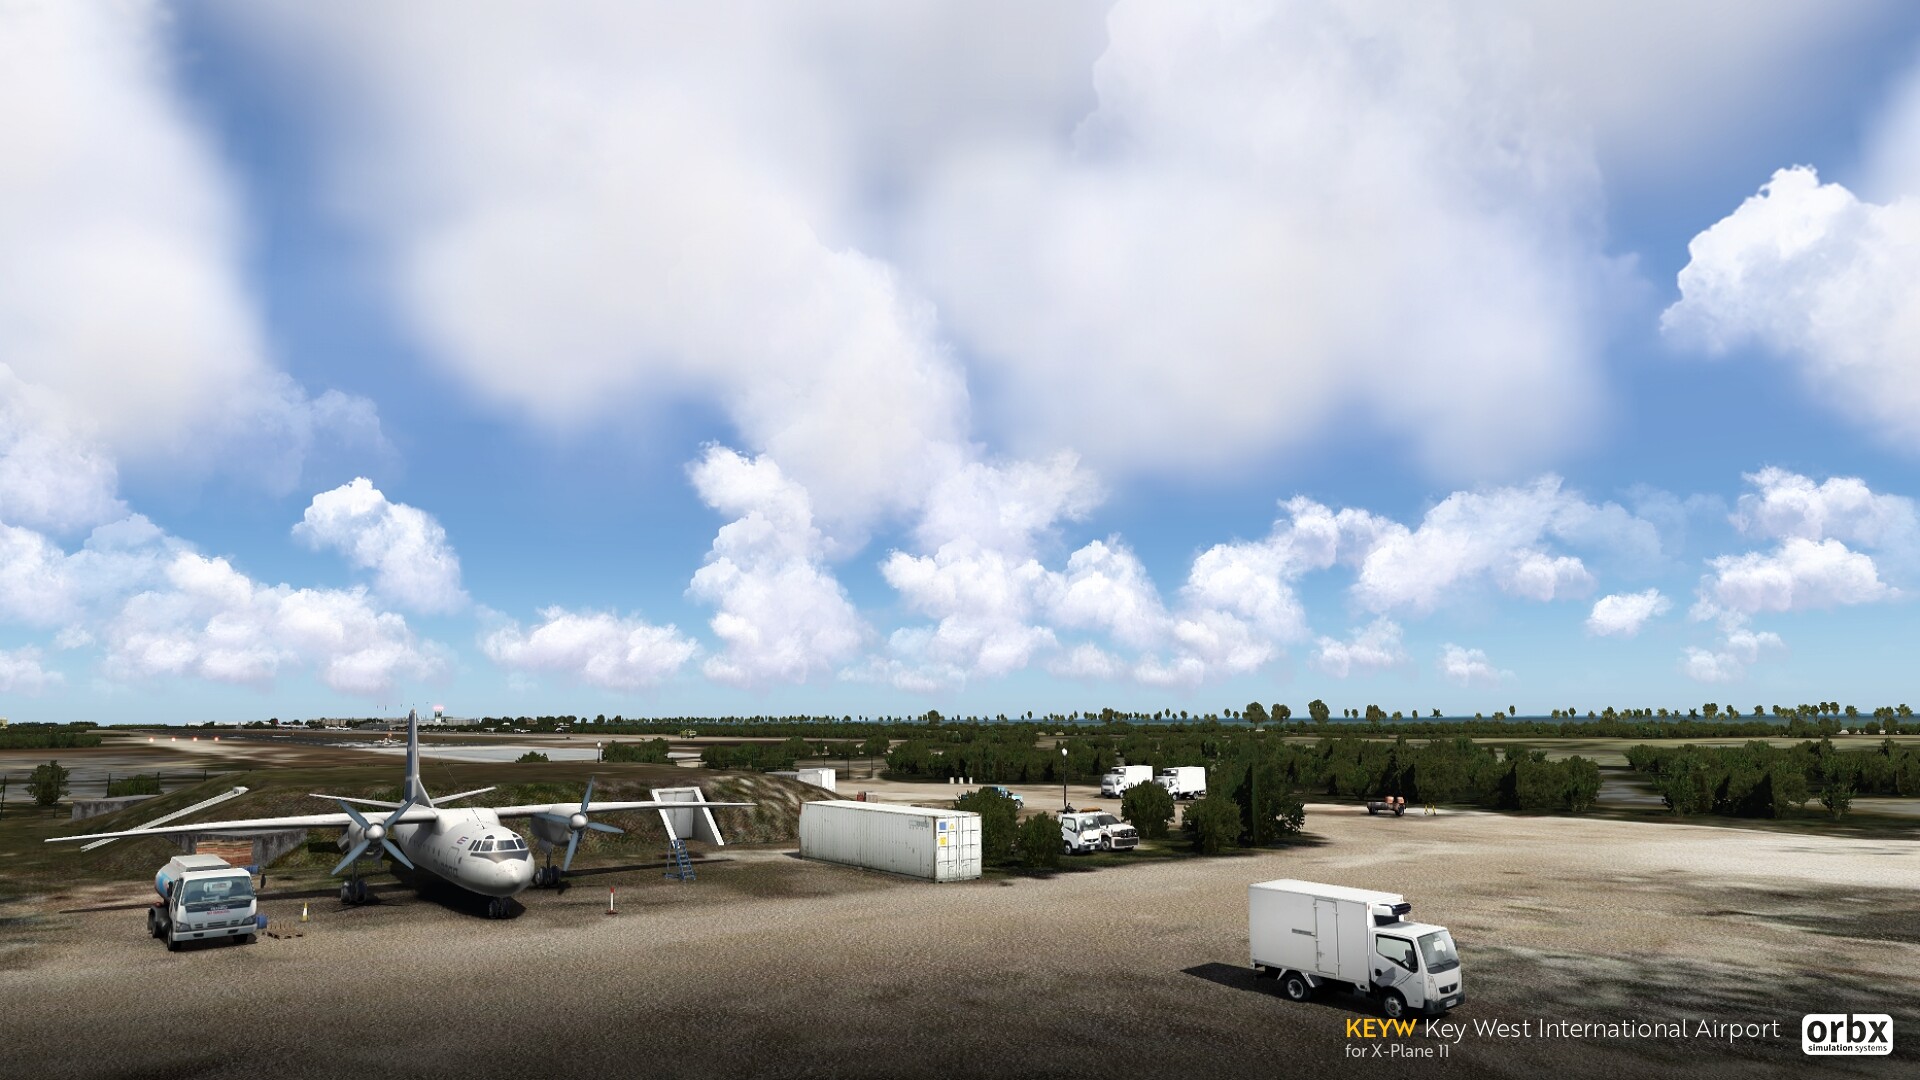
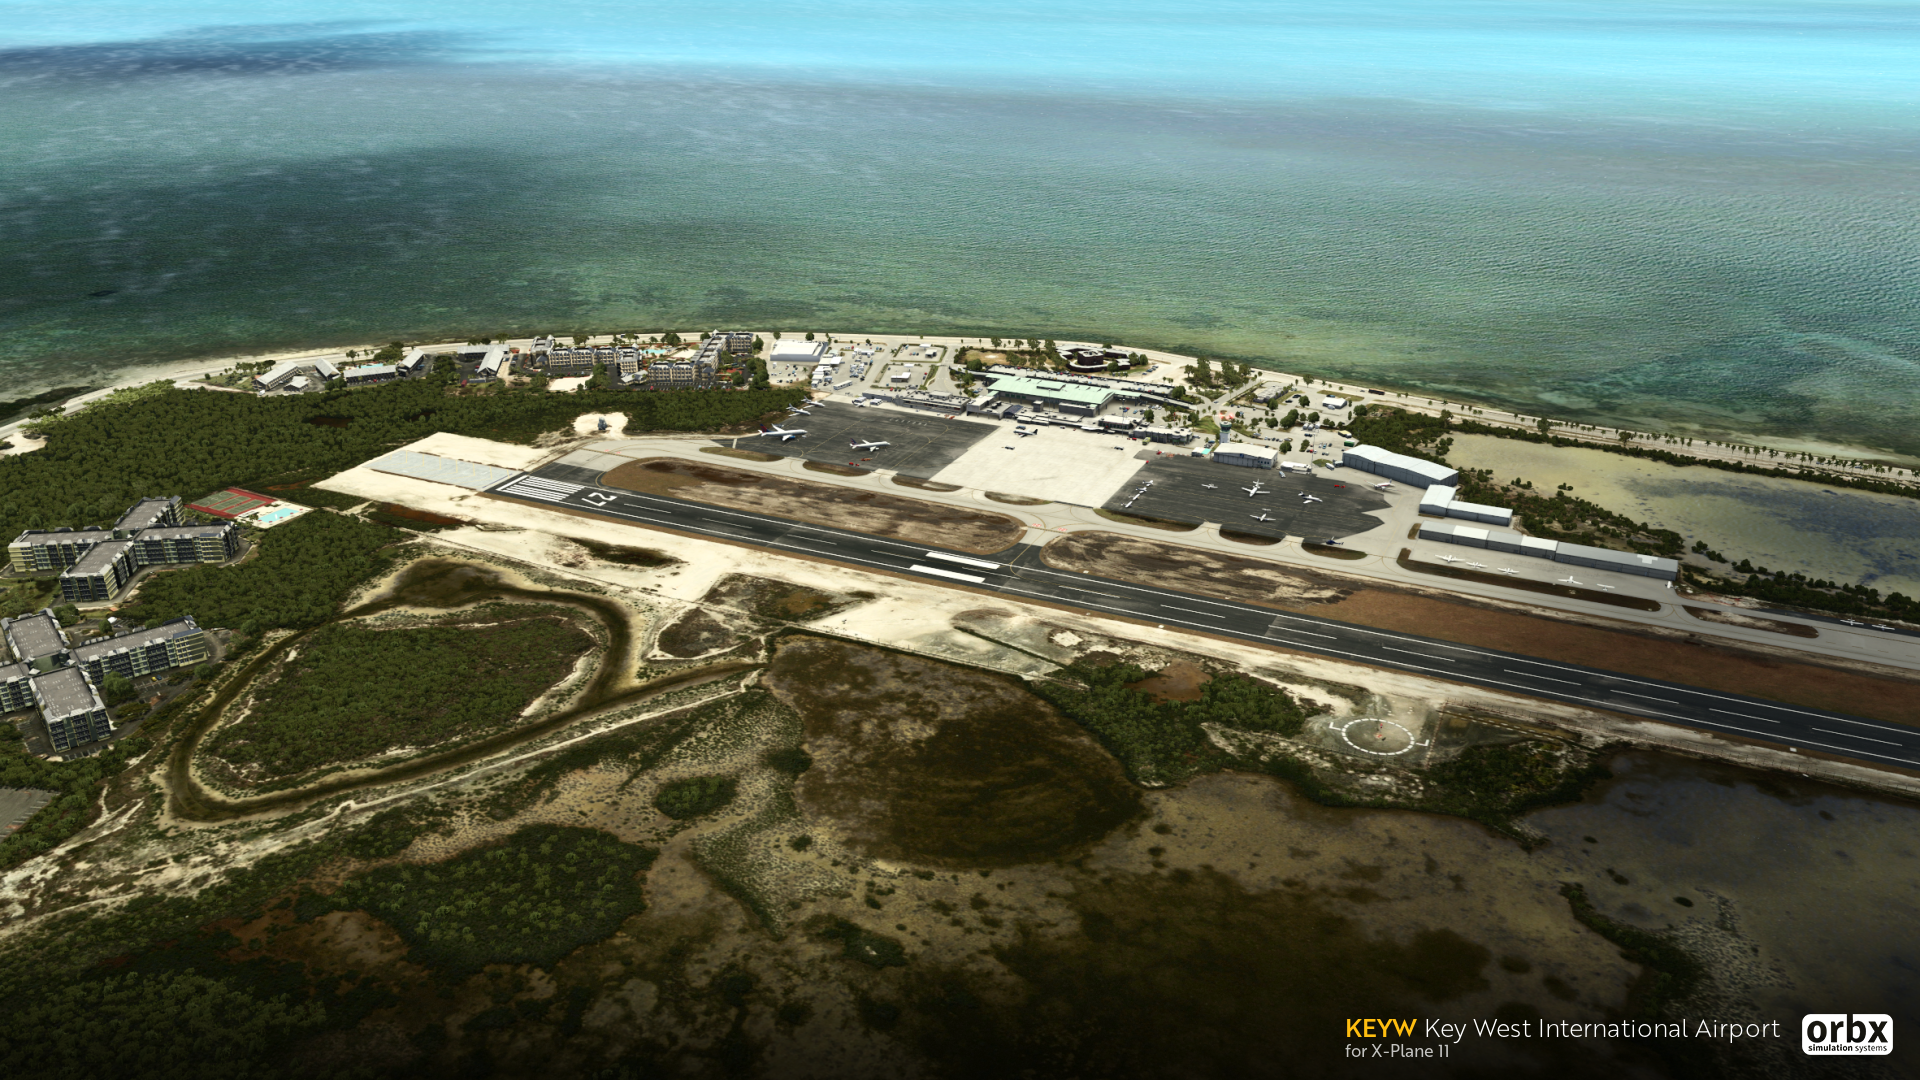
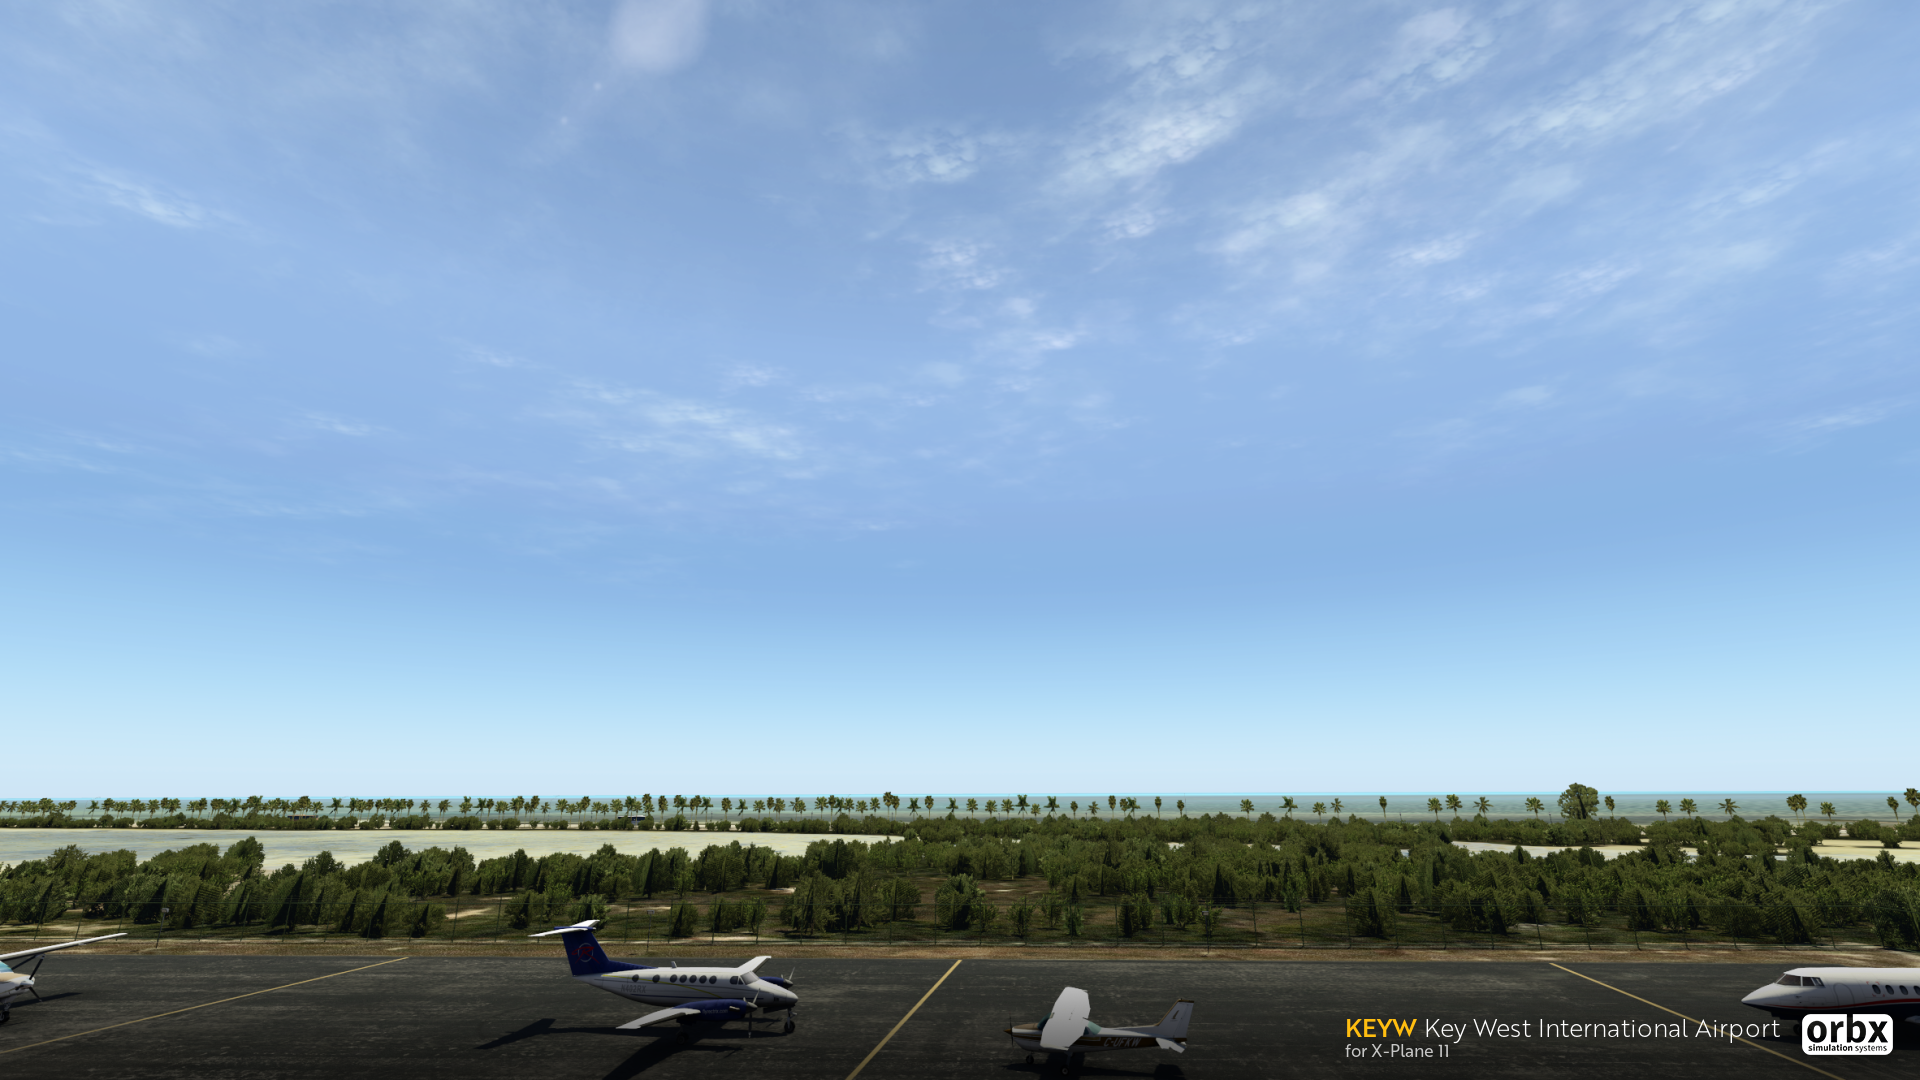
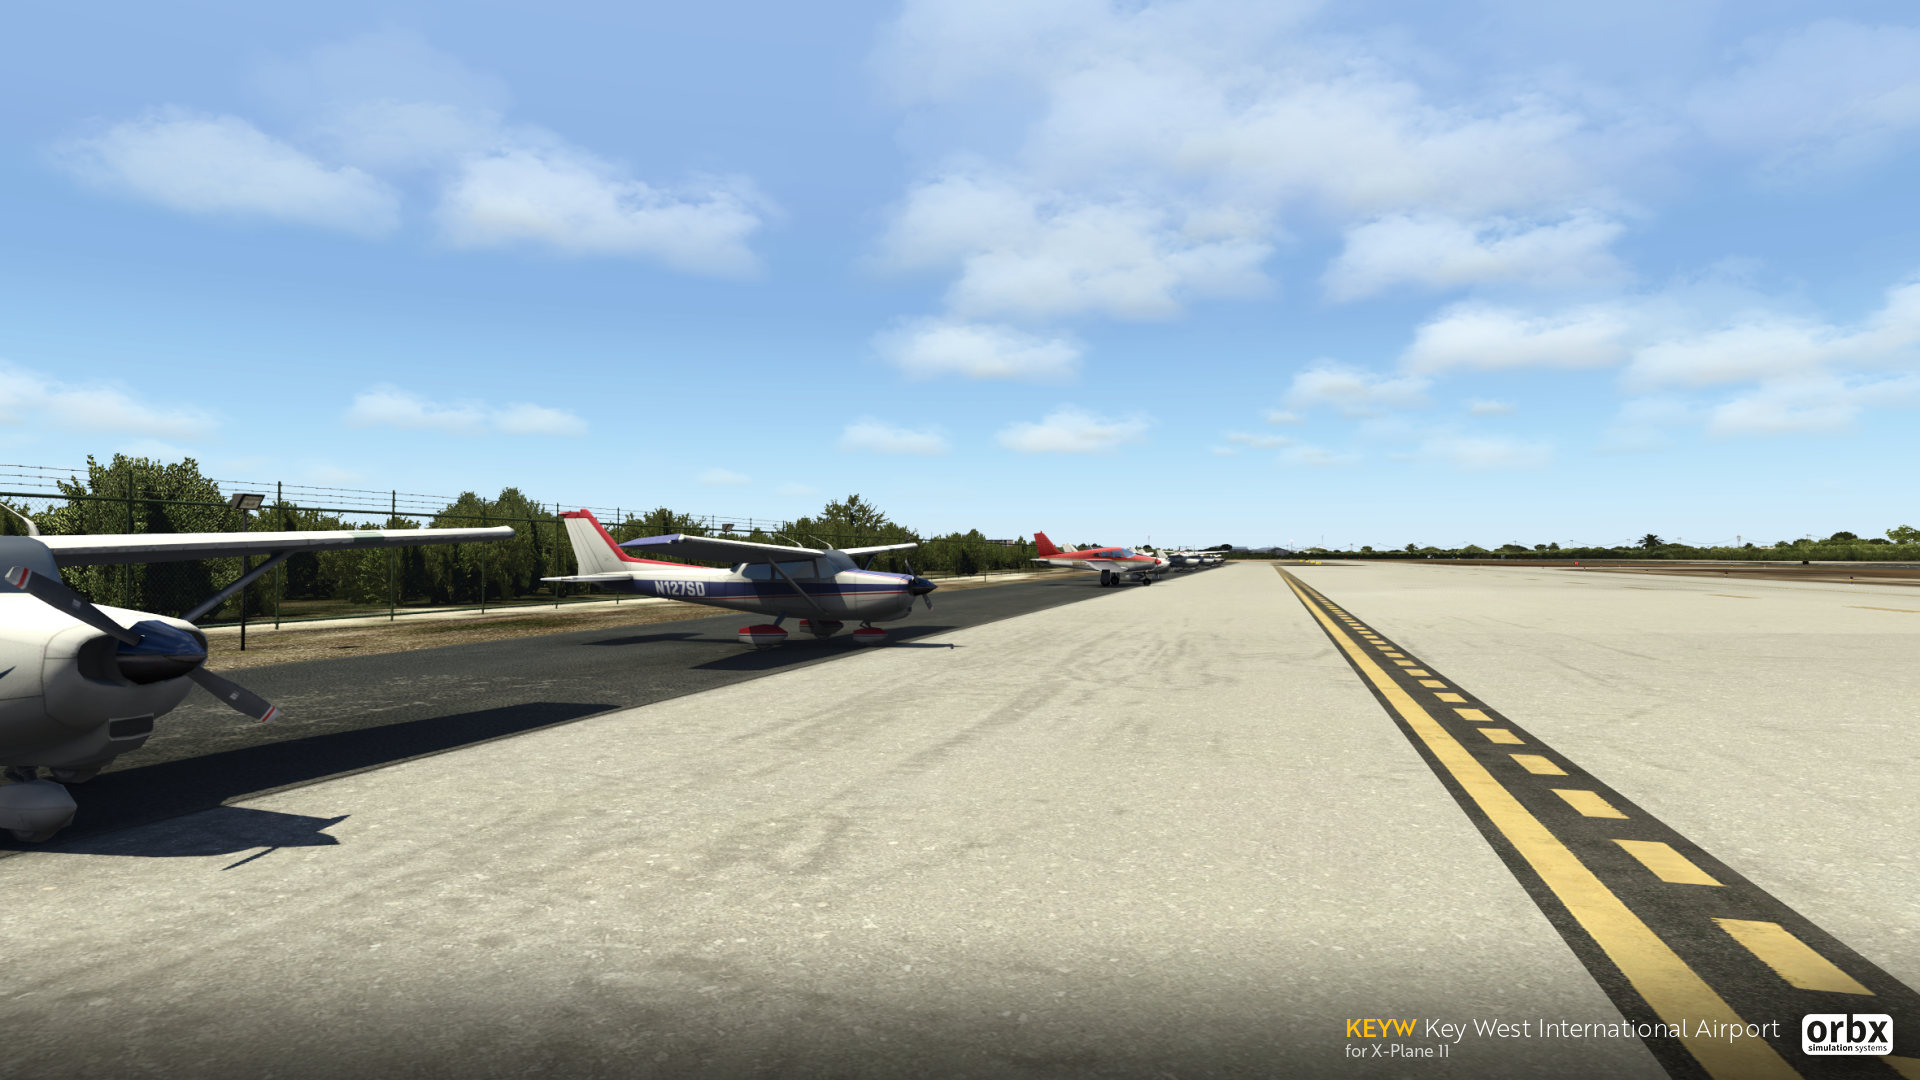
Situated on an island that is only 8-square miles means that the airport is relatively small. Only a 5,076-foot runway is used to get your aircraft into the air. The largest aircraft to visit the airport is a Delta Air Lines 737-700, with American soon to have an A319 visit frequently. This short runway, along with regularly high temperatures, often means pilots face a challenging take off with a small margin of error. Key West Seaplane Adventures is also based out of Key West offering scenic flights around the islands on tourist trips.
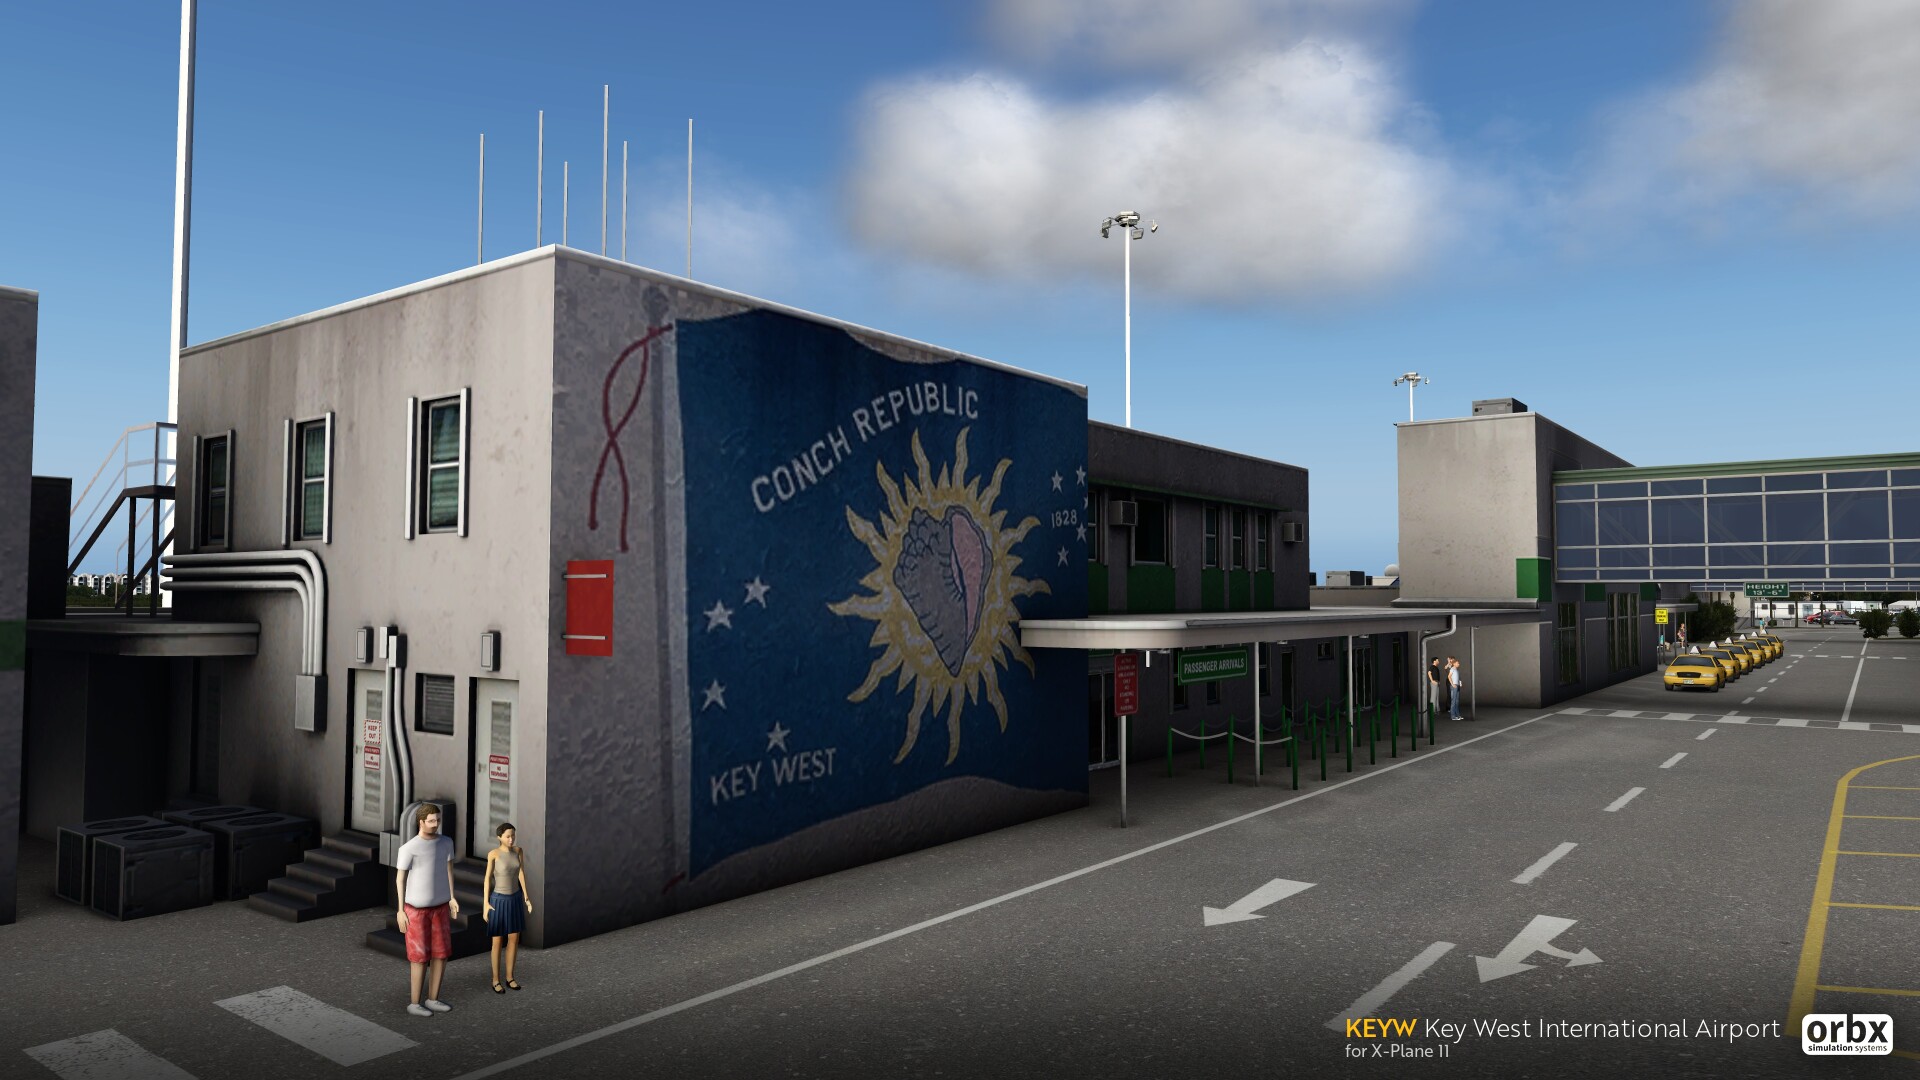
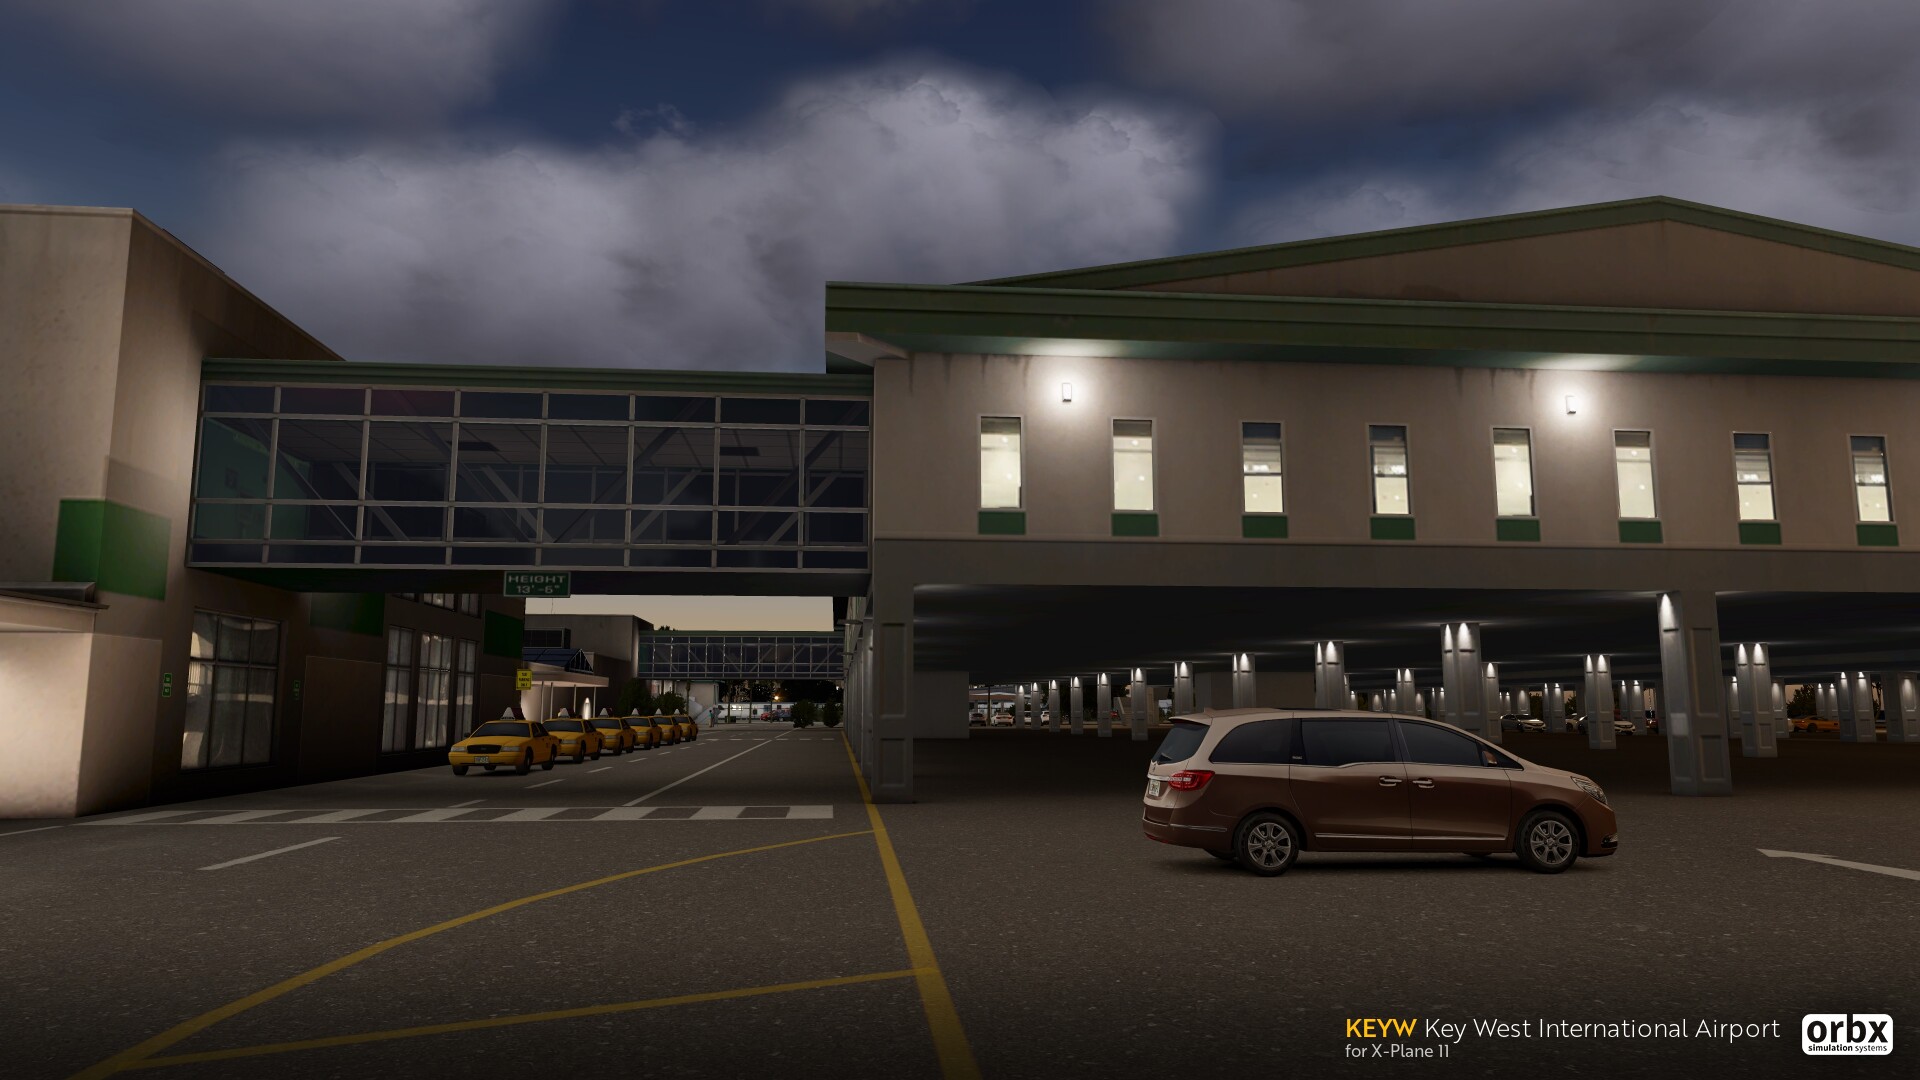
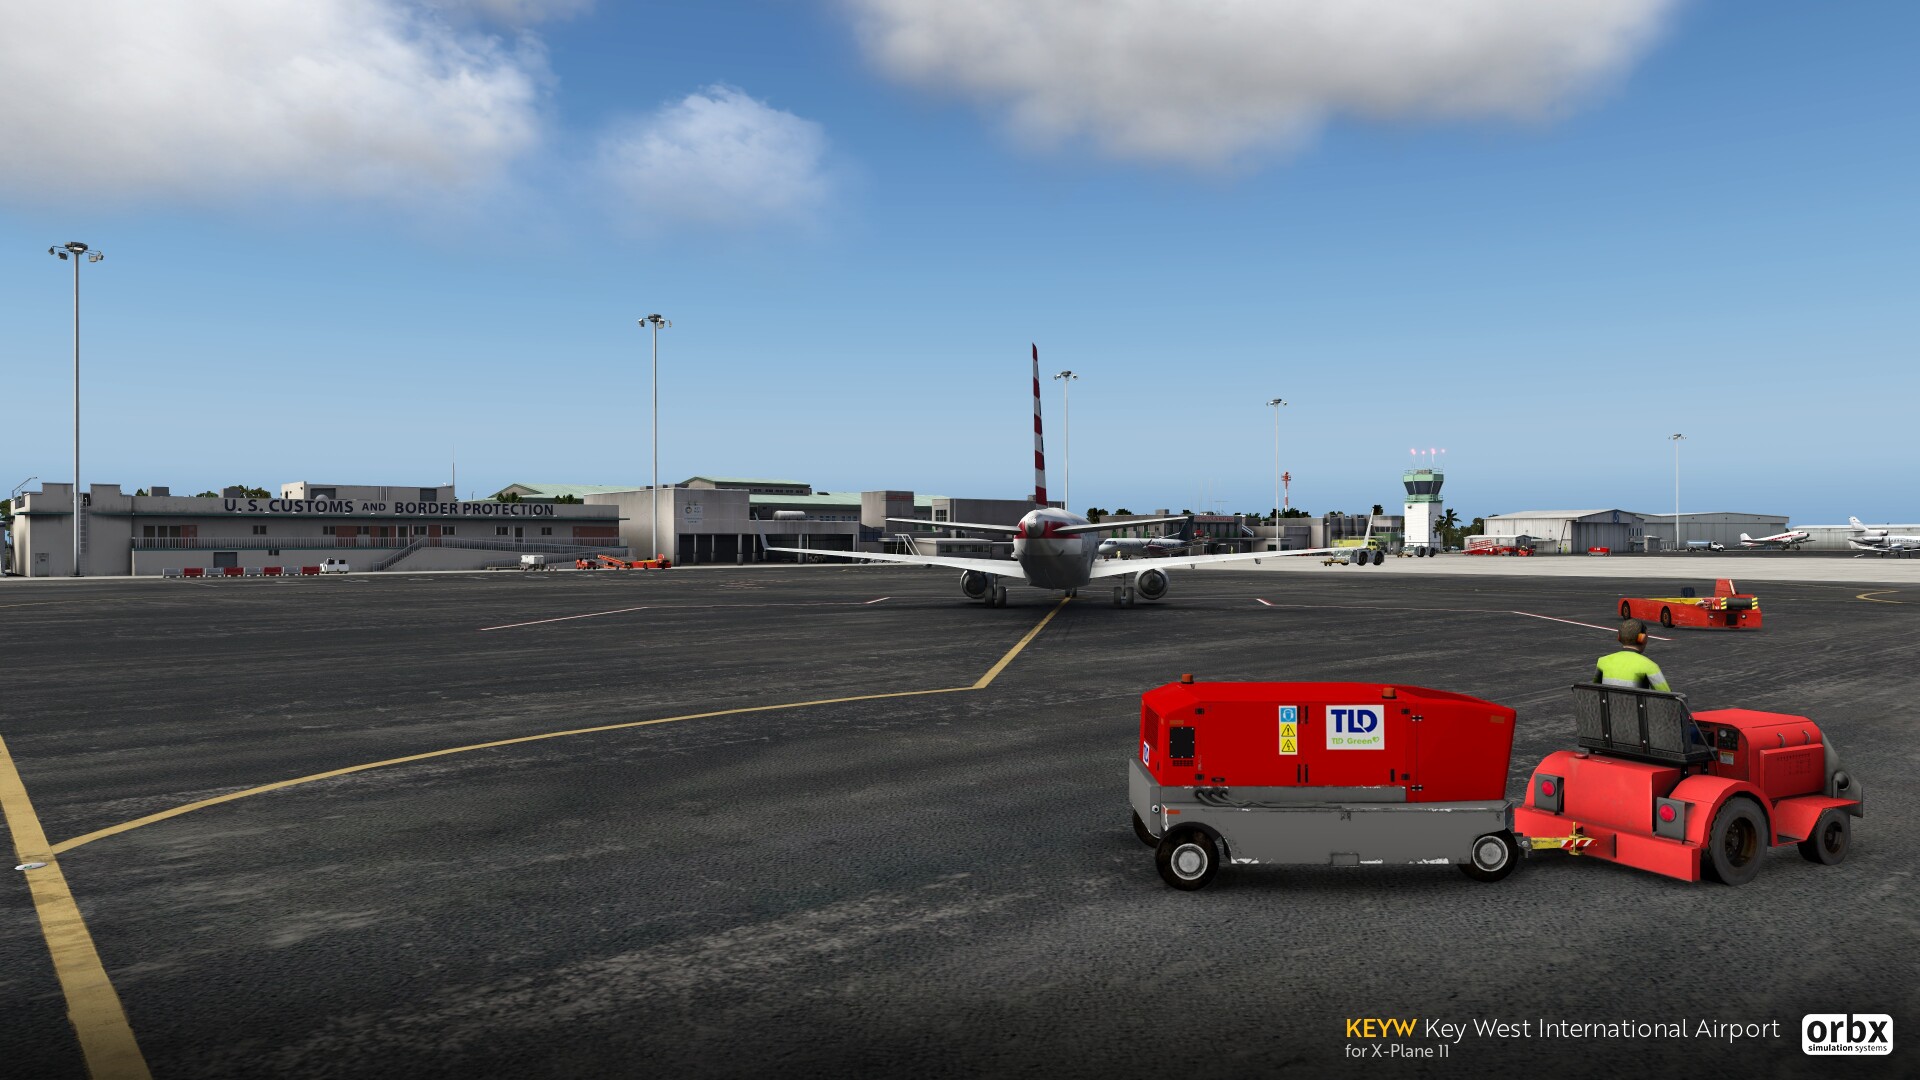
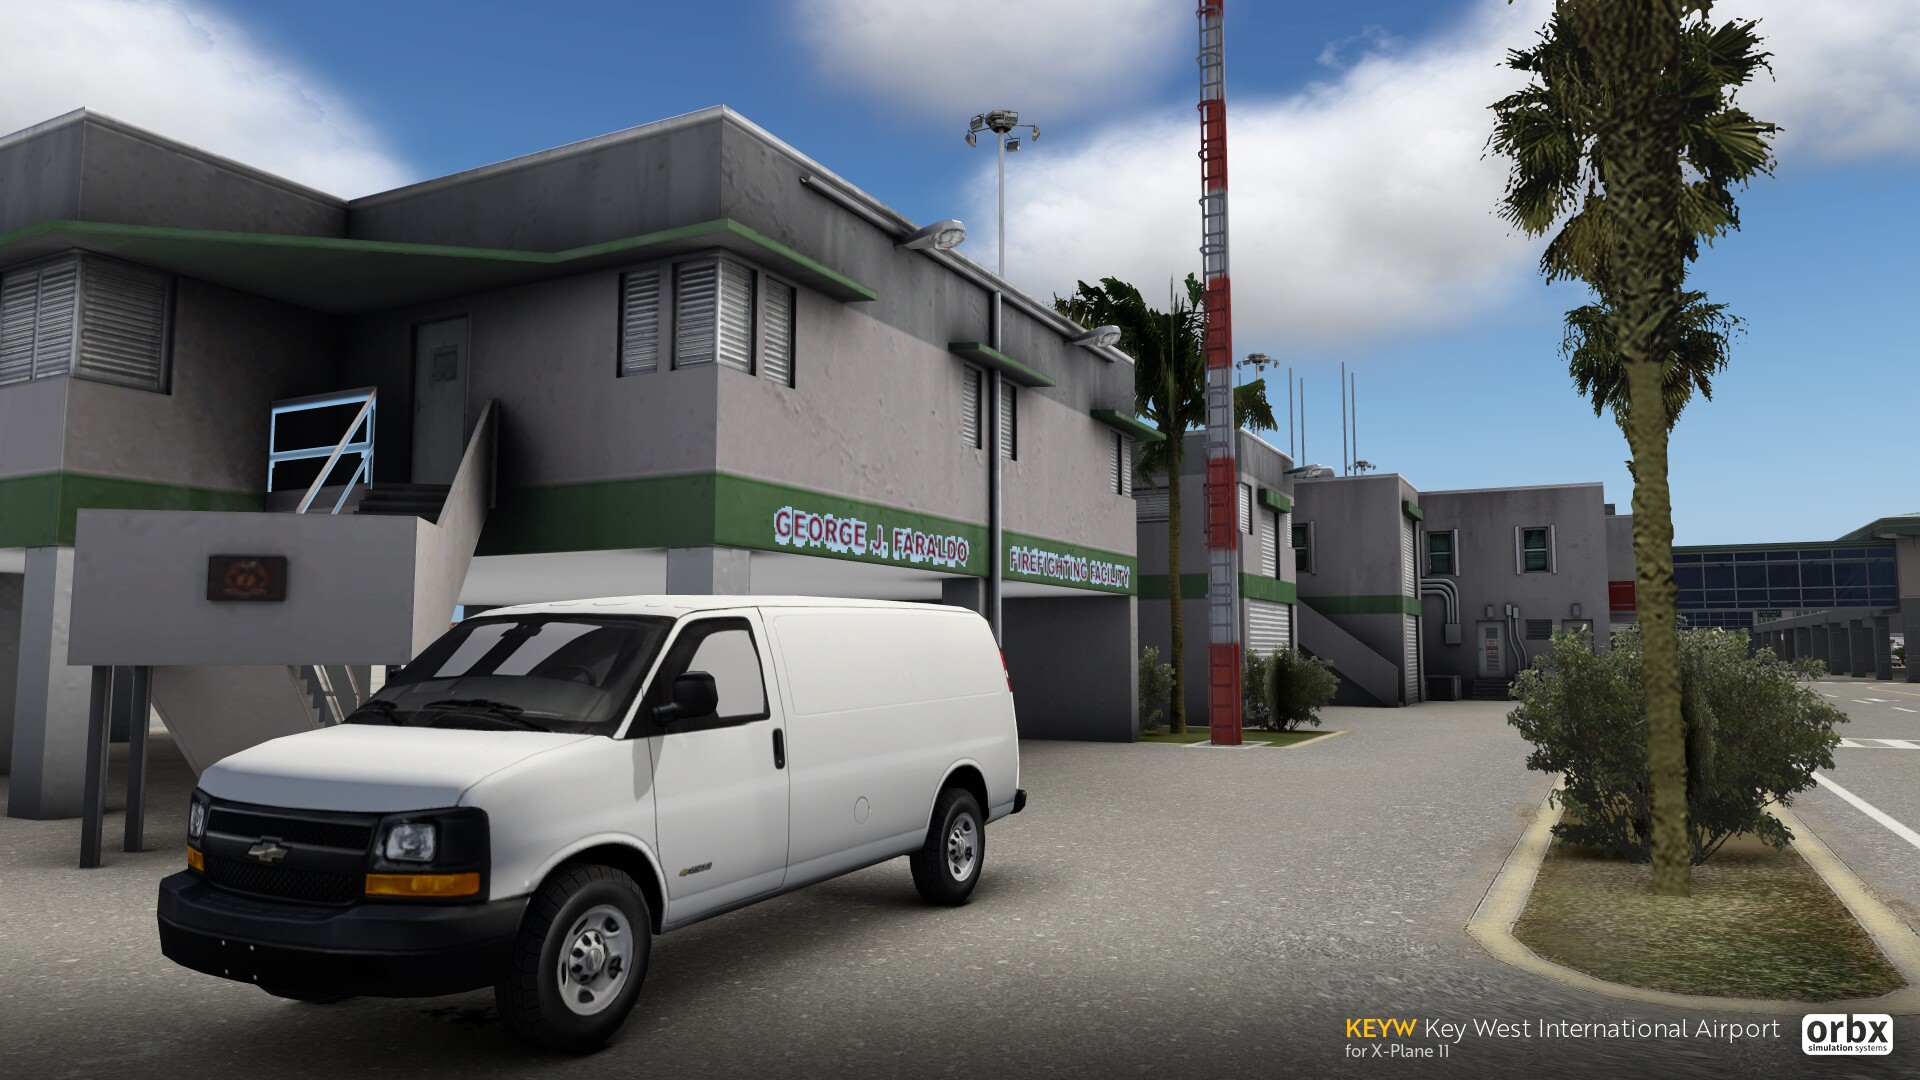
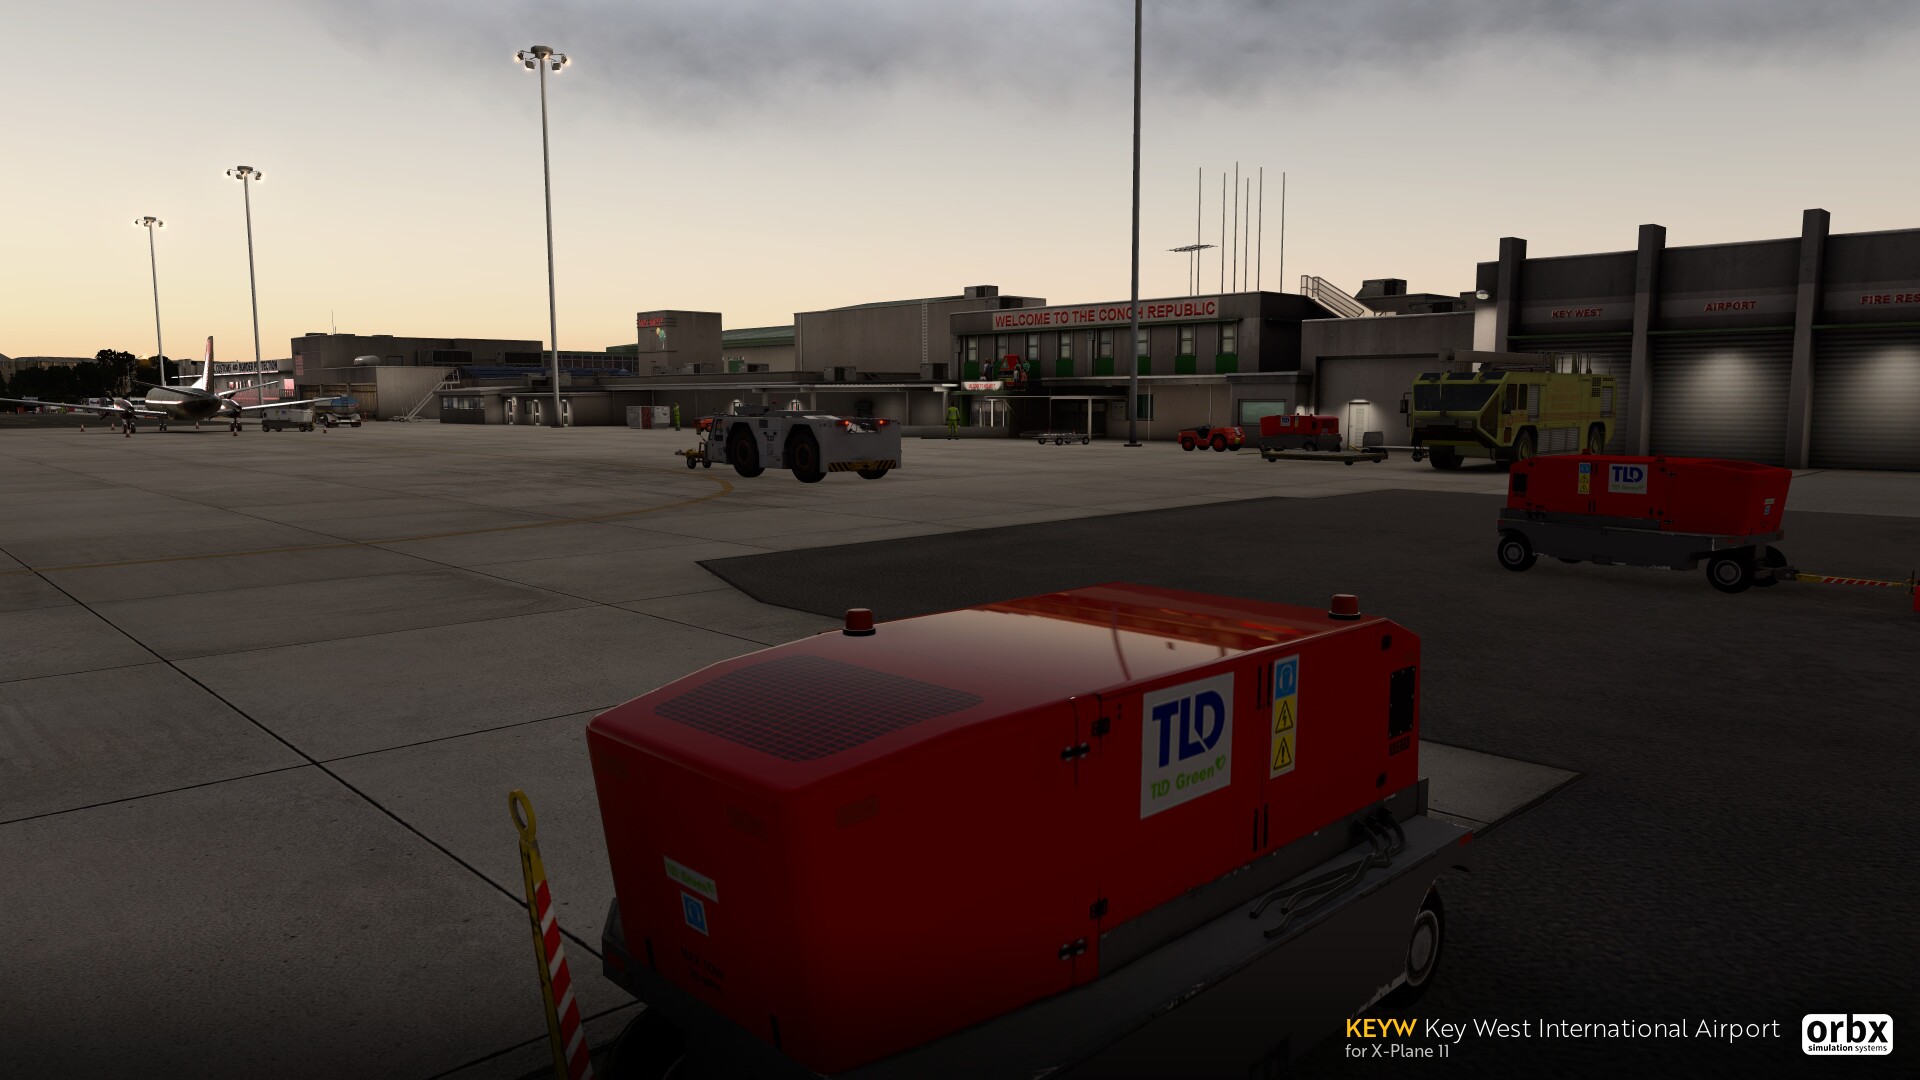
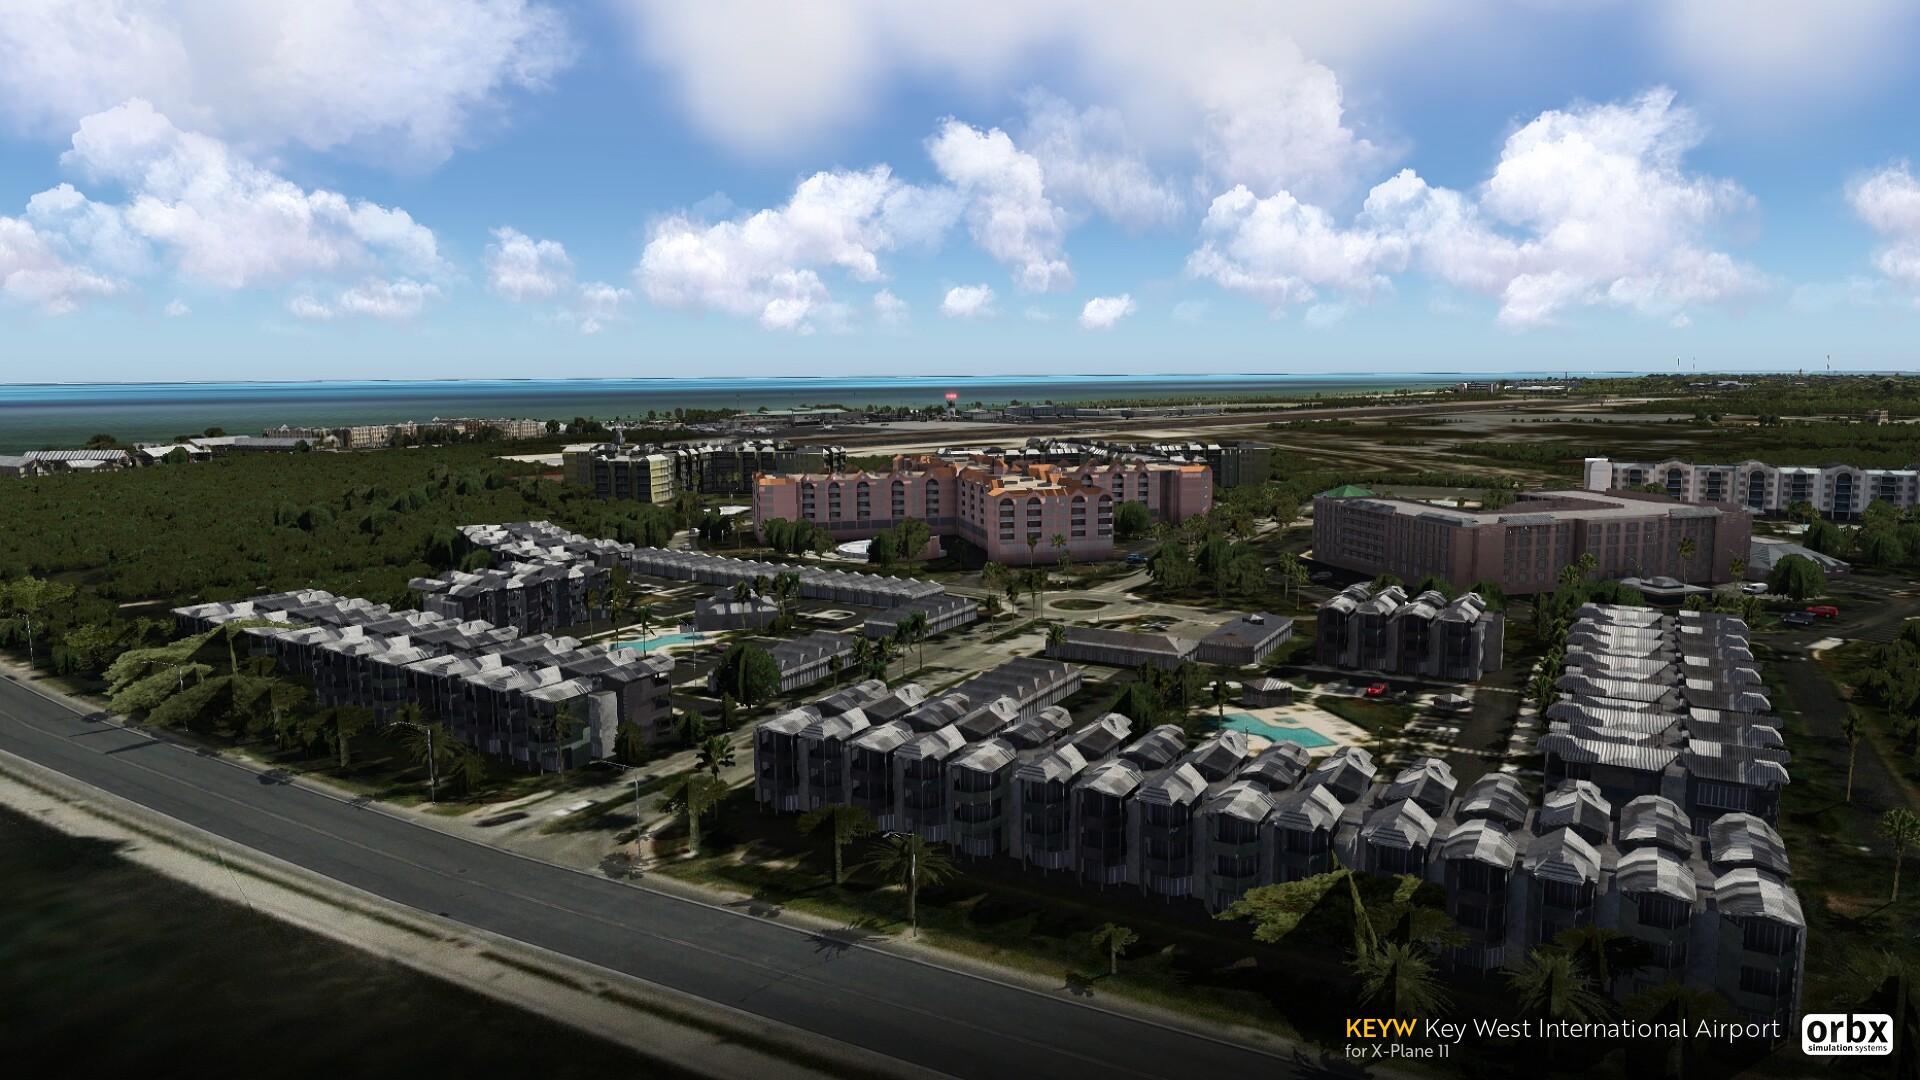
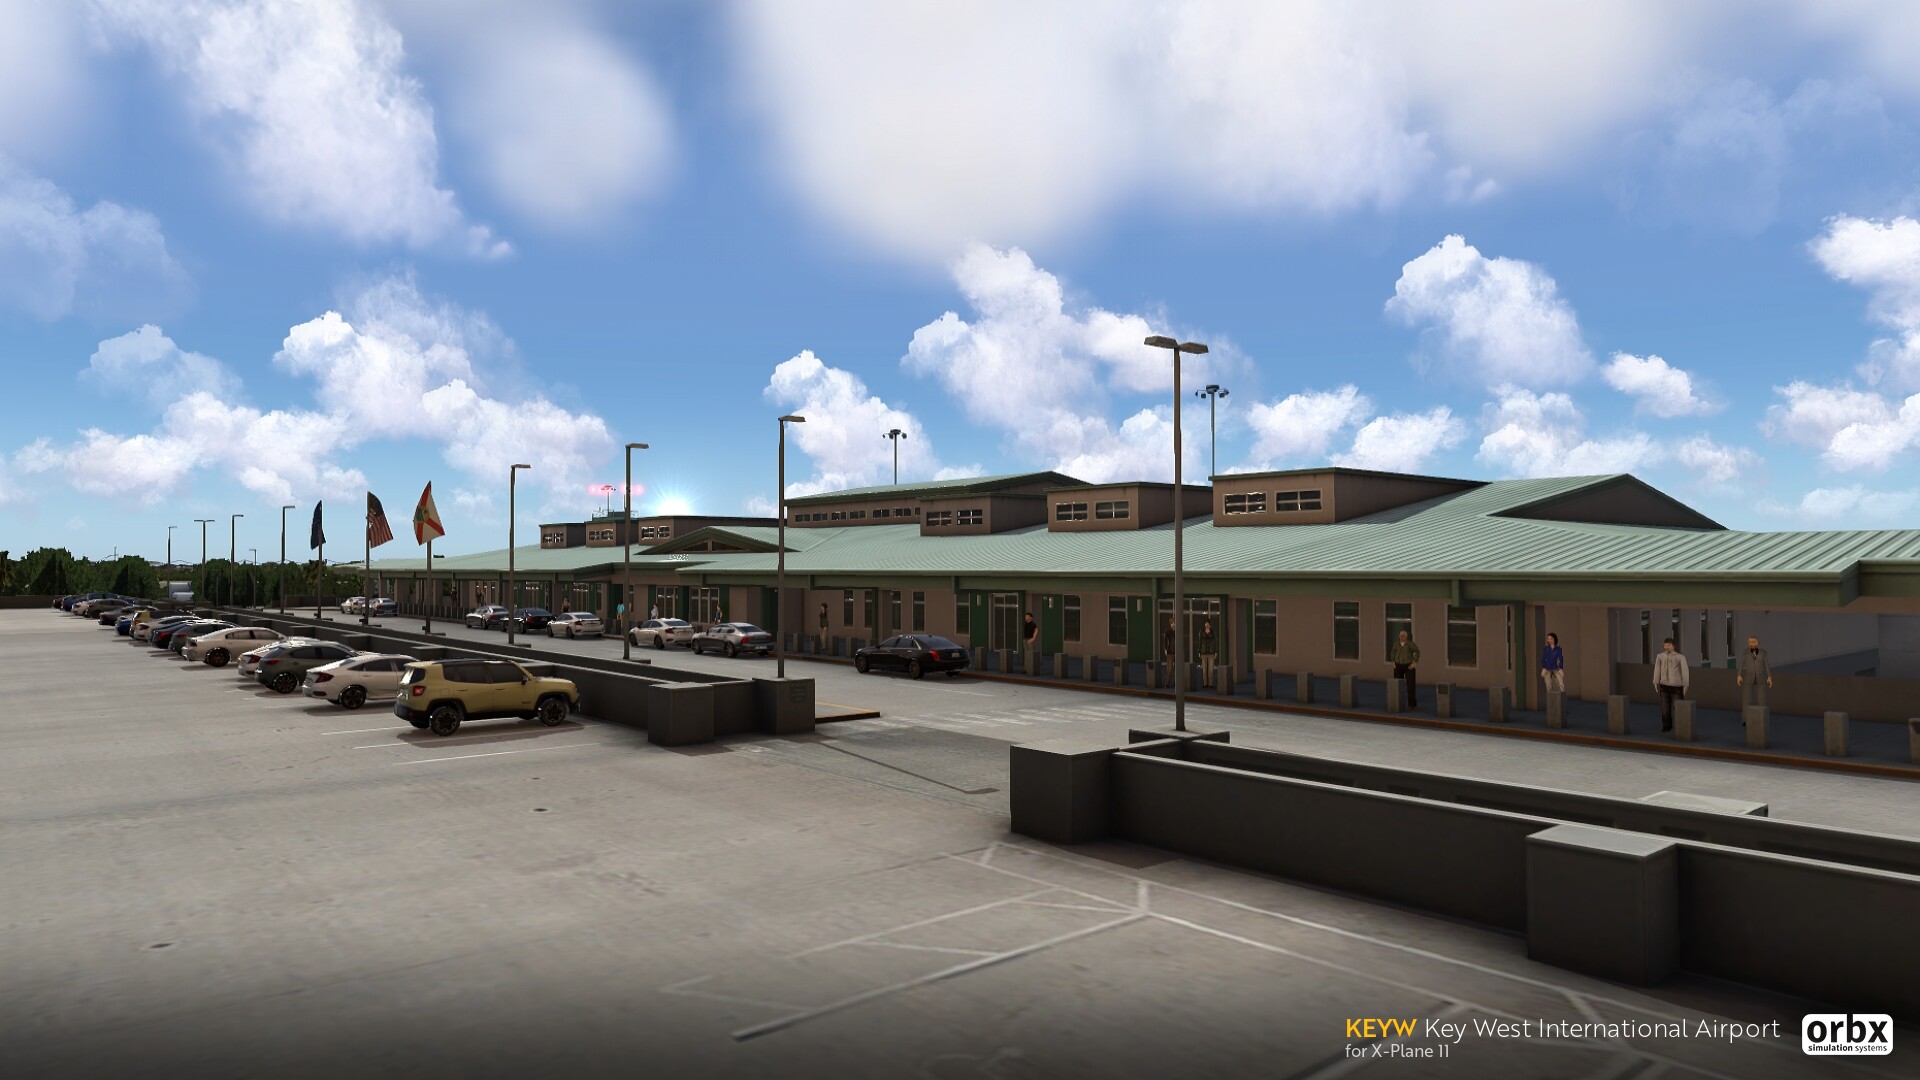
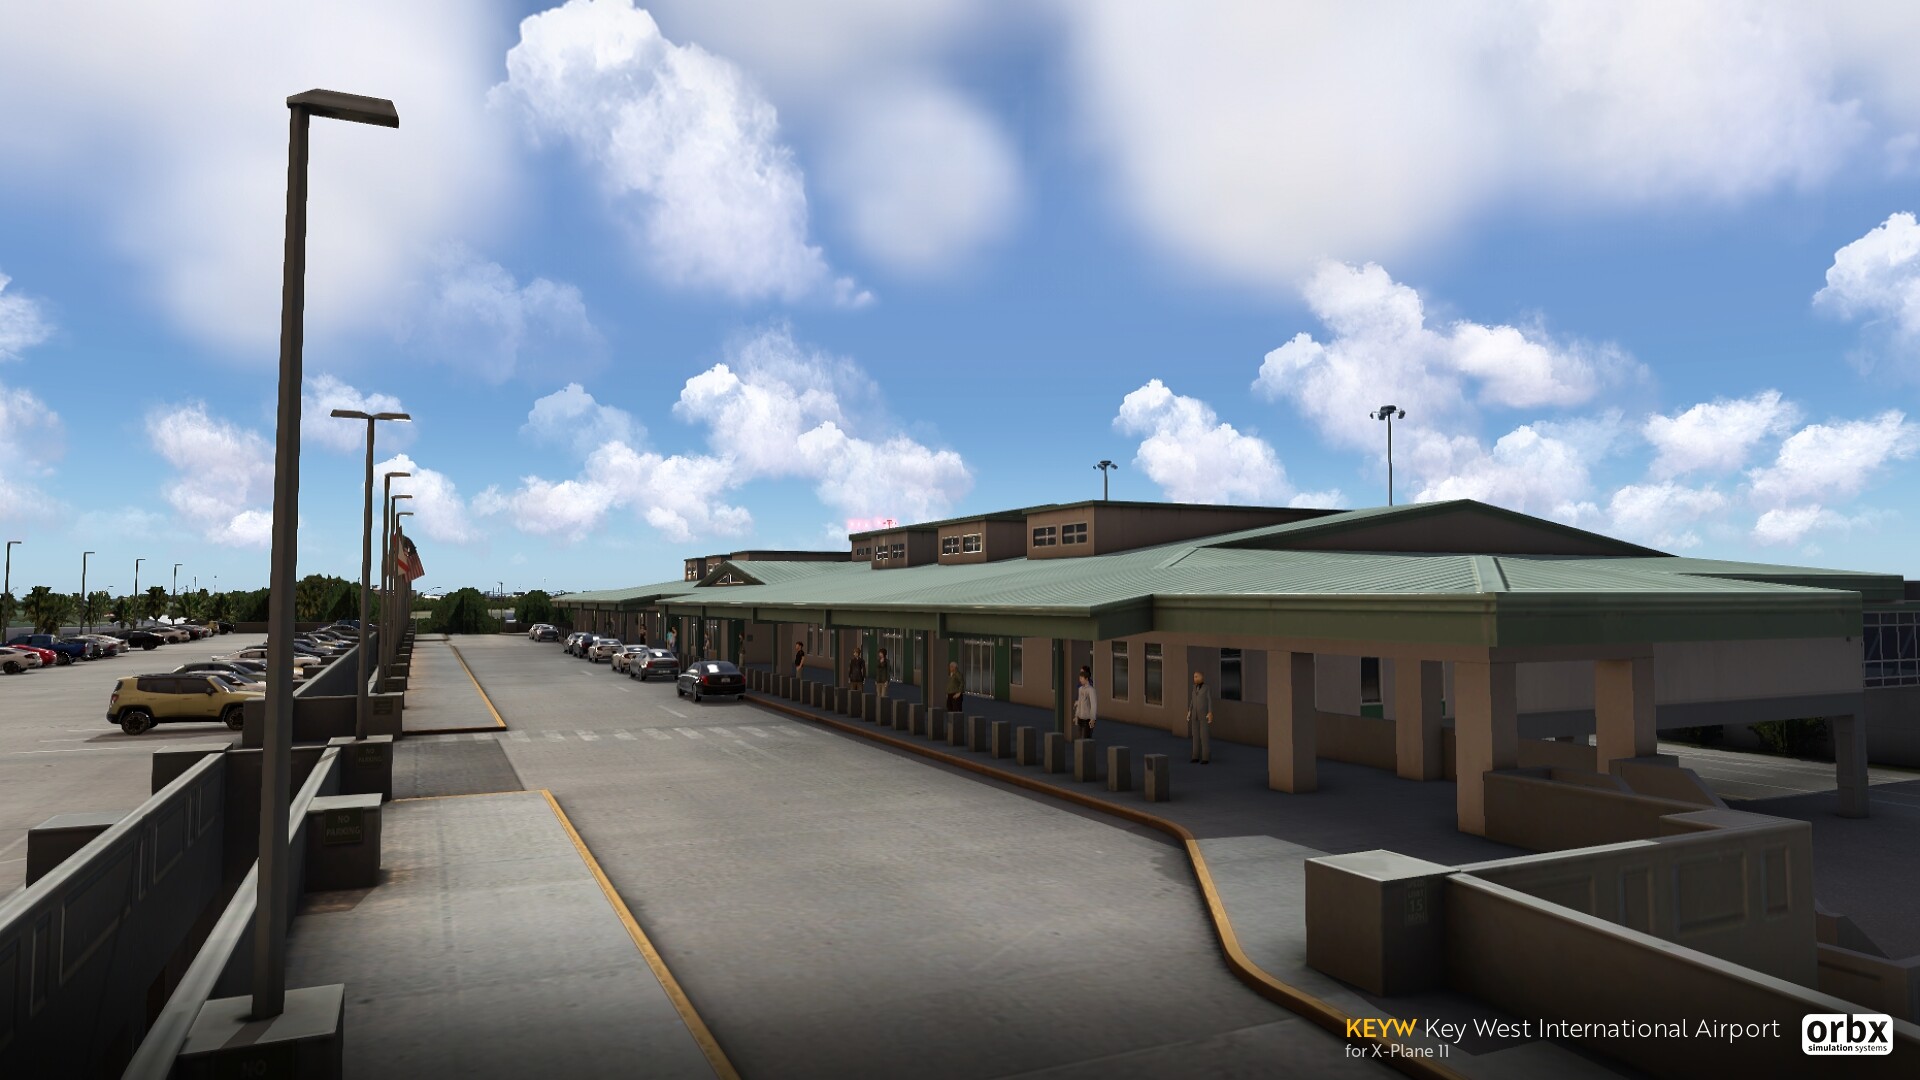
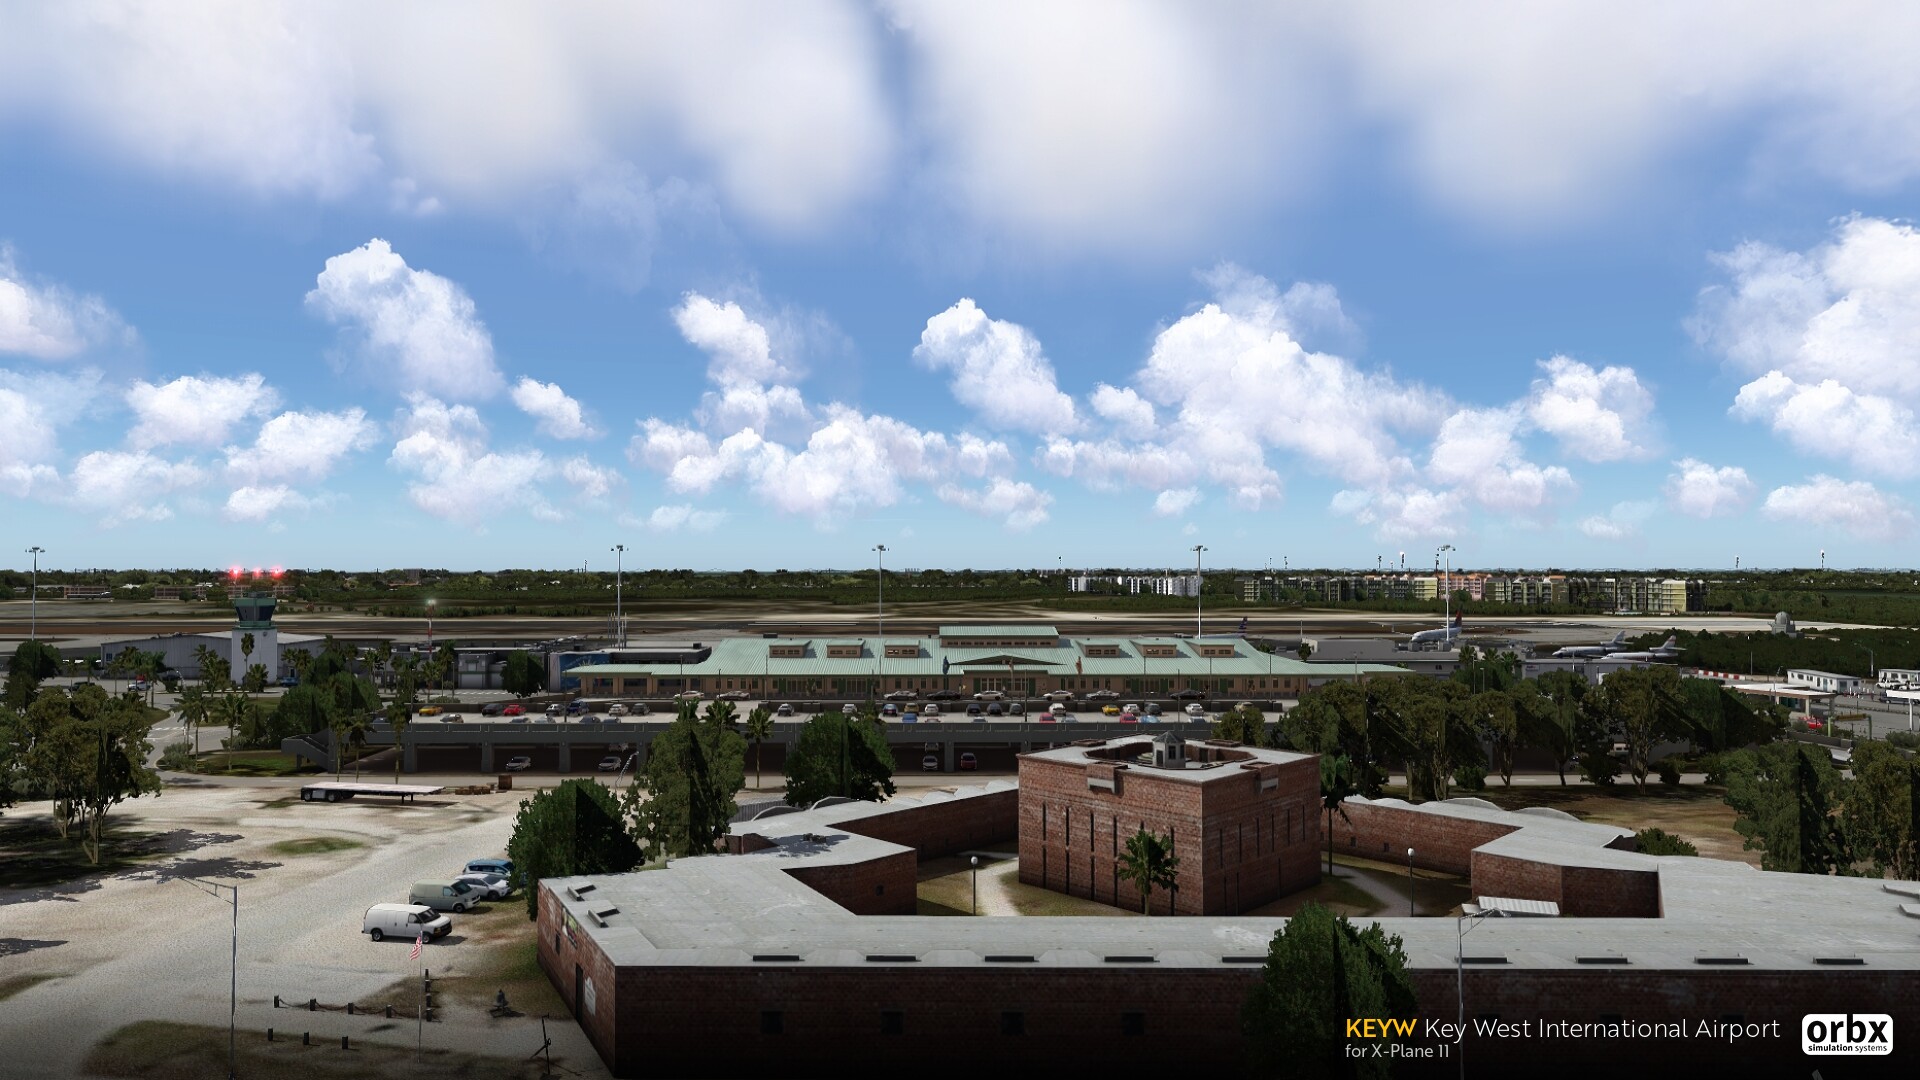
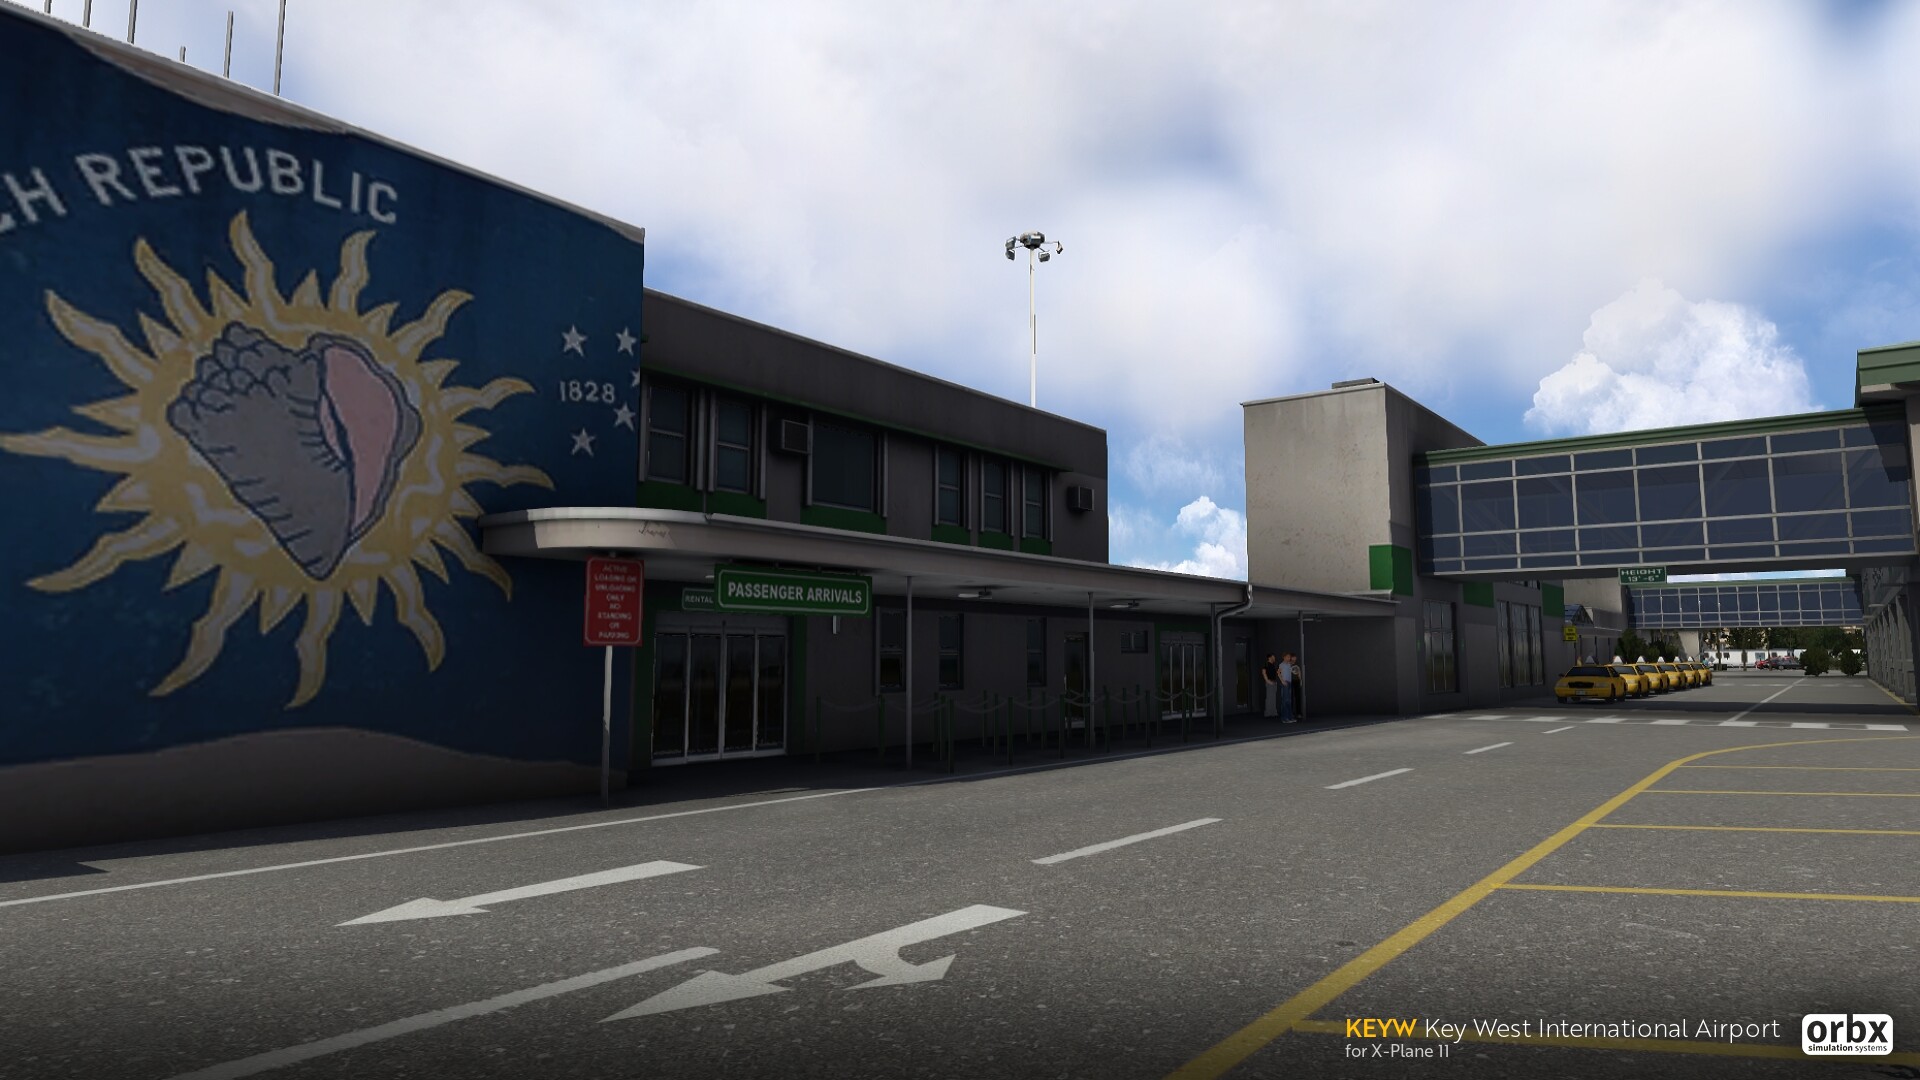
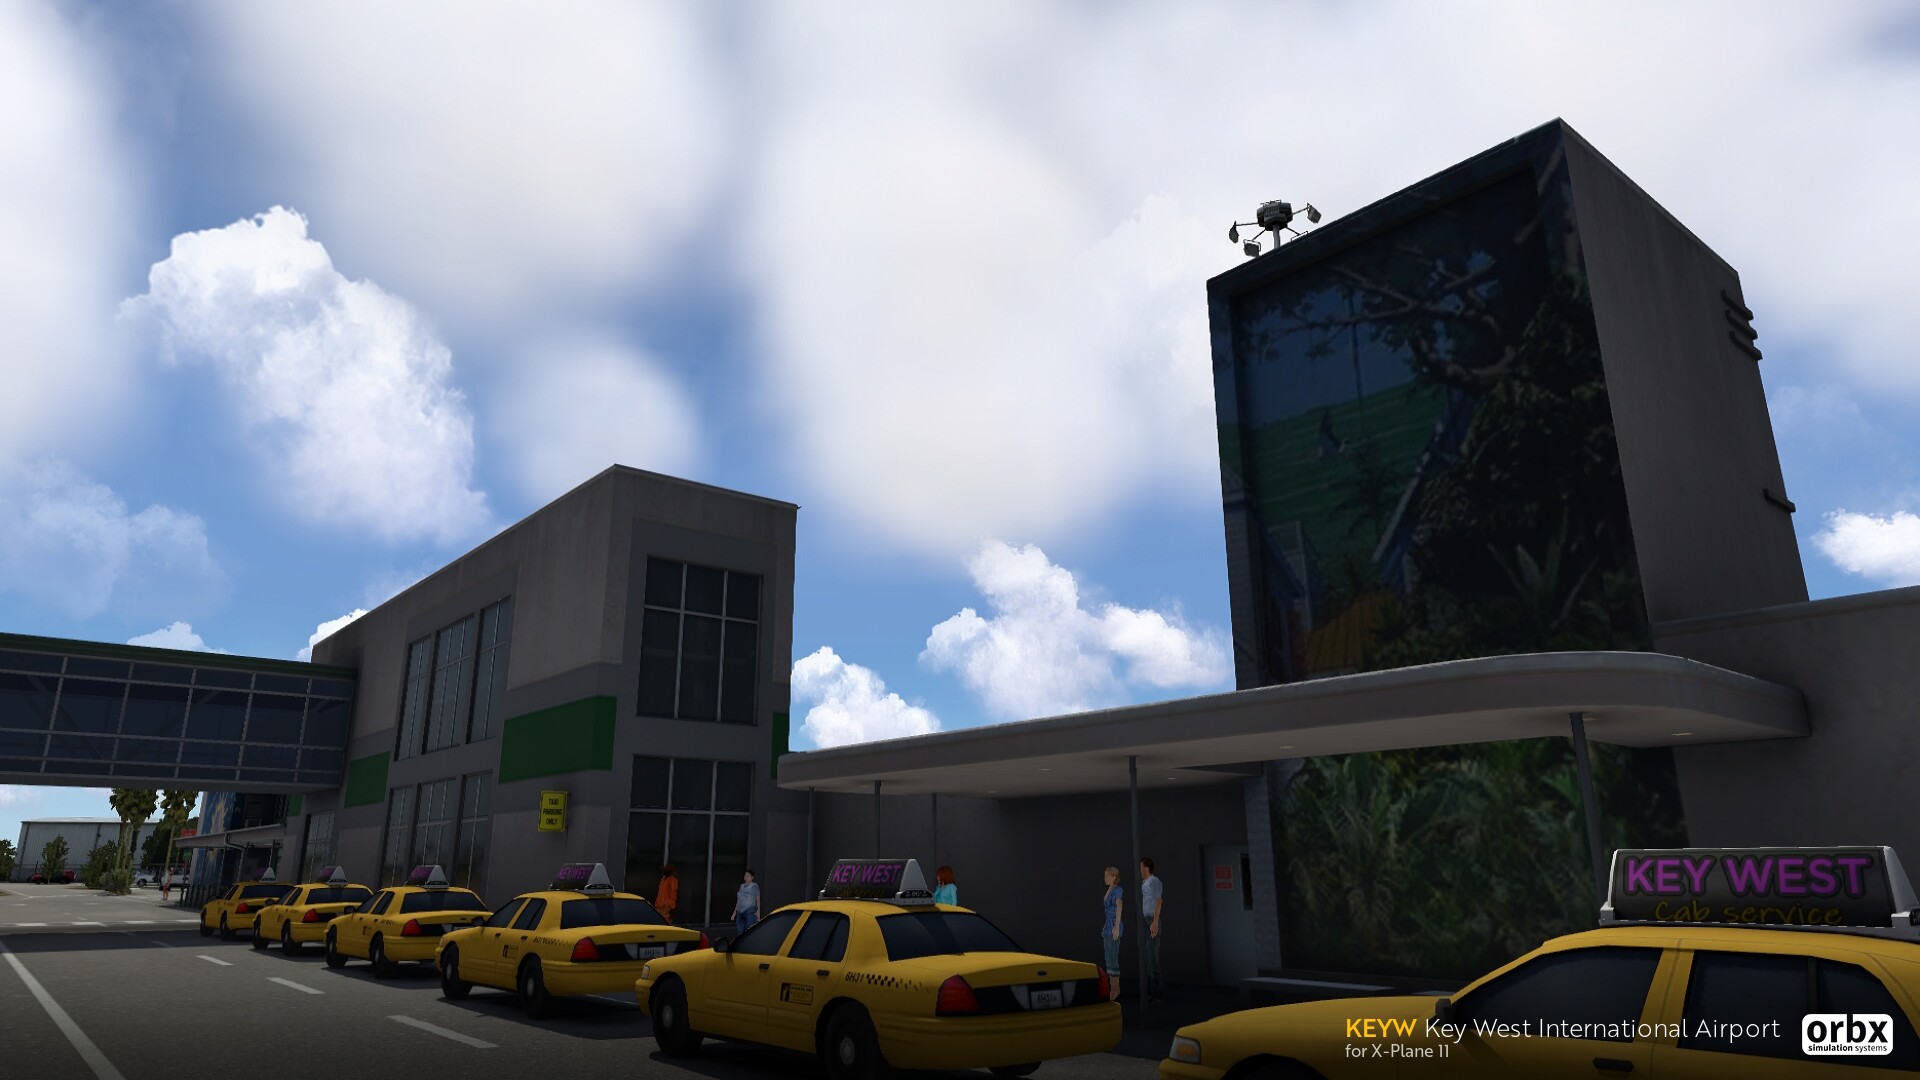
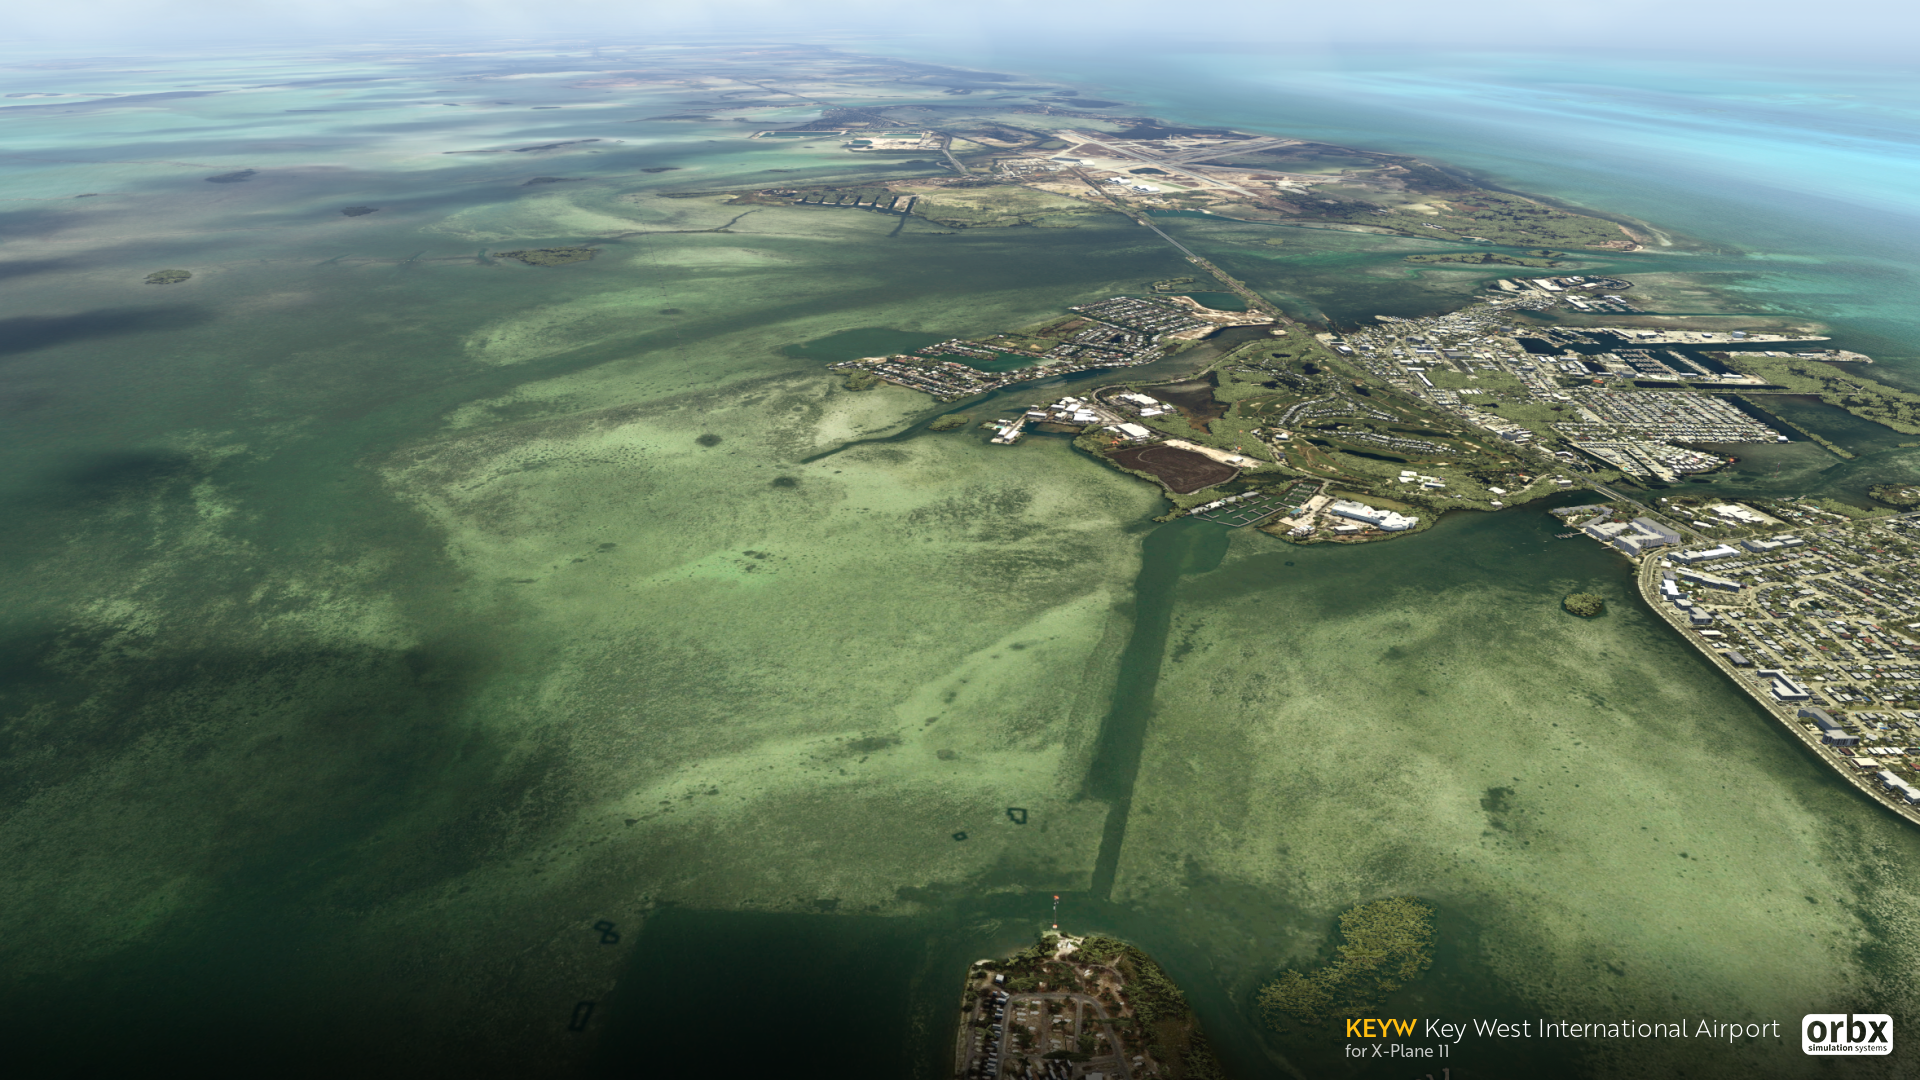
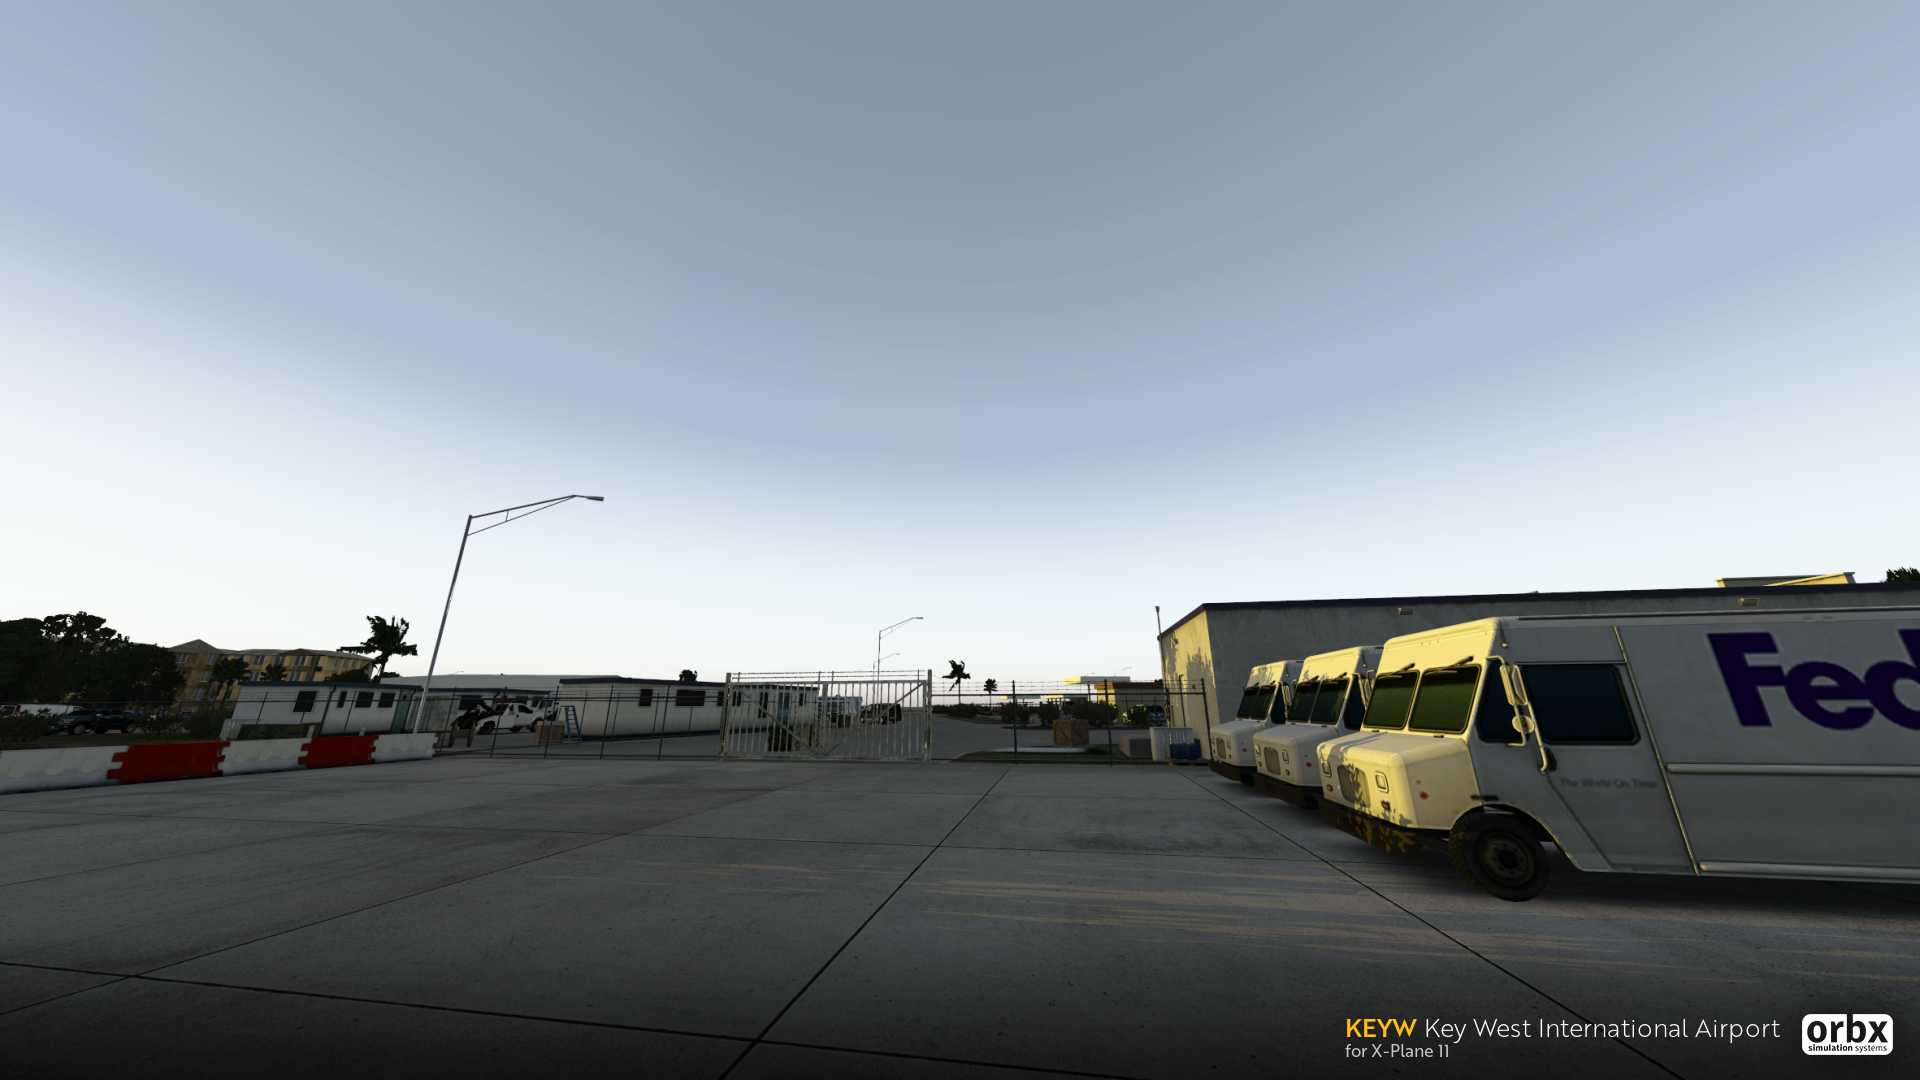
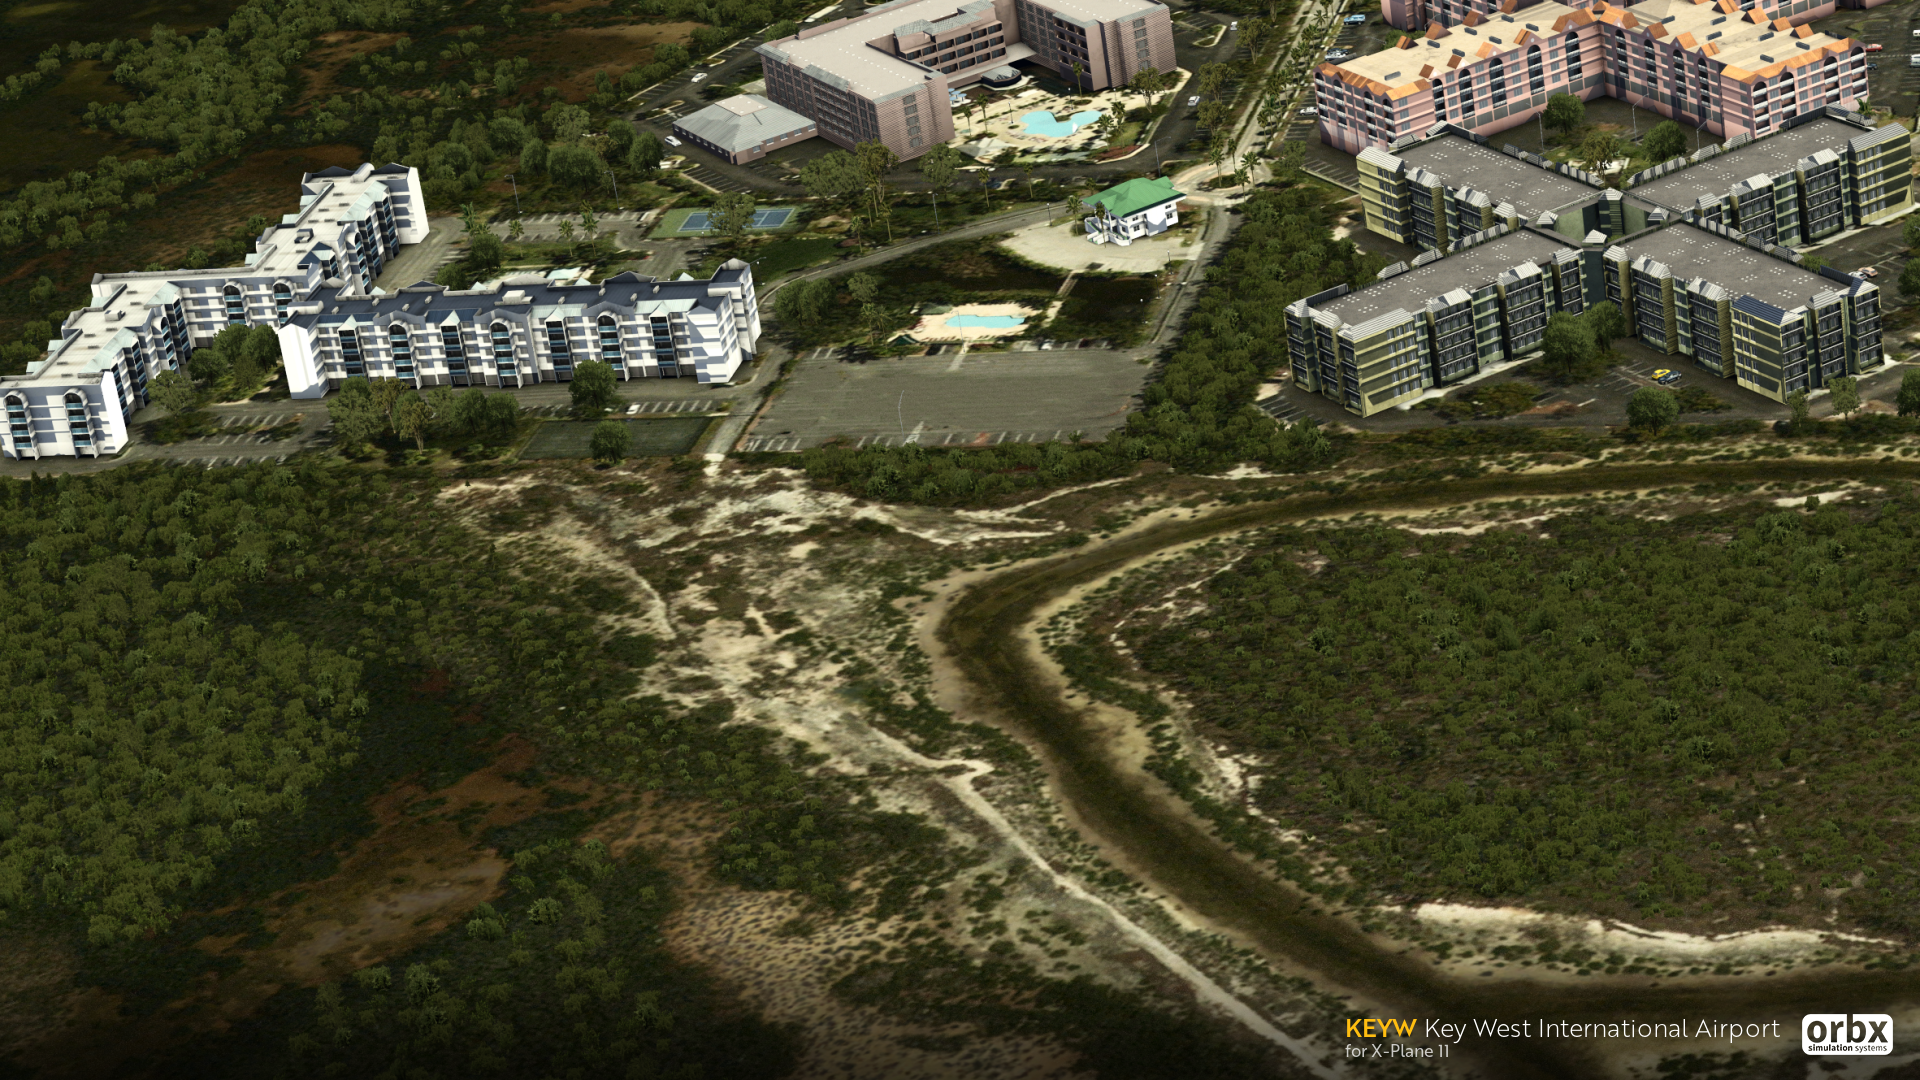
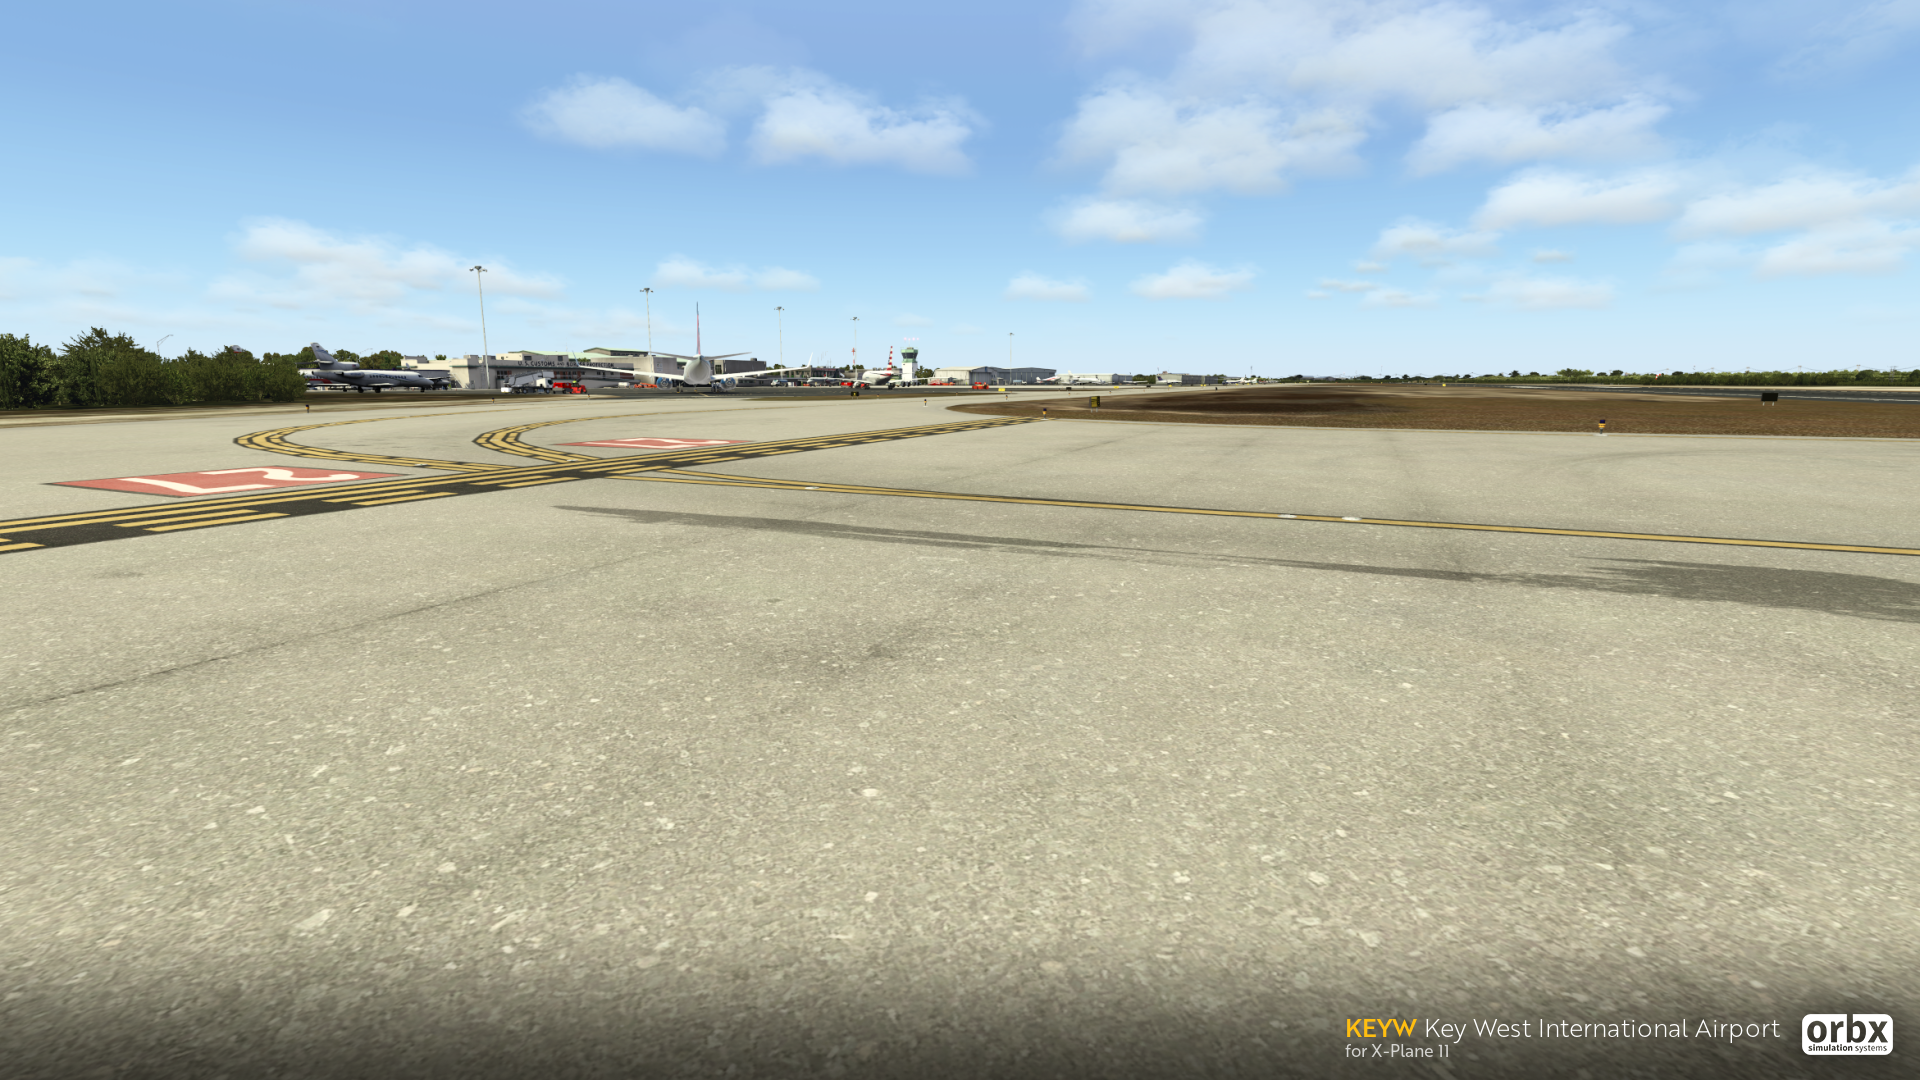
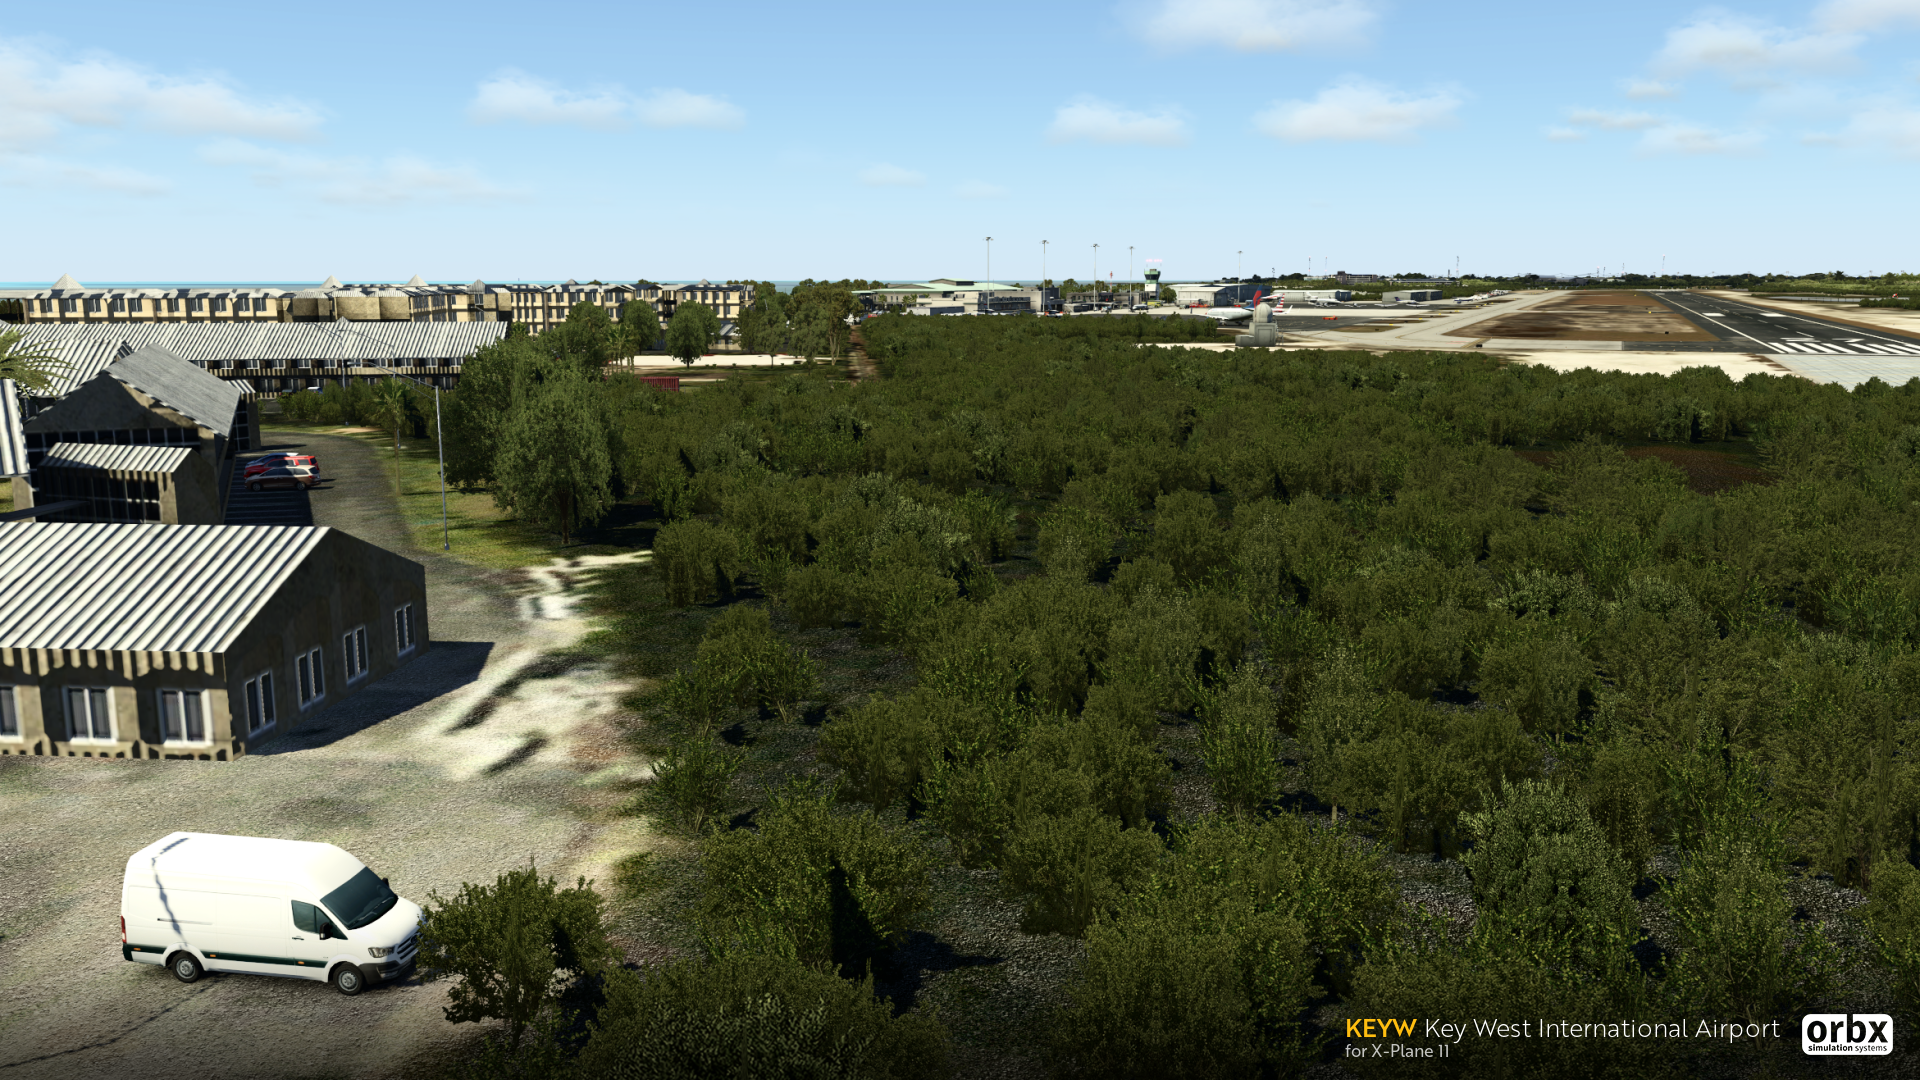
Sparing no details, we have included all the buildings, hotels and major landmarks surrounding the airport, along with smaller details such as road signs, benches and much more. Extra attention is paid to ensuring the ultra-high-resolution satellite imagery blends seamlessly into the water and surrounding area. You can even see the detailed reefs under the water near the runway.
Combining our experience of X-Plane development with our love for tropical and sun-drenched destinations, Key West is the perfect blend of visual delight and silky-smooth performance. The carefully crafted airport comes complete with PBR materials on all surfaces in the airport and finely detailed static aircraft in the airport for the ultimate Key West experience.
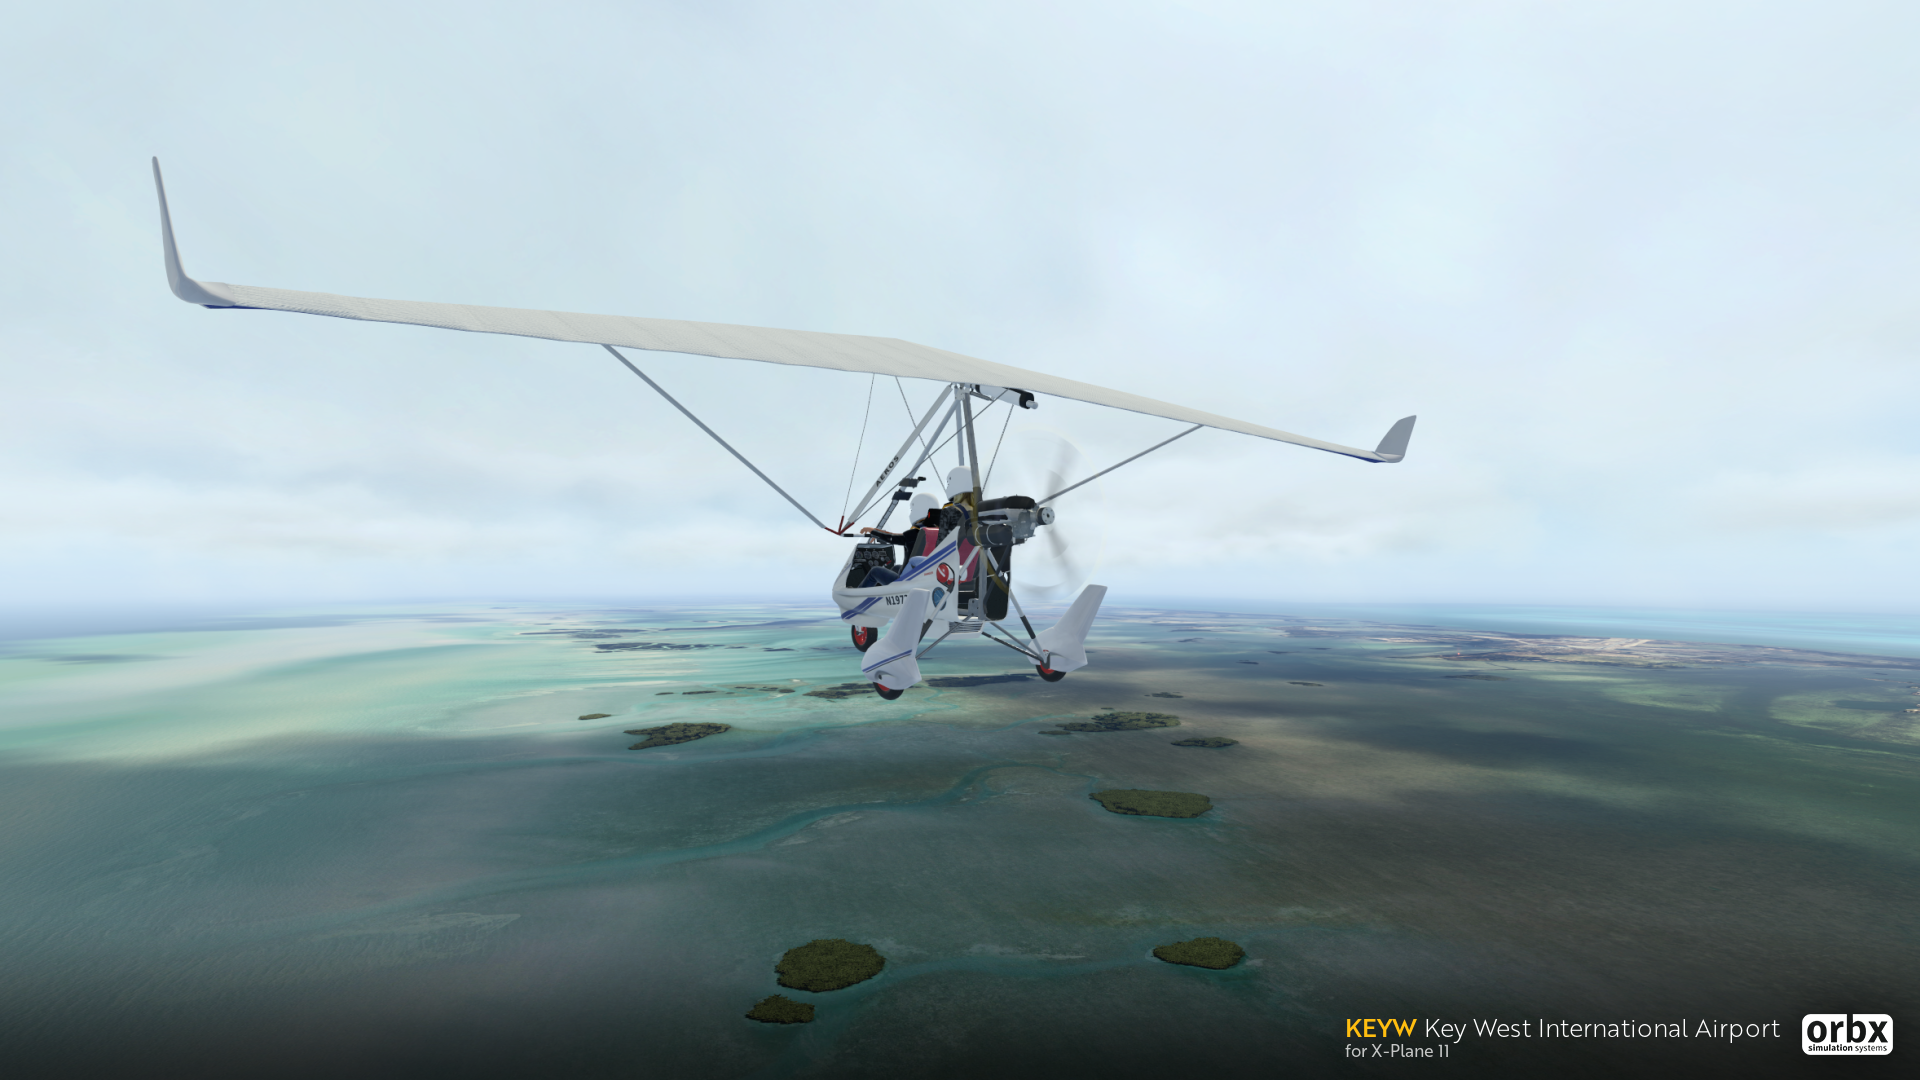
With the unique Caribbean atmosphere and vibe, be sure to take a Cessna around the island to indulge yourself. Escape the winter chill and head to tropical Key West Airport.
FEATURES
- Ultra-high-resolution satellite imagery surrounding the airport
- Plenty of detailed 3D models from terminal buildings to road signage
- Includes surrounding buildings such as hotels and major landmarks
- Fully PBR compliant for the most realistic looking models
- Visually breathtaking approach along the coast
- Several static aircraft bringing the airport to life
- Seamlessly blends into the upcoming TrueEarth US Florida


KEYW Key West airport is due for release at the same time as TrueEarth USA Florida, and we will offer a bundle deal discount on KEYW for customers buying both at the same time.
Stay tuned for more screenshots in the coming weeks!
-
10
-
1
-
This is a VERY significant development for all users. I have pinned this topic.
I encourage some of us to share the results of these settings. Here is what EGHI looks for me with a 0.56 setting now (expand to see the 4K image):

-
3
-
-
If you don’t like it, don’t buy it. Enough said.
-
2
-
 2
2
-
-
Ok Gregg, I will amend the announcement. Don't want to ruffle any feathers ...
-
2
-
-
Thanks for "considering investing"
")
Orbx does not create airports to be used for real-world training or commercial use by airlines. We sell to hobbyists and present 'facsimiles' of airports and are restricted to what imagery is currently available for us to license. In this instance we have licensed 2016 imagery which will not have any new works in it.
I have passed your feedback onto the developers and they will investigate further, perhaps a patch post-release.
-
3
-
1
-
1
-
-
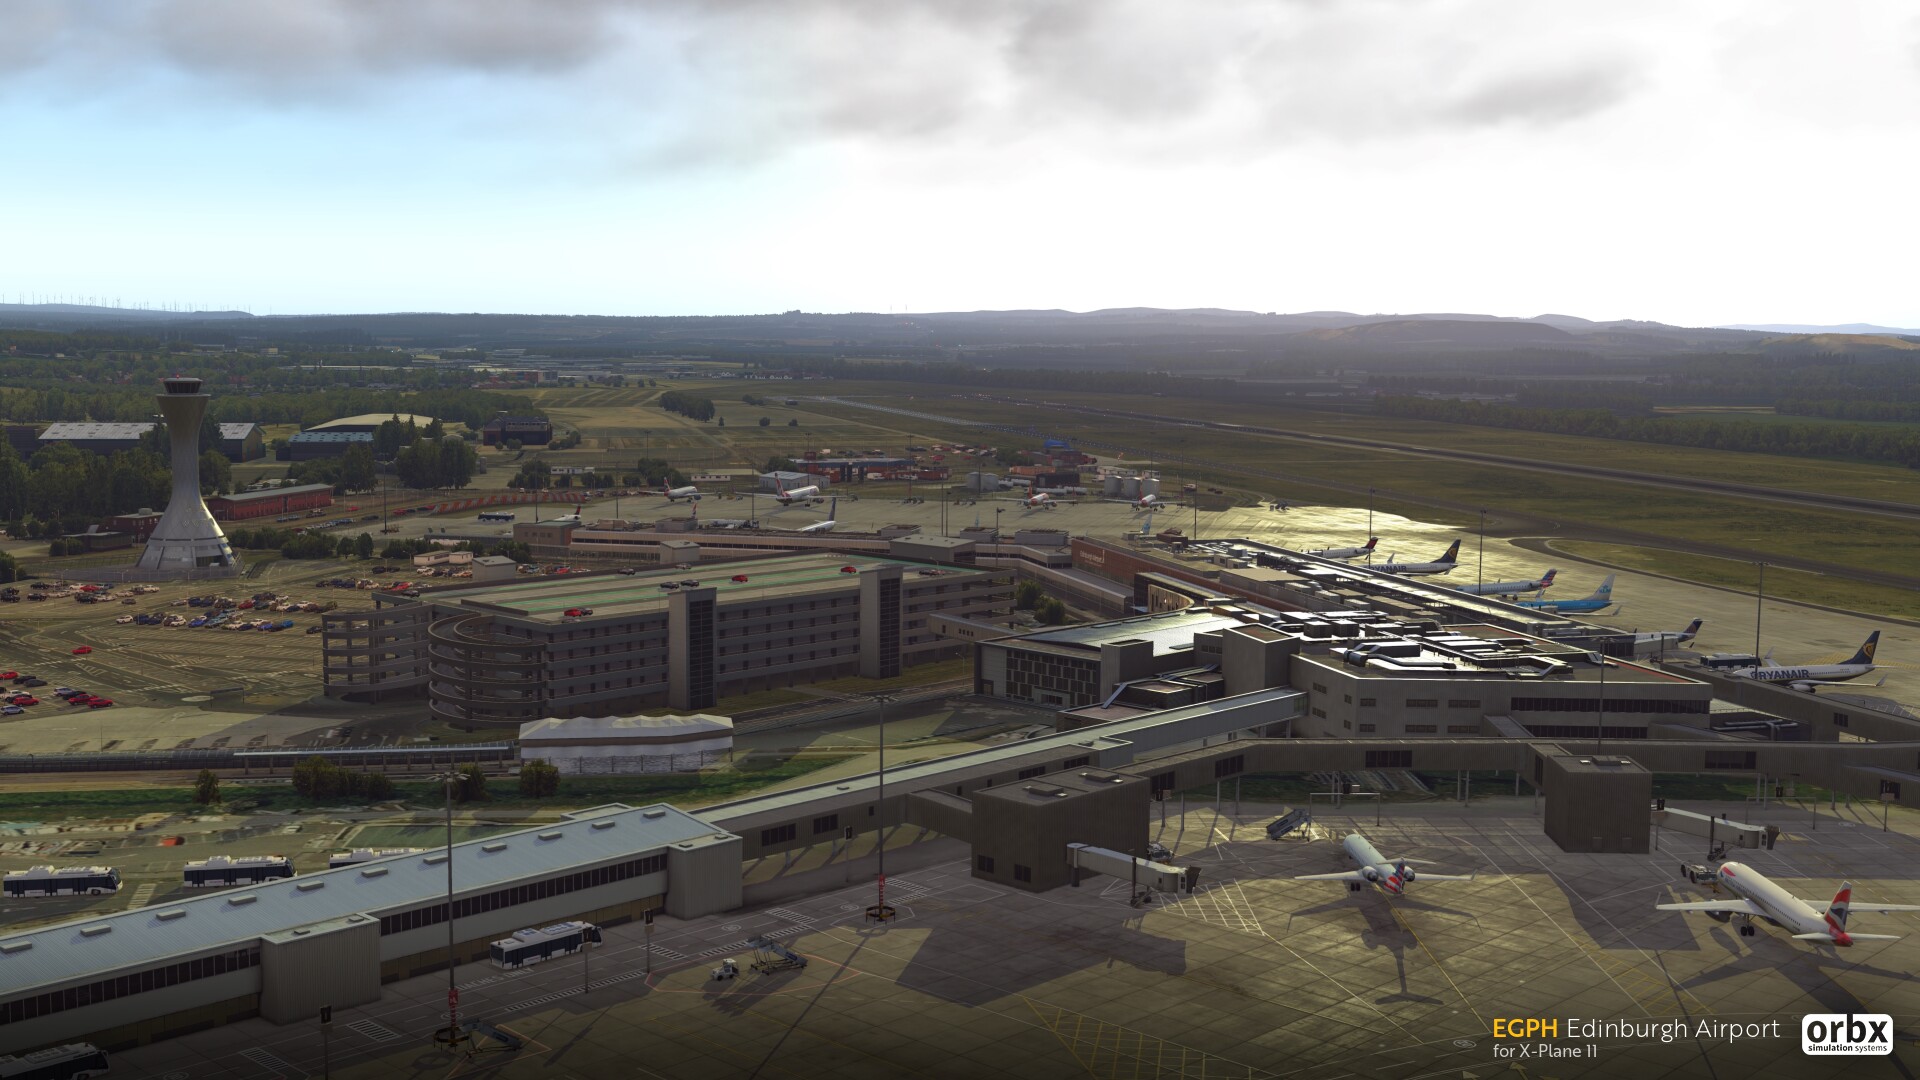
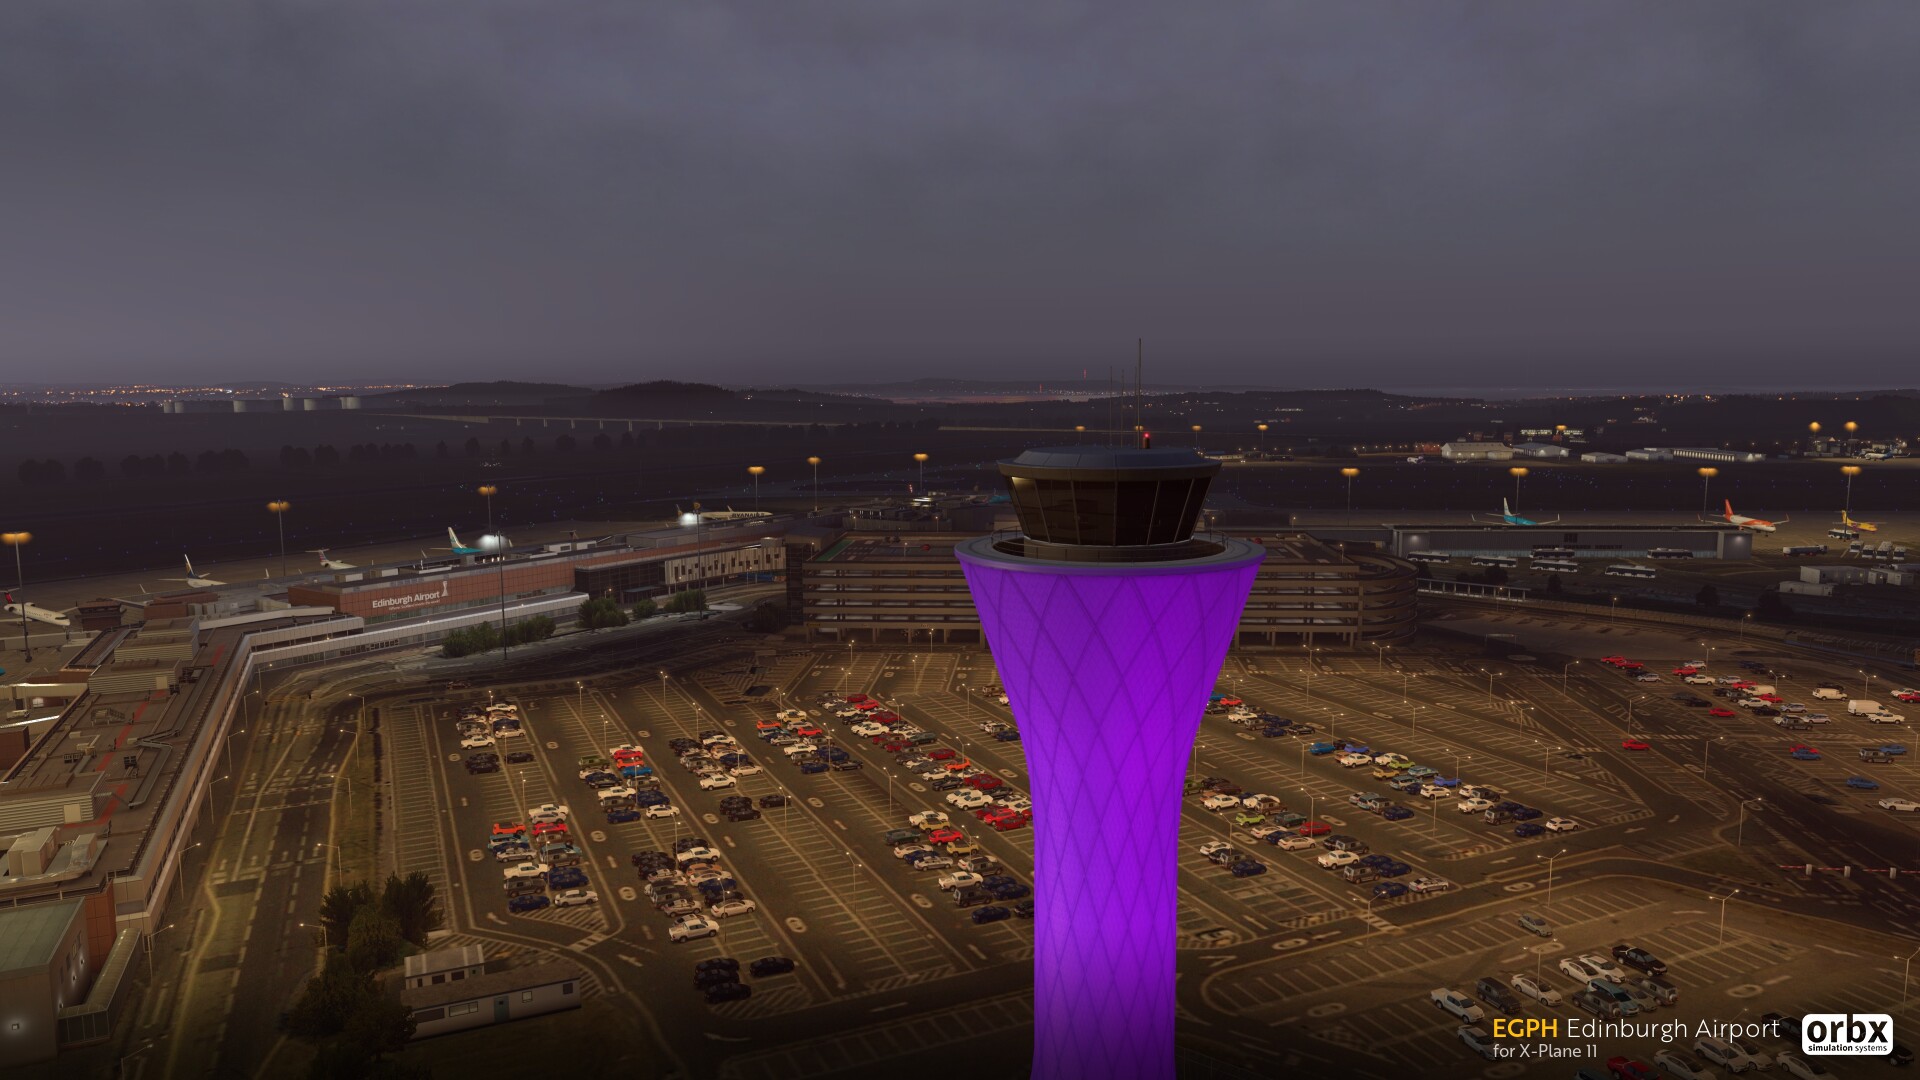
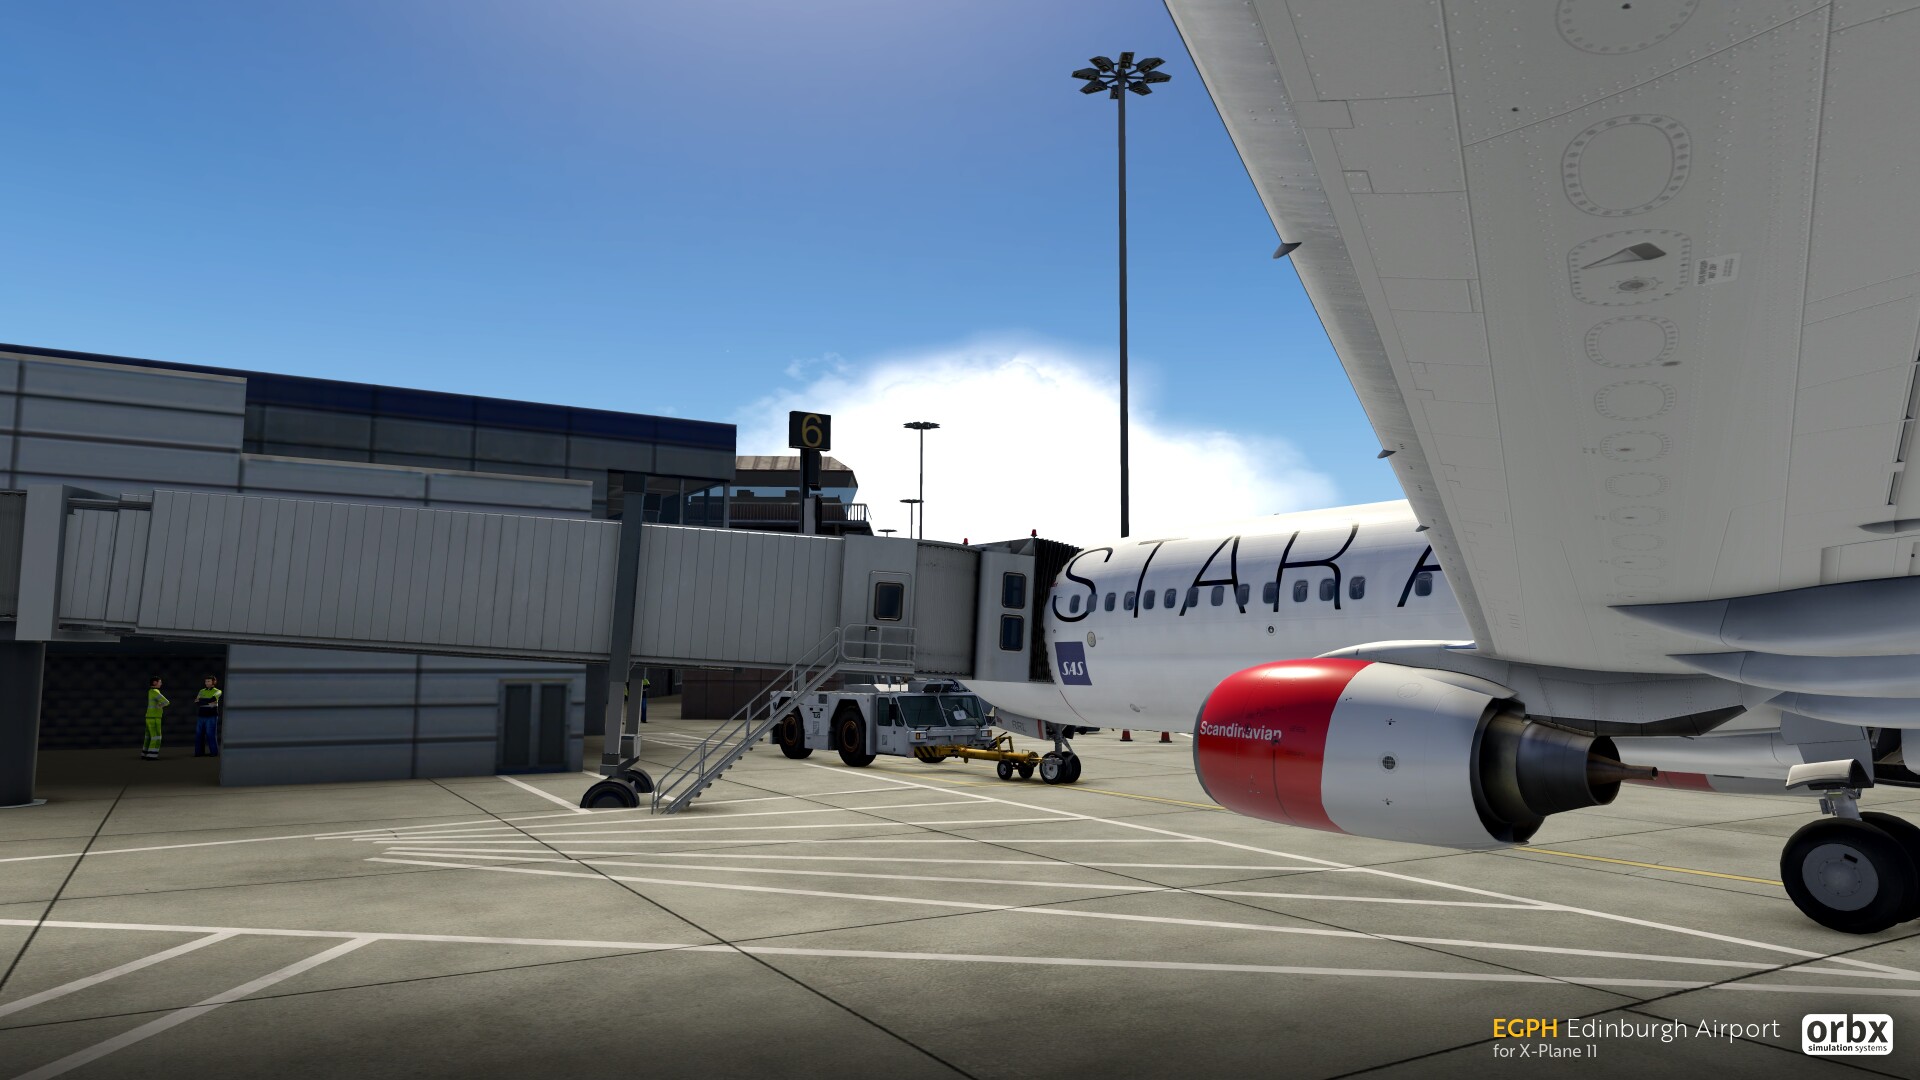
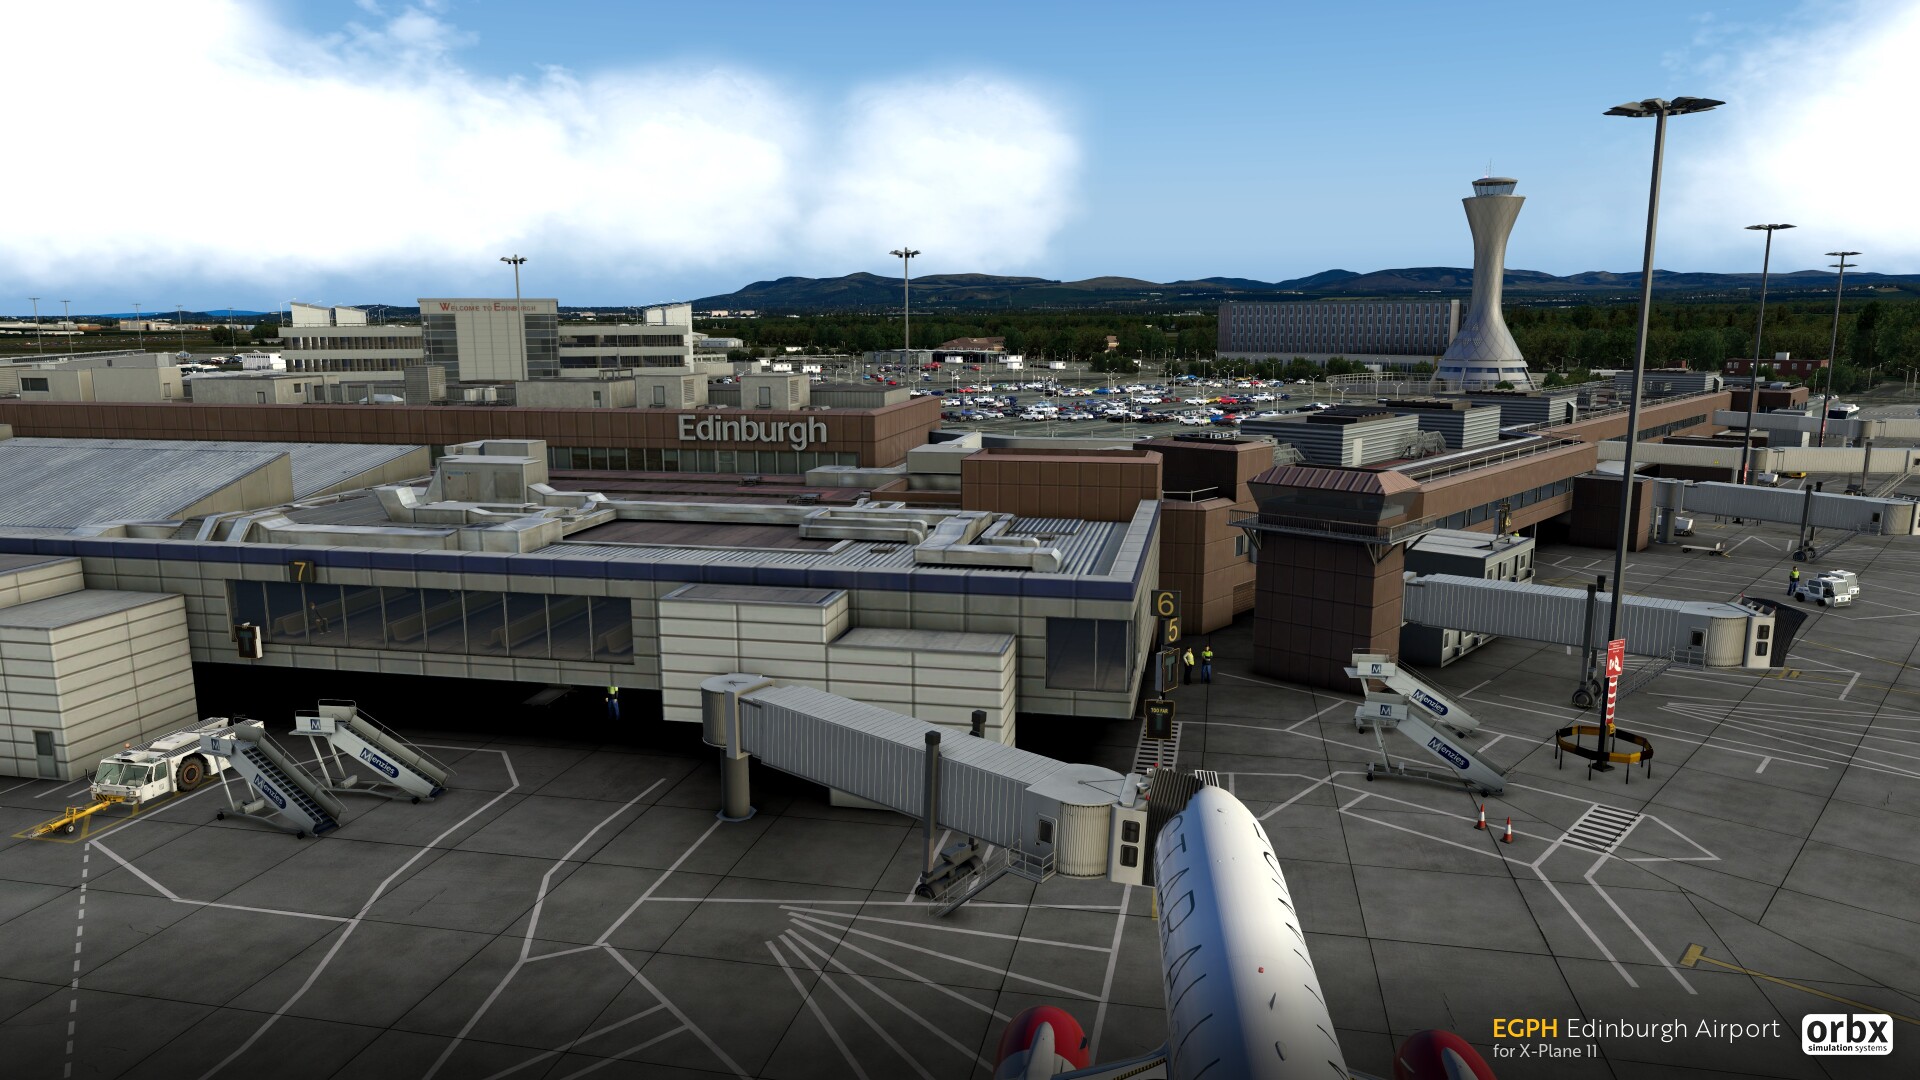
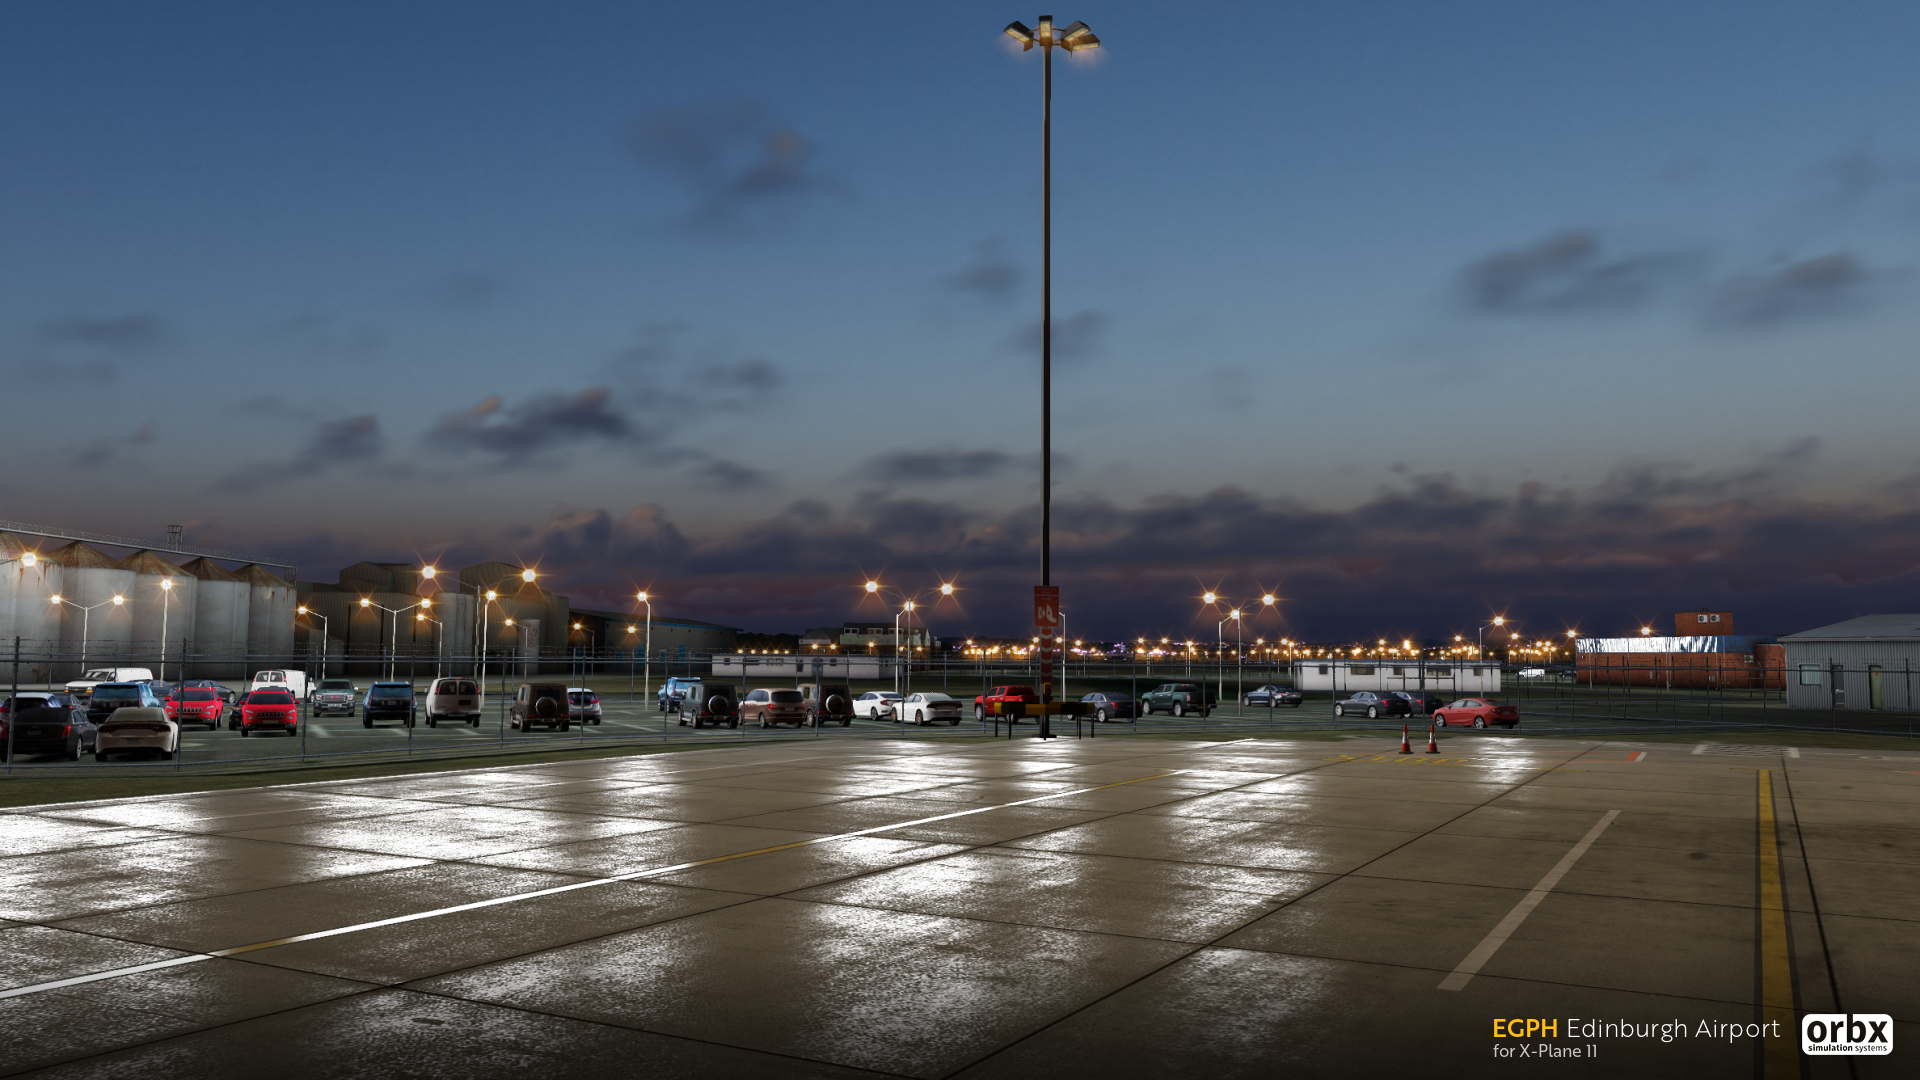
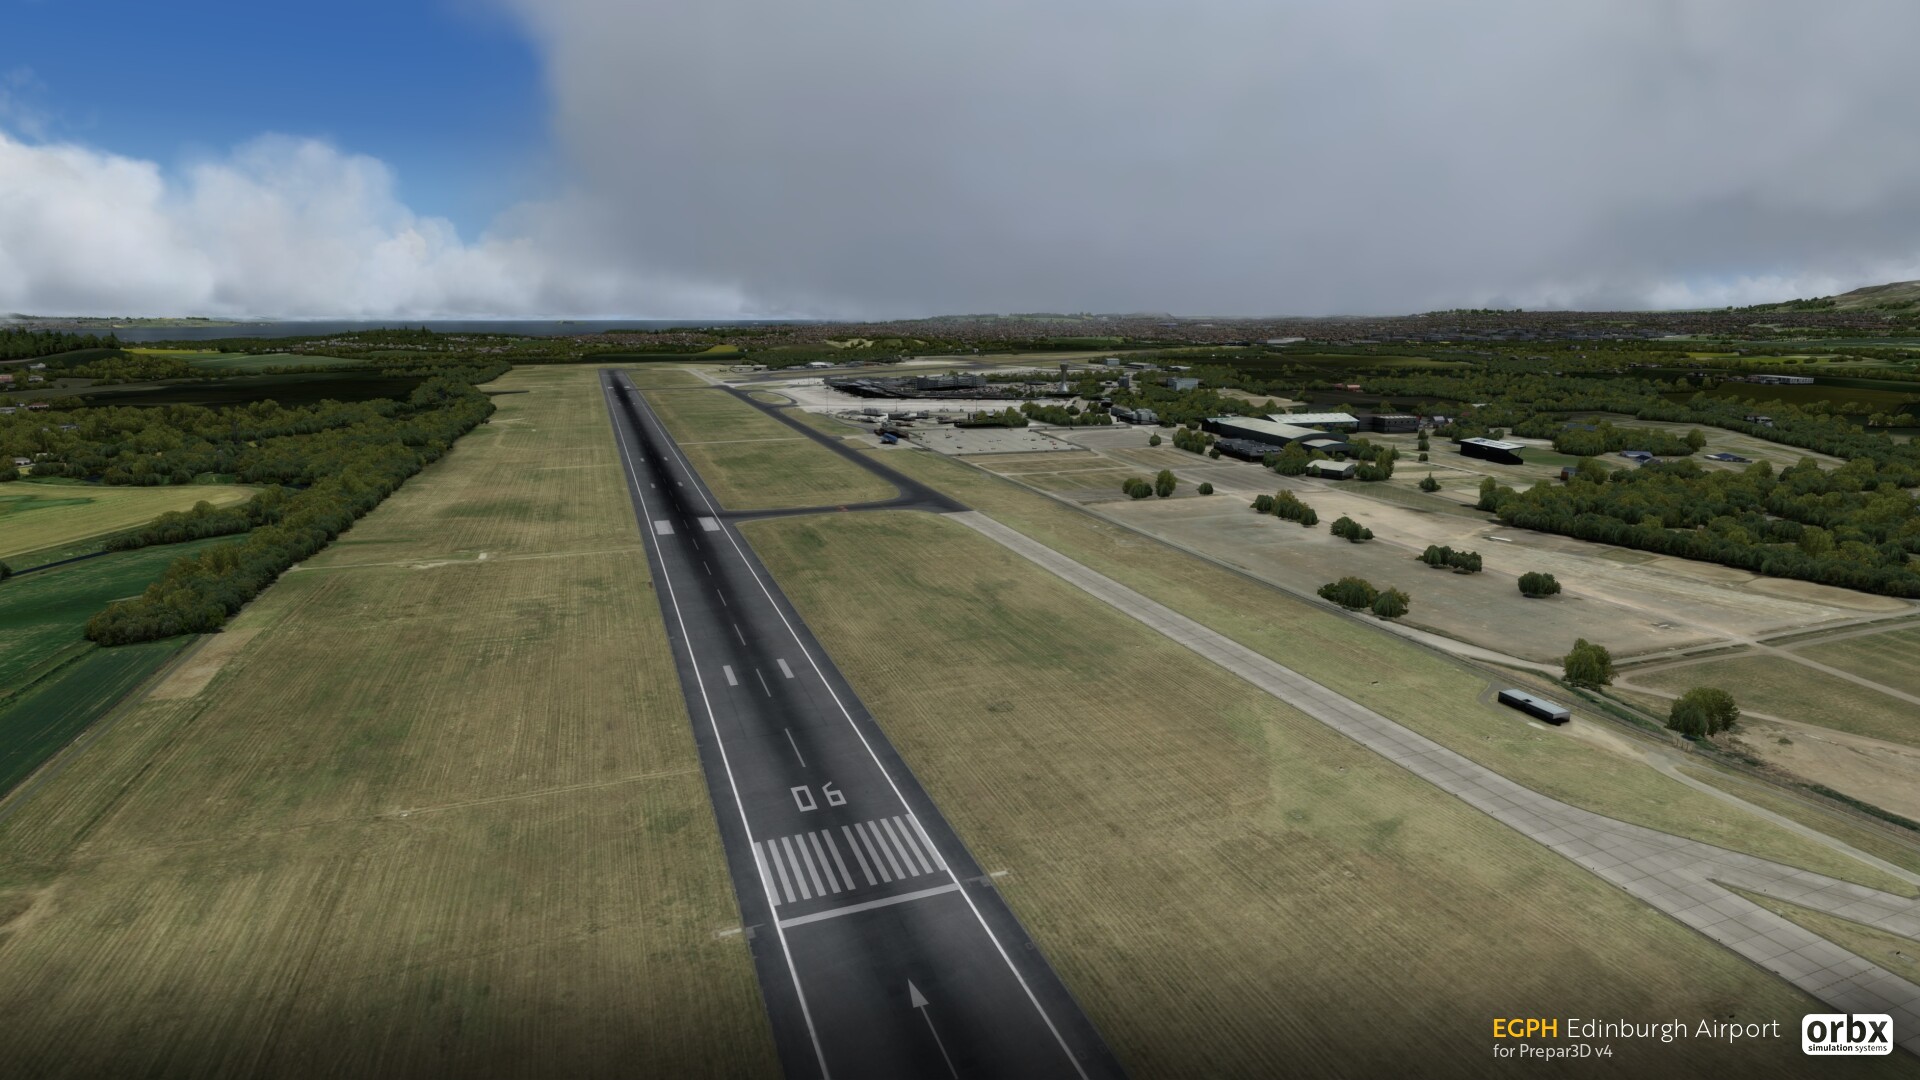
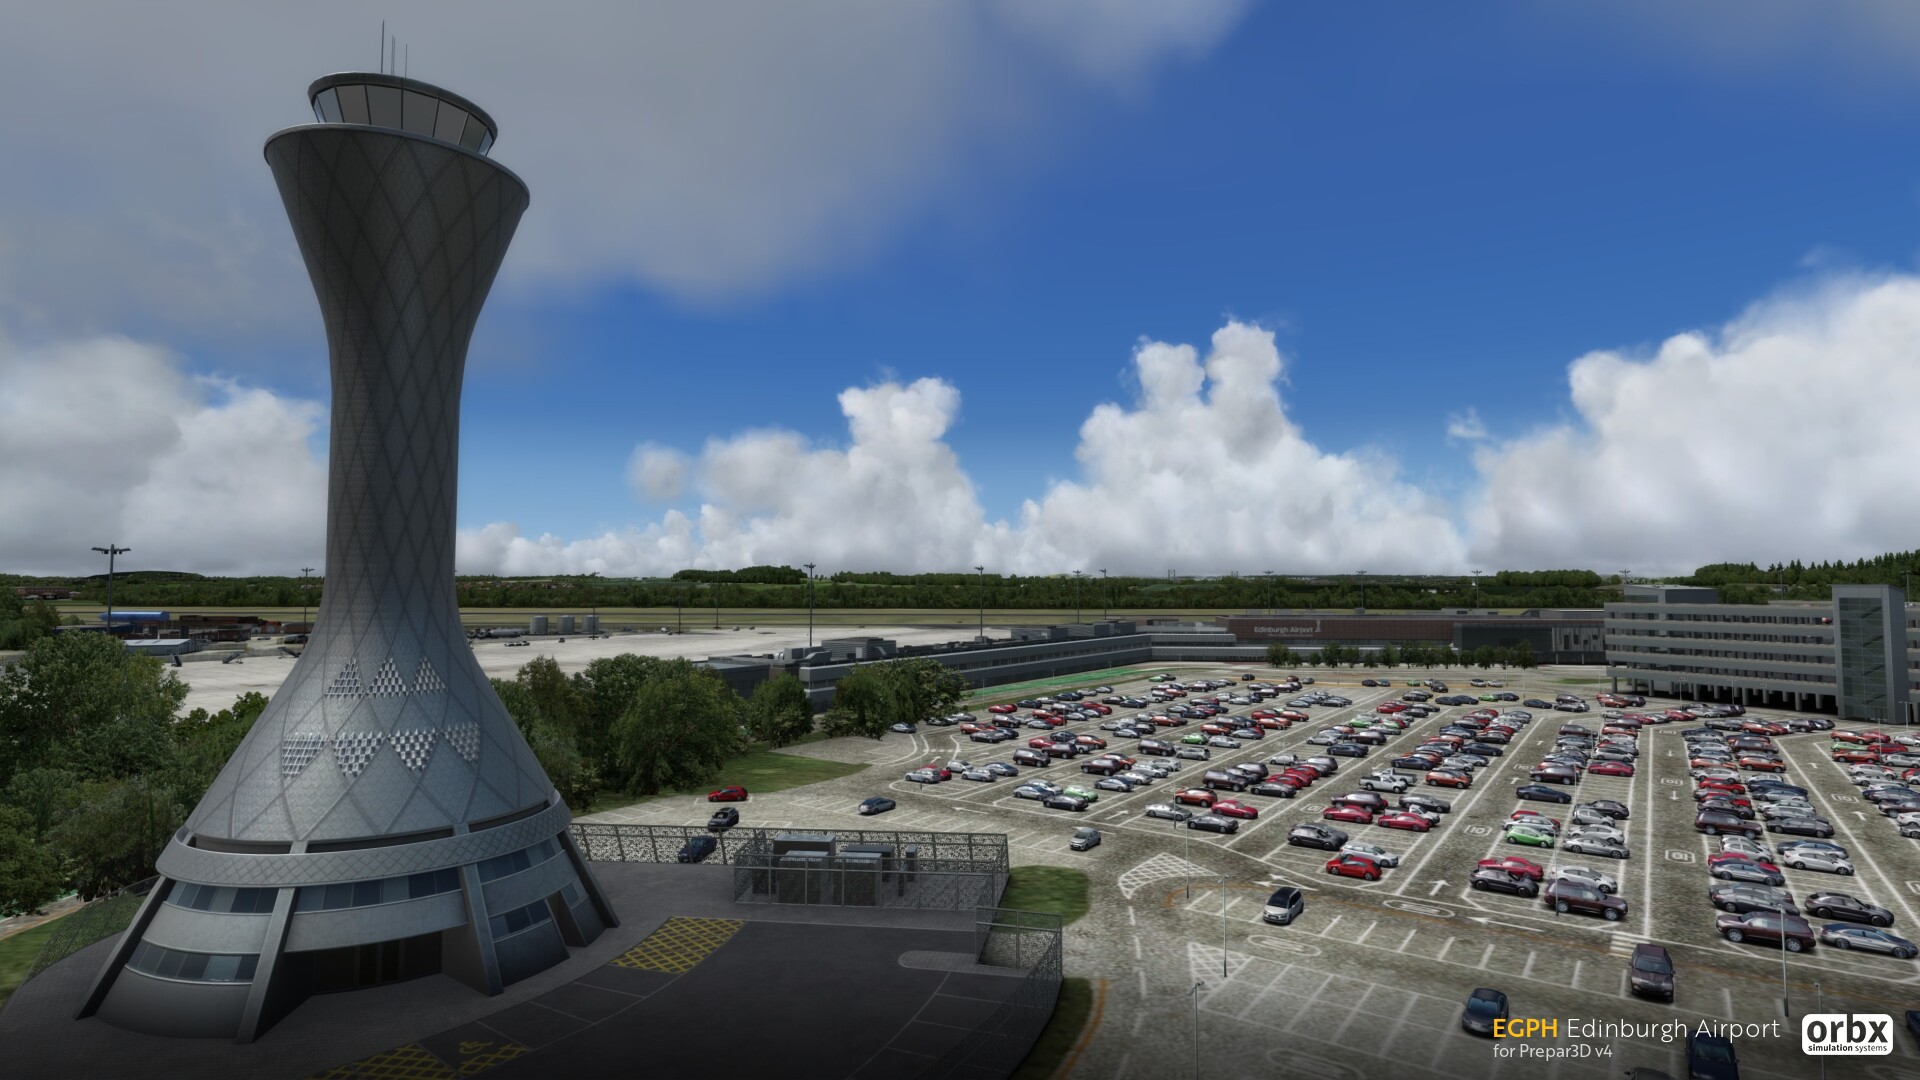
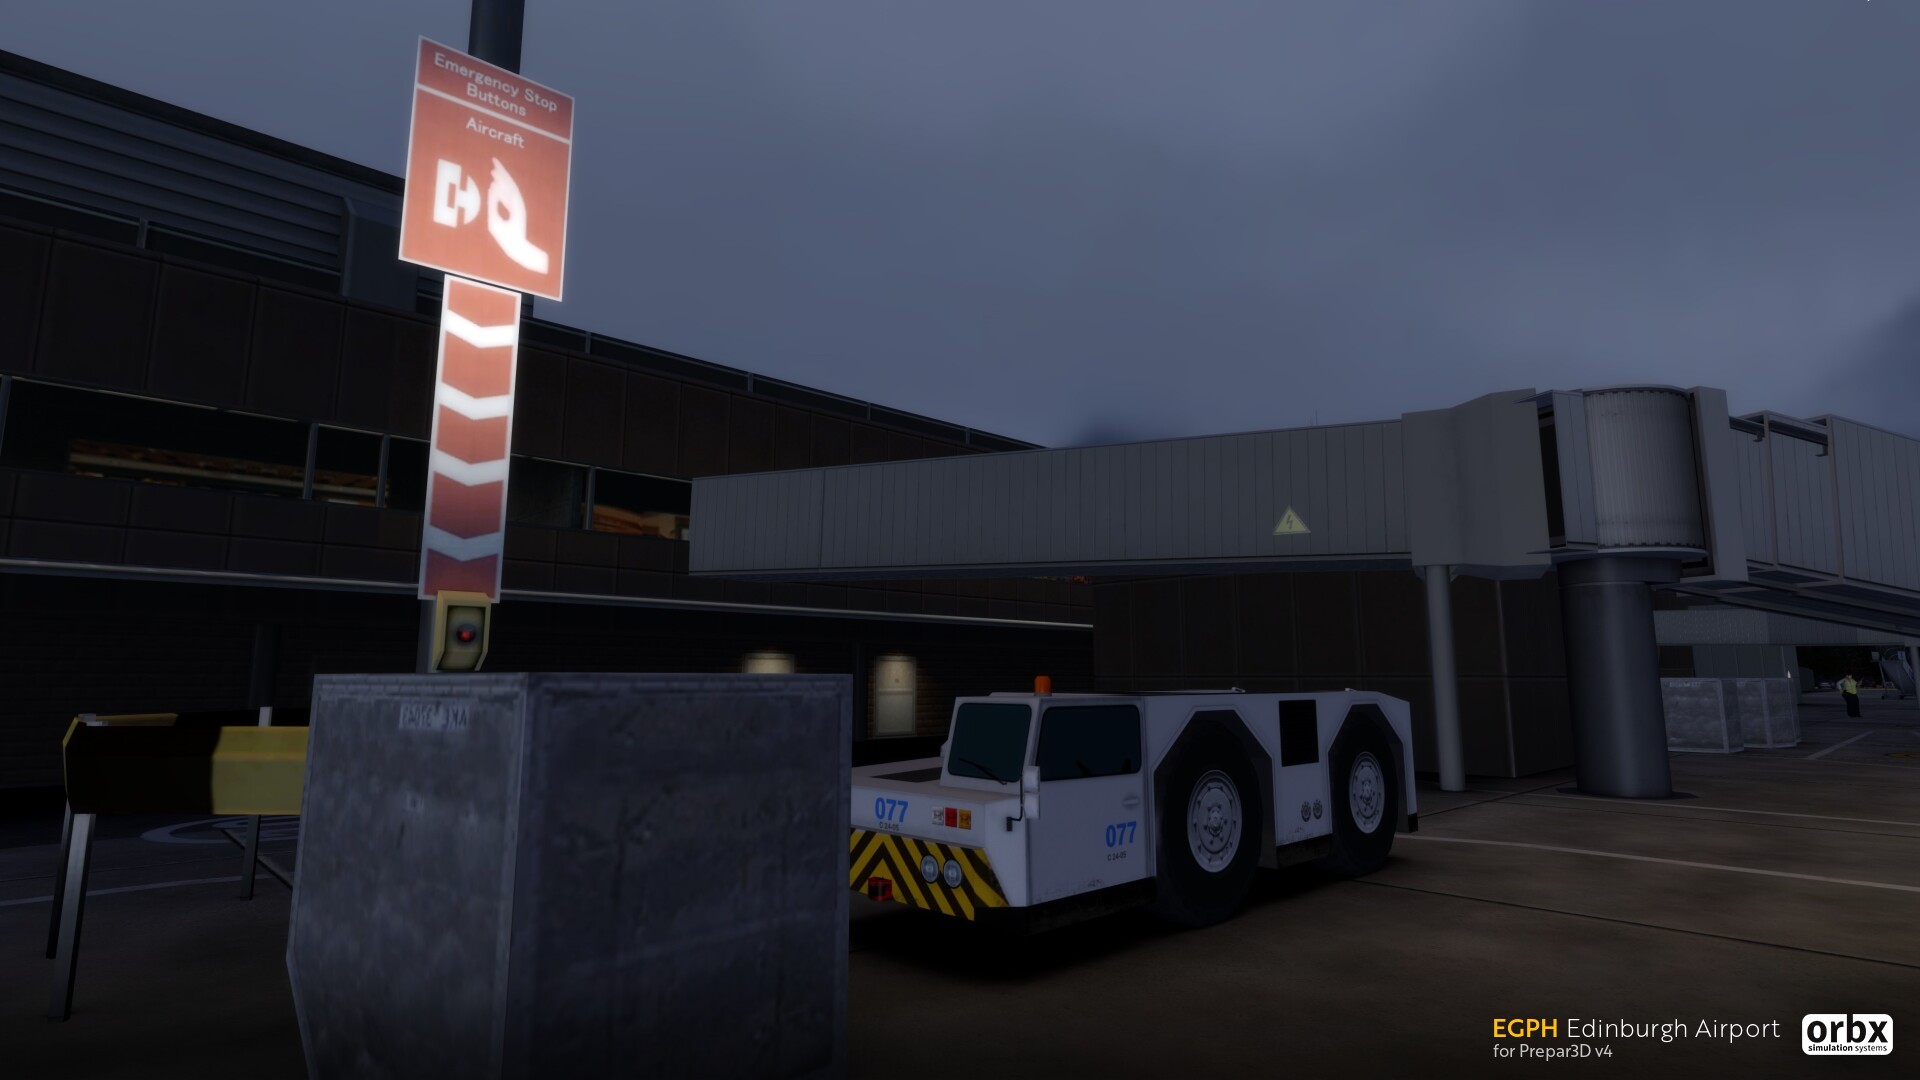
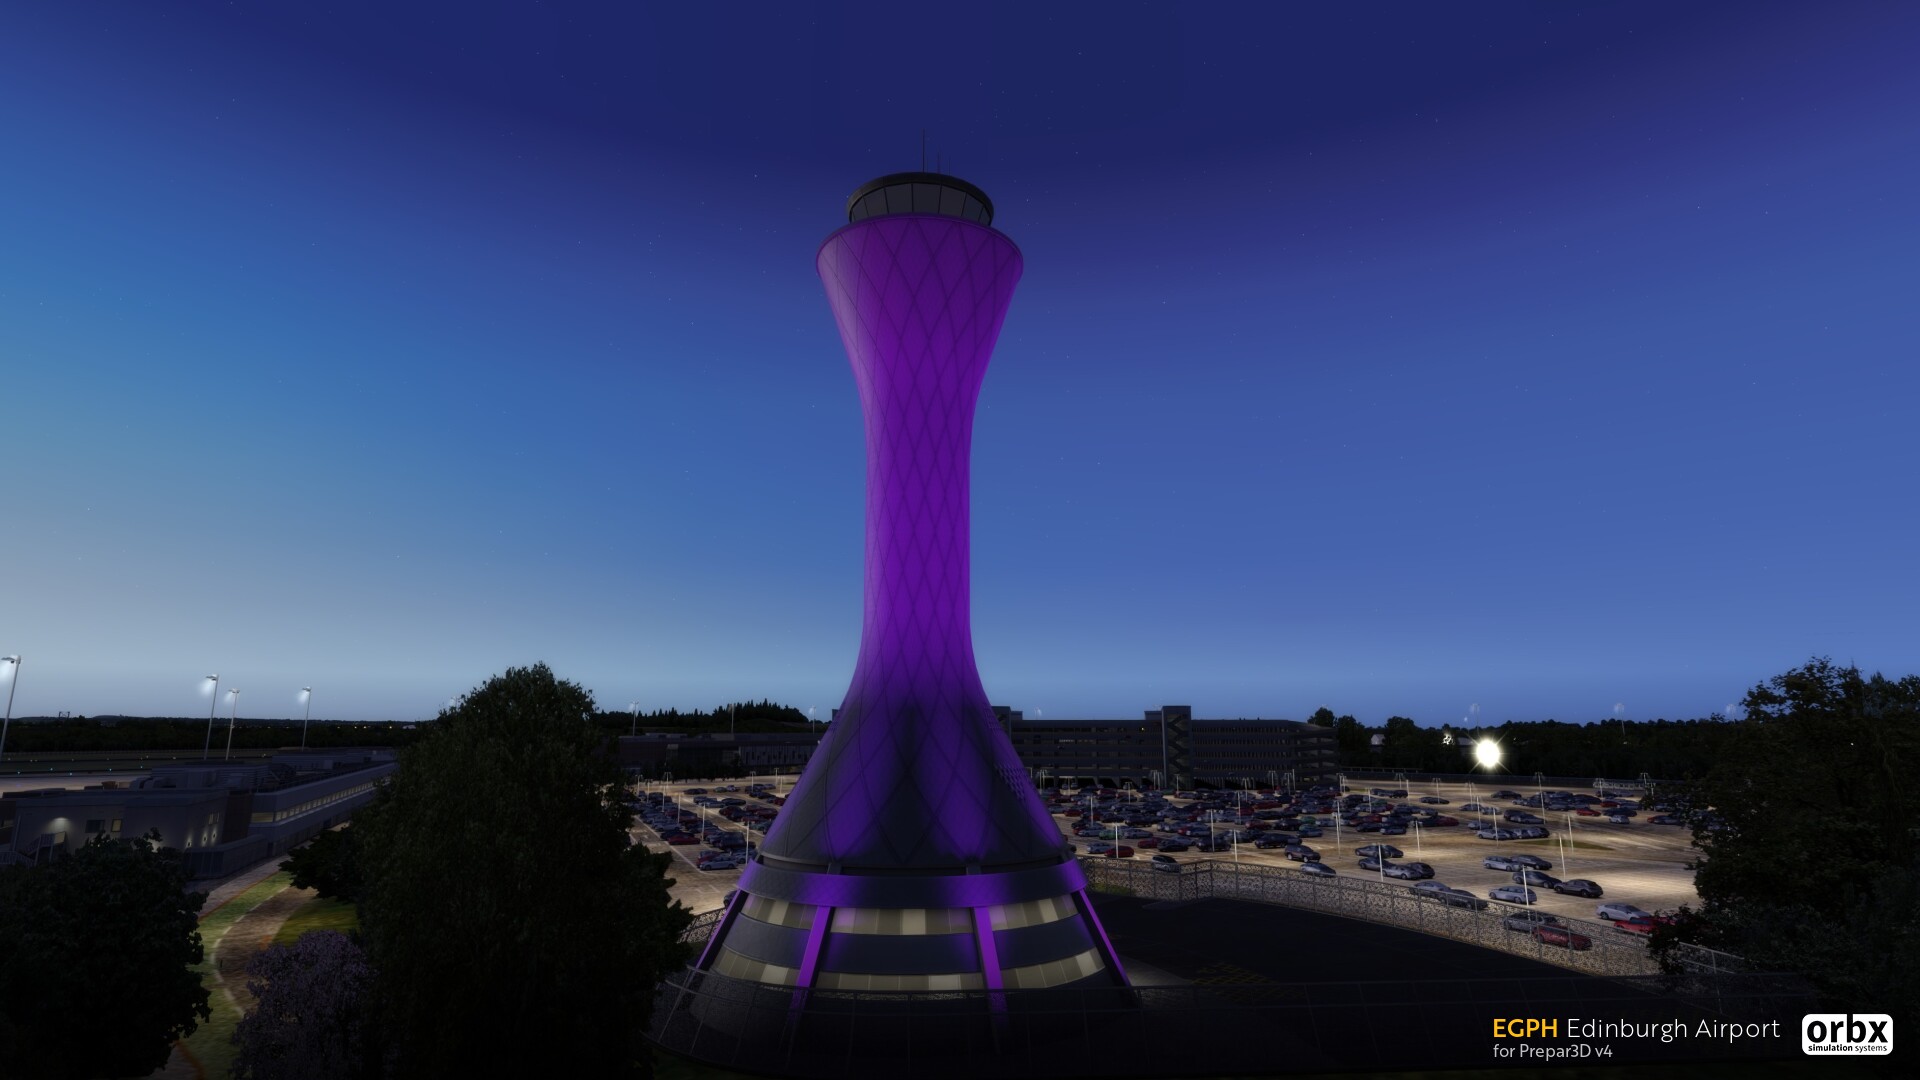
The historic capital of Scotland awaits.
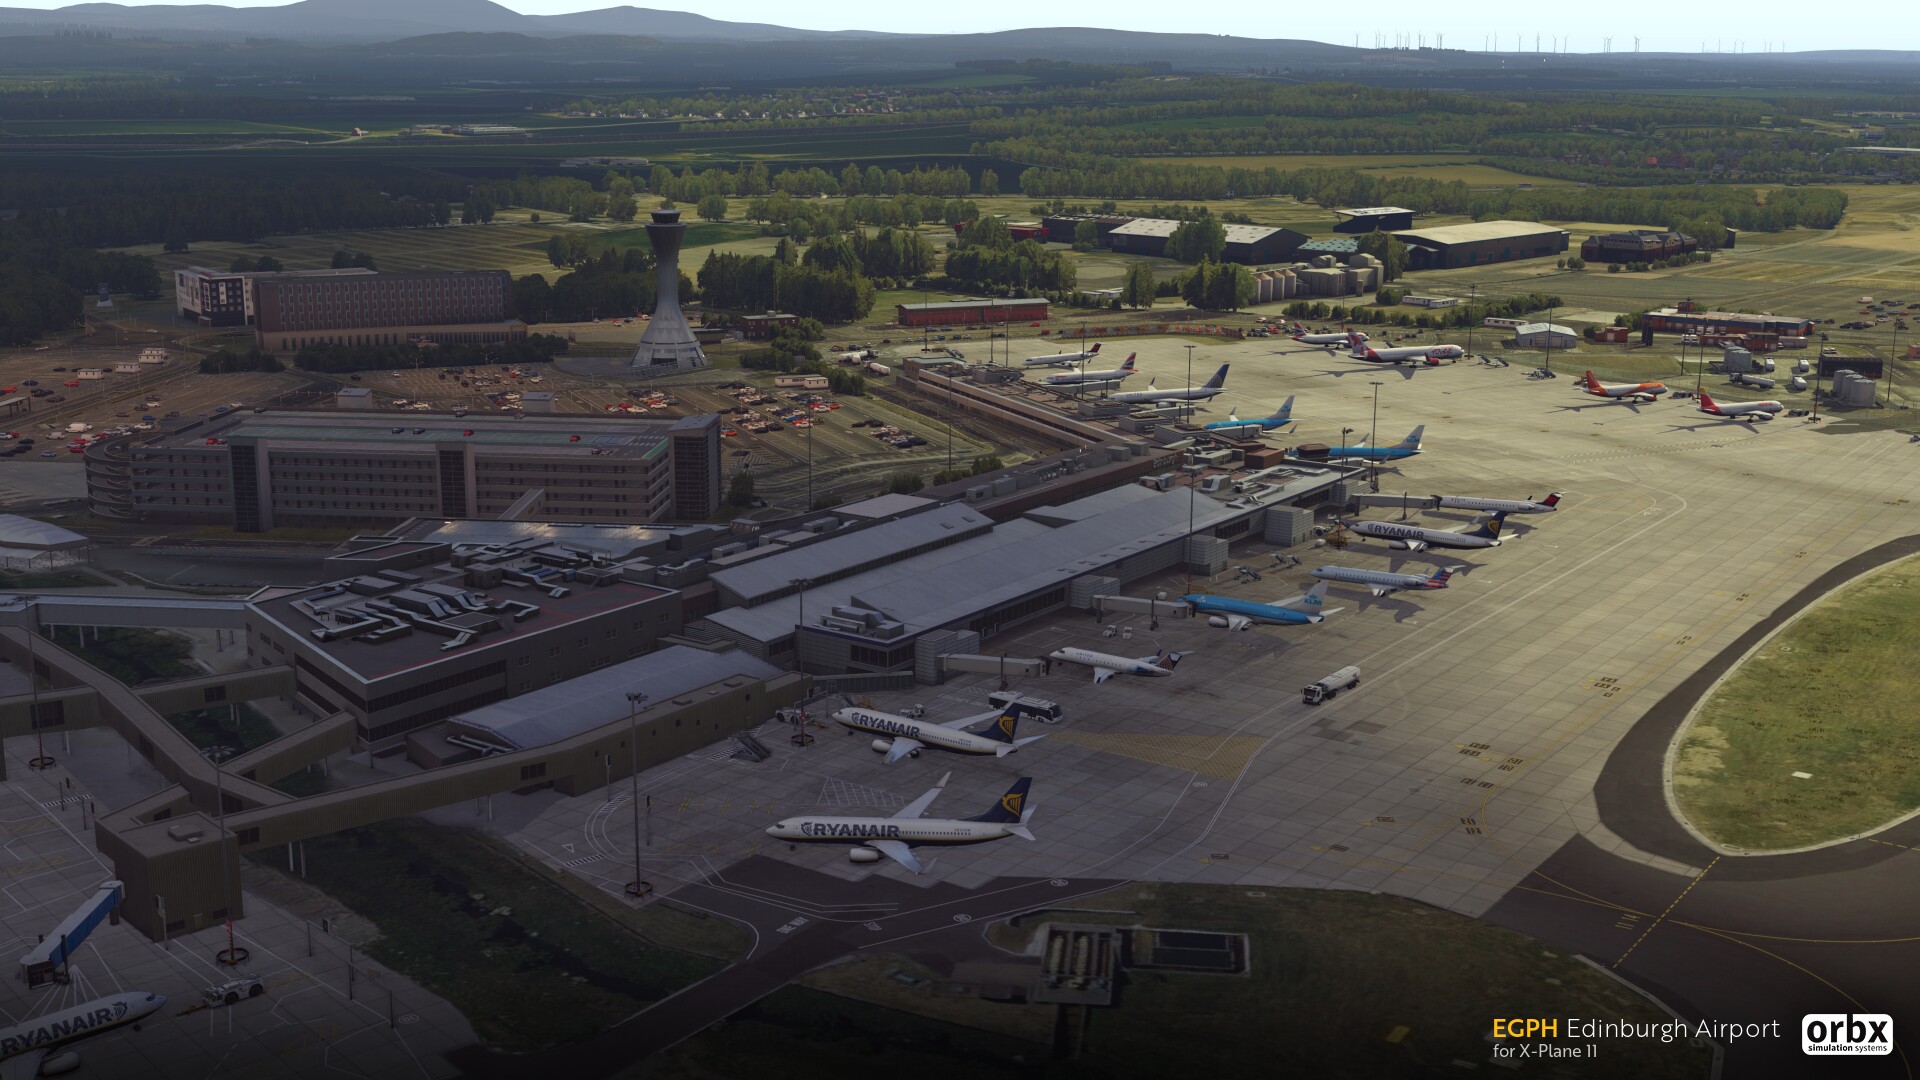
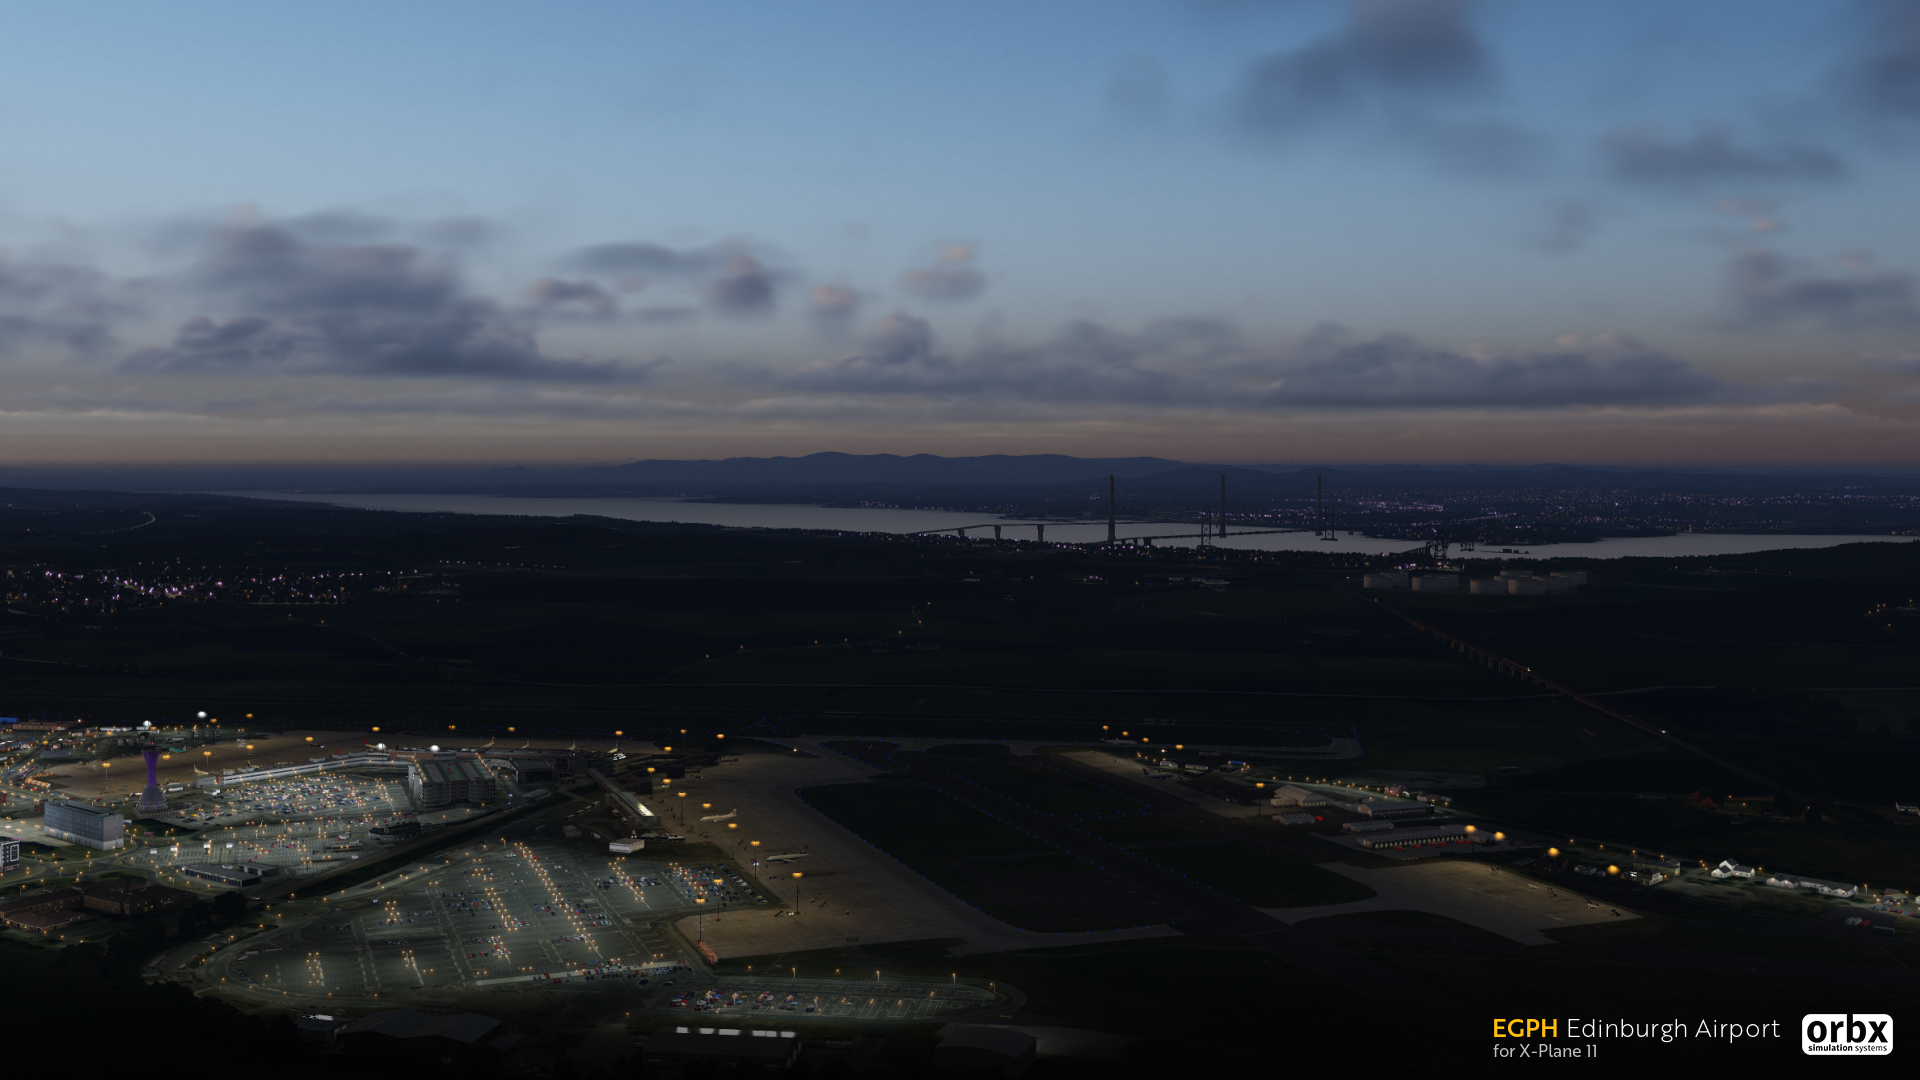
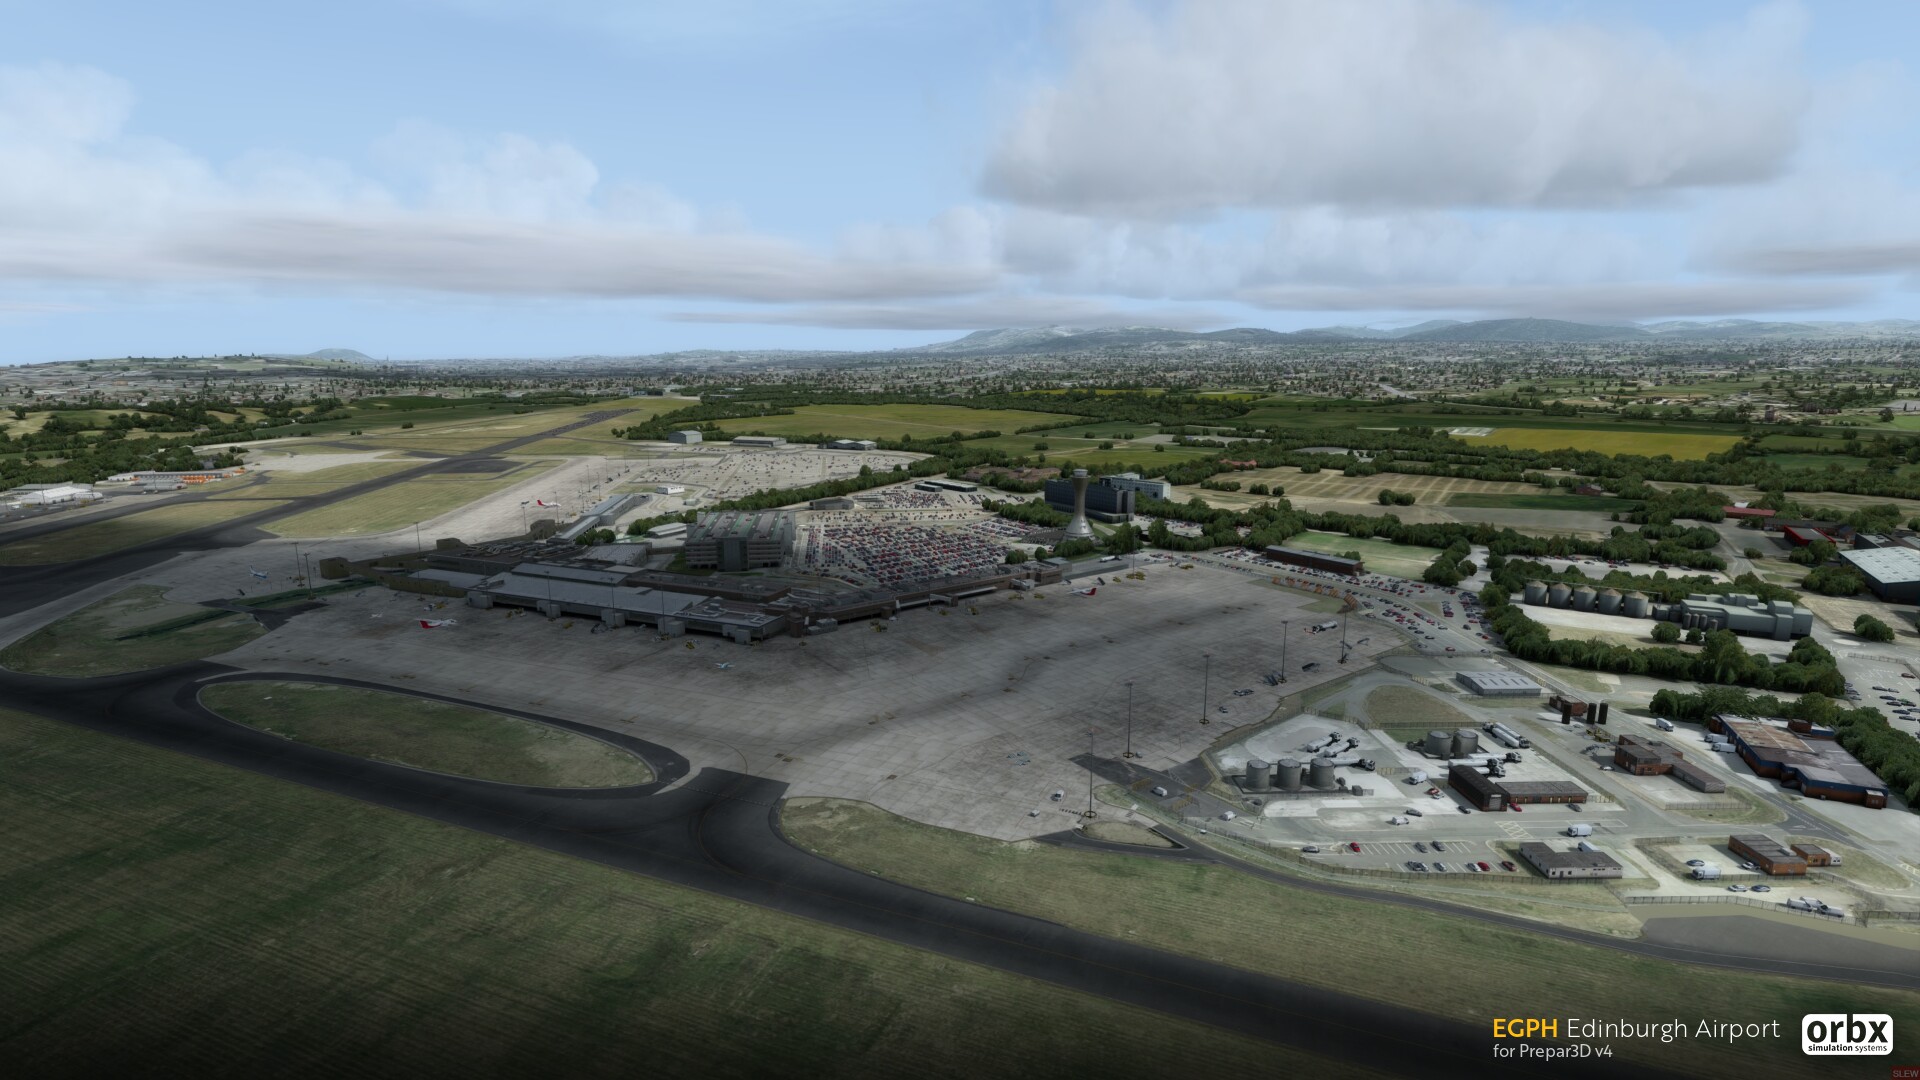
Orbx continues to develop exciting new locations within the world of flight simulation, with the imminent release of EGPH Edinburgh Airport for both Prepar3D V4 and X-Plane 11.
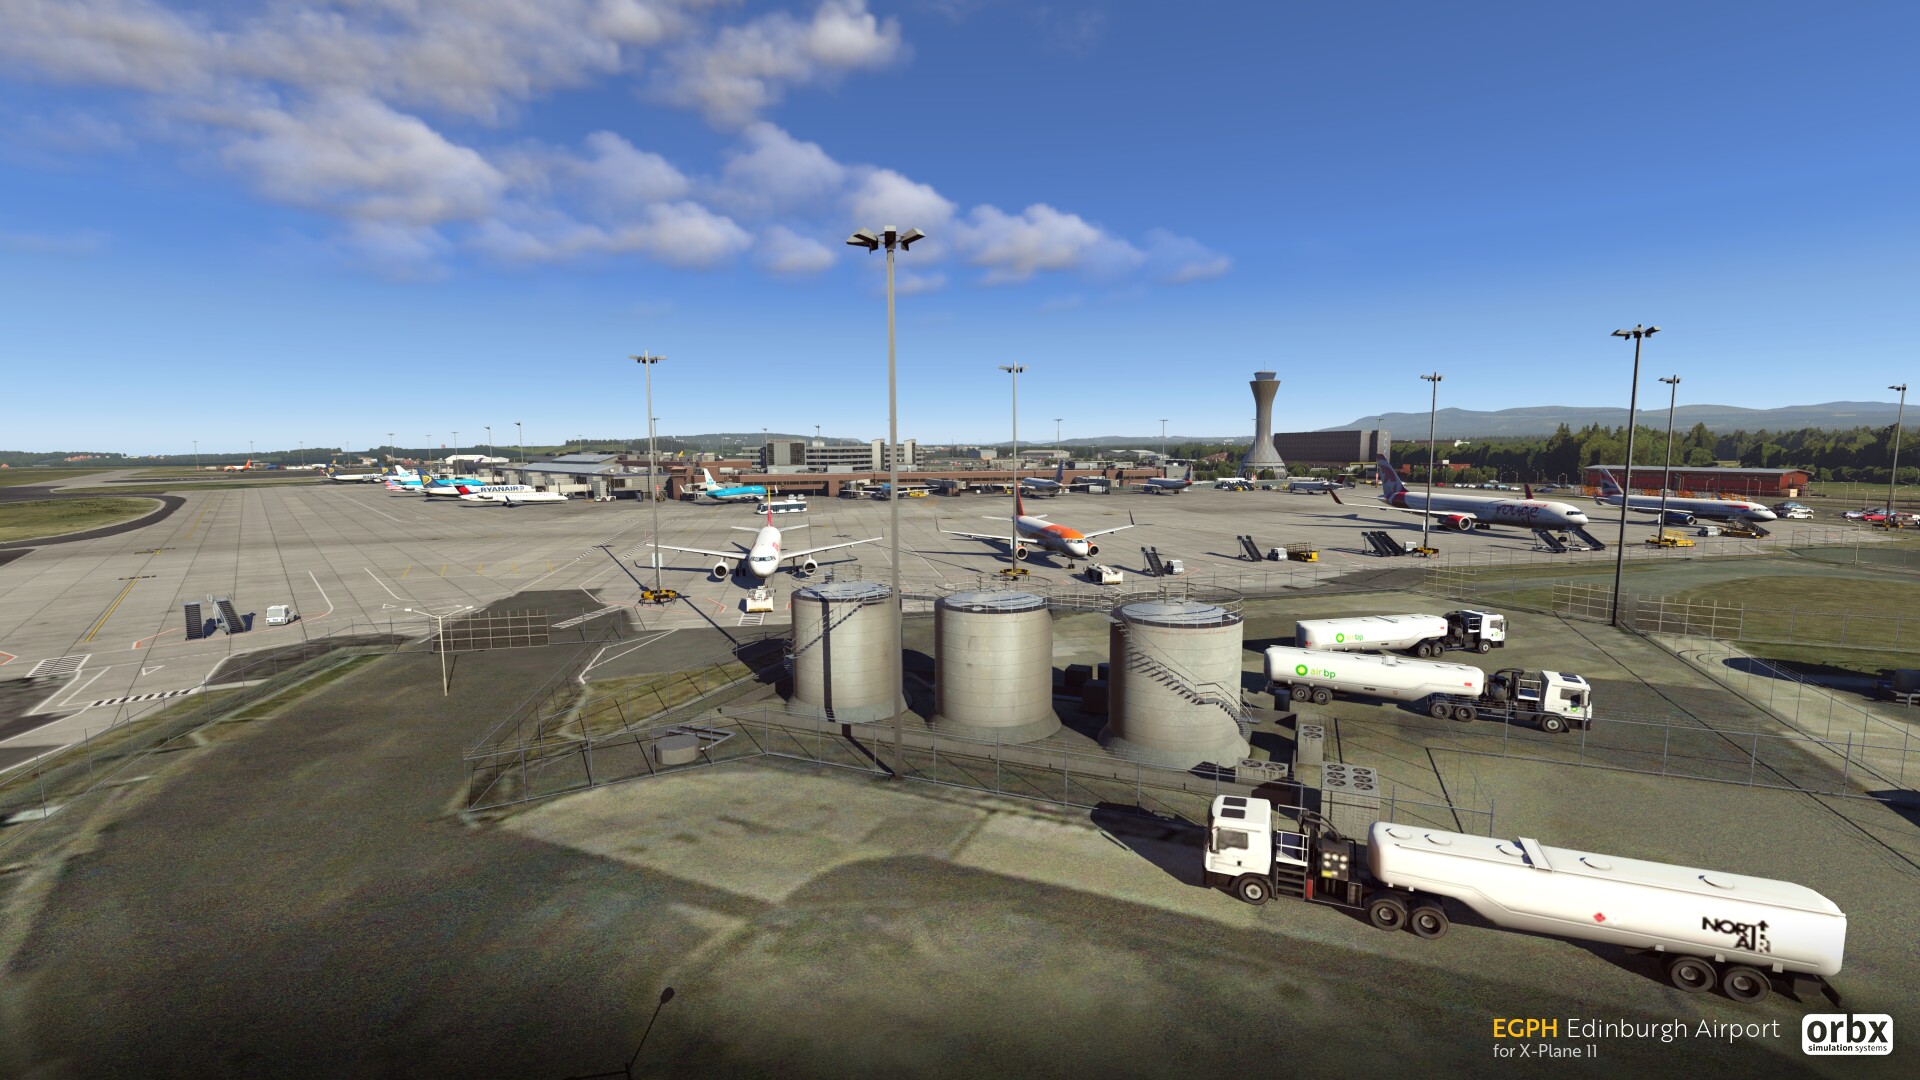
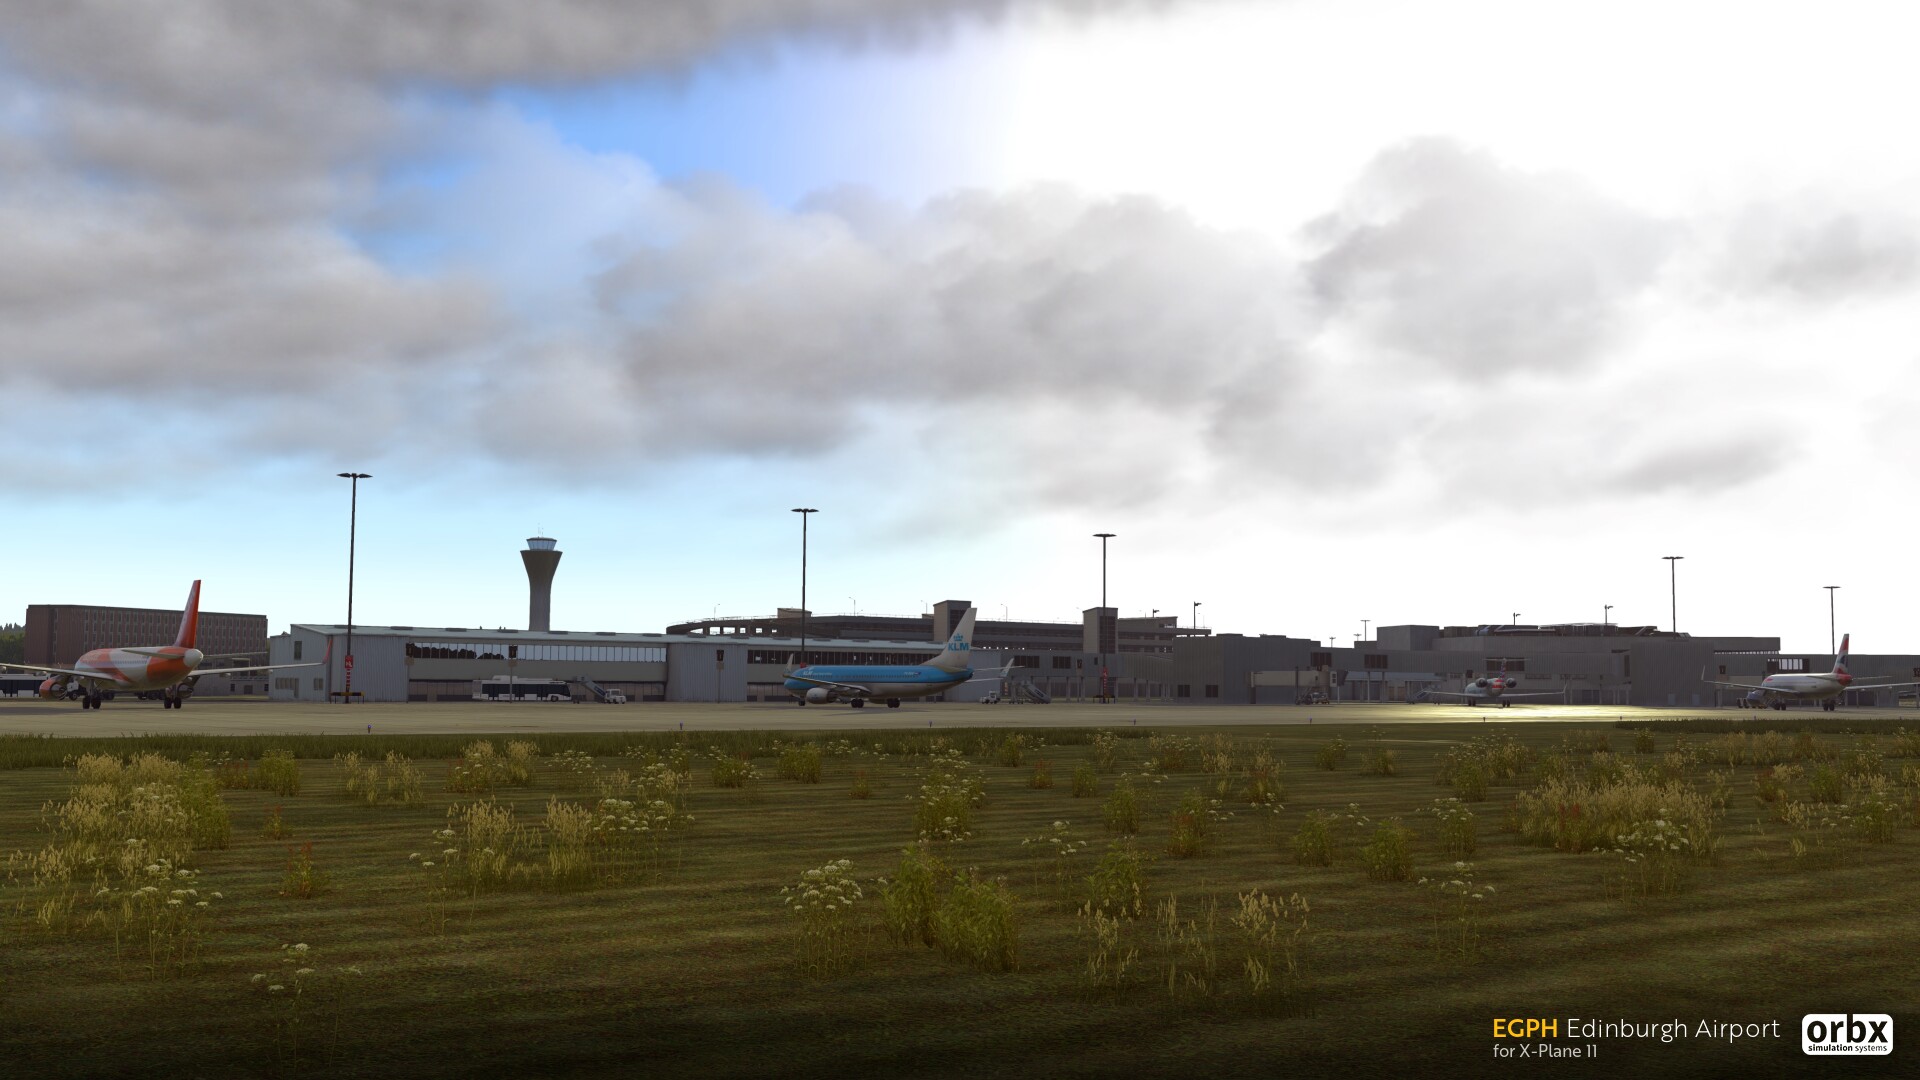
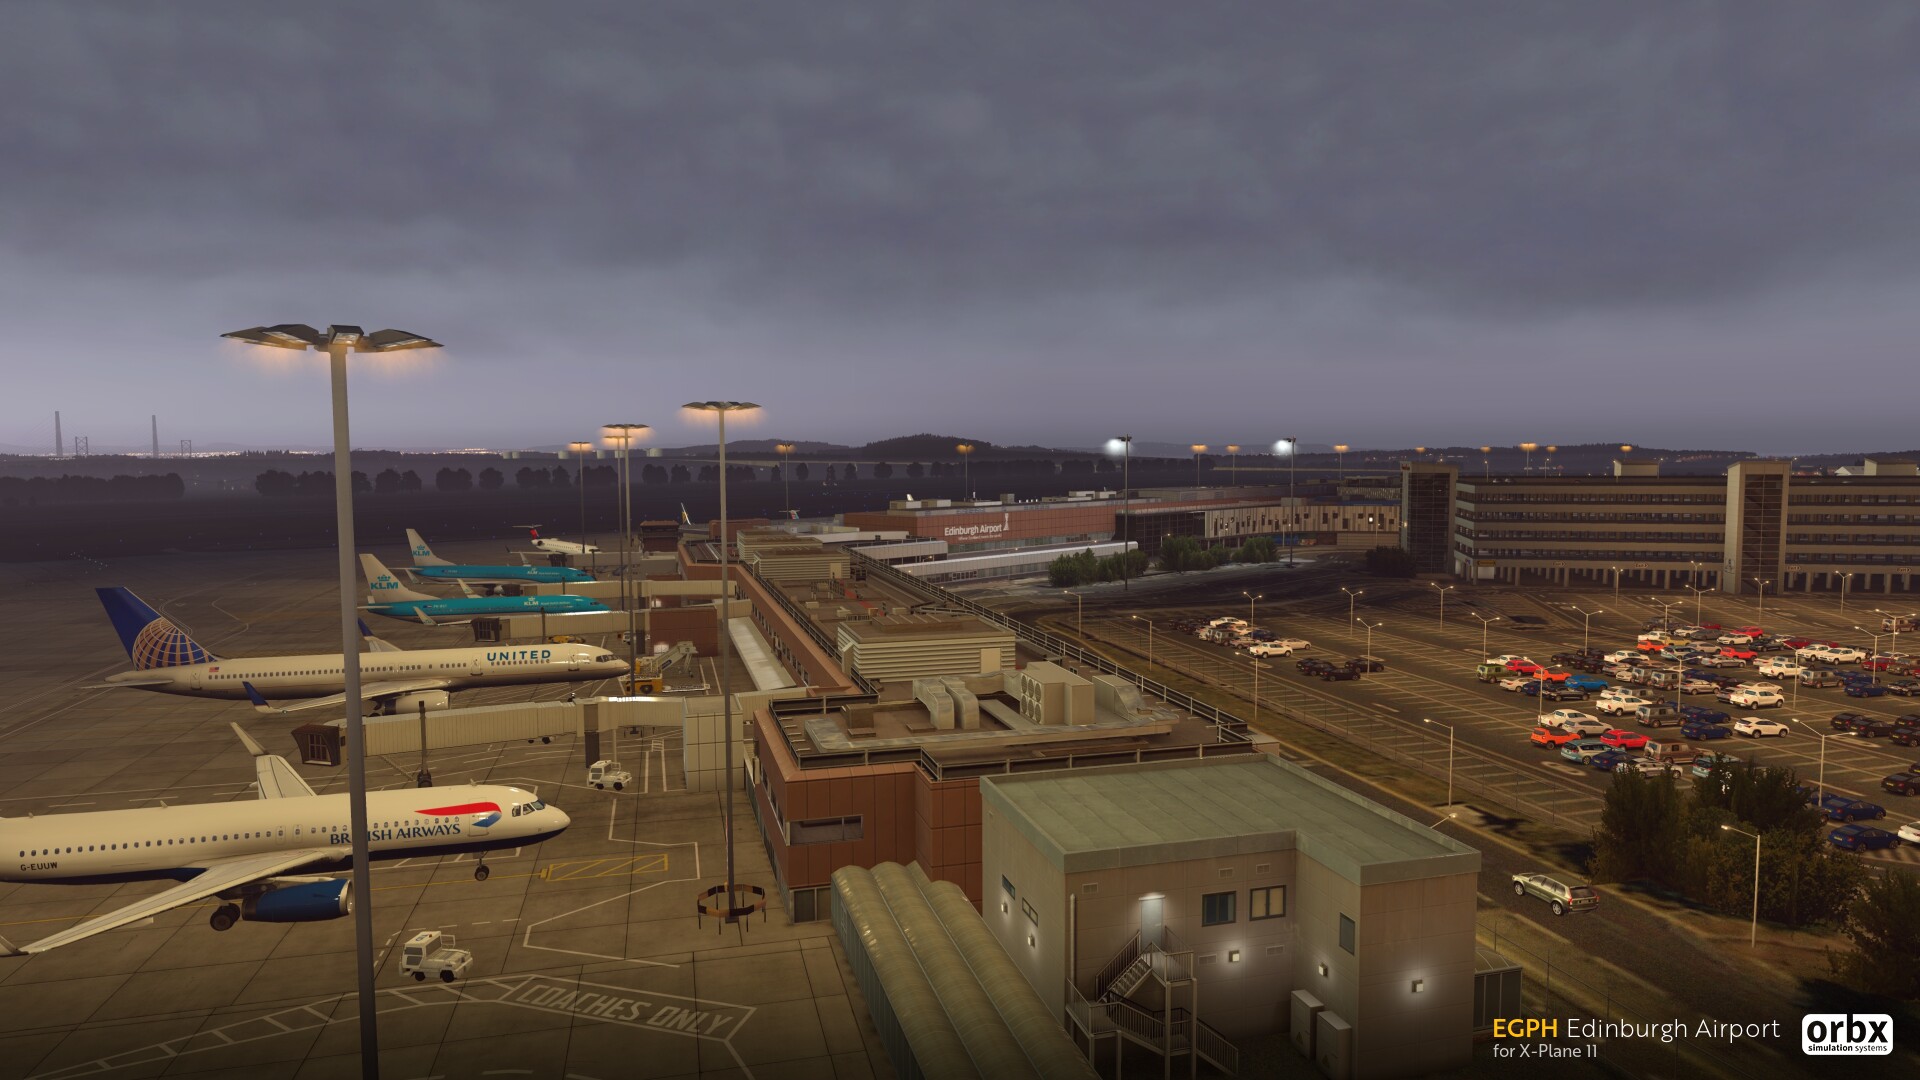
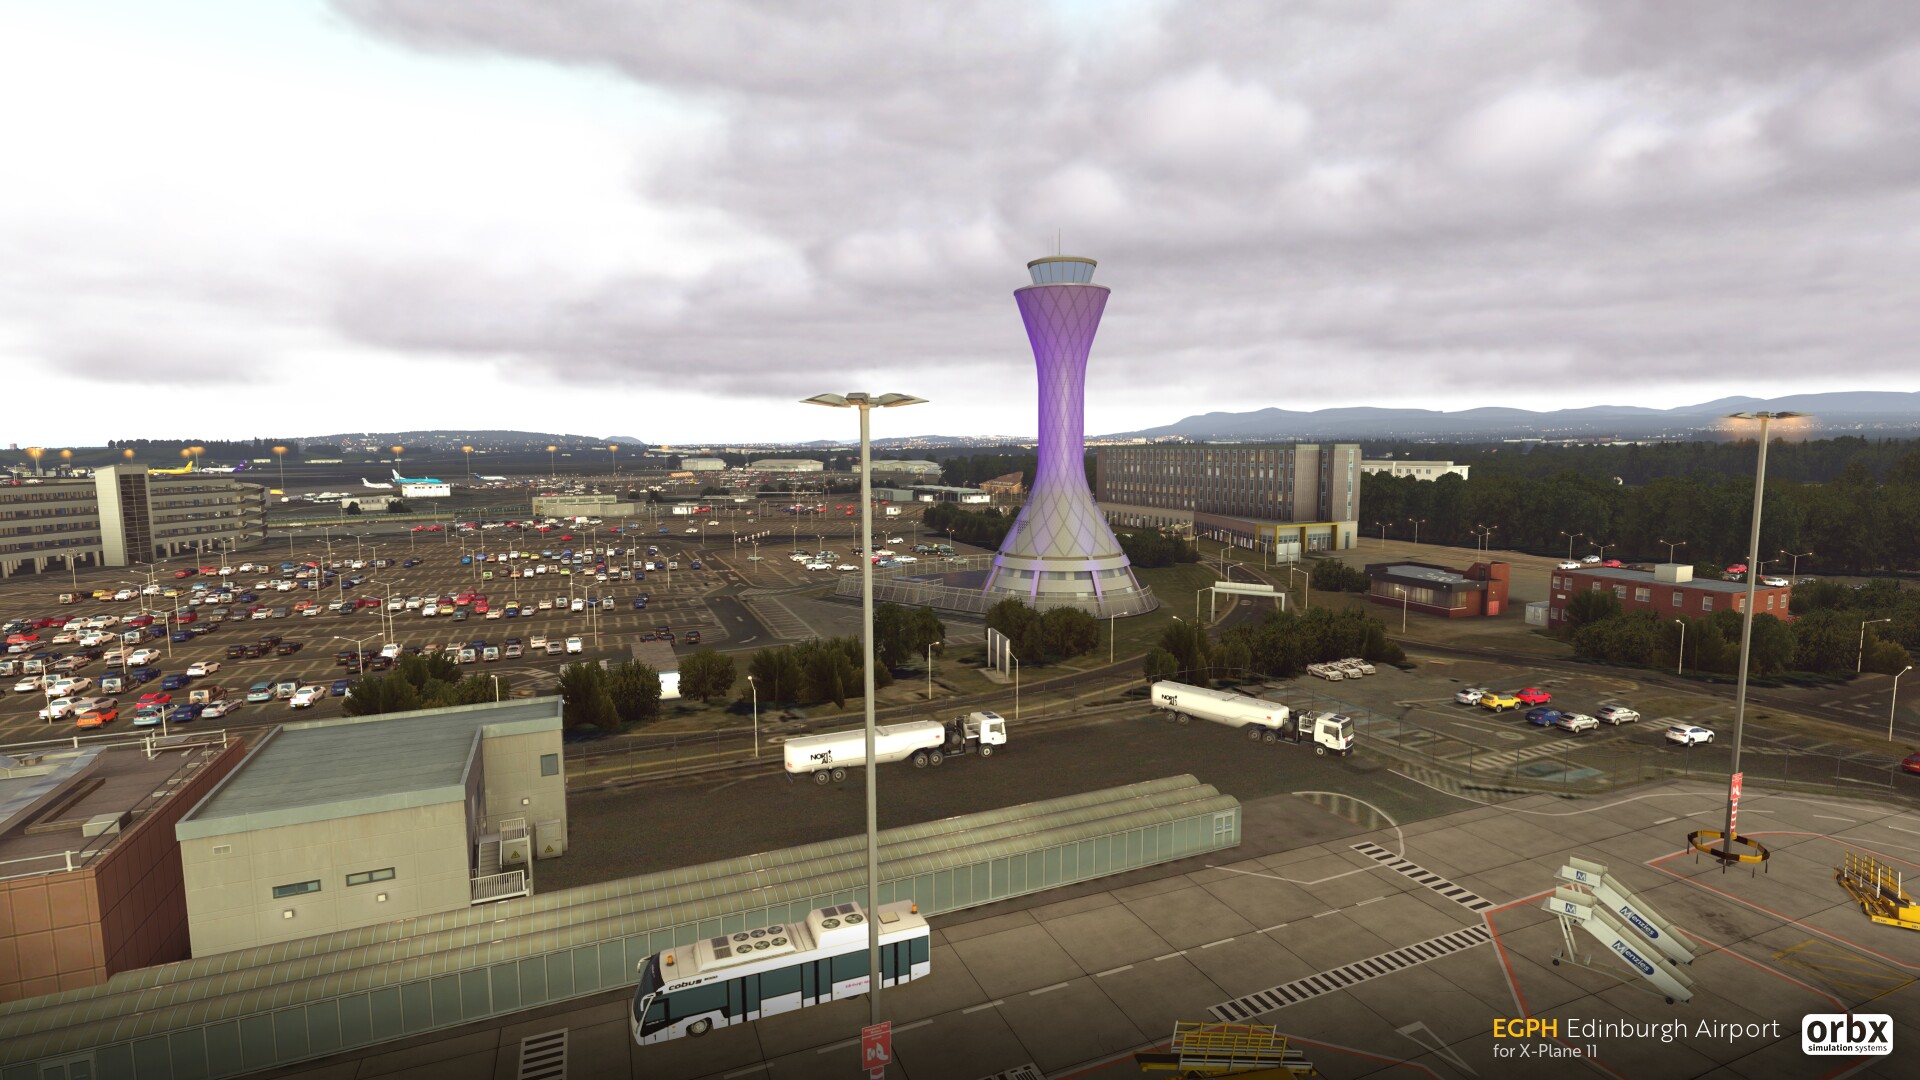
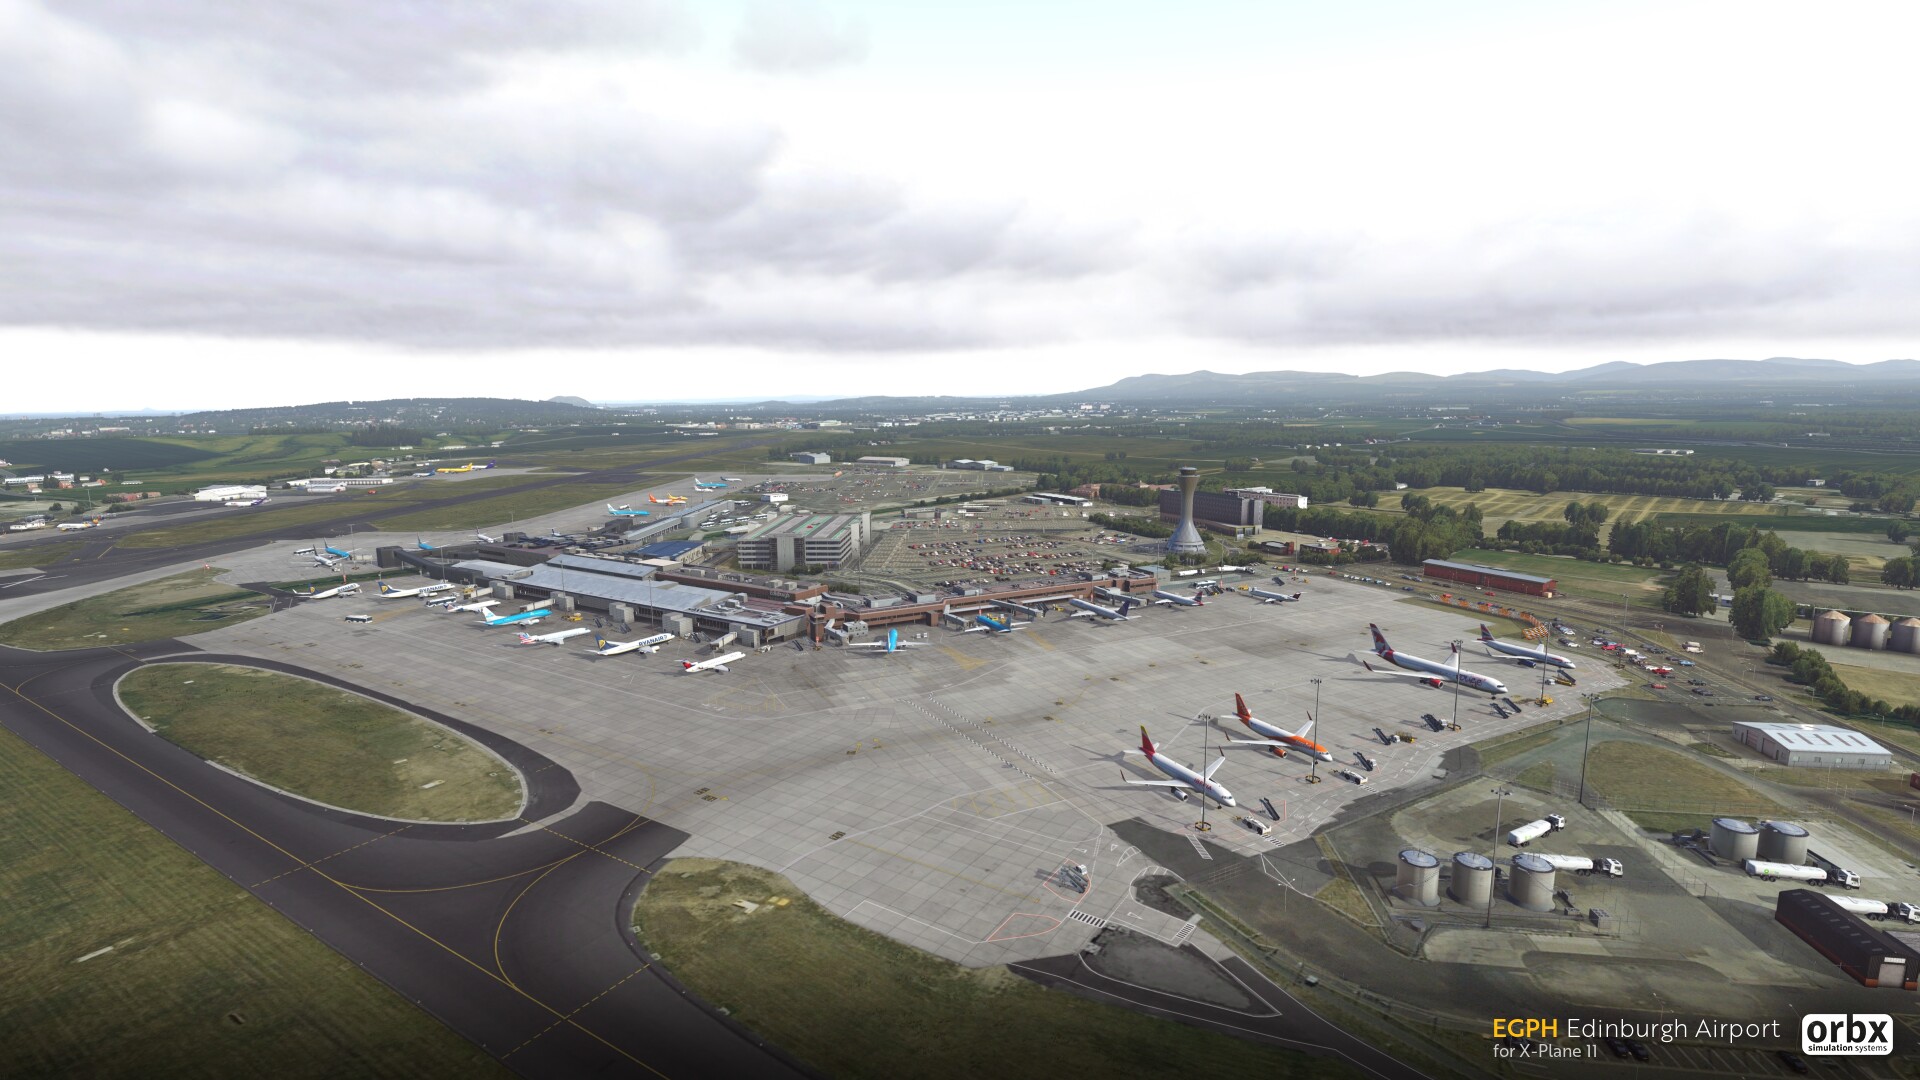
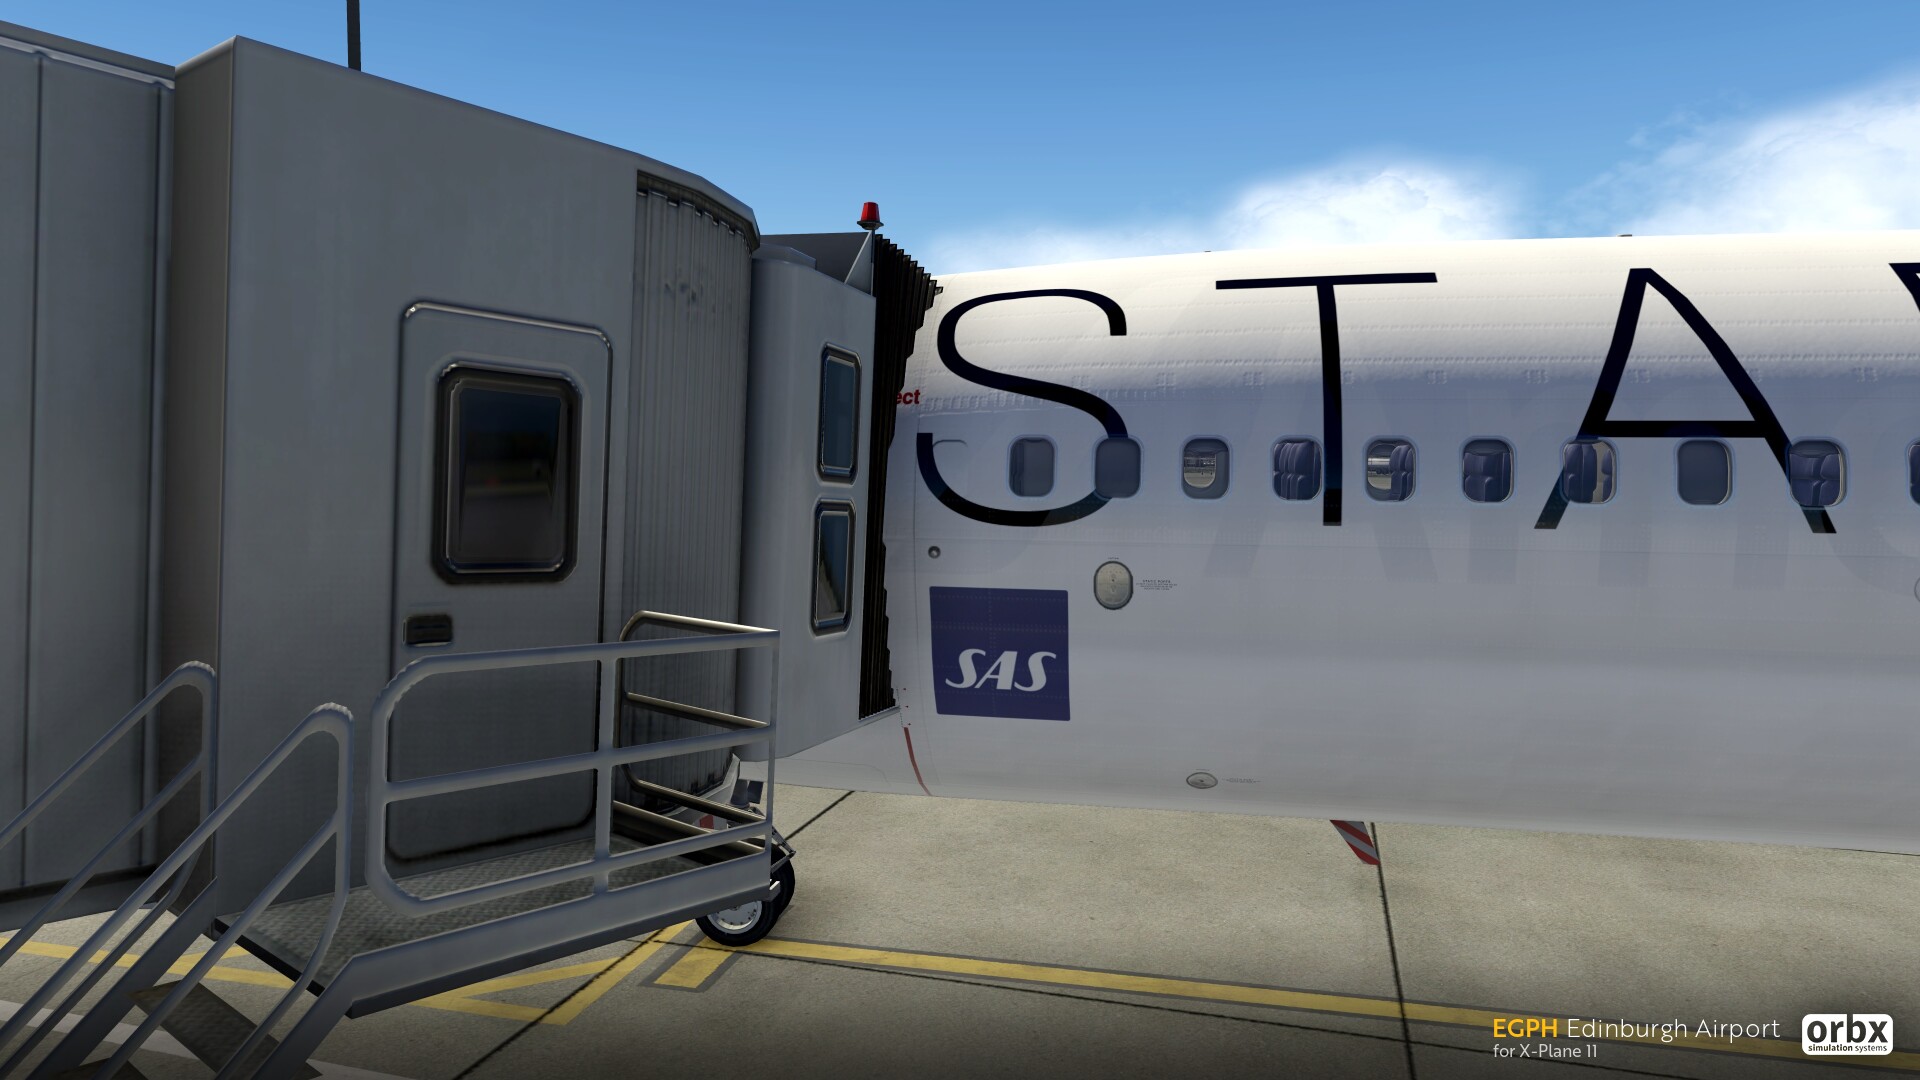
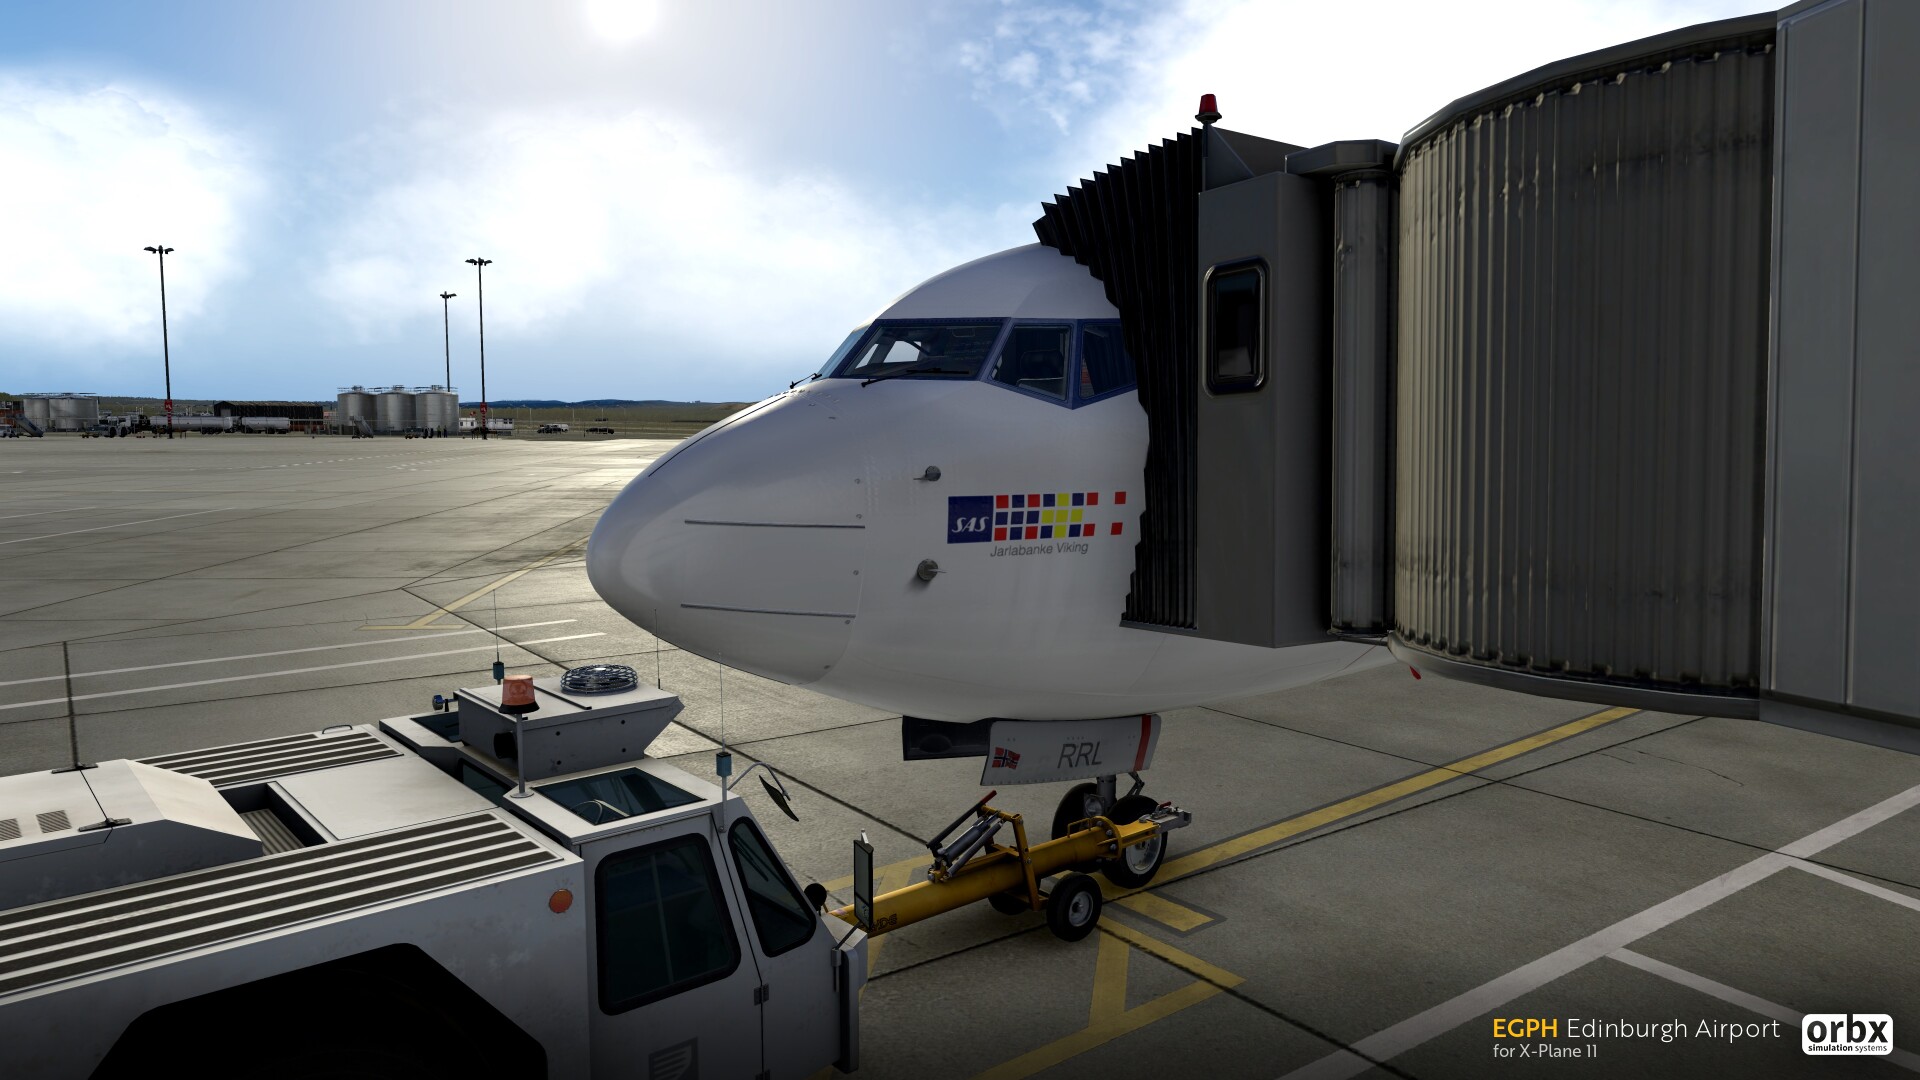
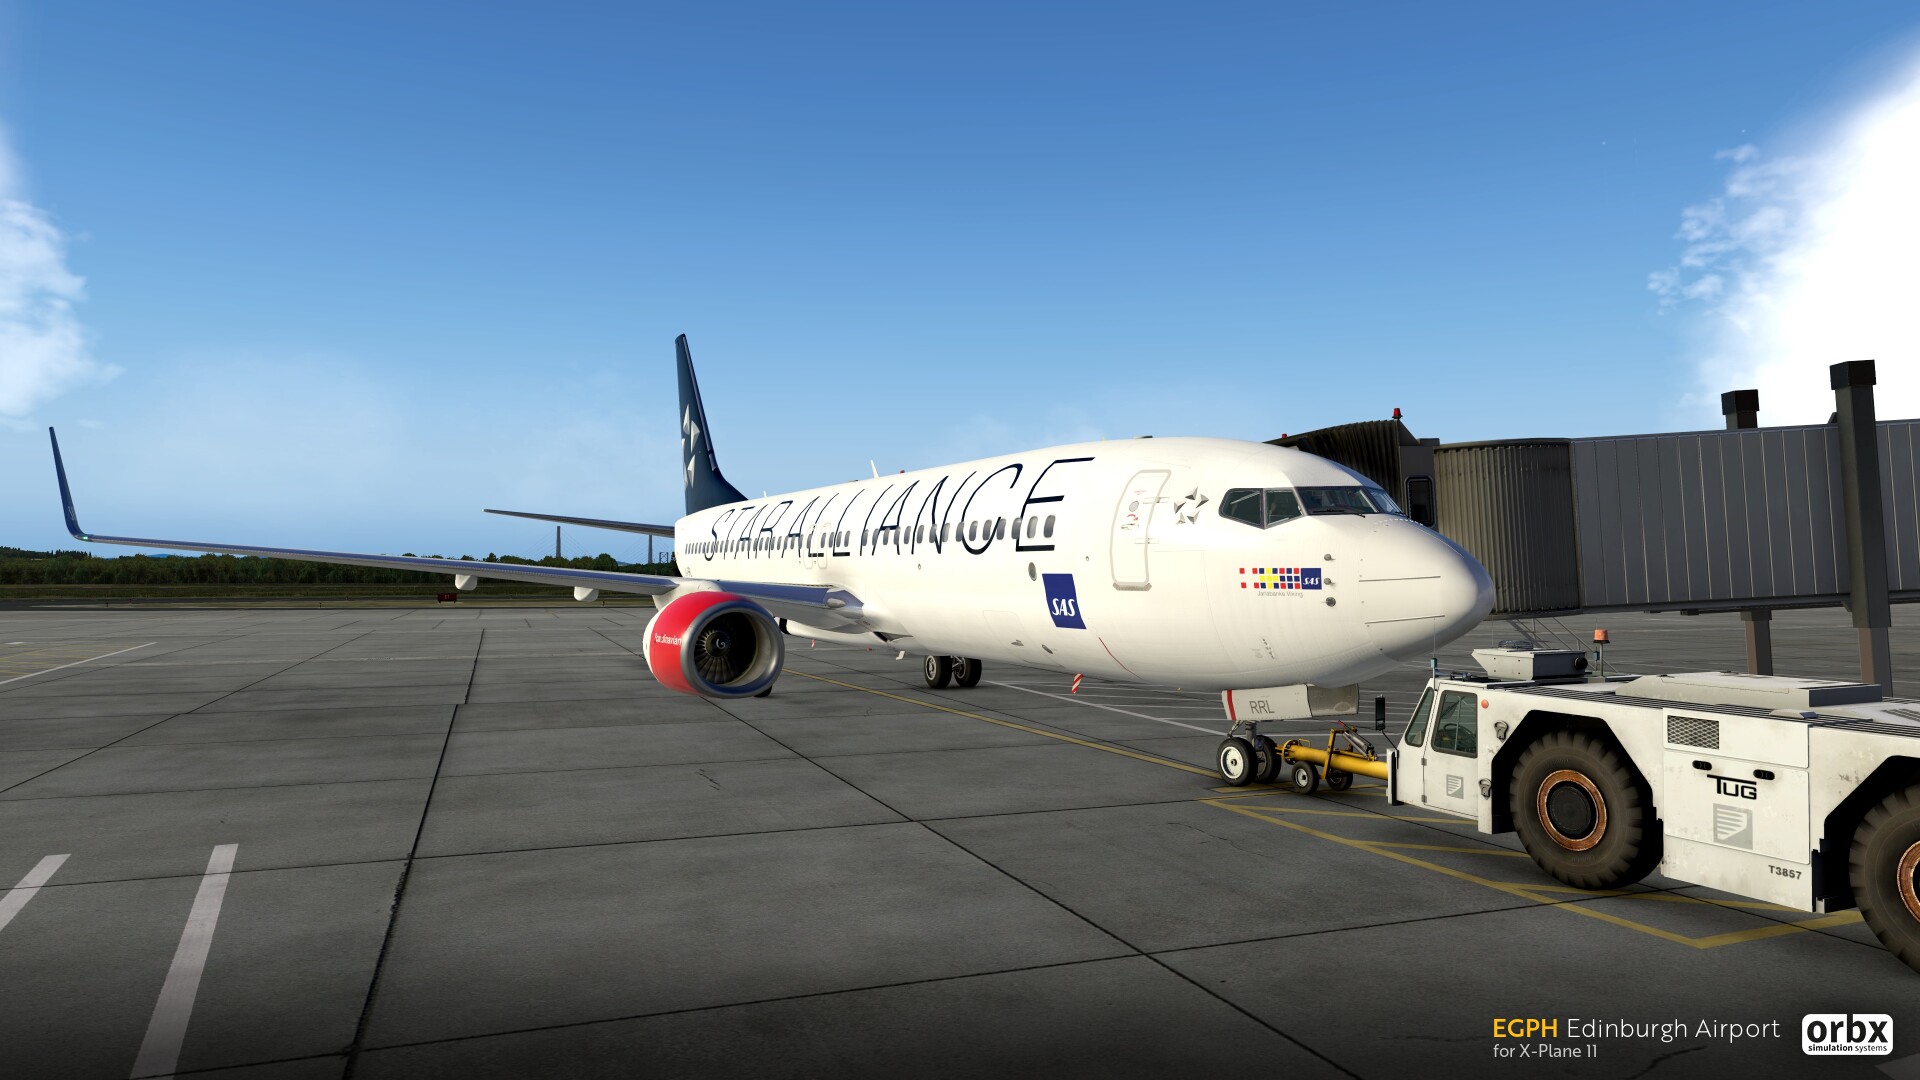
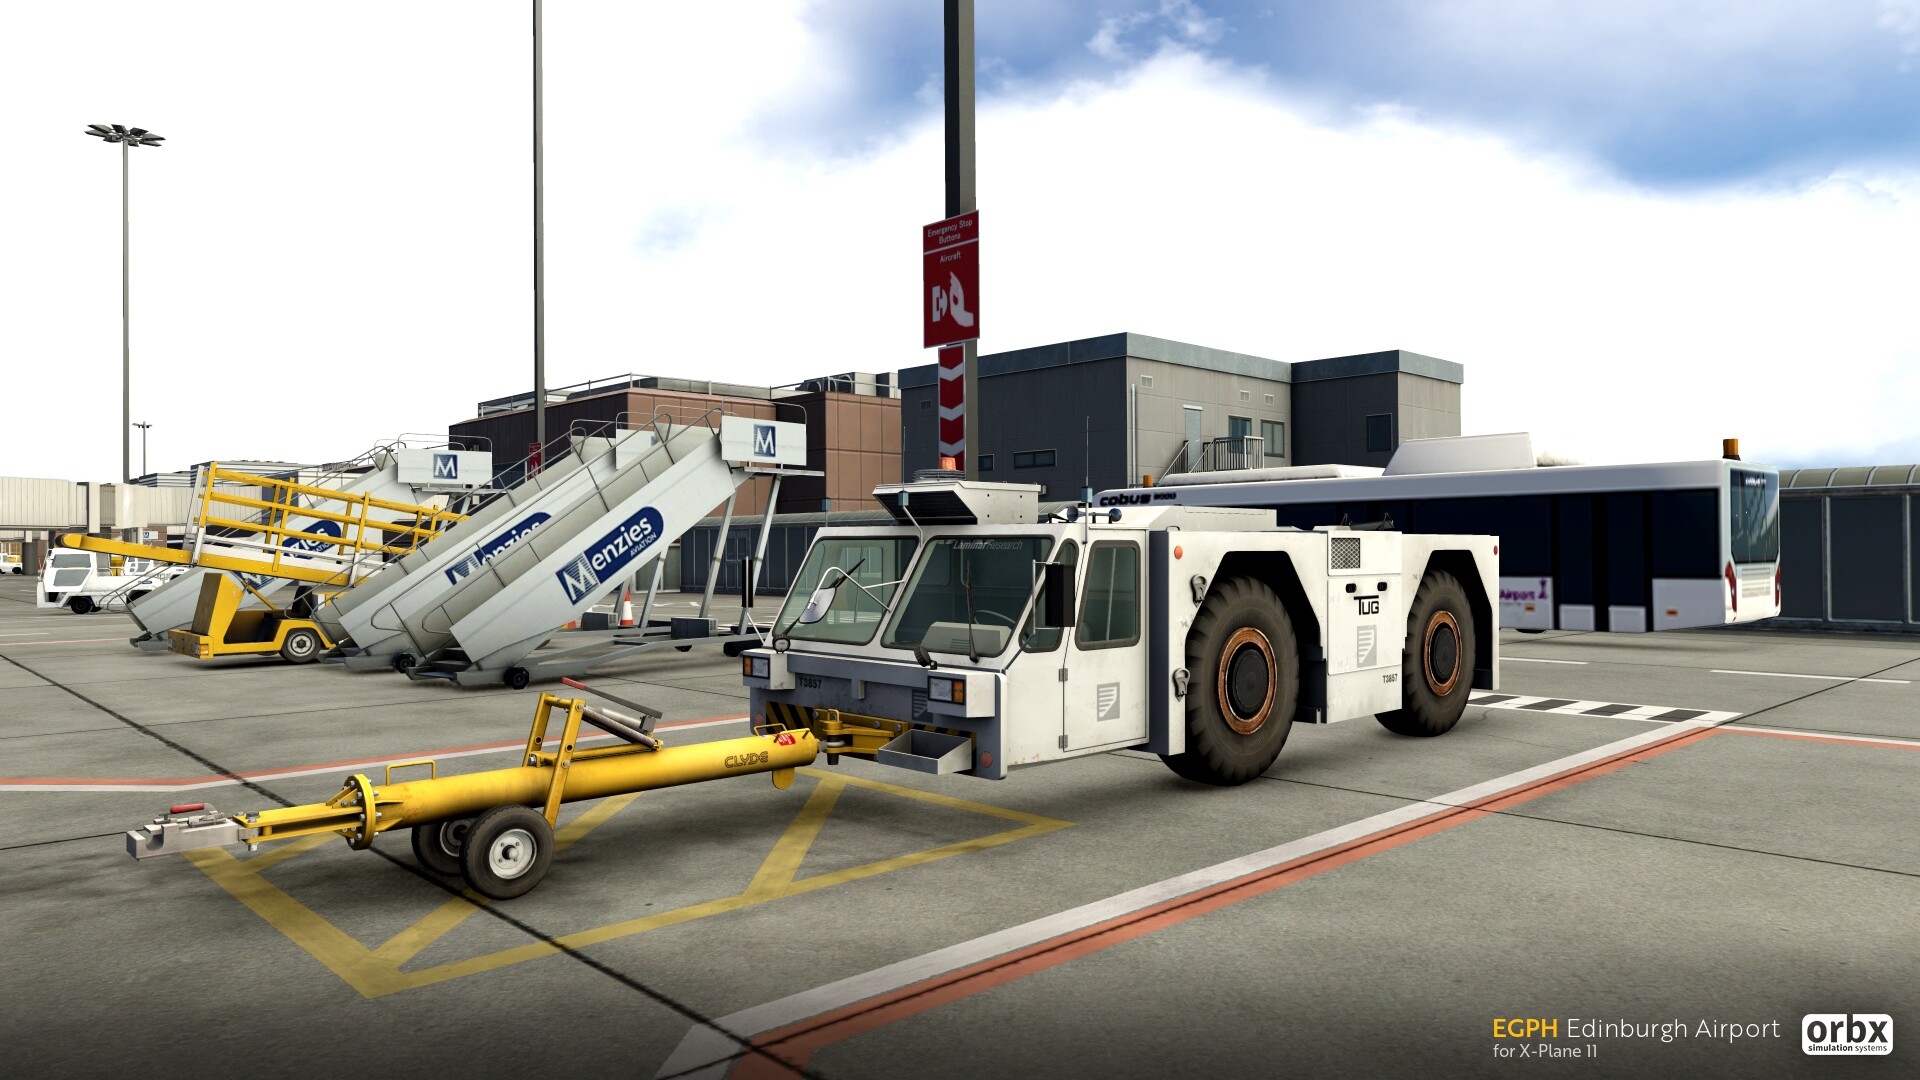
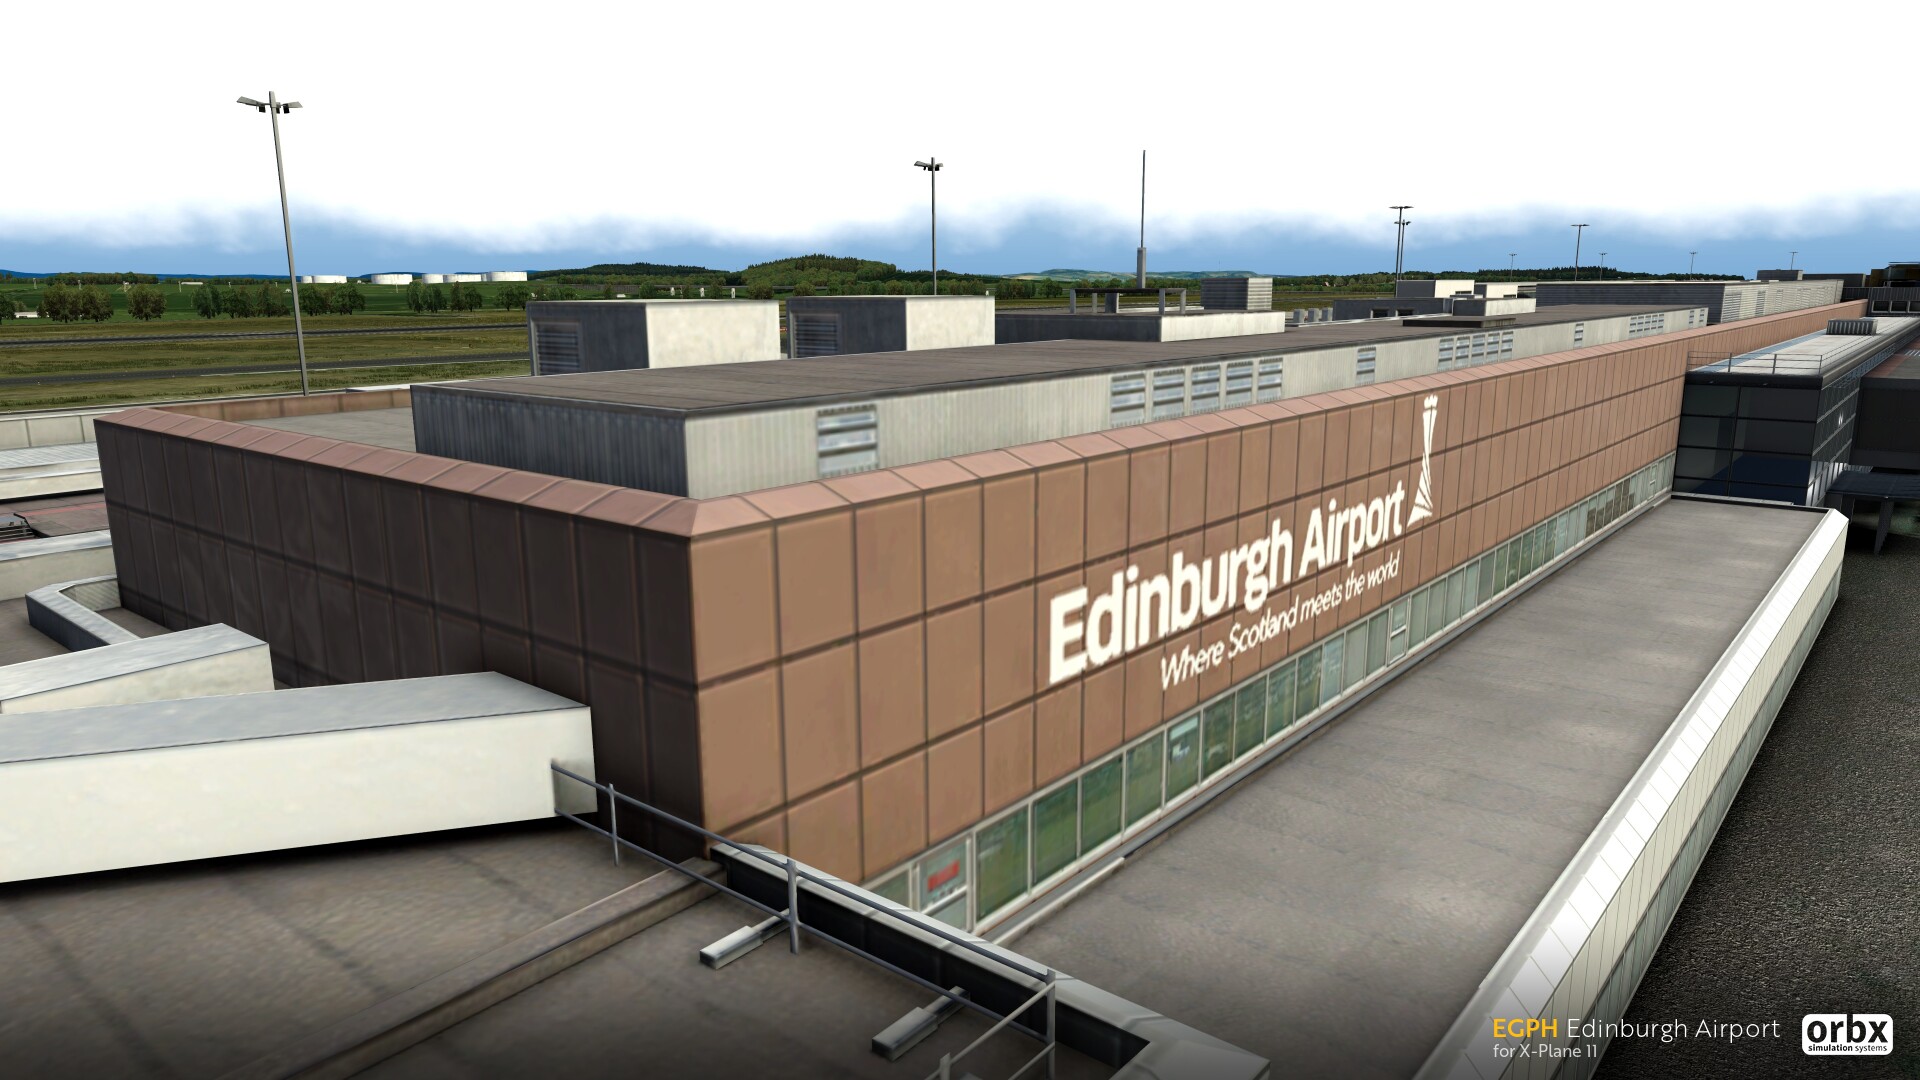
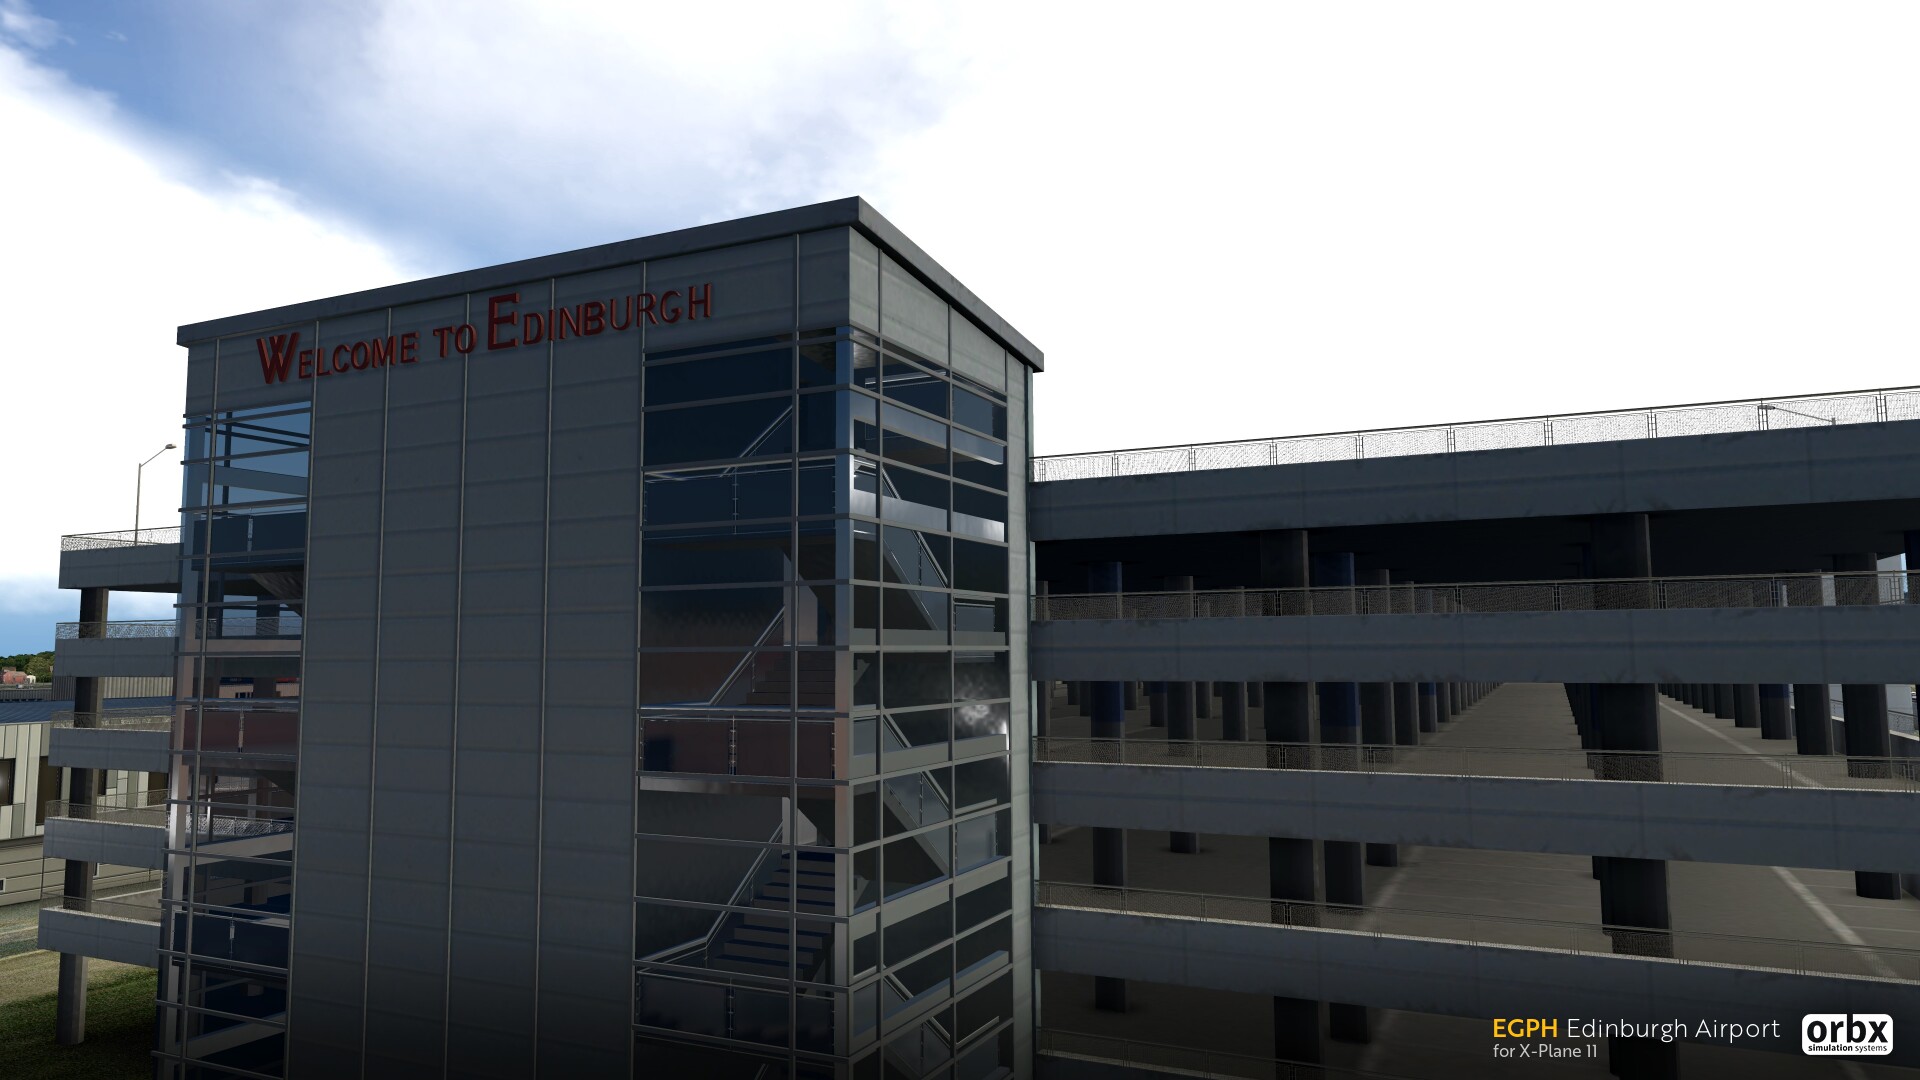
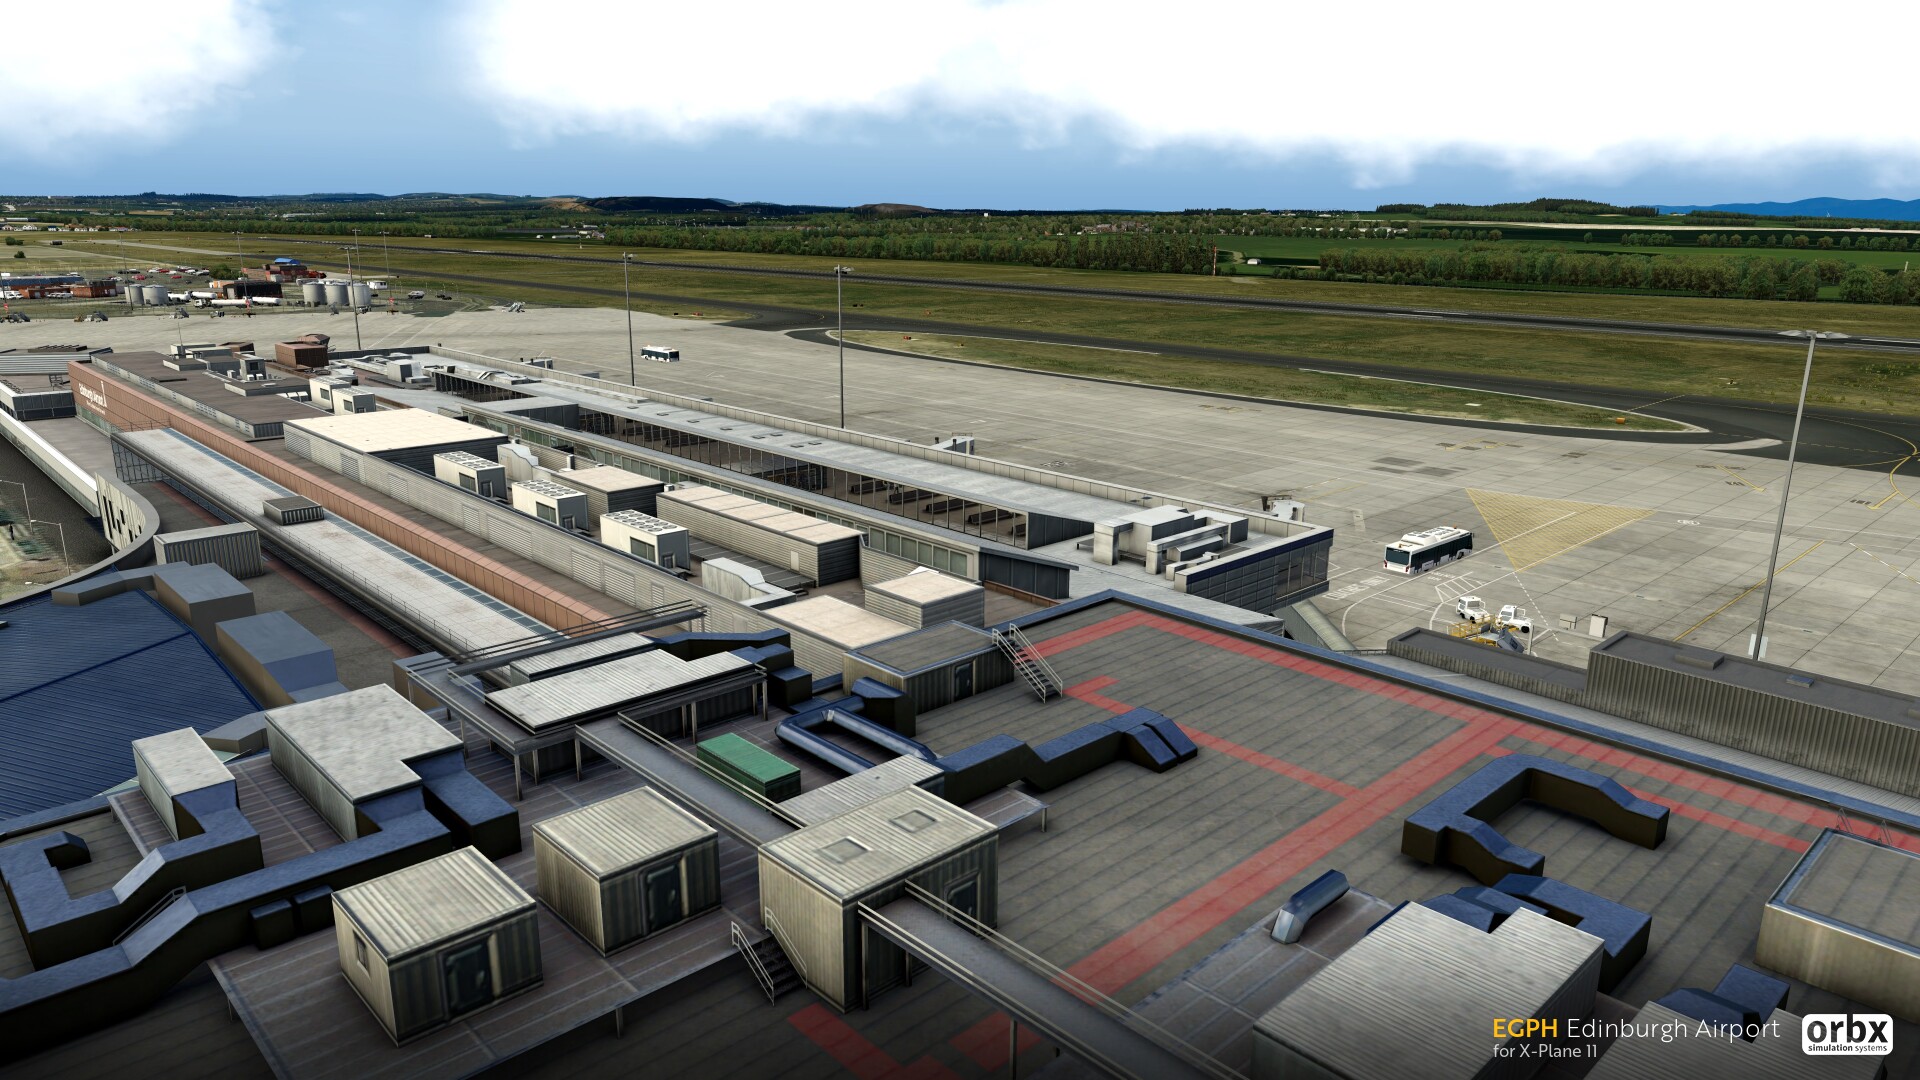
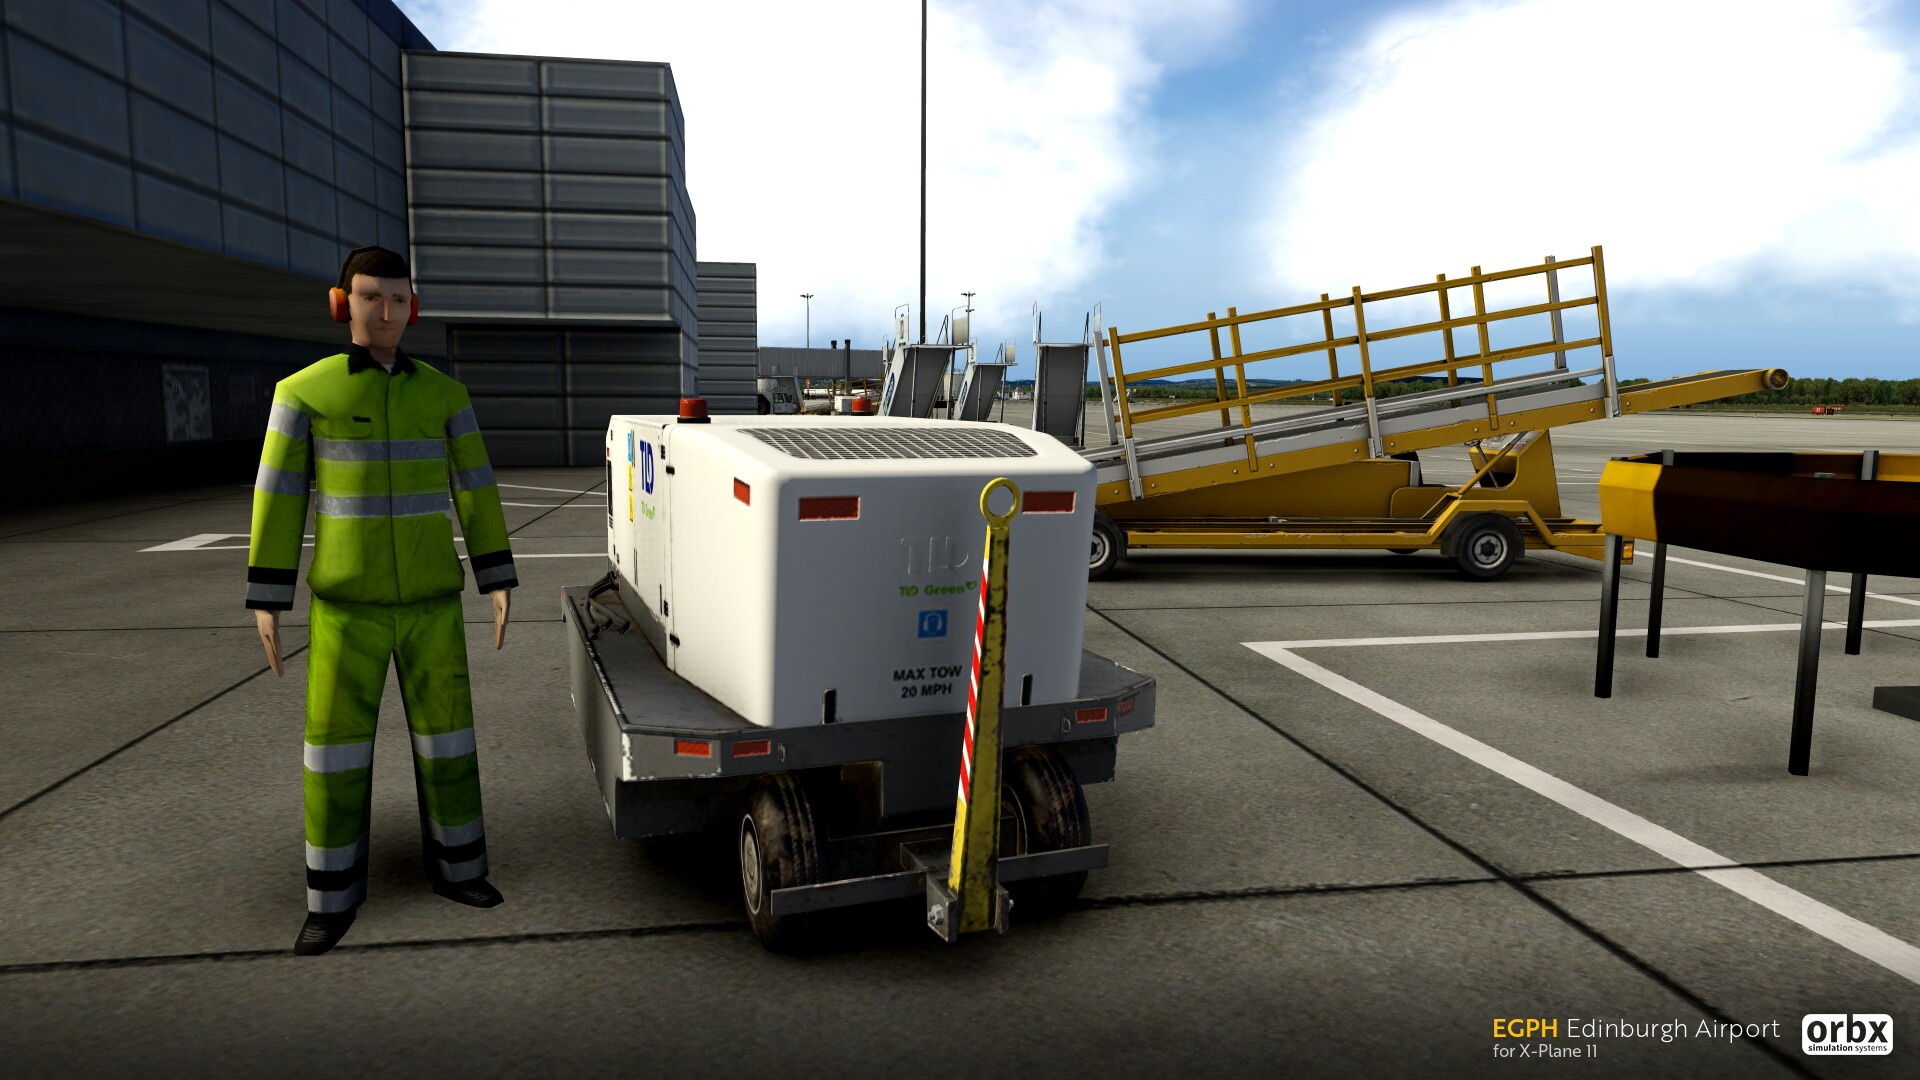
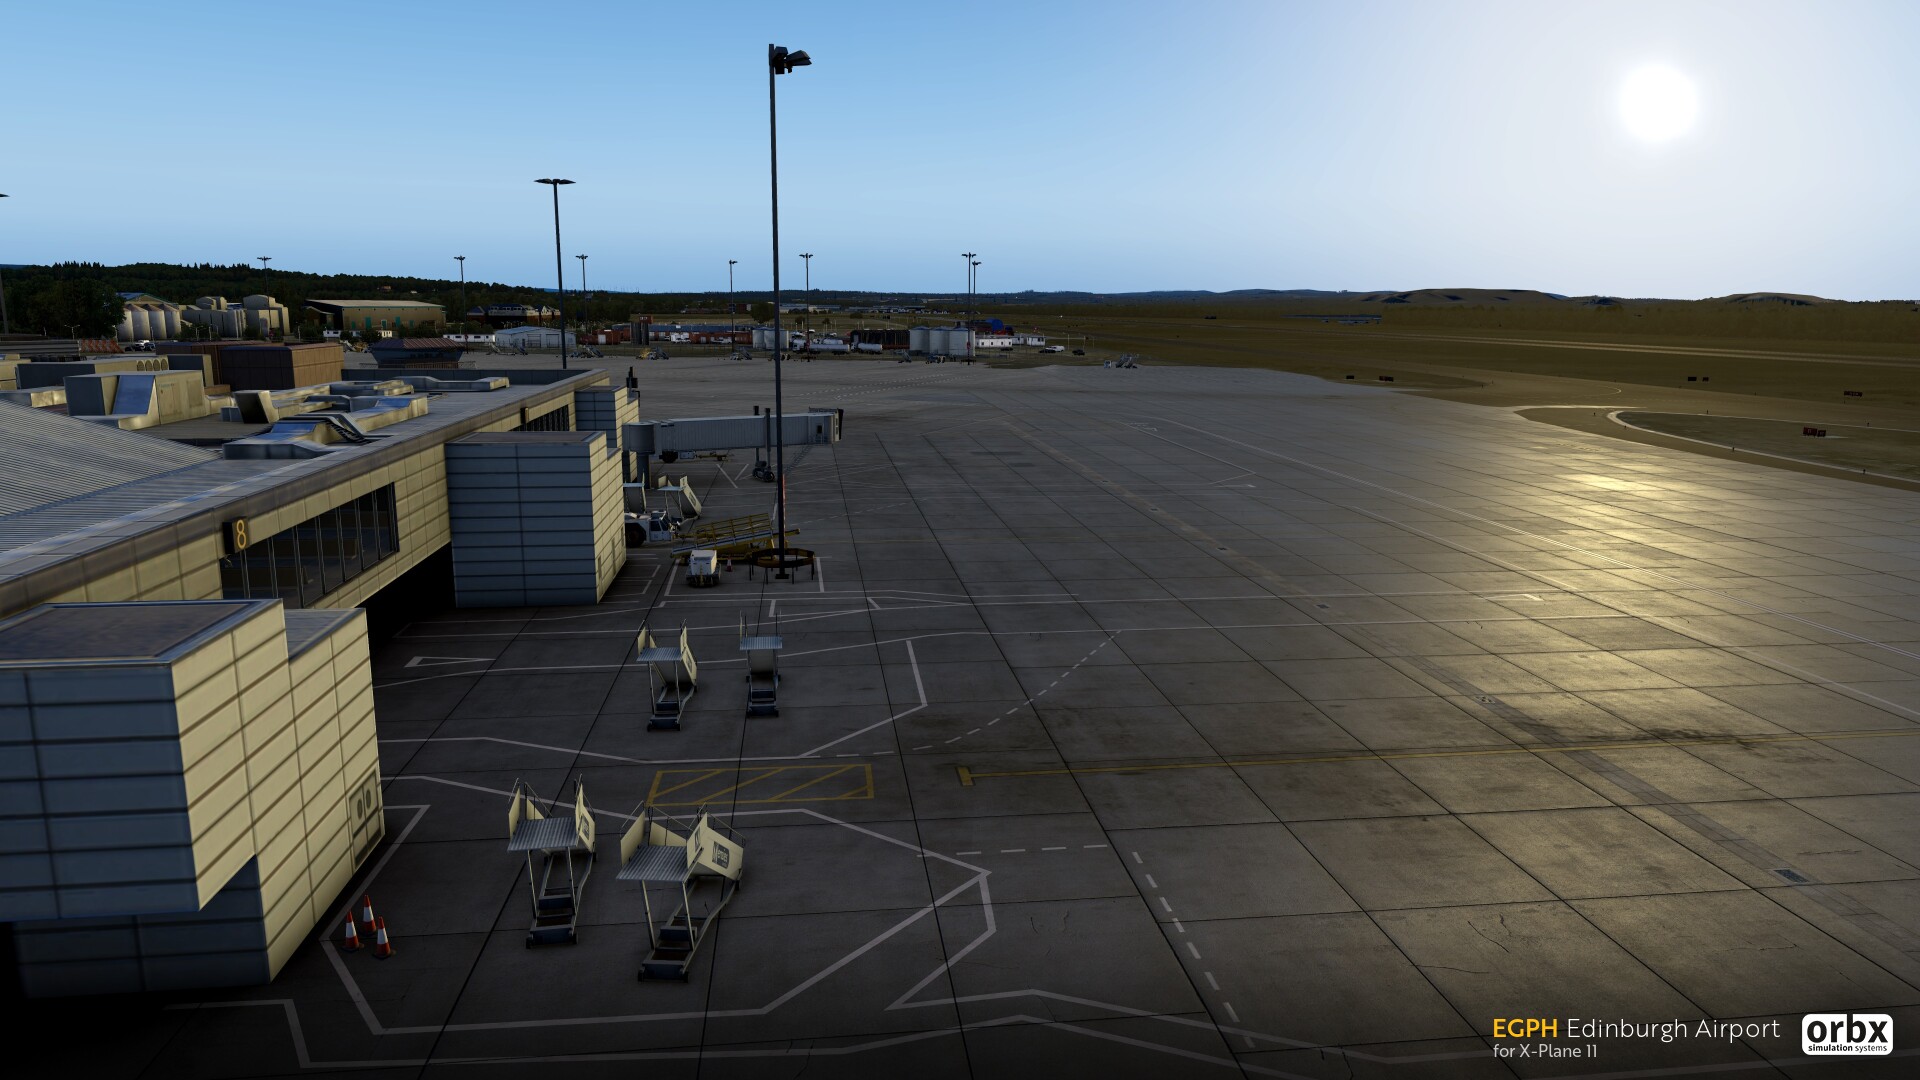
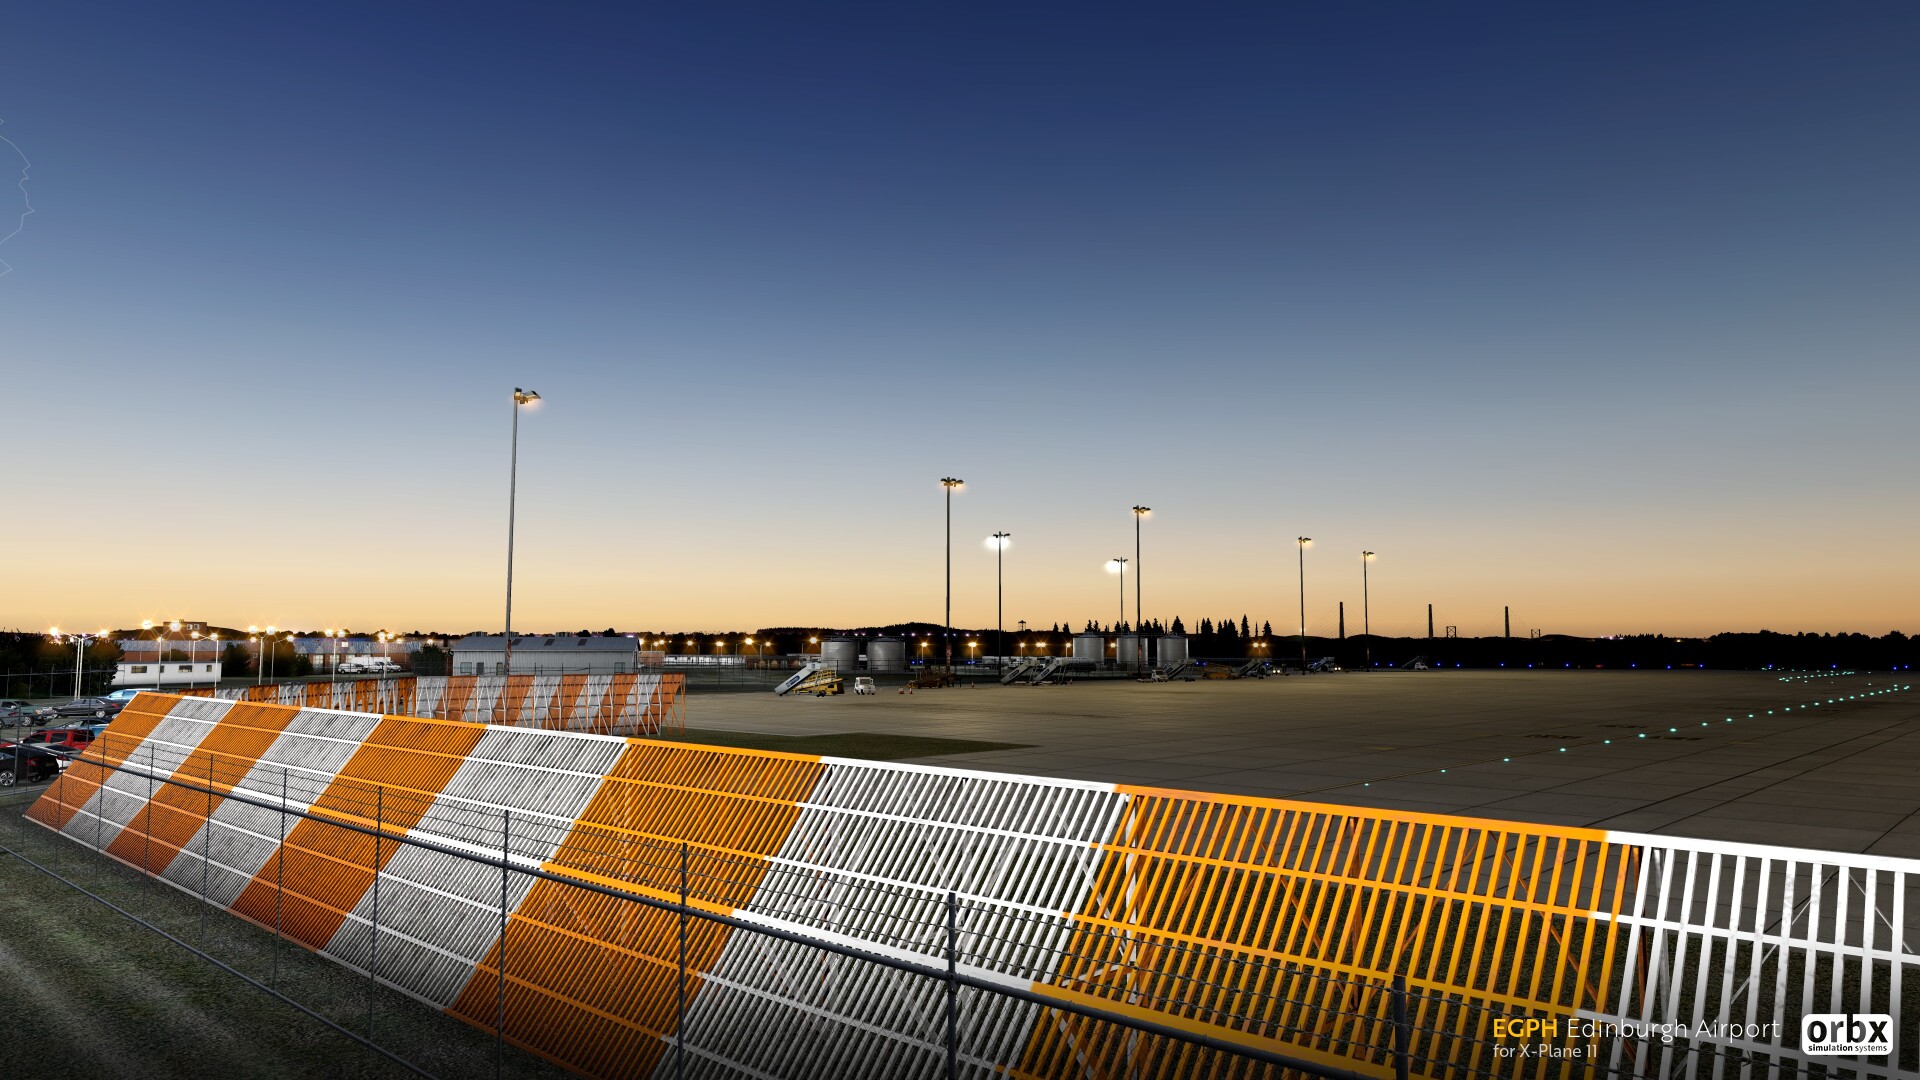
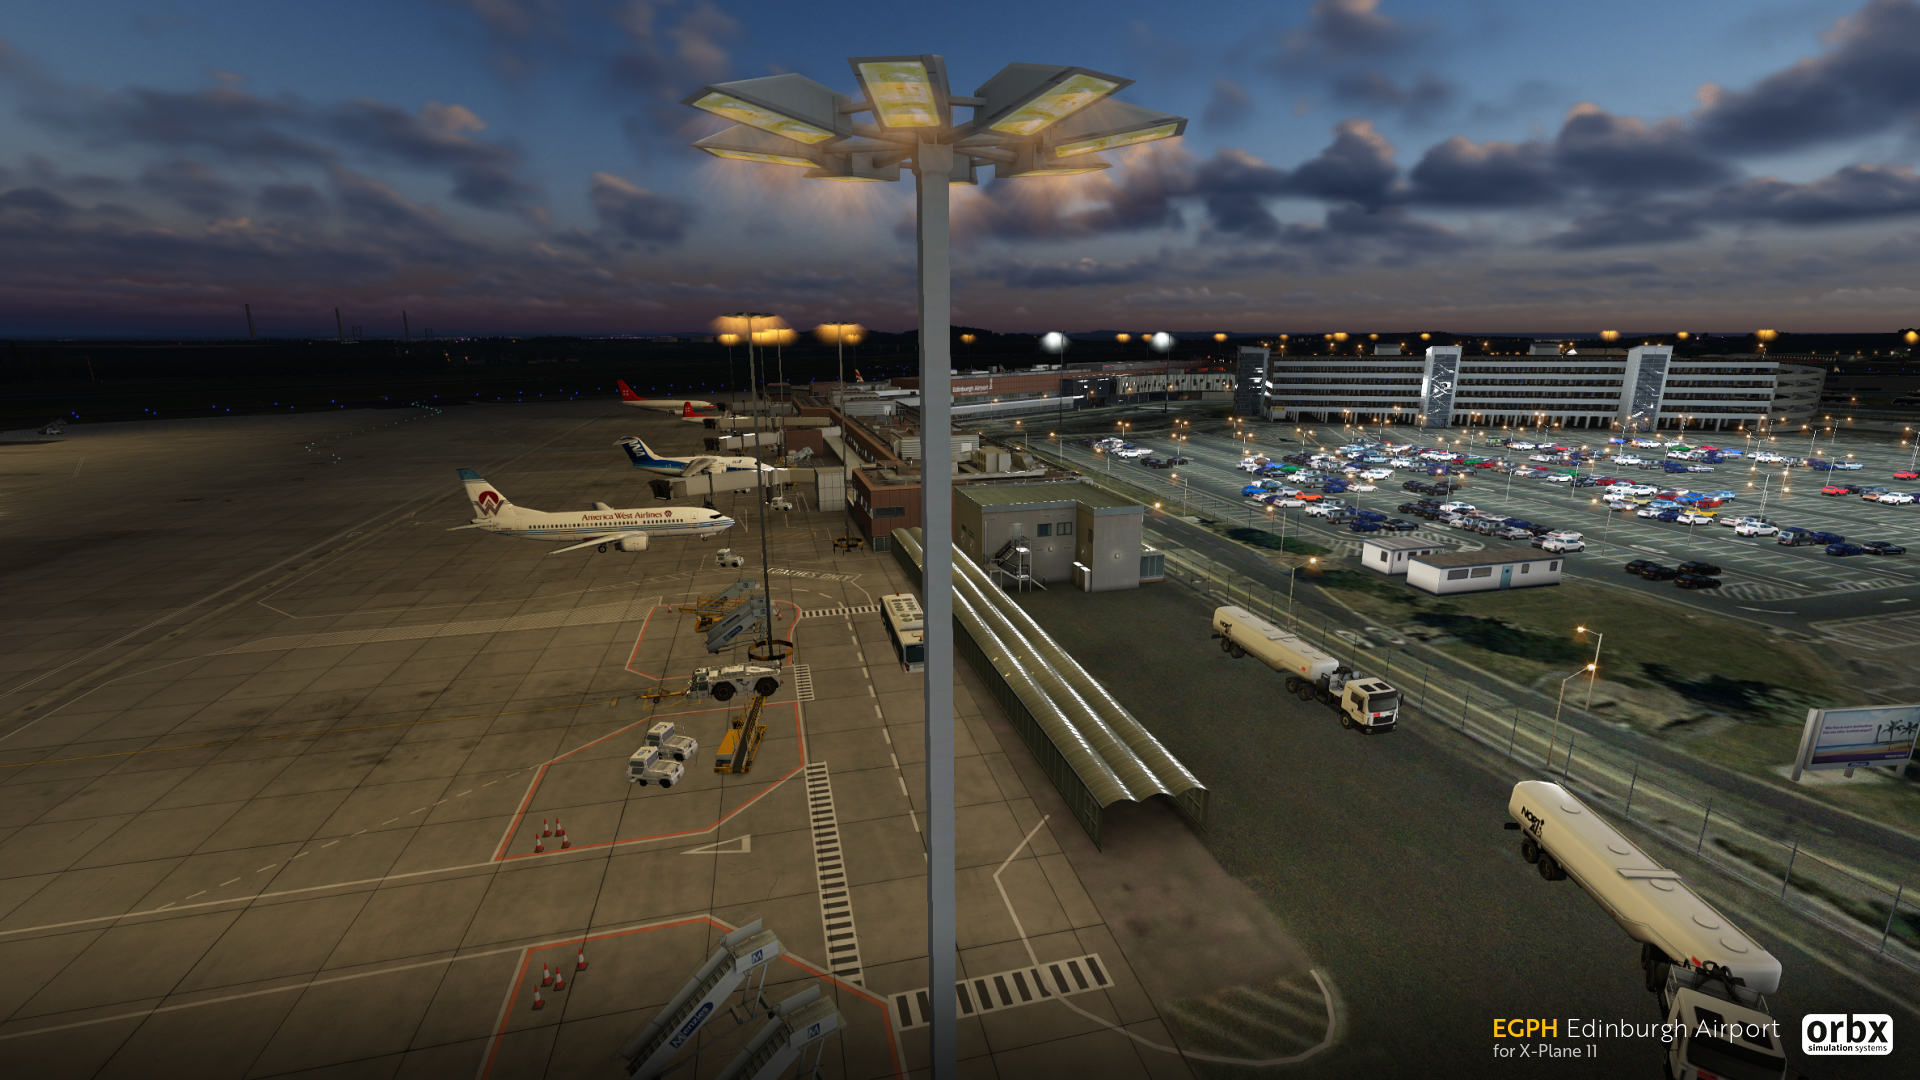
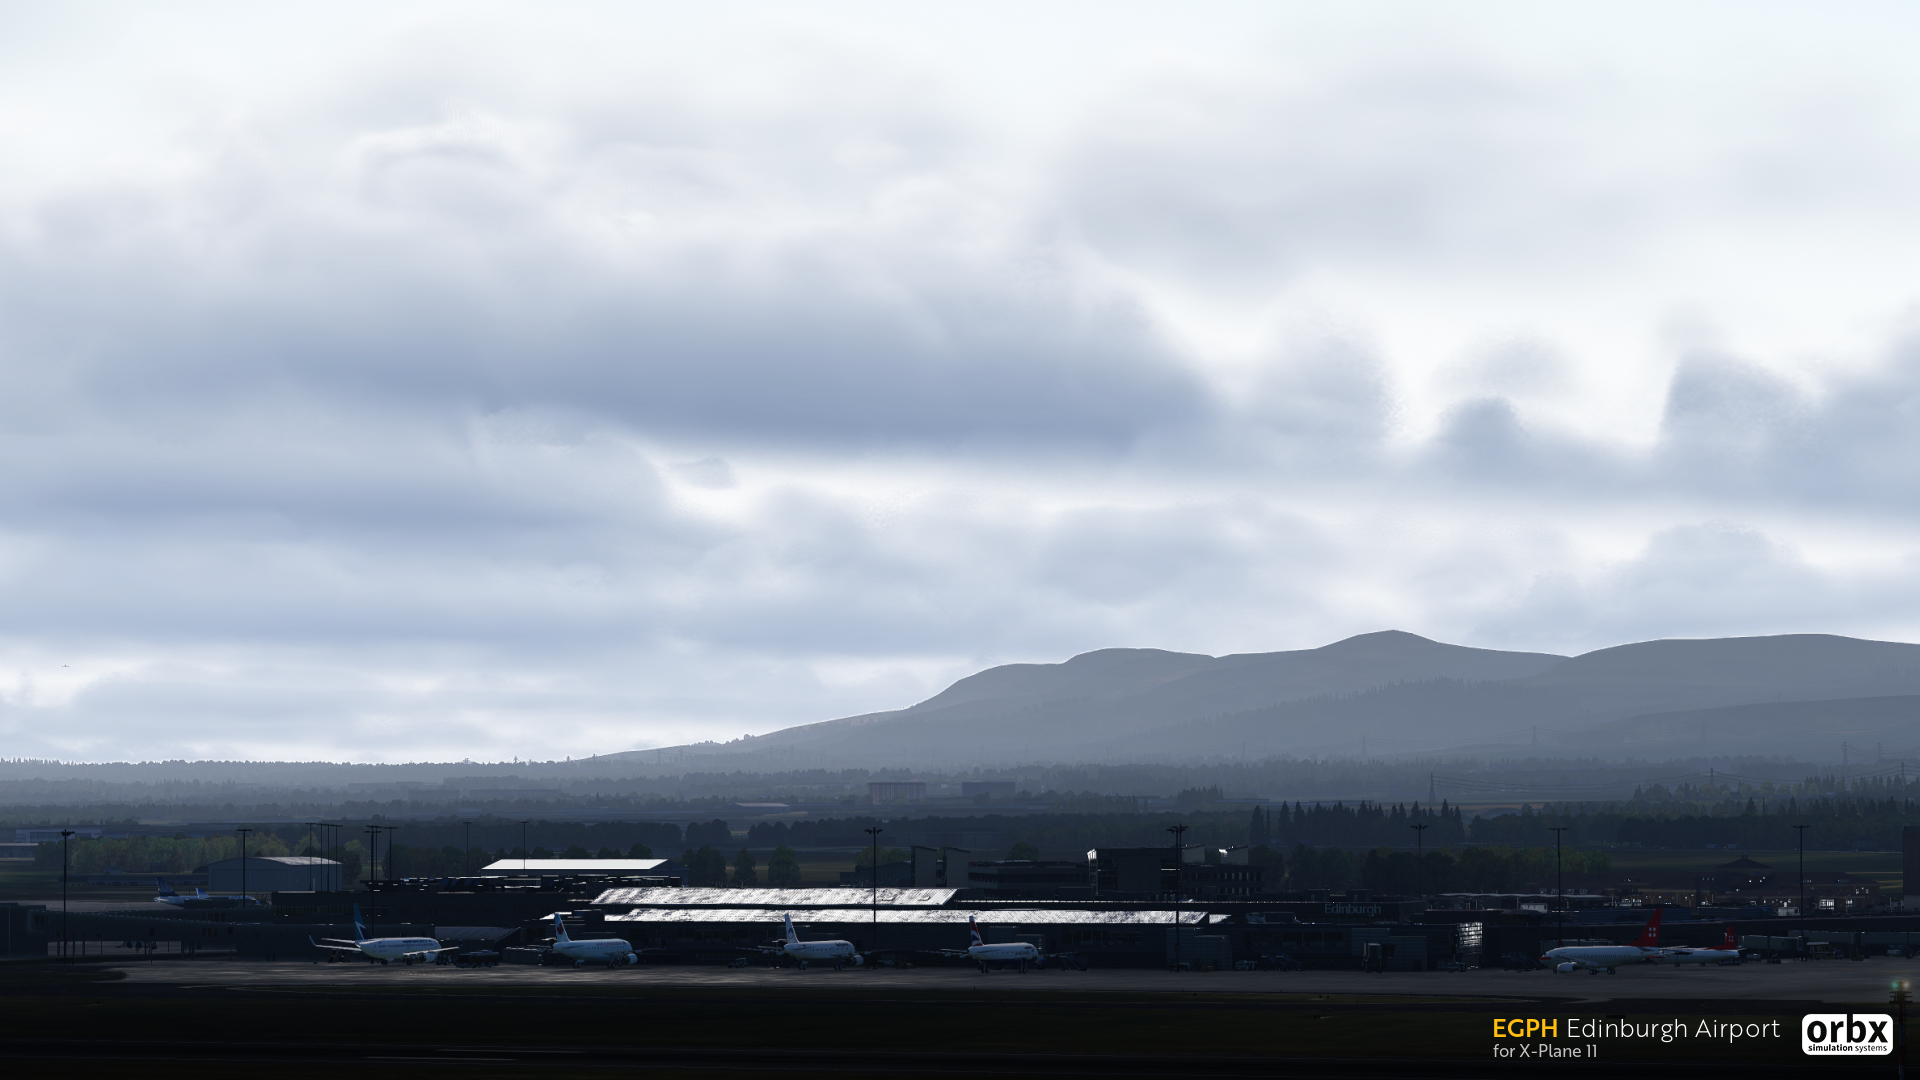
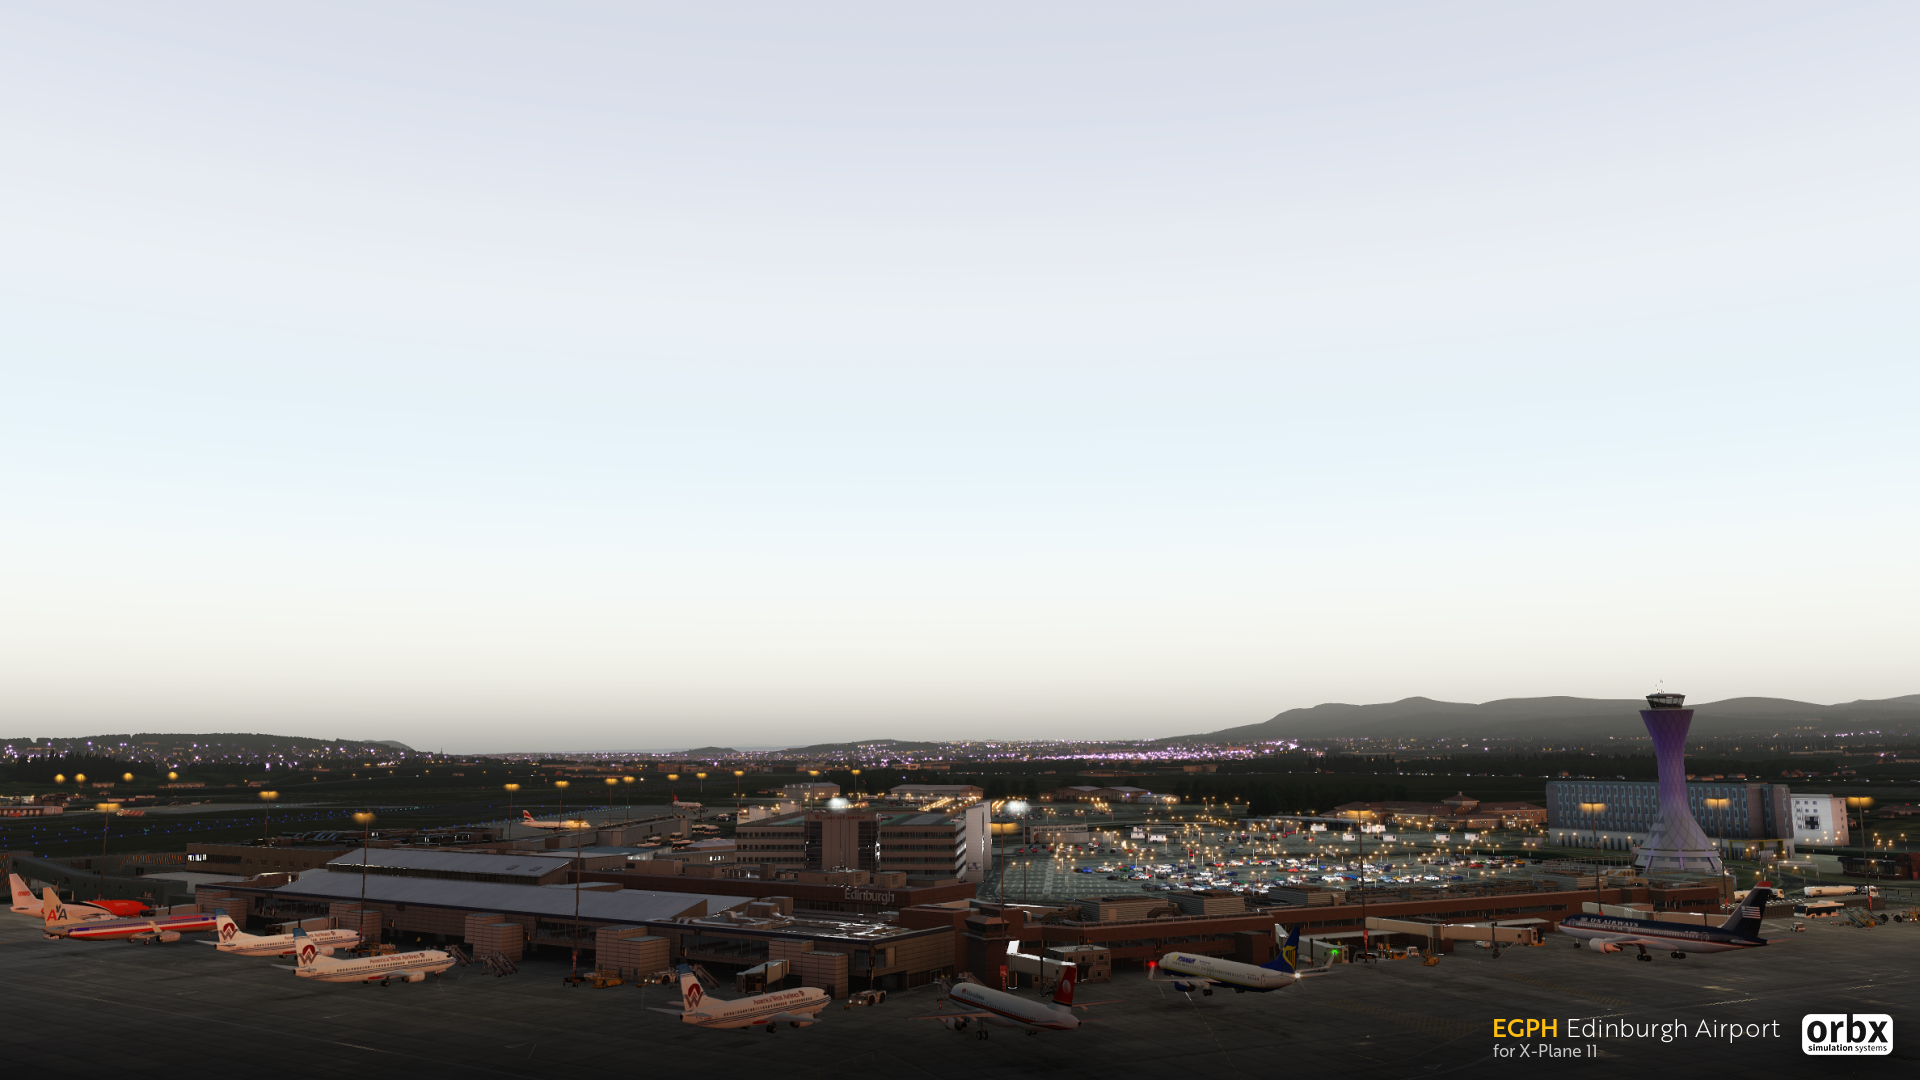
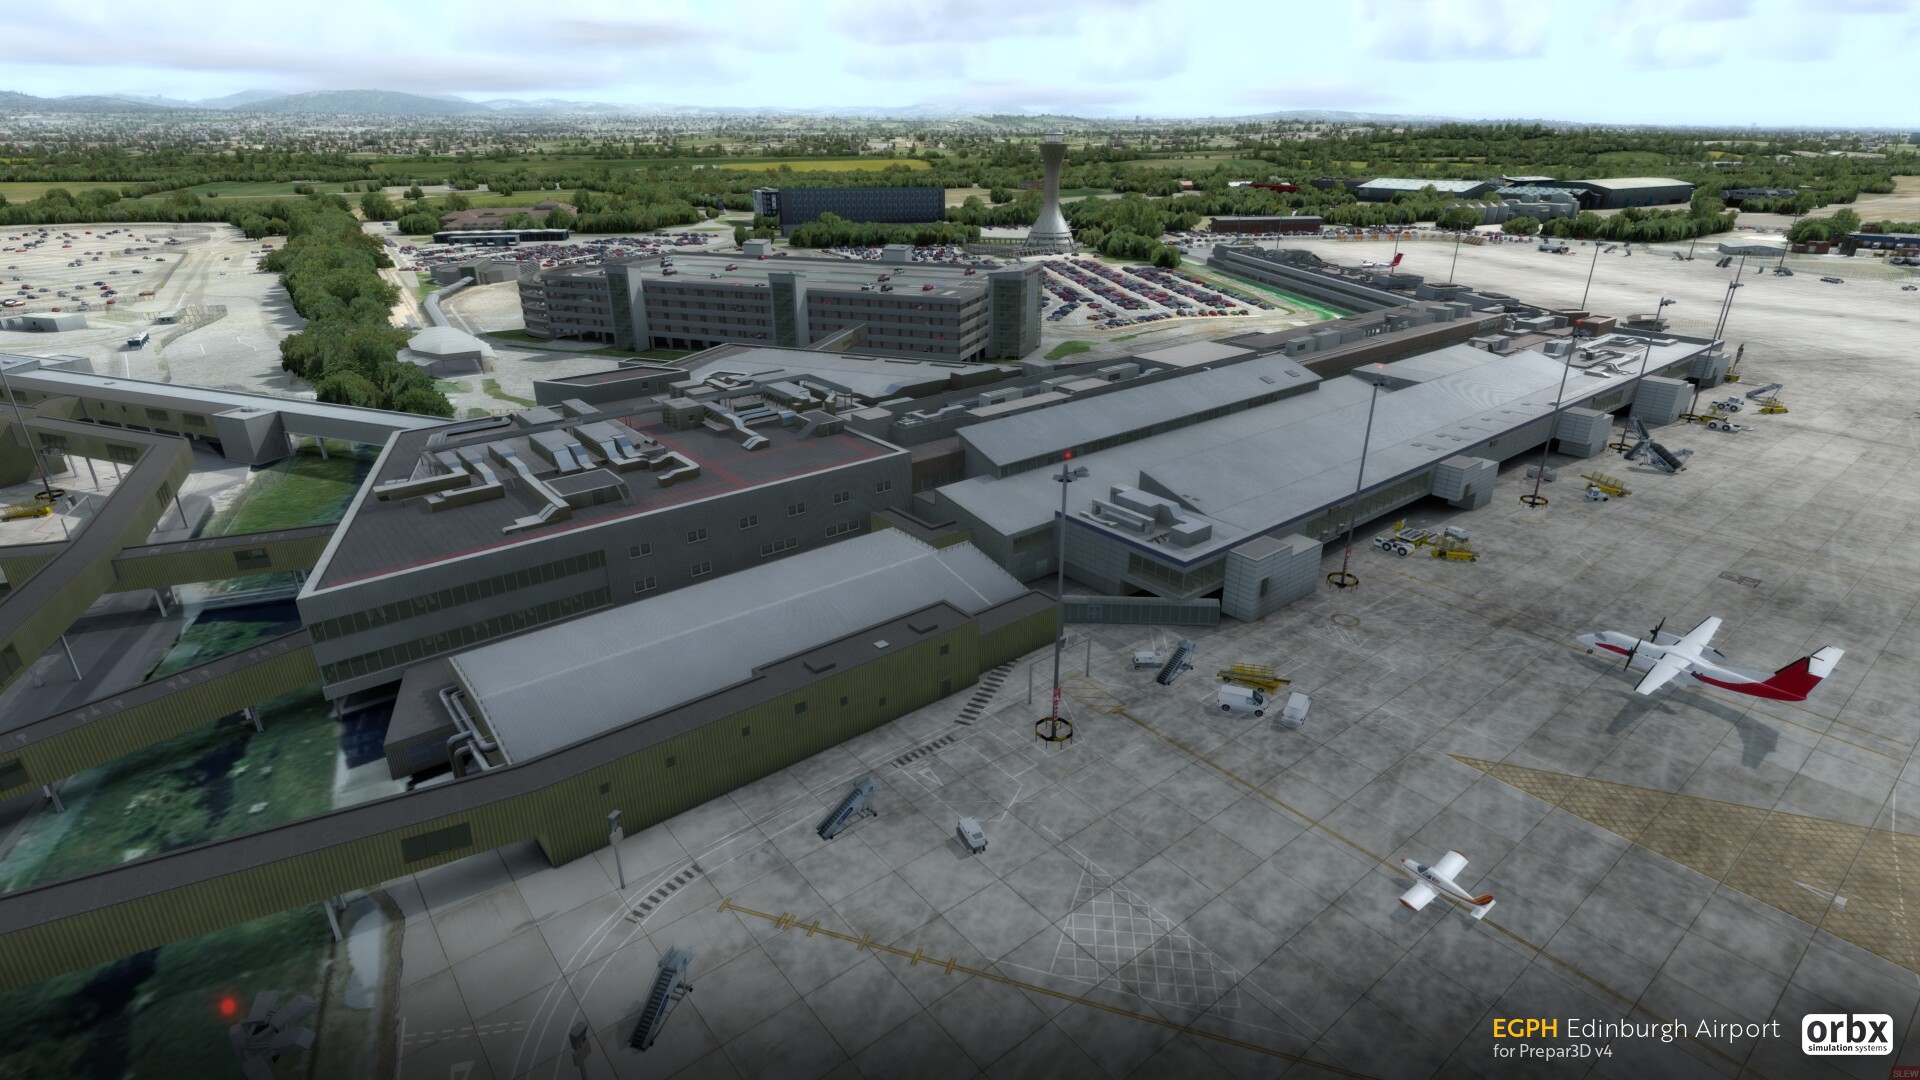
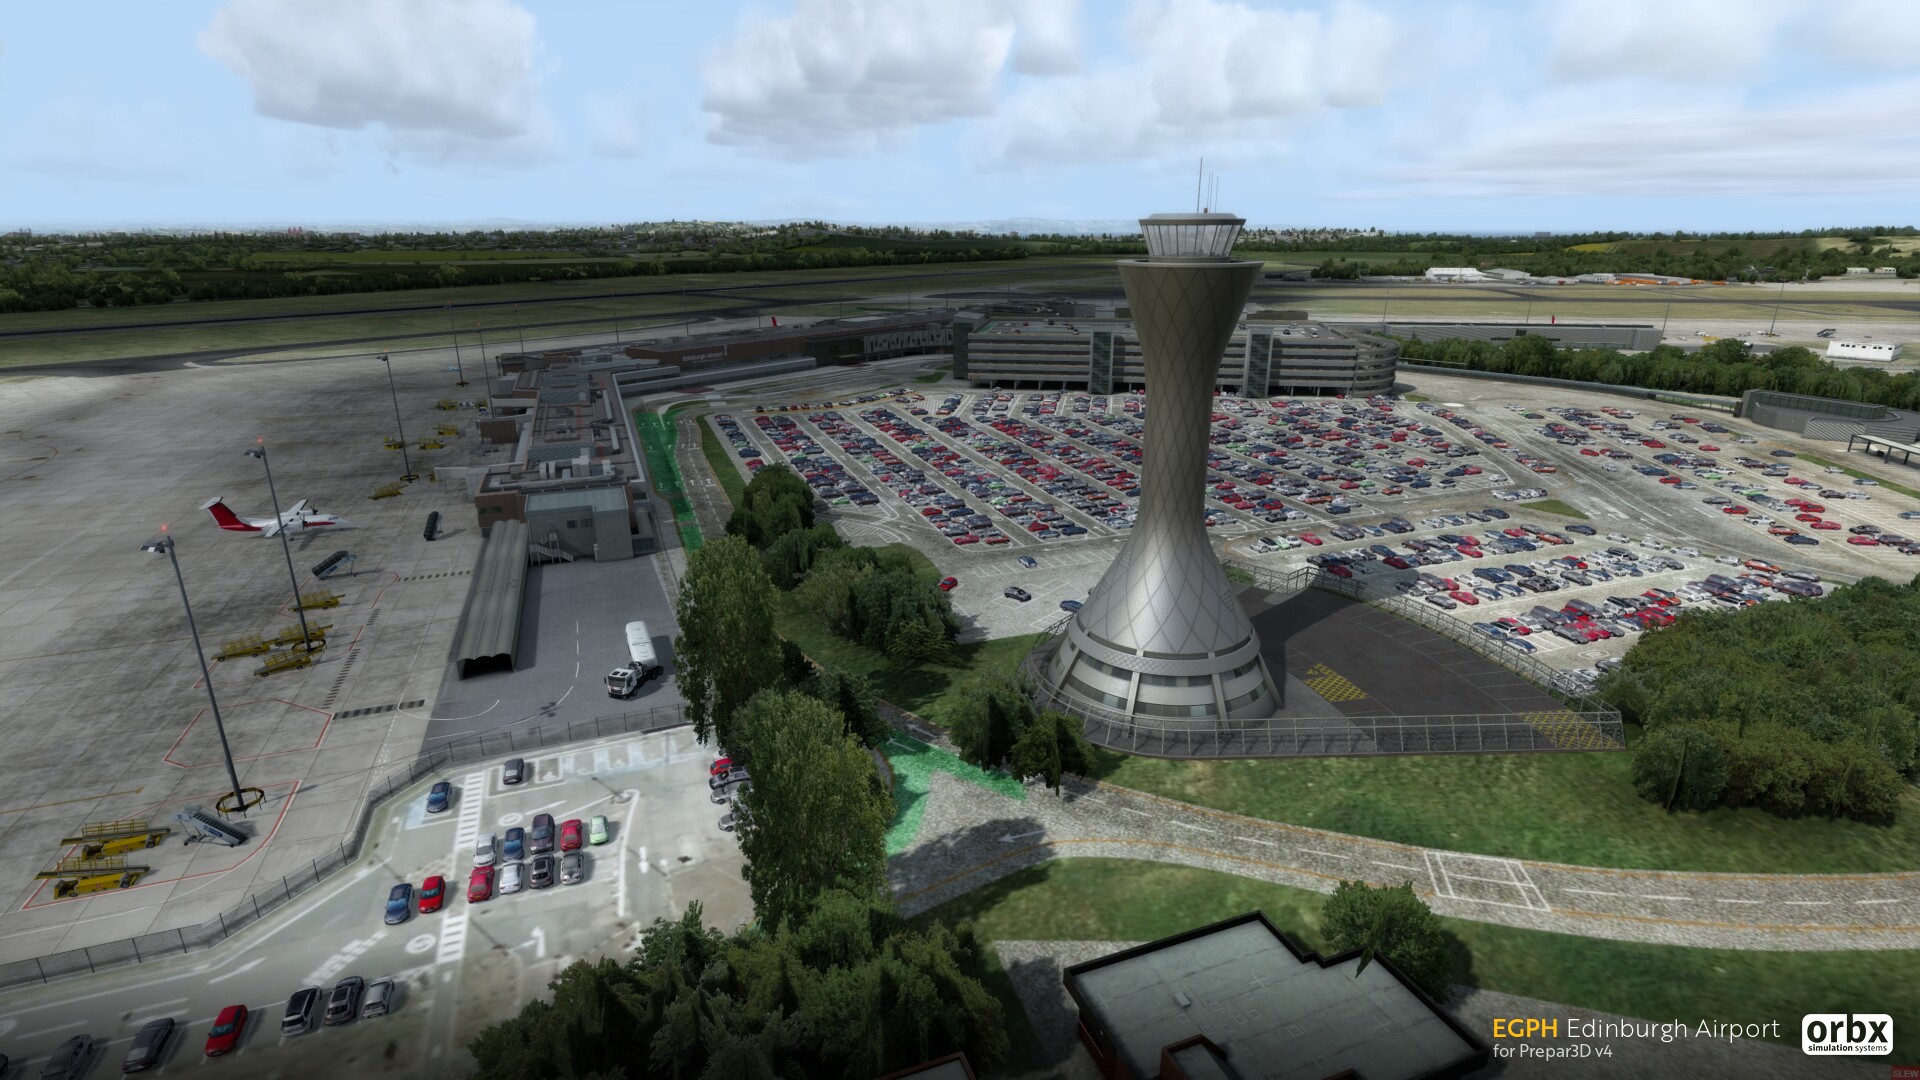
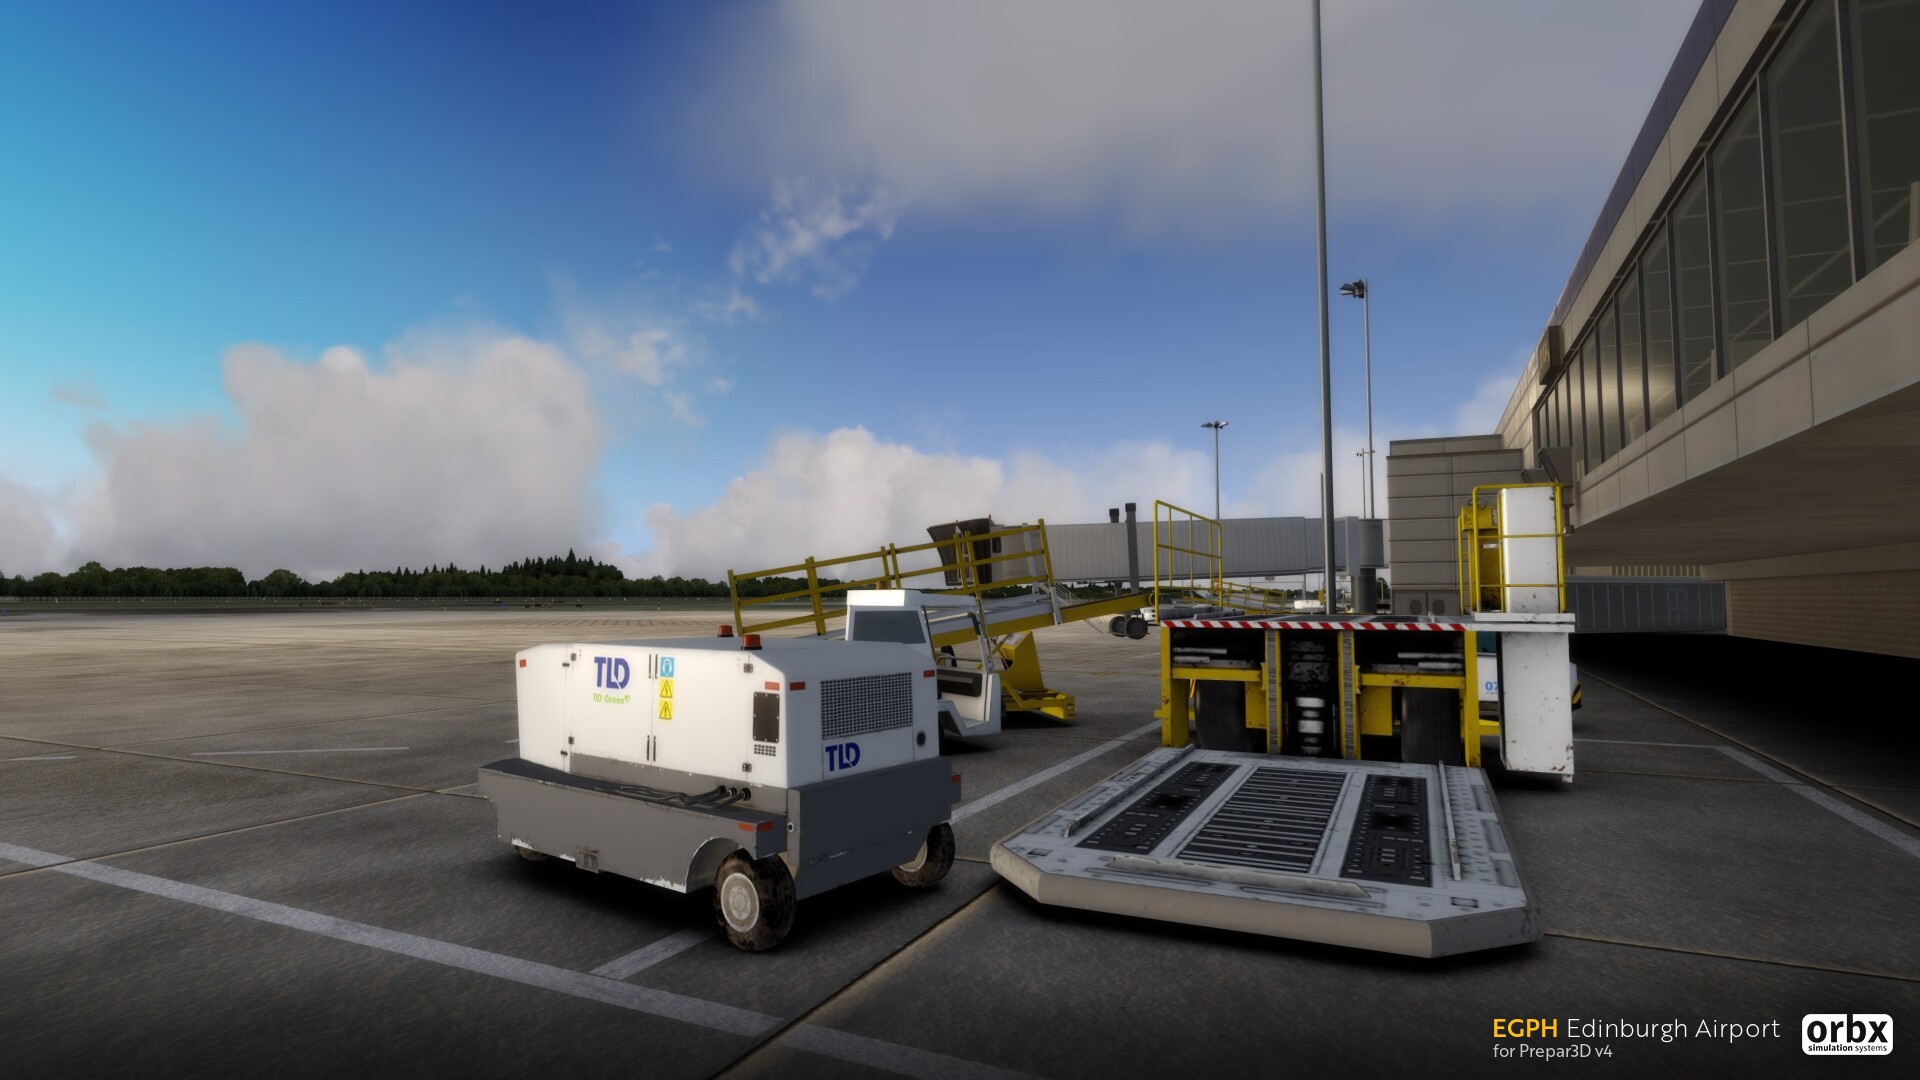
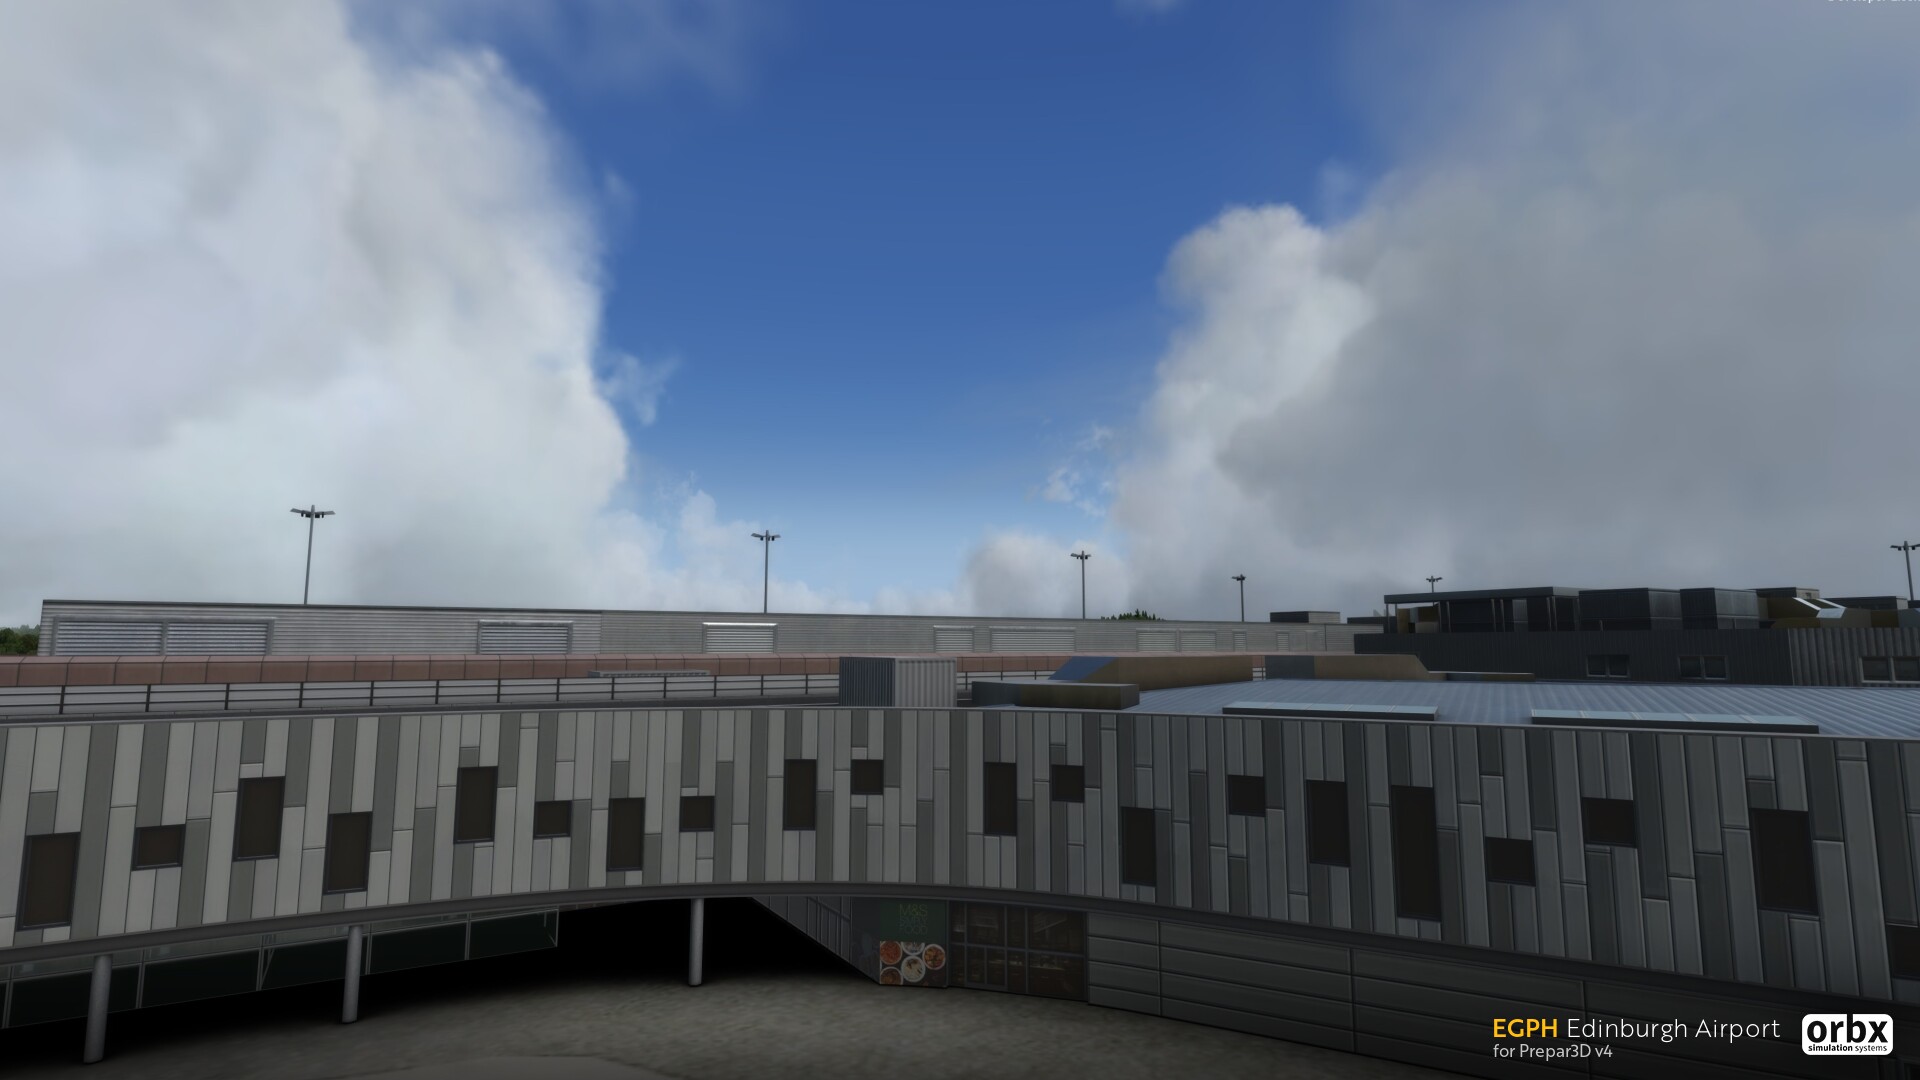
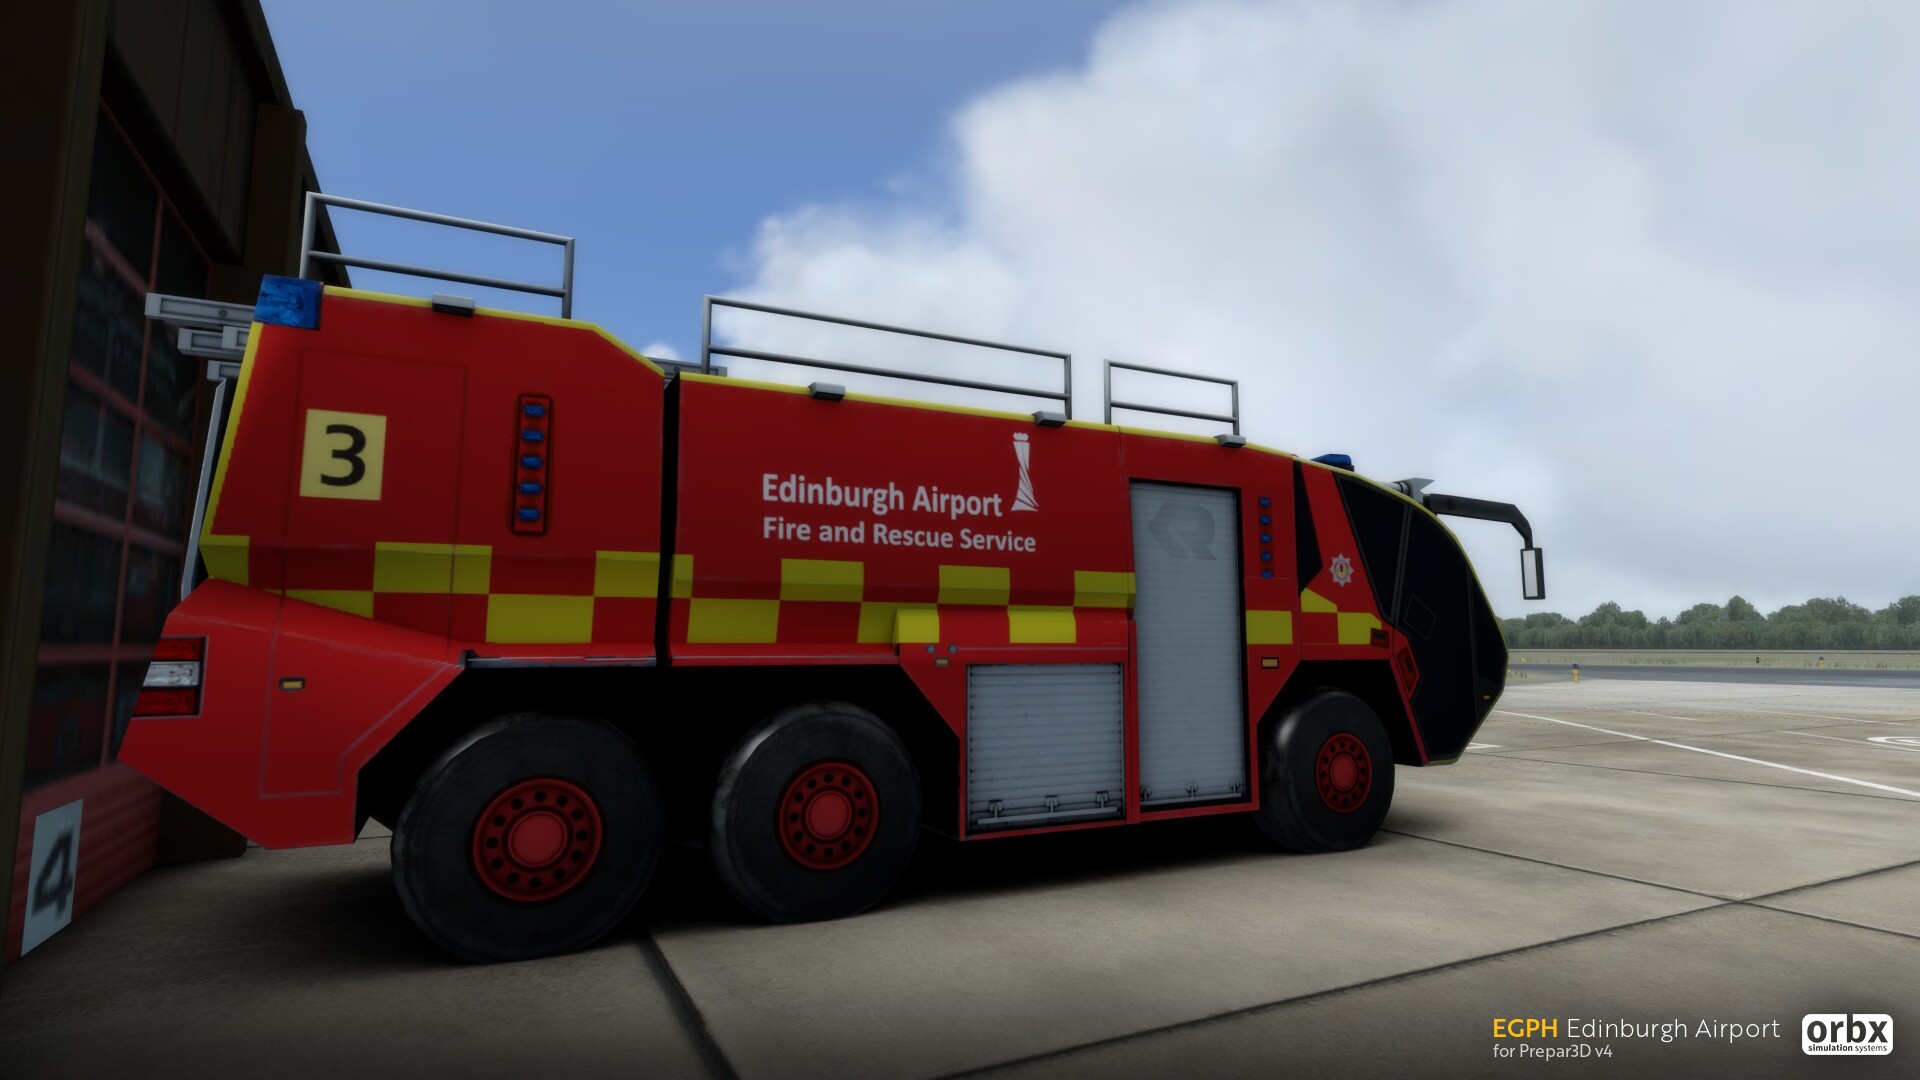
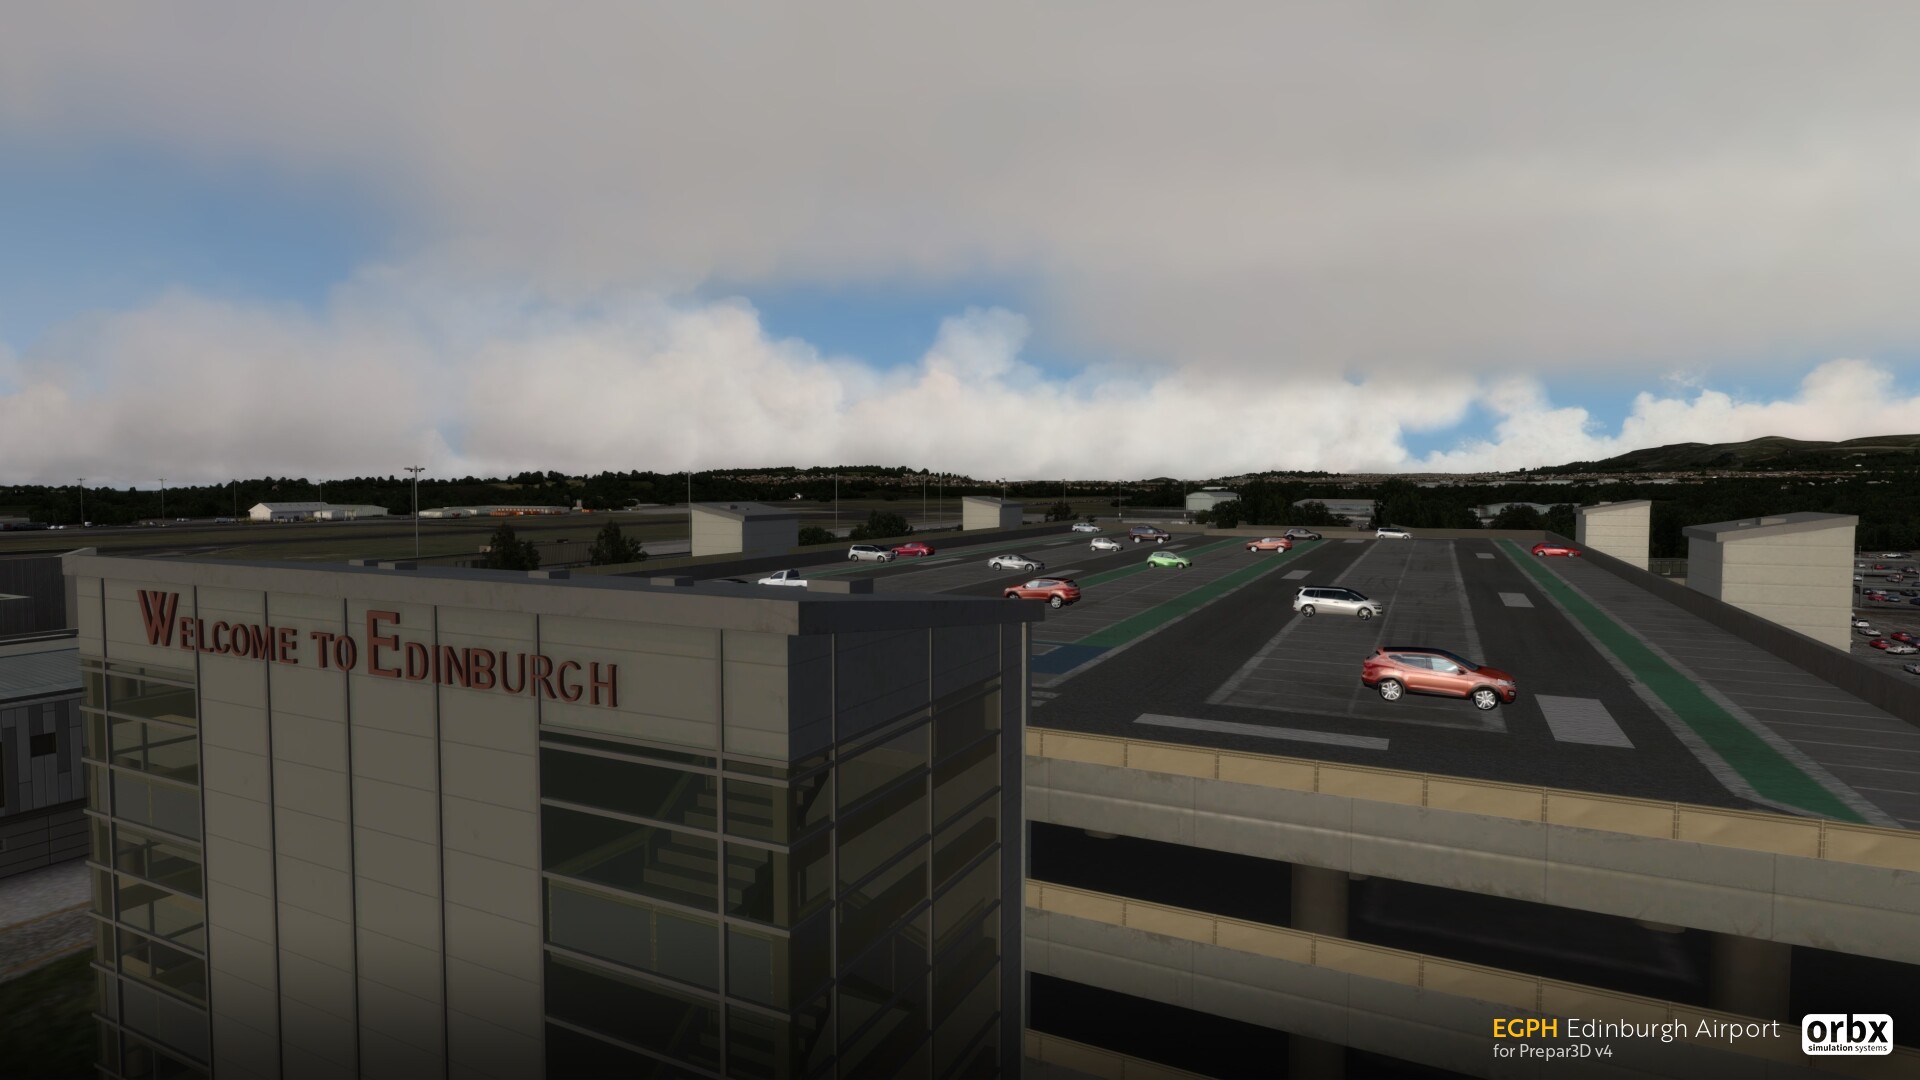
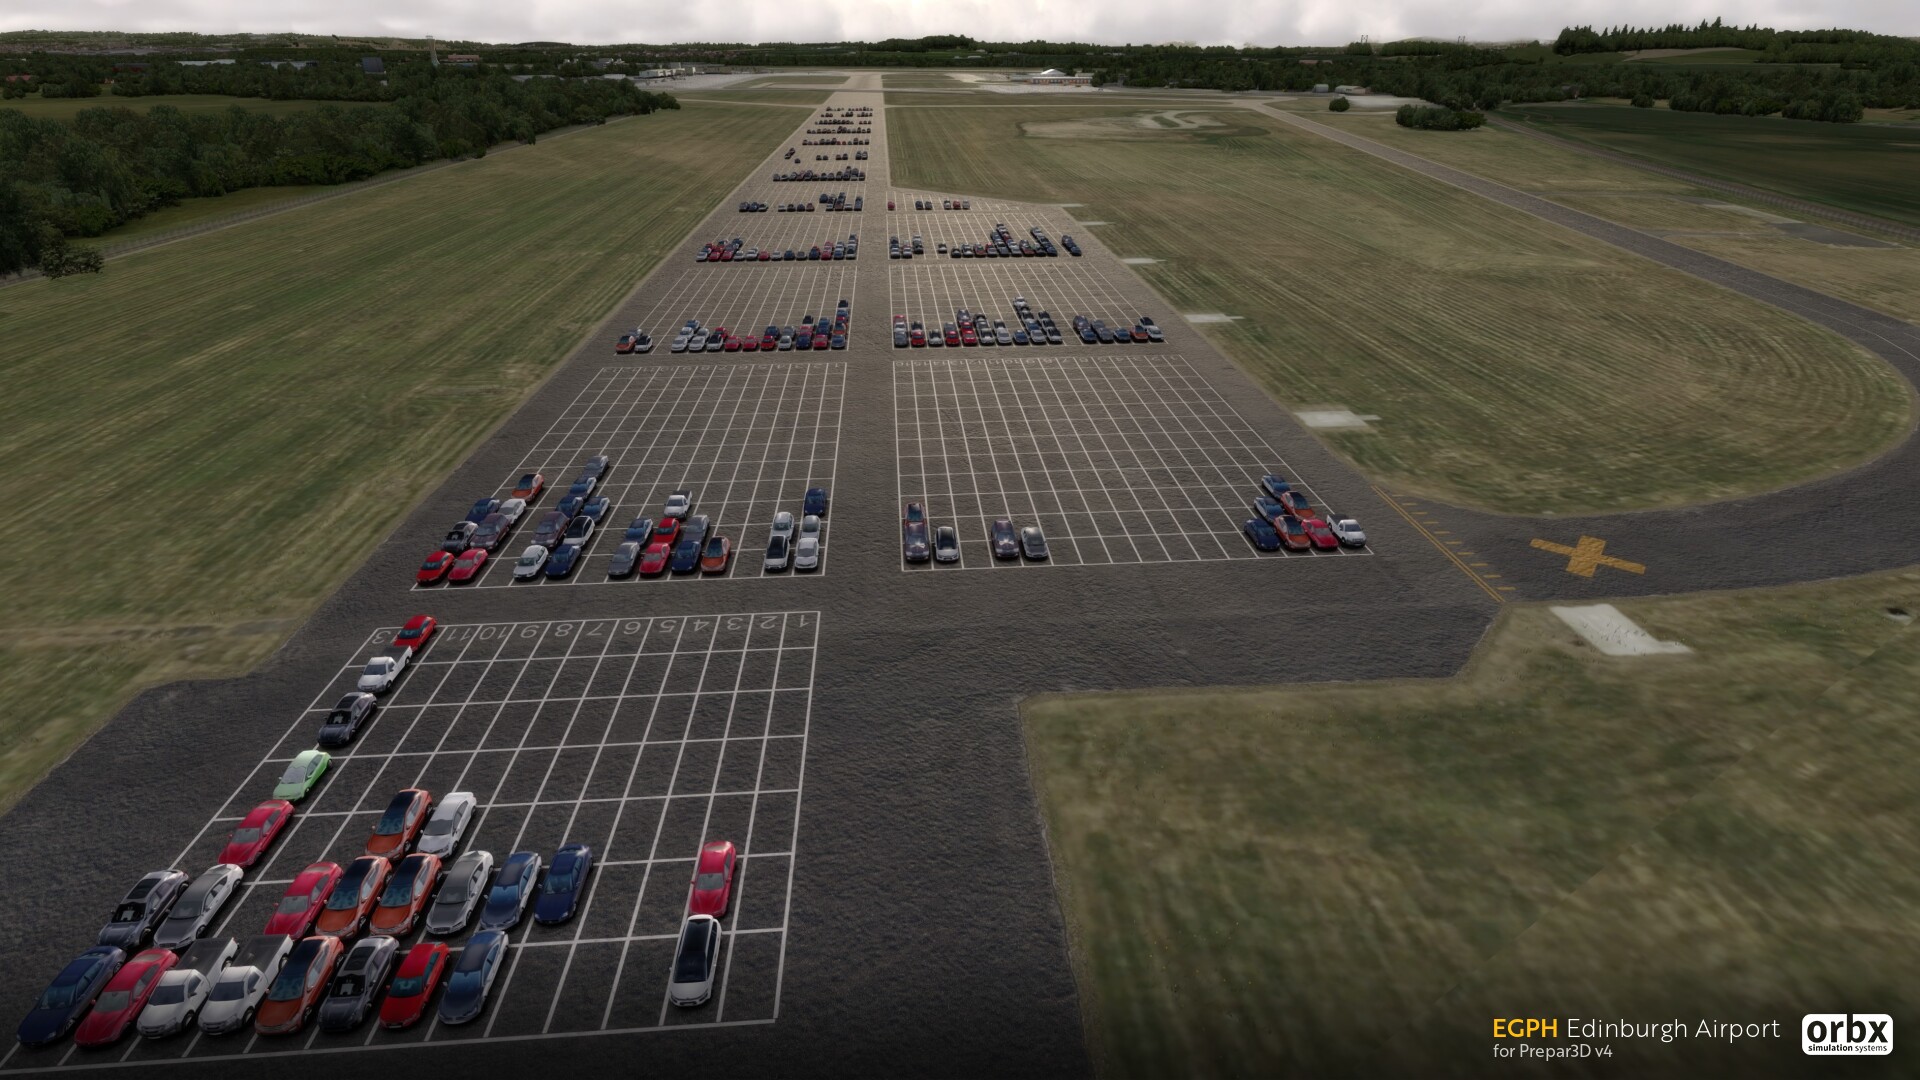
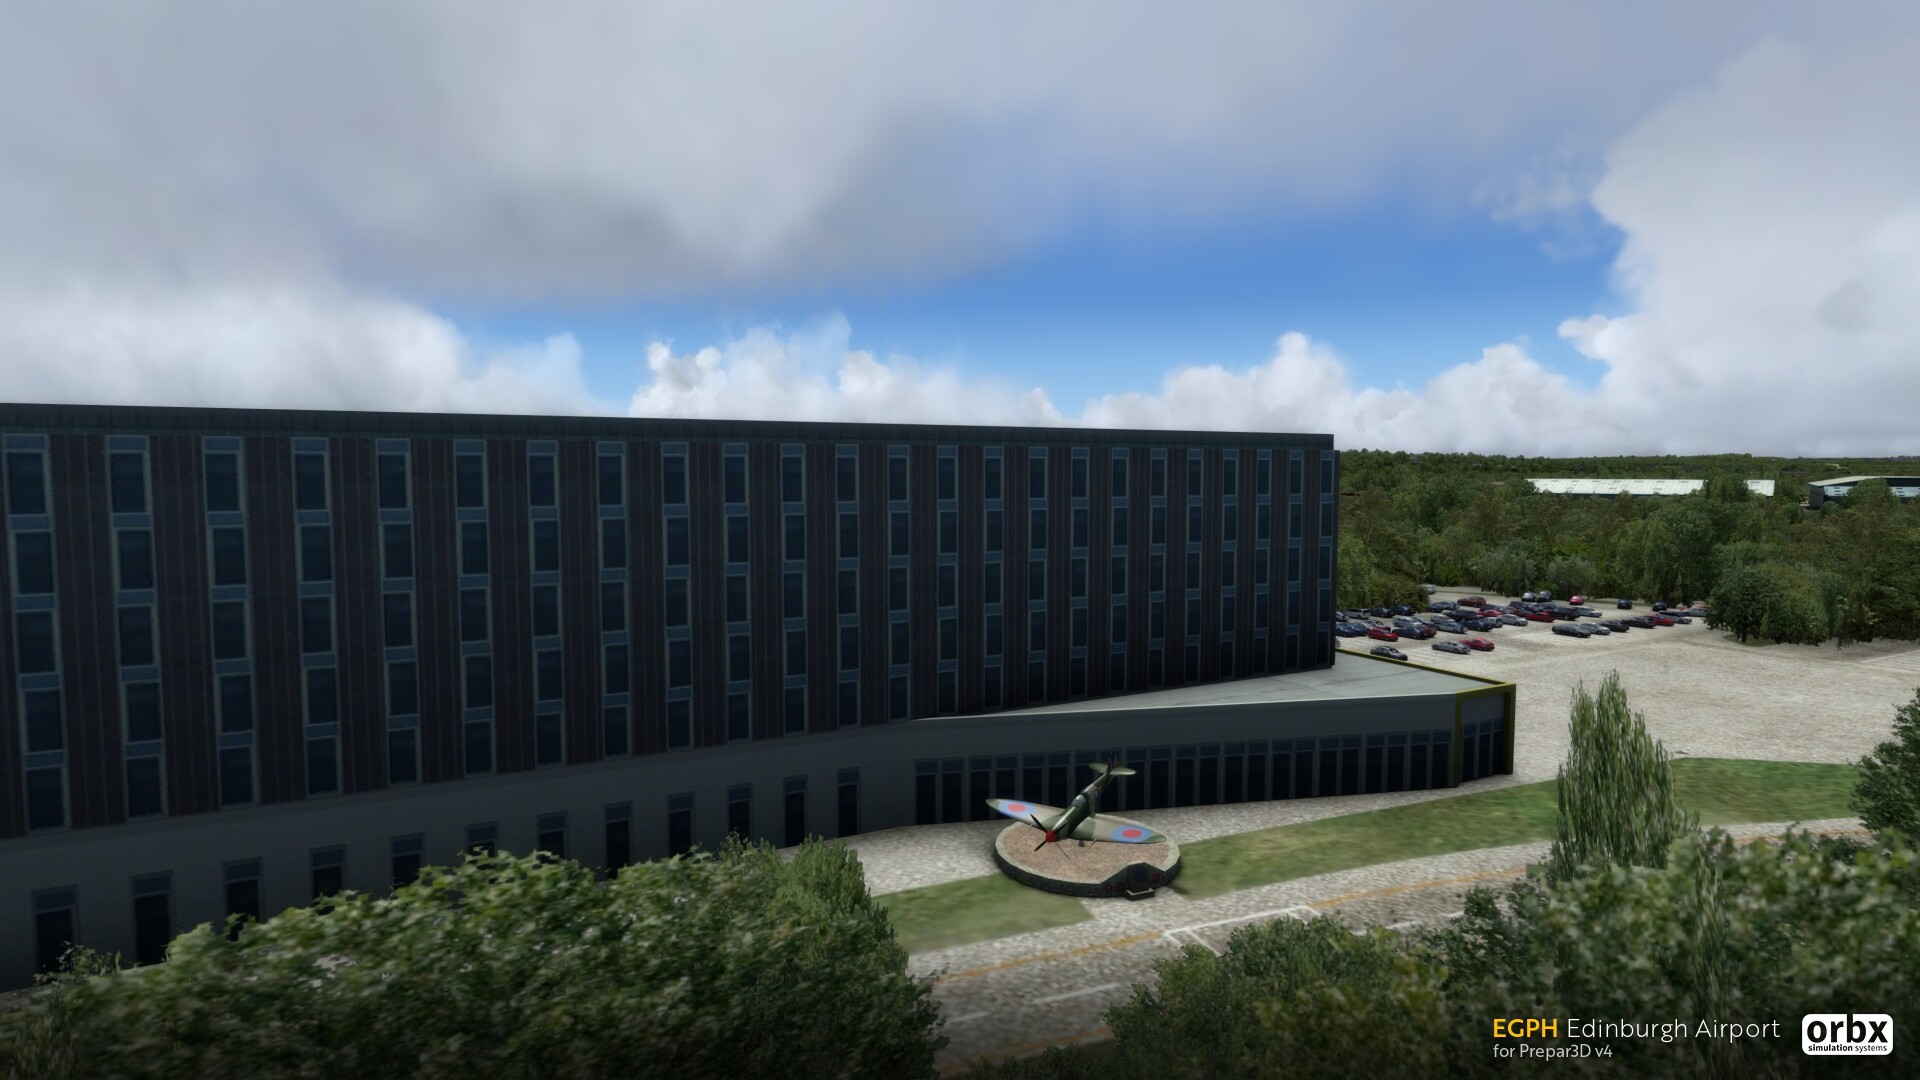
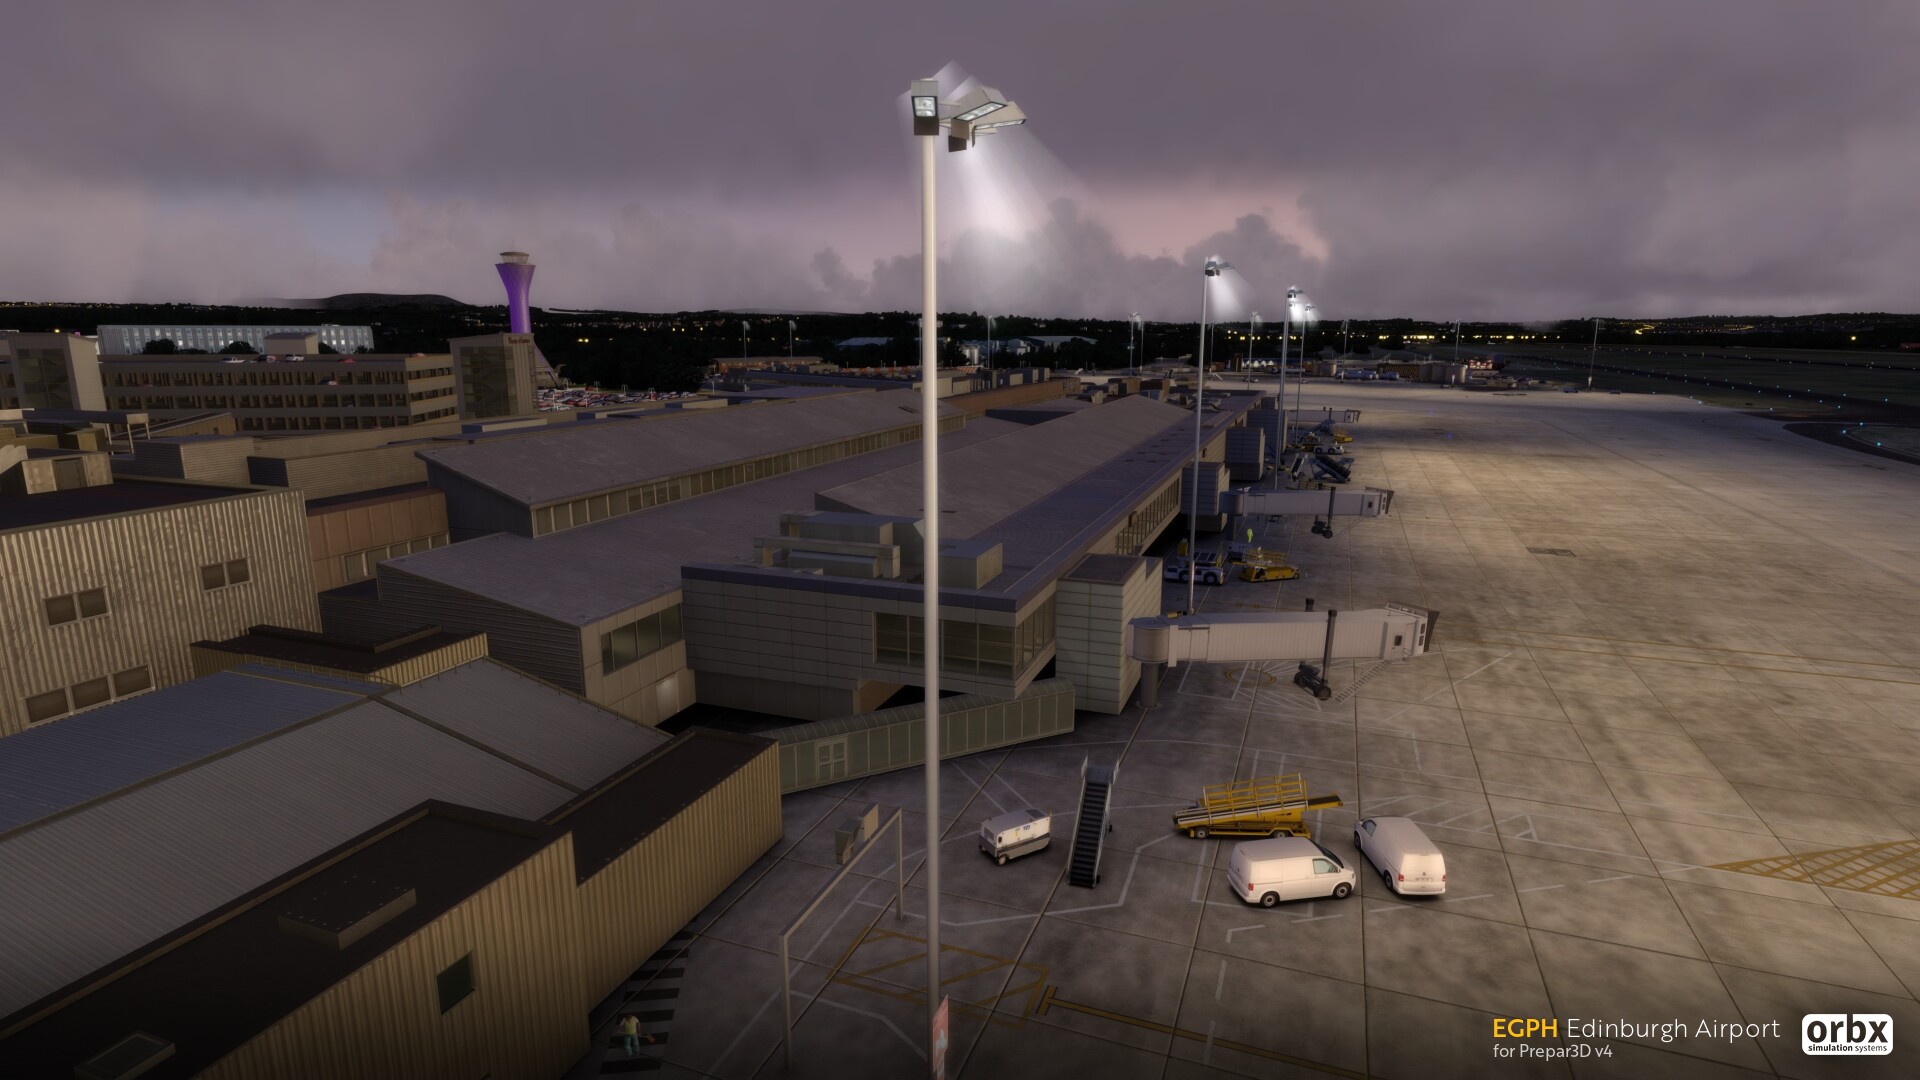
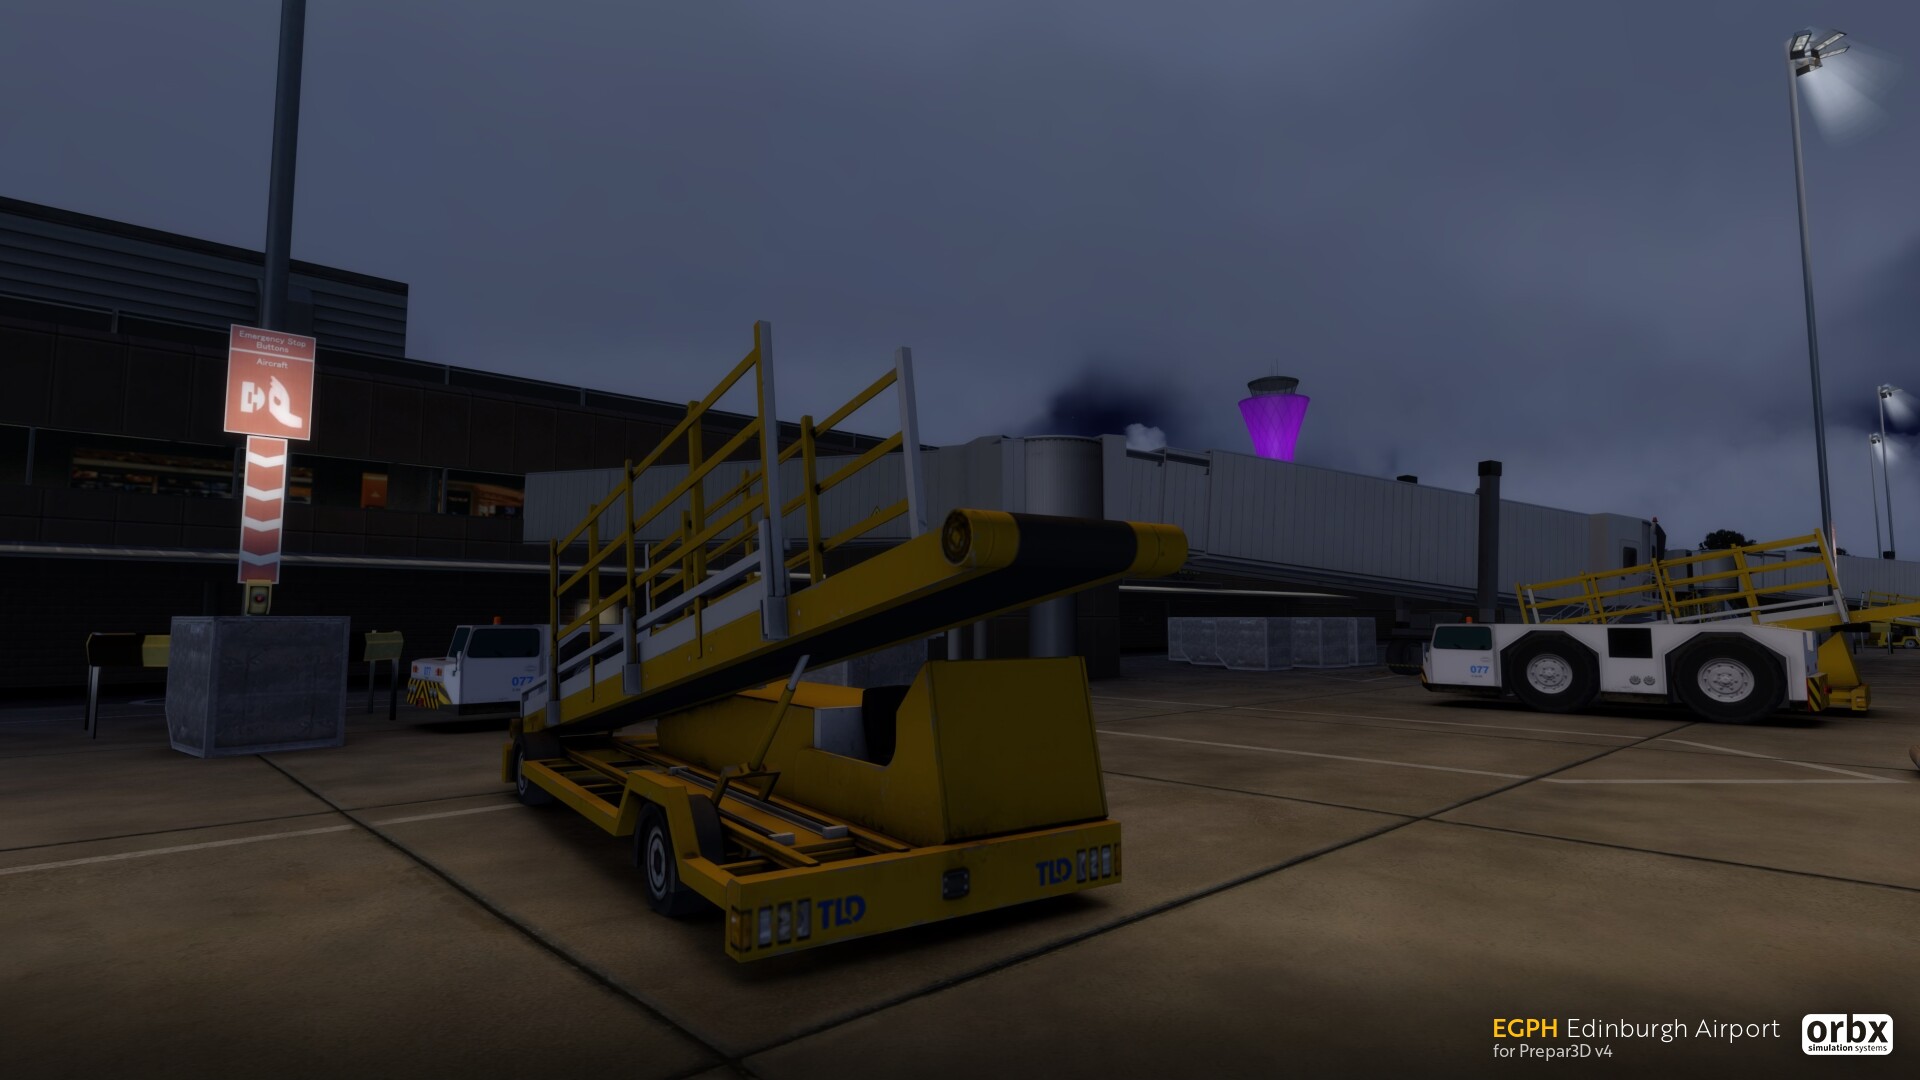
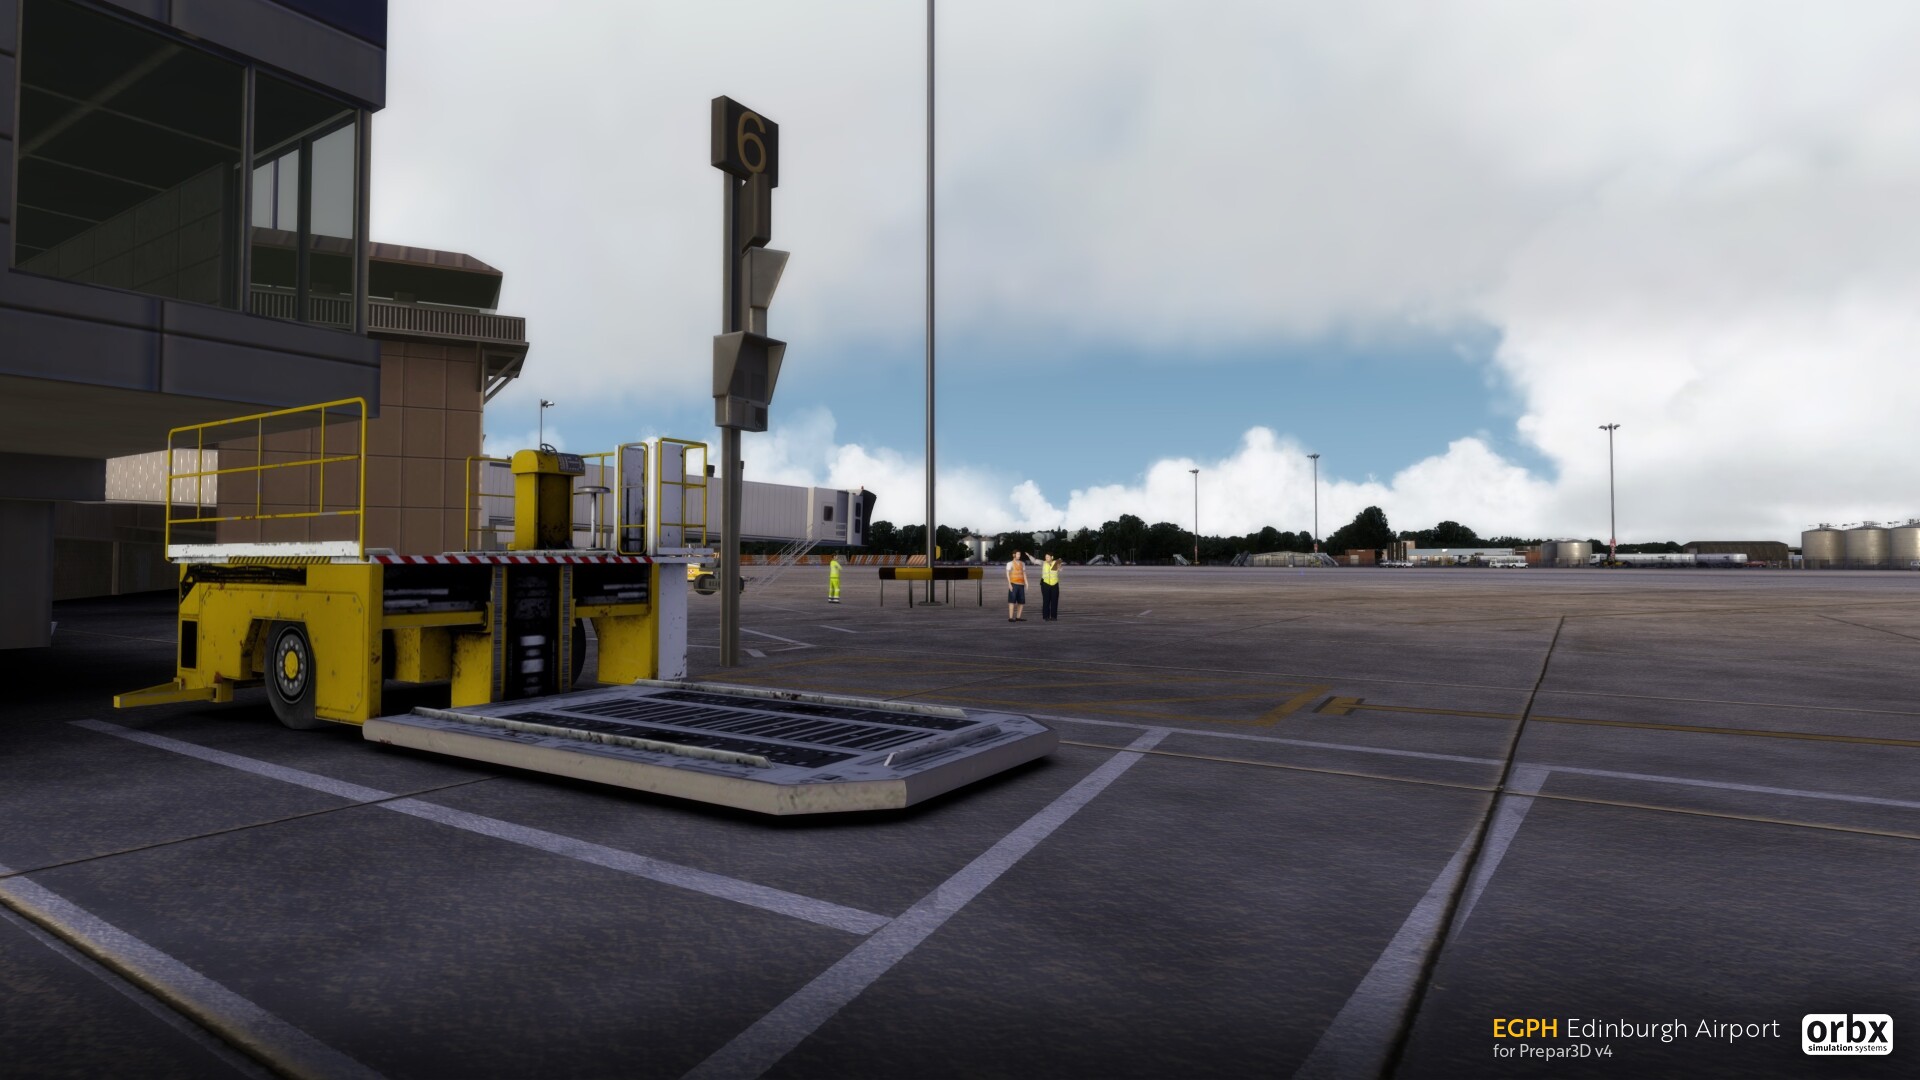
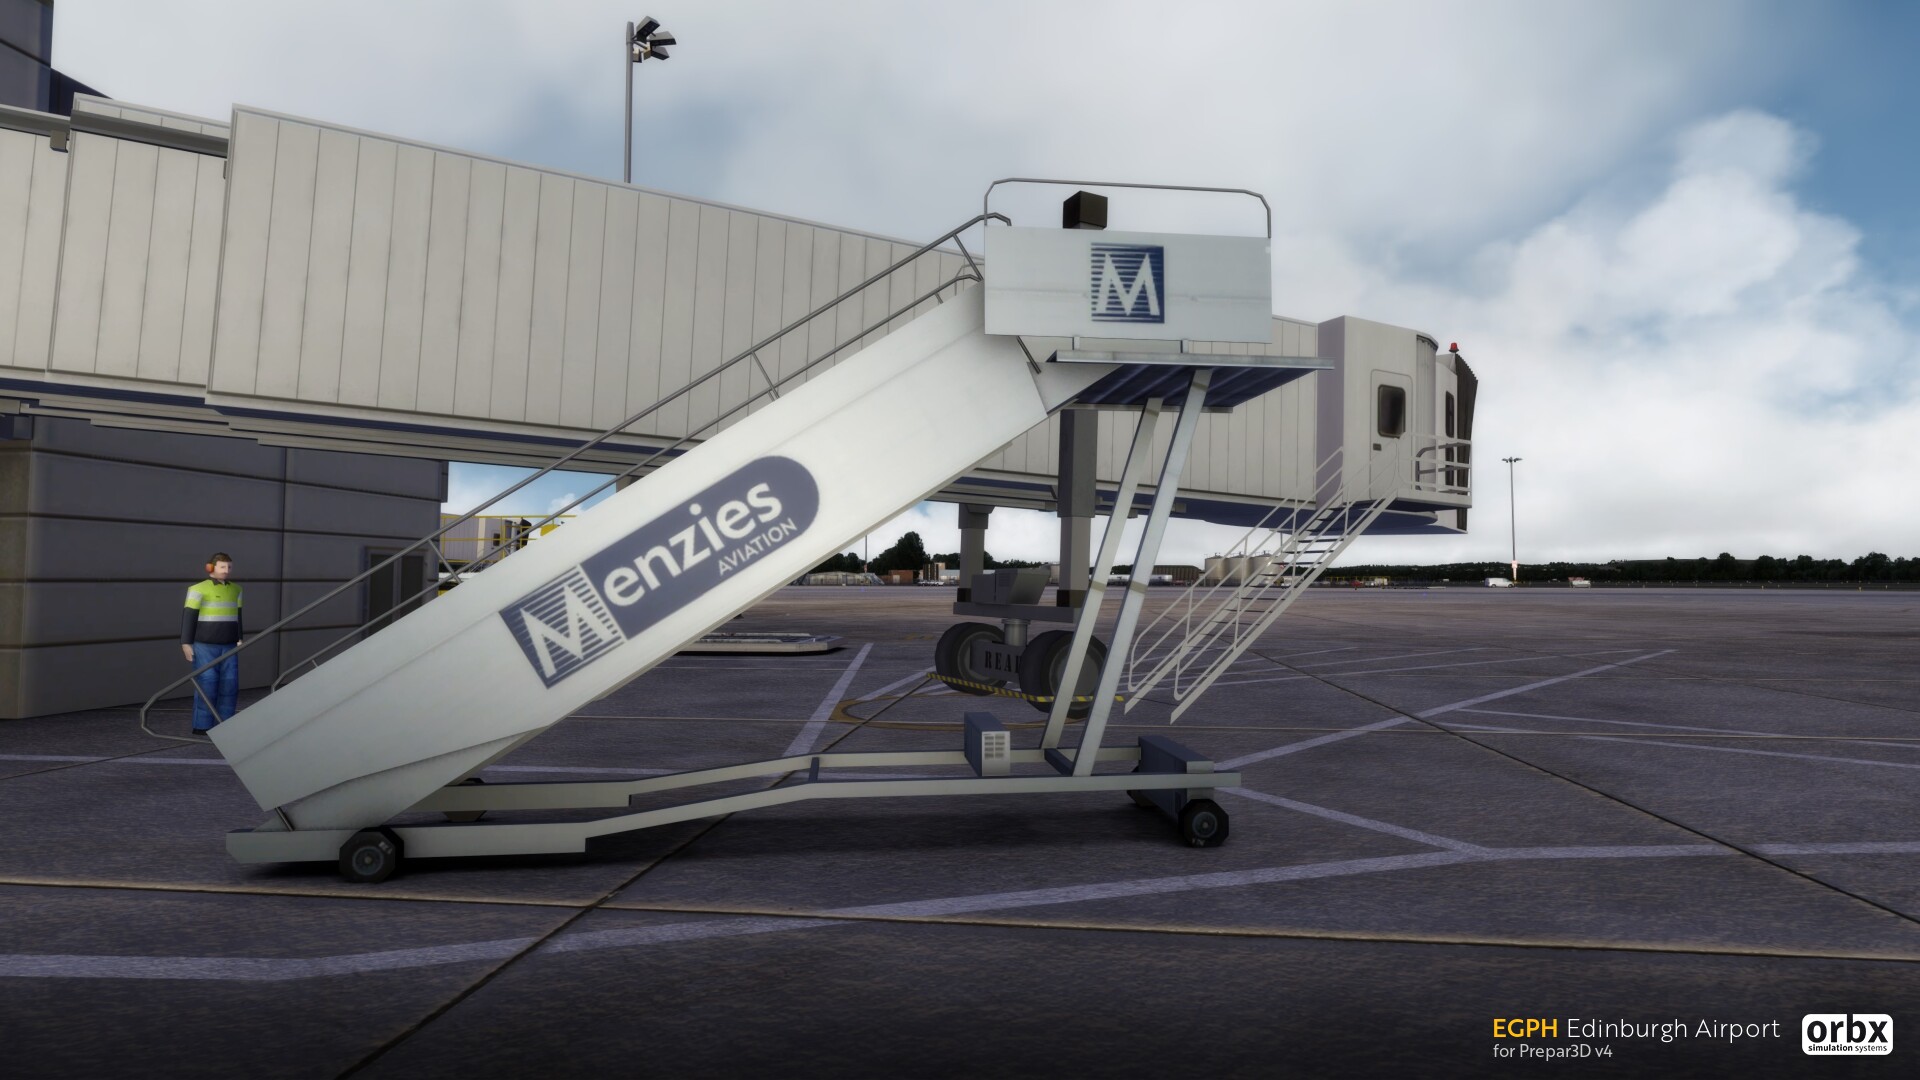
In-House team Gaya Simulations has faithfully recreated the busy airport using the latest techniques and features to give you the most realistic experience possible. Using HD PBR textures to provide an unprecedented level of detail throughout - in particular on the airport apron. Explore the fully modelled fire stations, hotels and office buildings that surround the airport, or watch as the airport comes to life with animated traffic throughout.
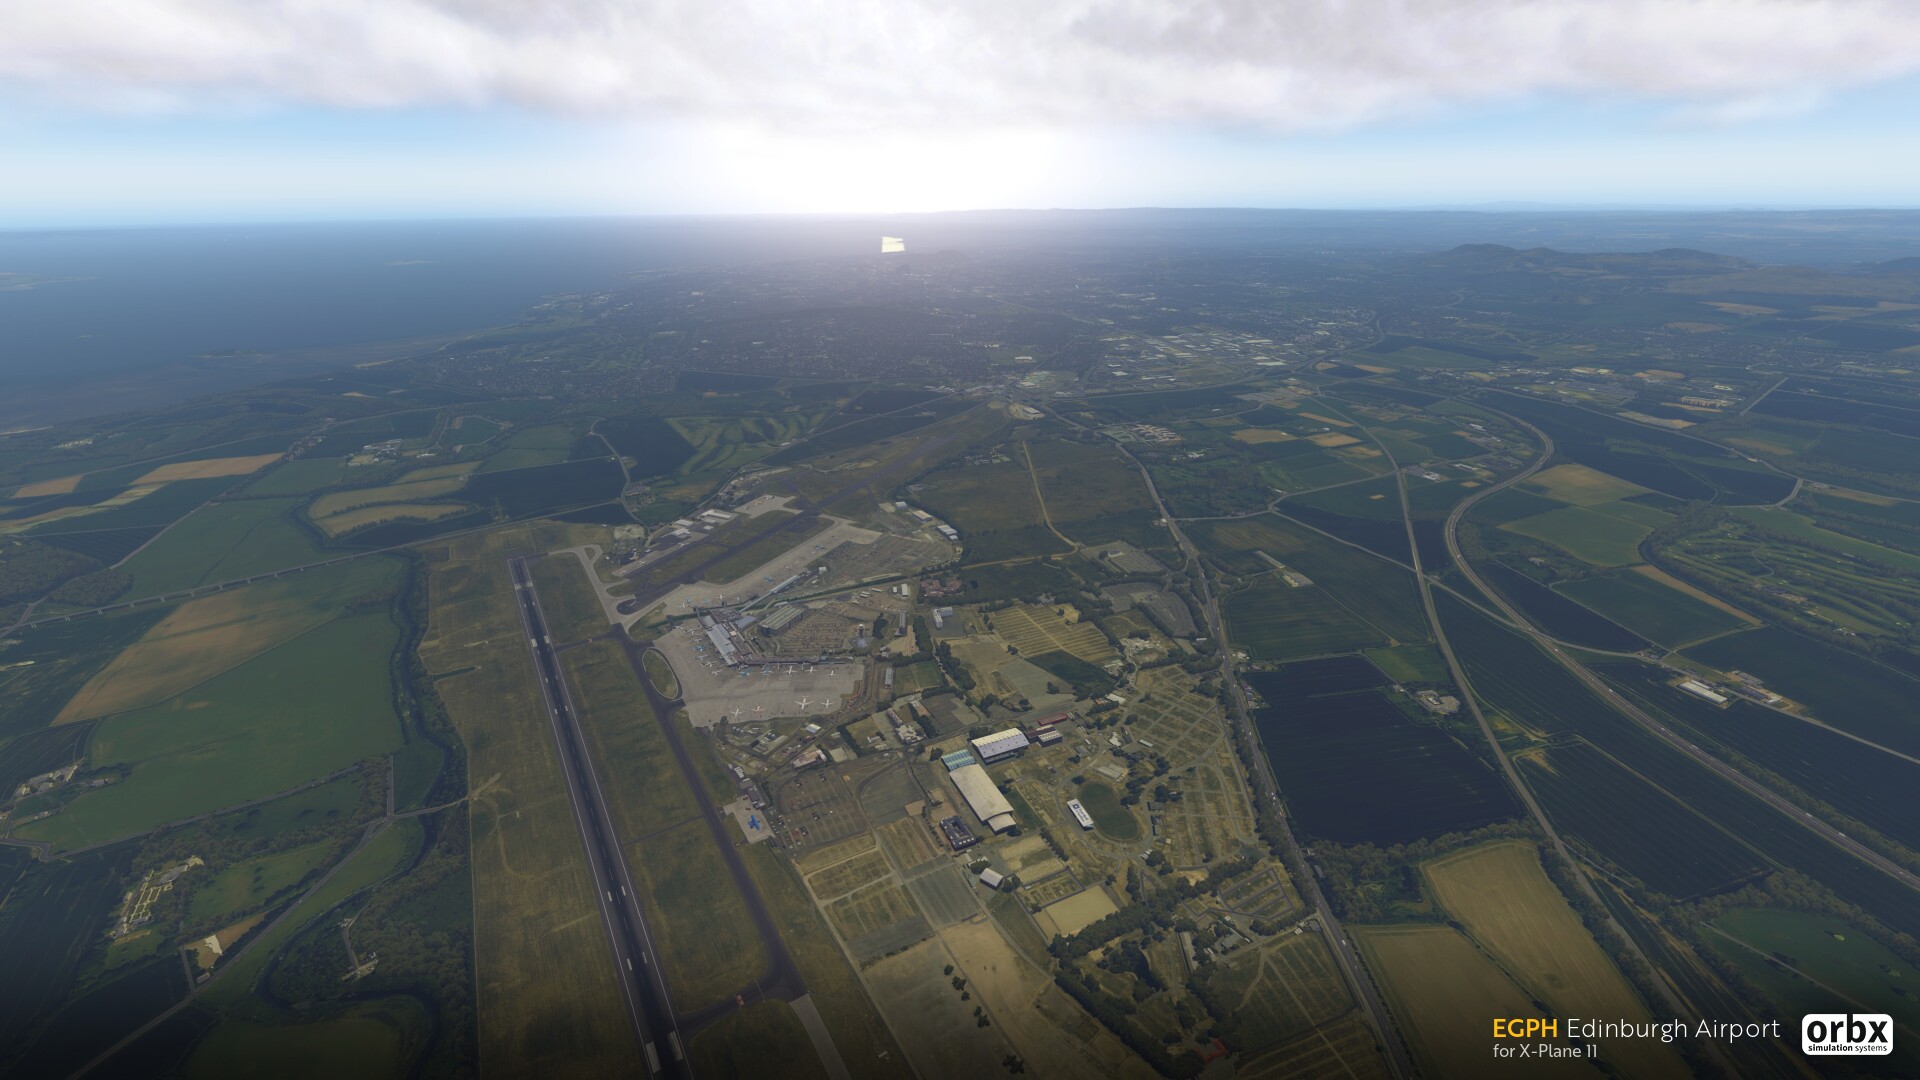
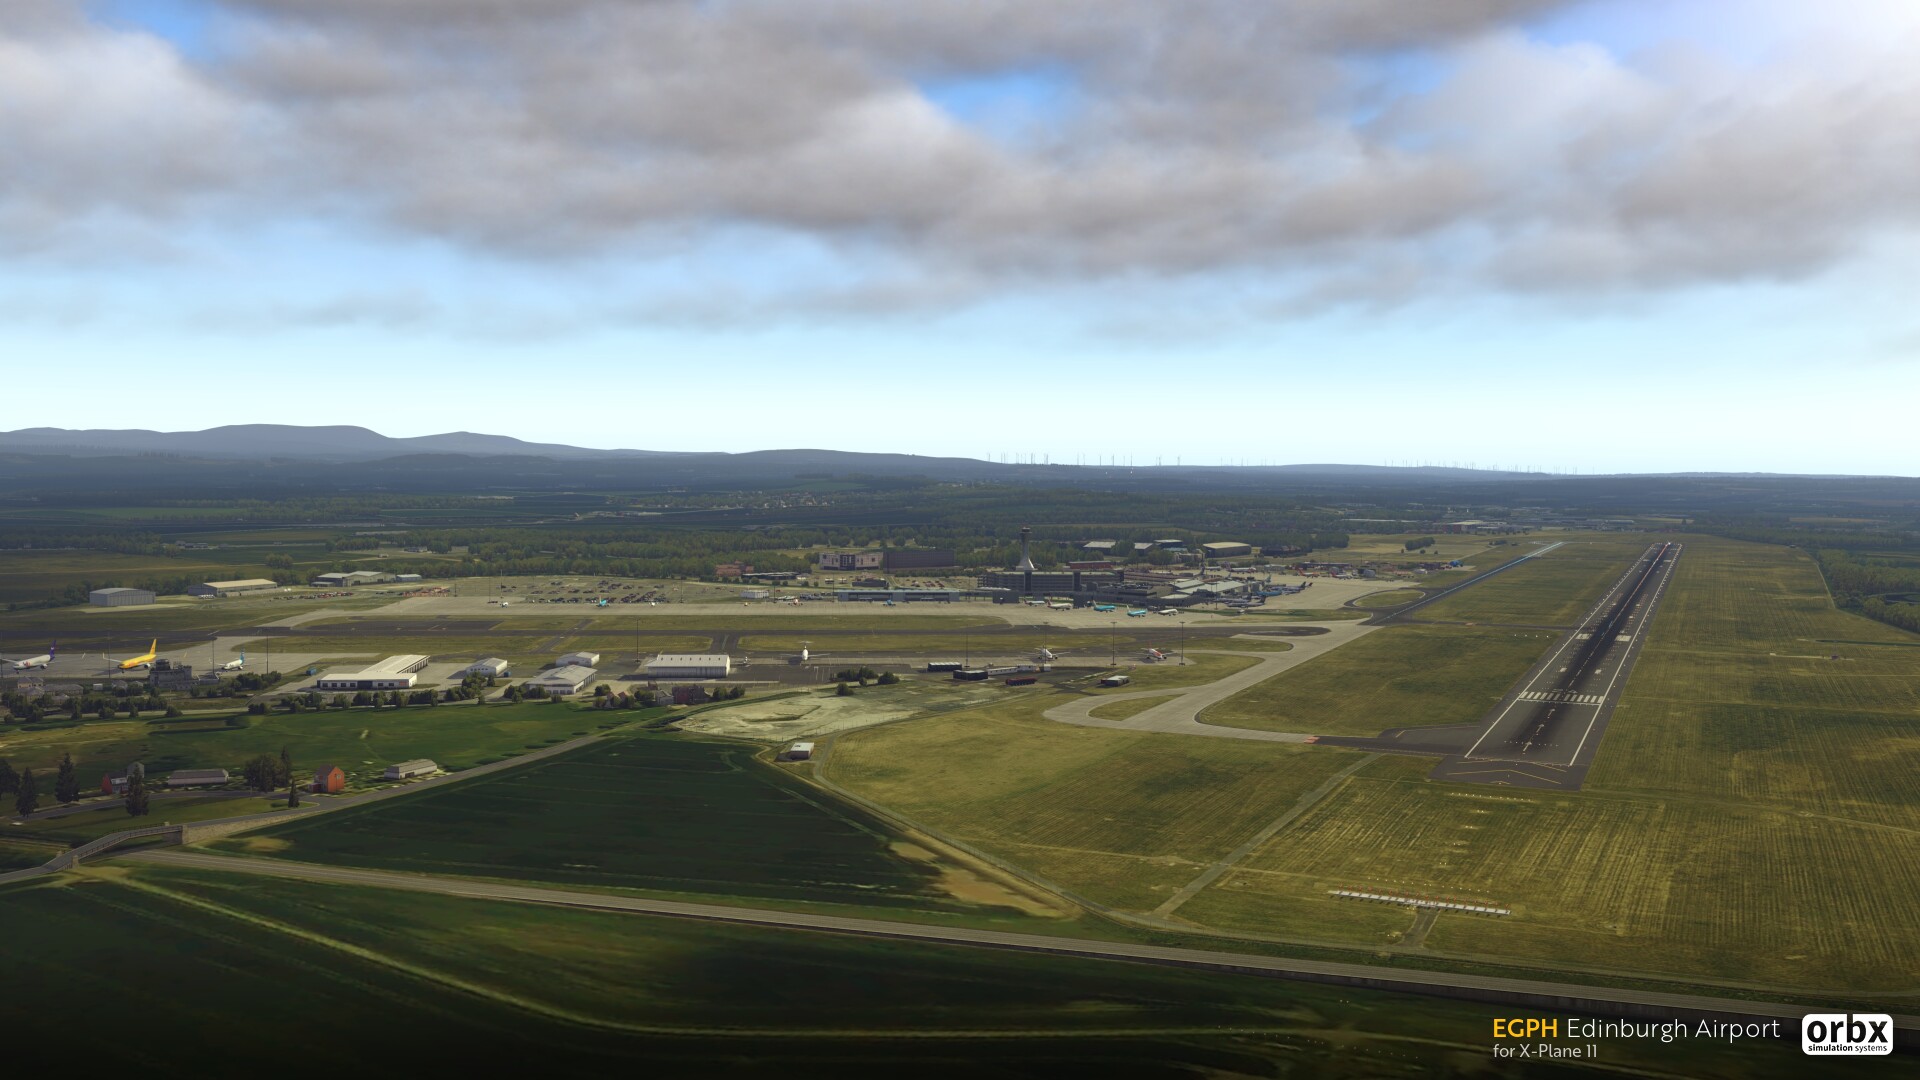
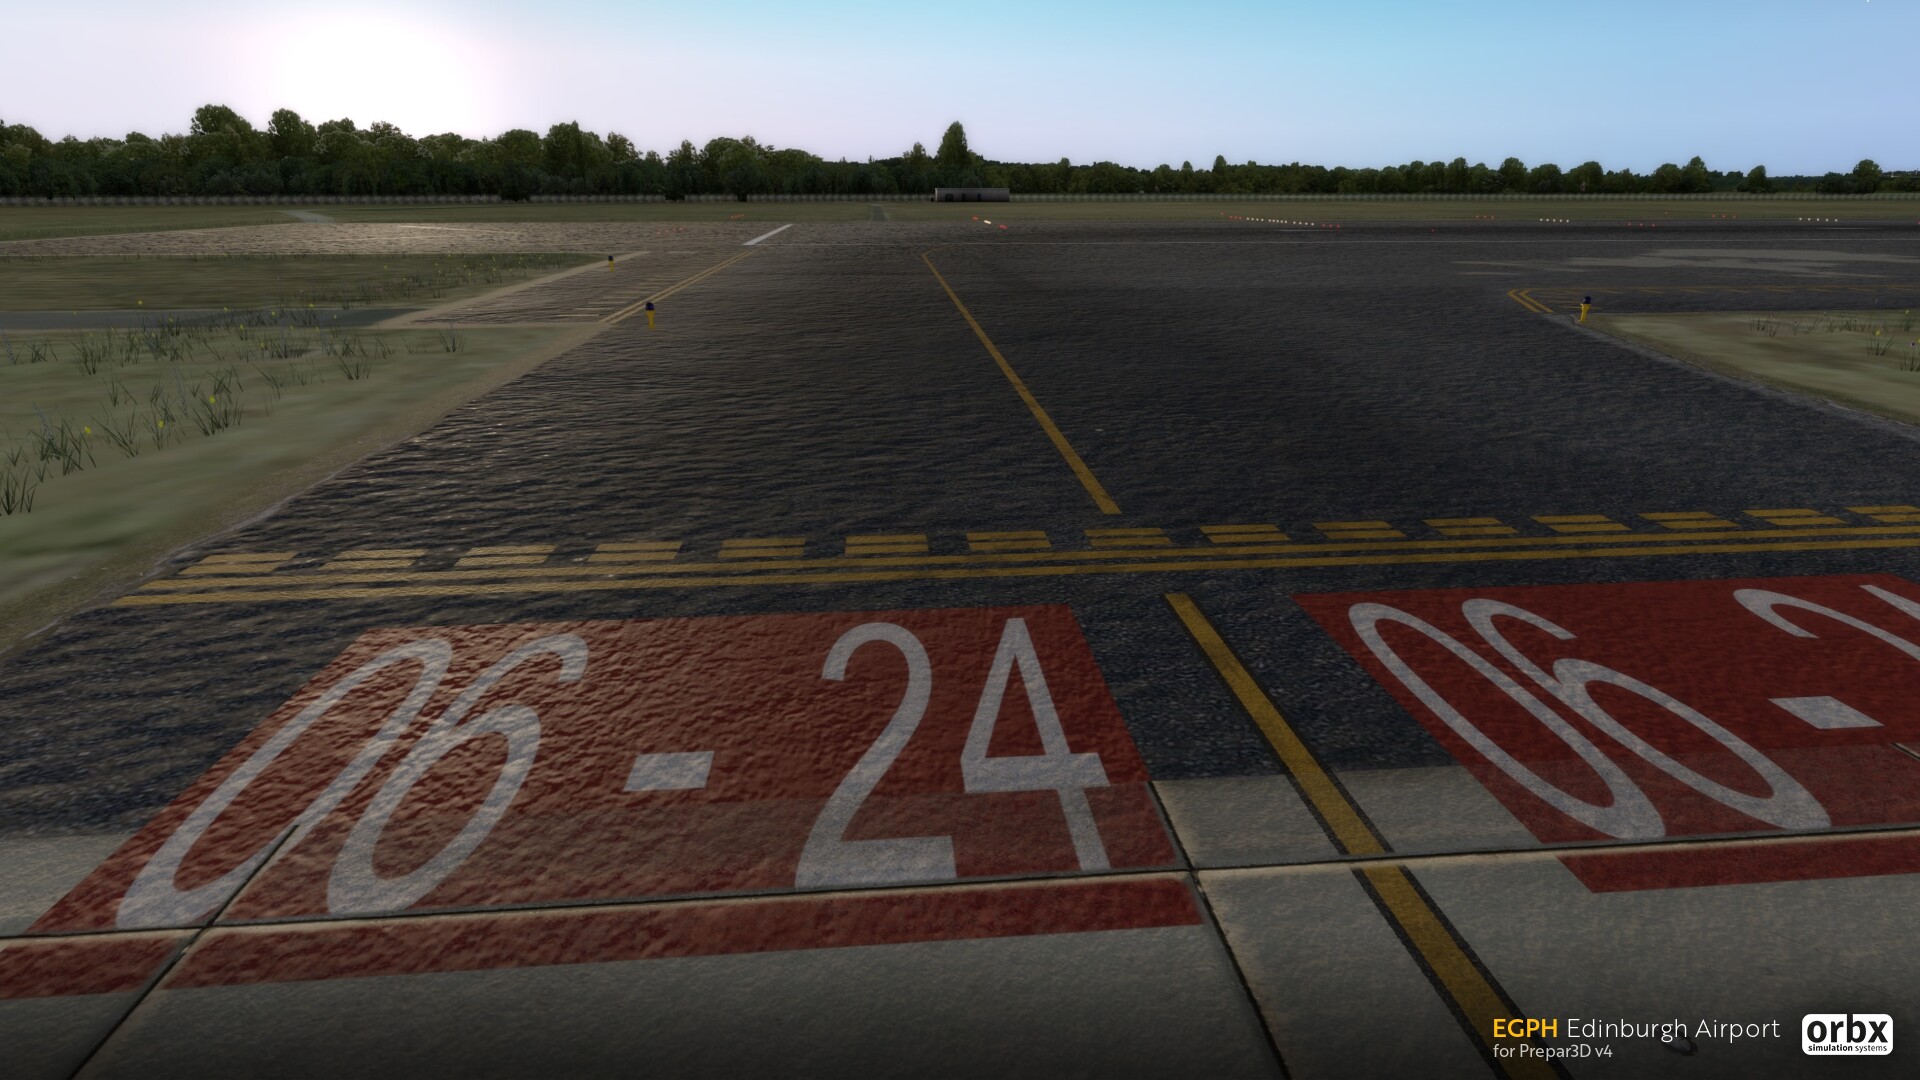
This version of the airport takes into account many of the airport’s recent changes, including the old Runway 12/30, which closed in March 2018. Note that our airport depicts all ground areas based on our licensed imagery from 2016-2017. We may look into an update to add new aircraft parking areas in the future.
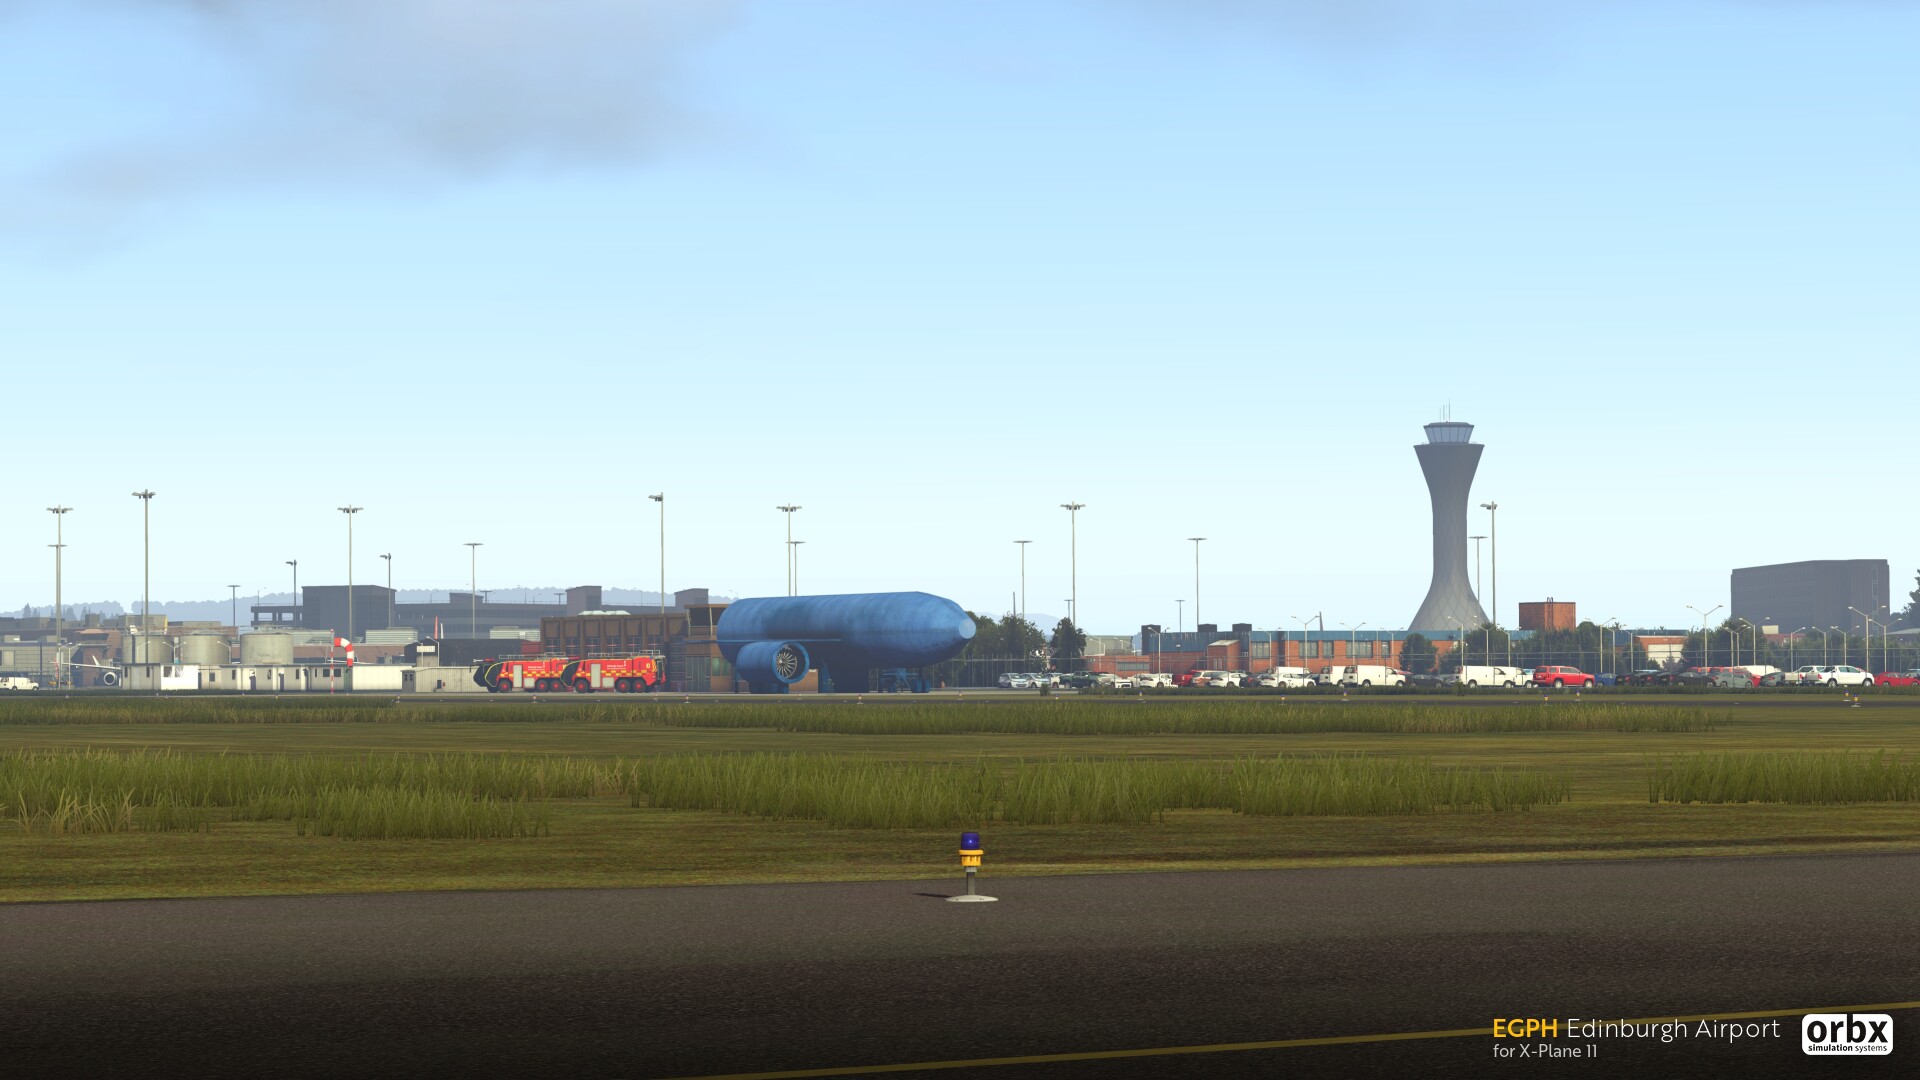
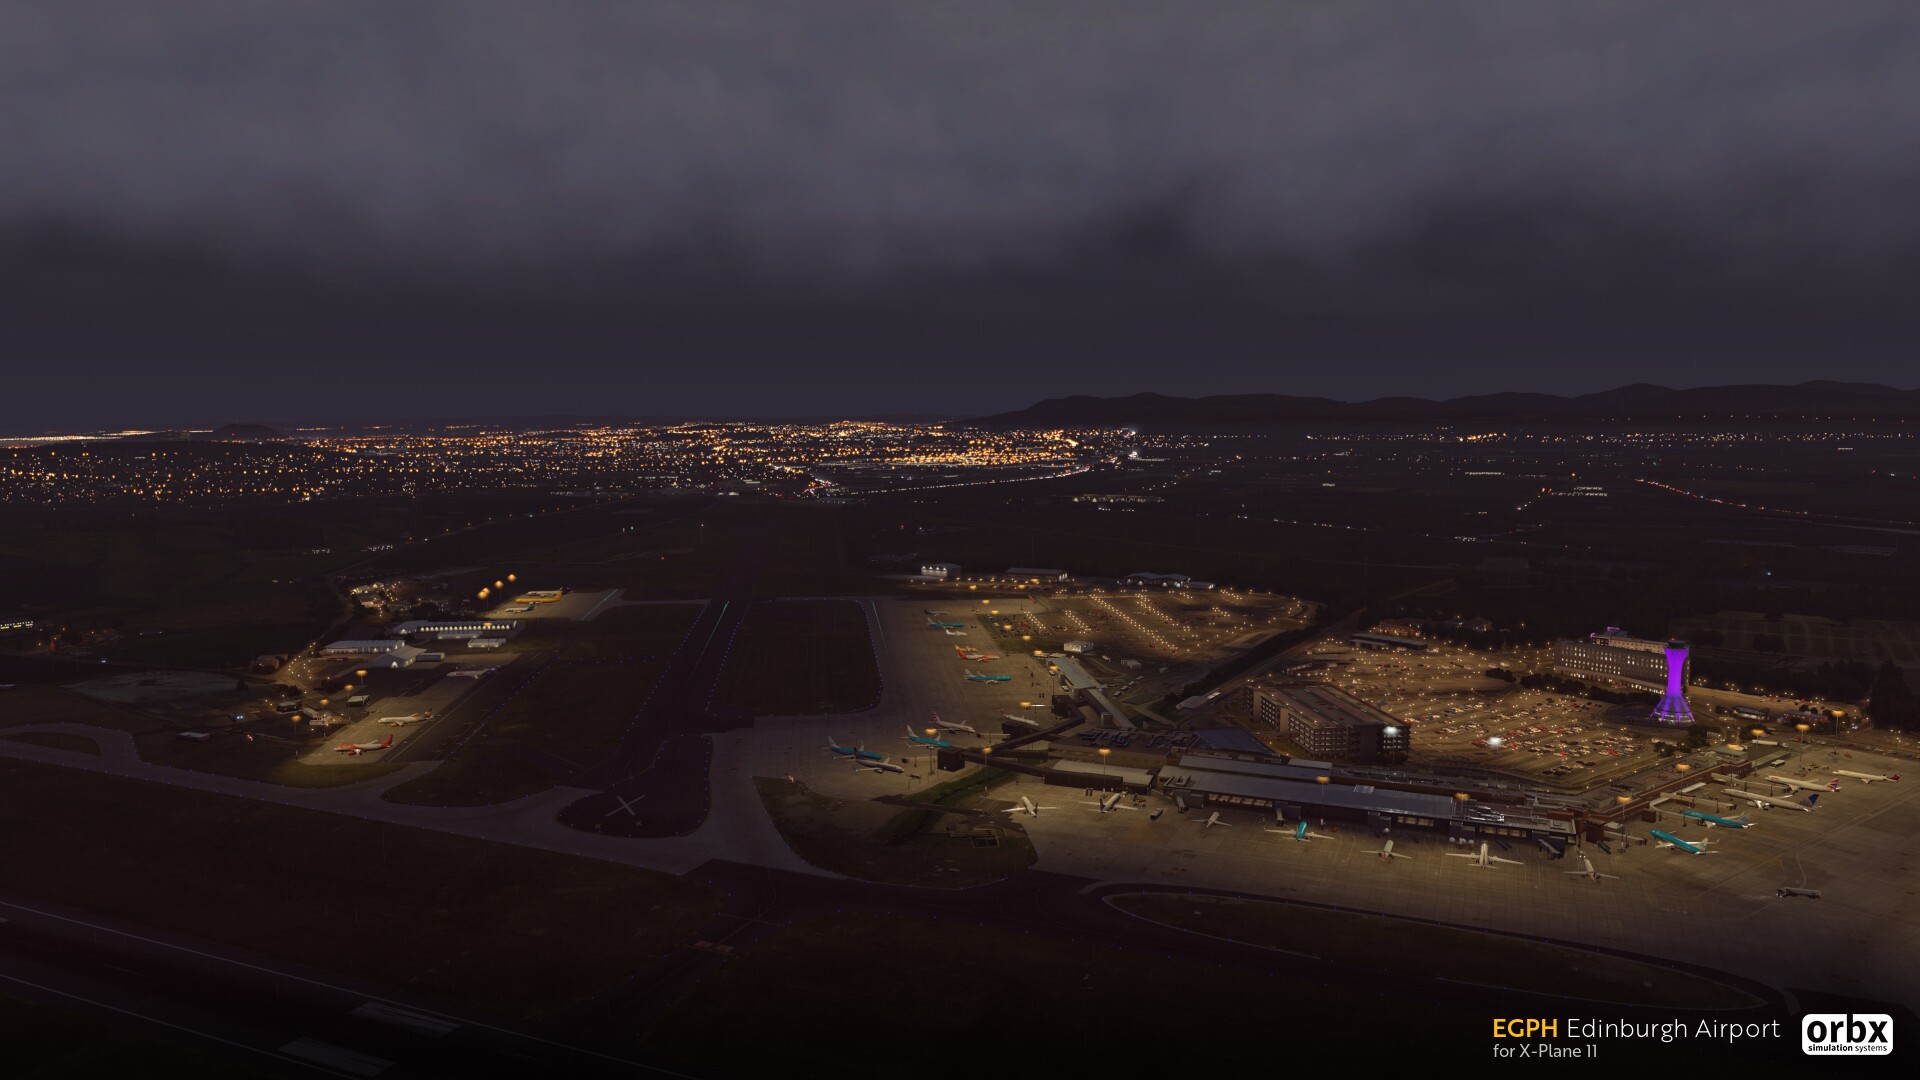
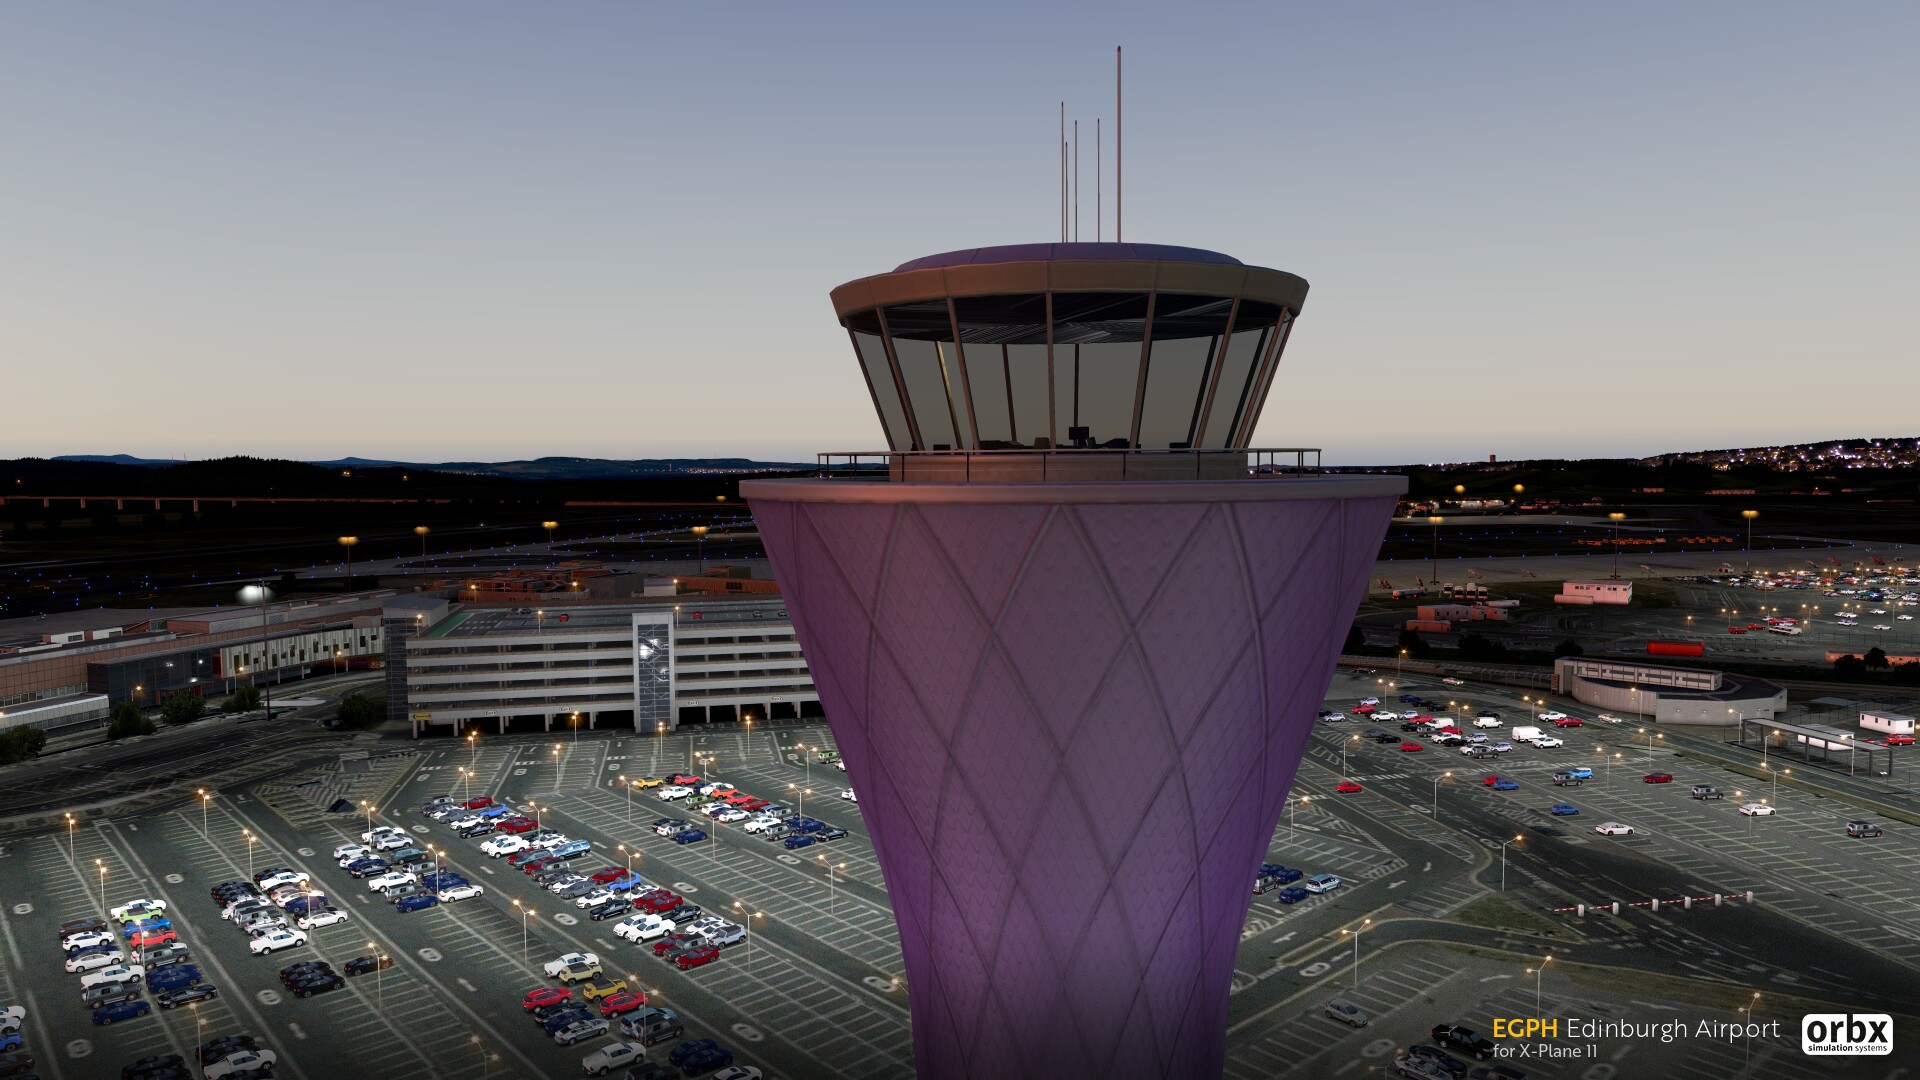
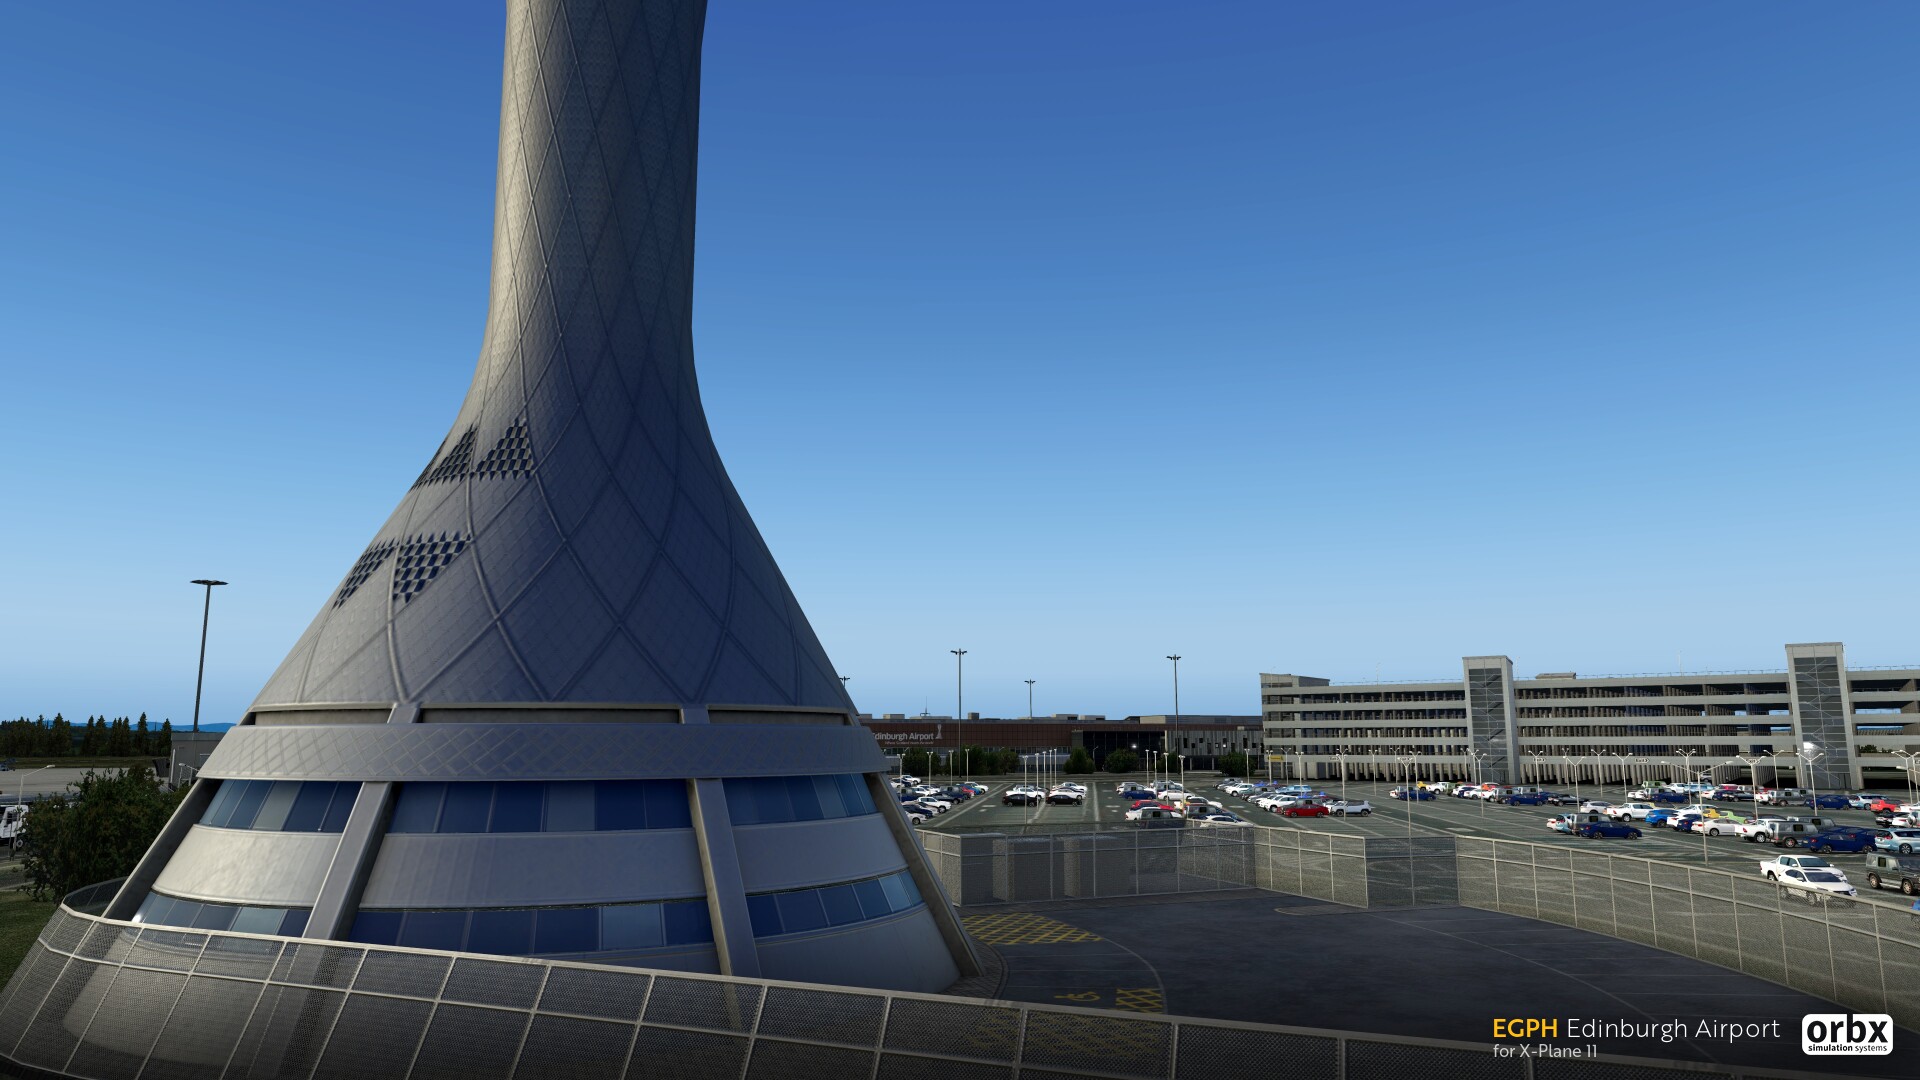
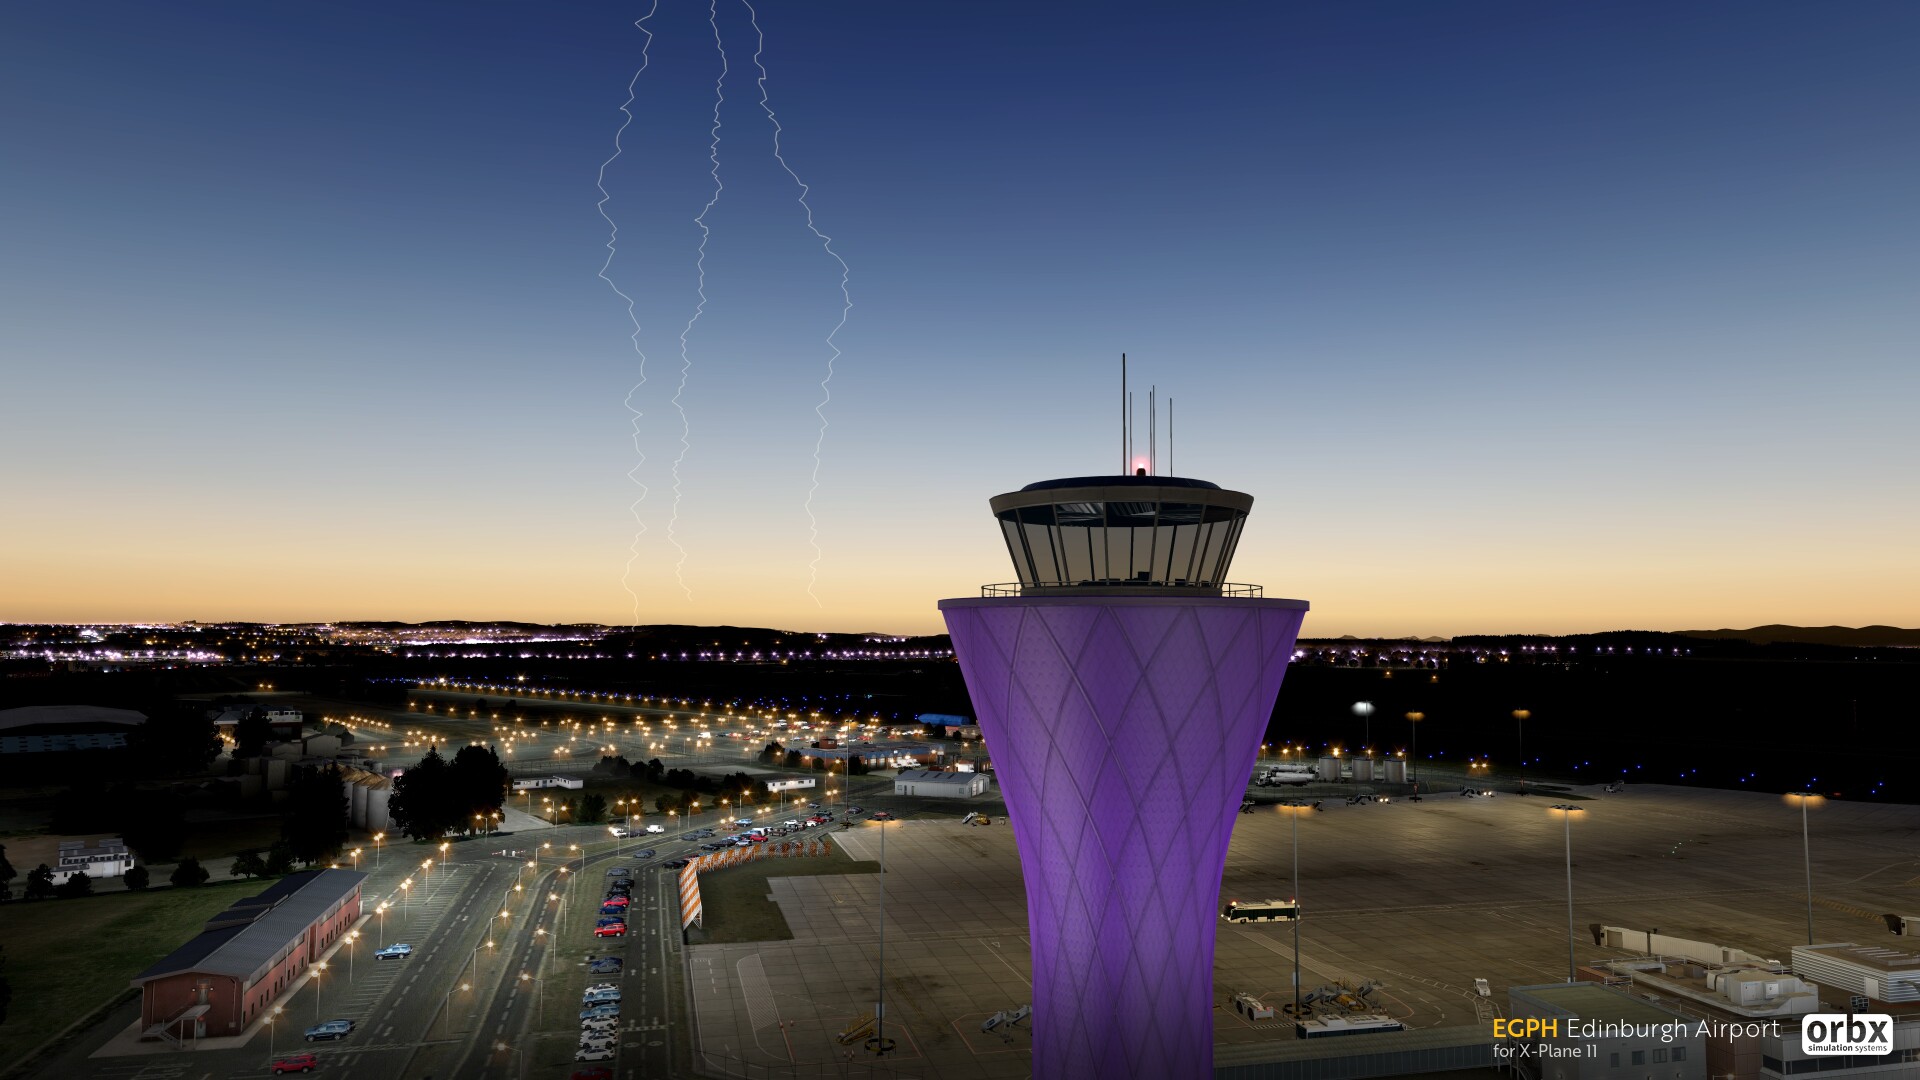
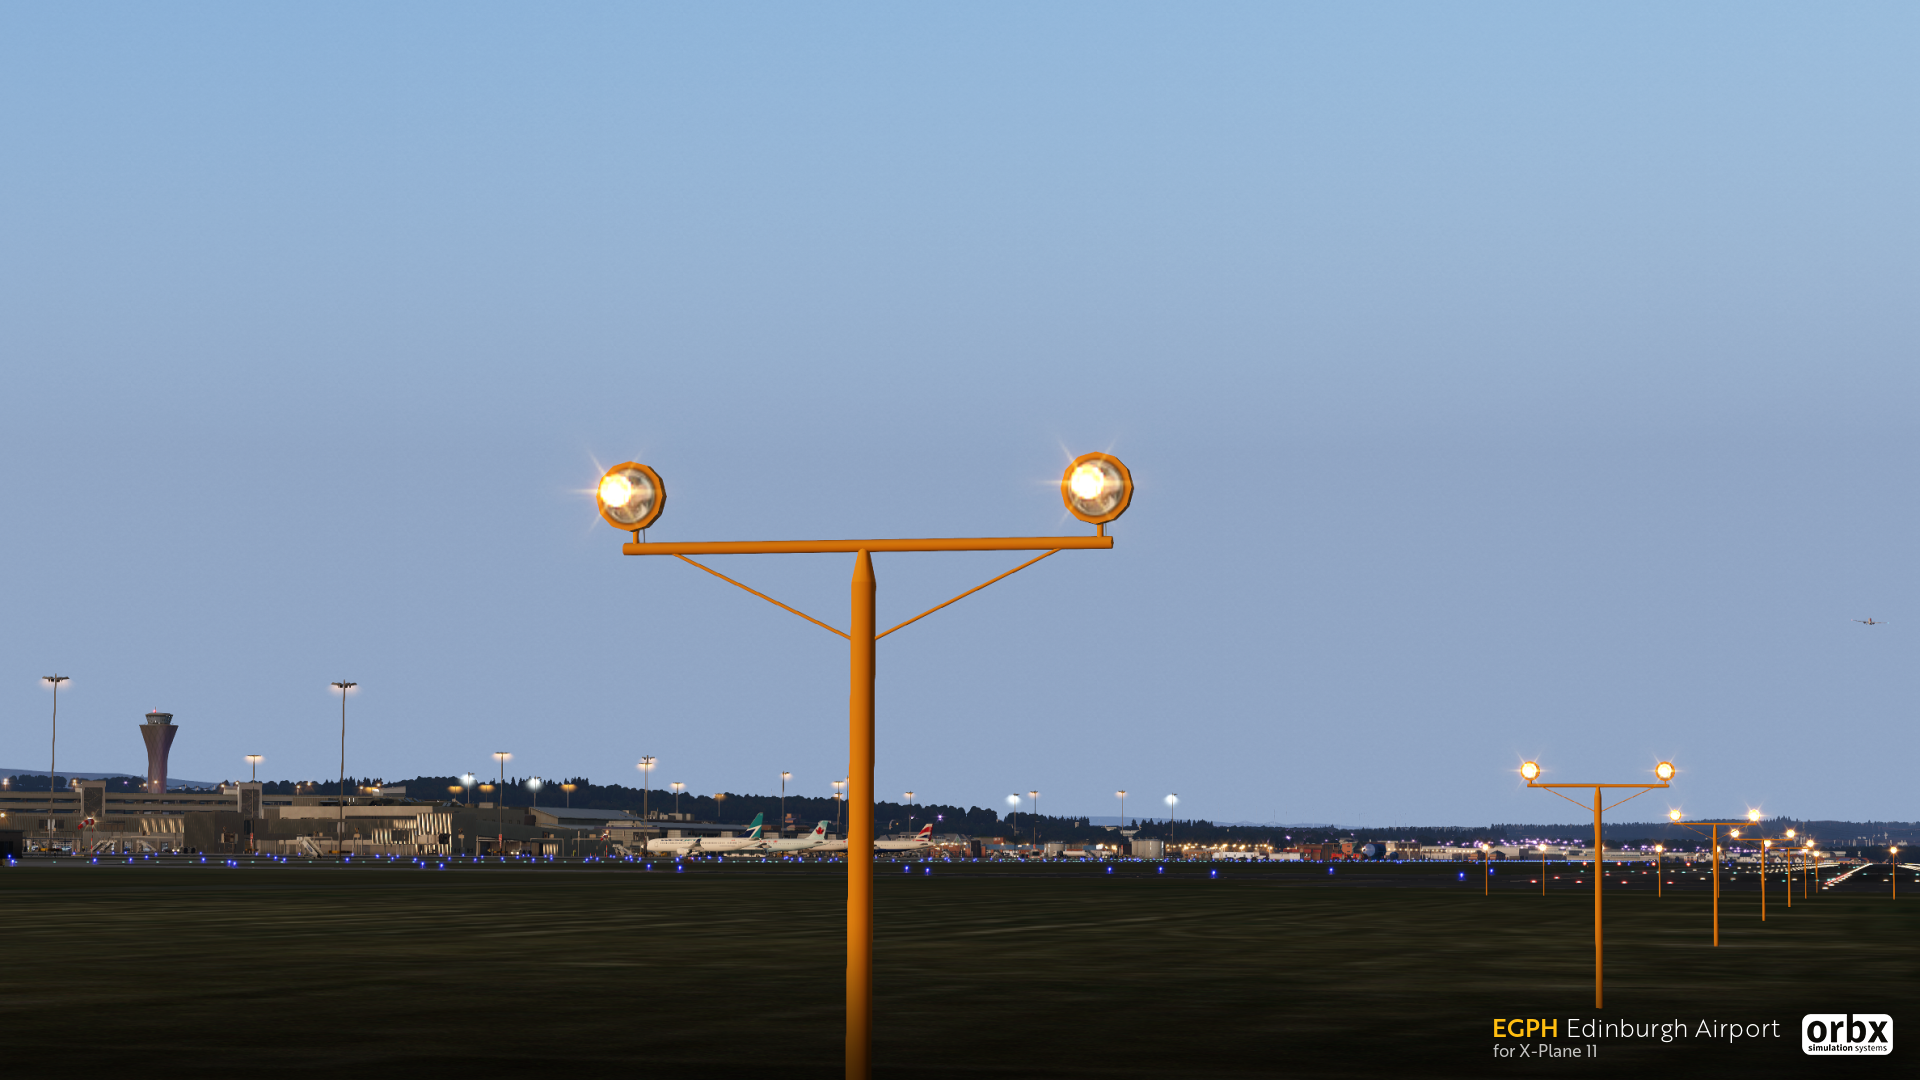
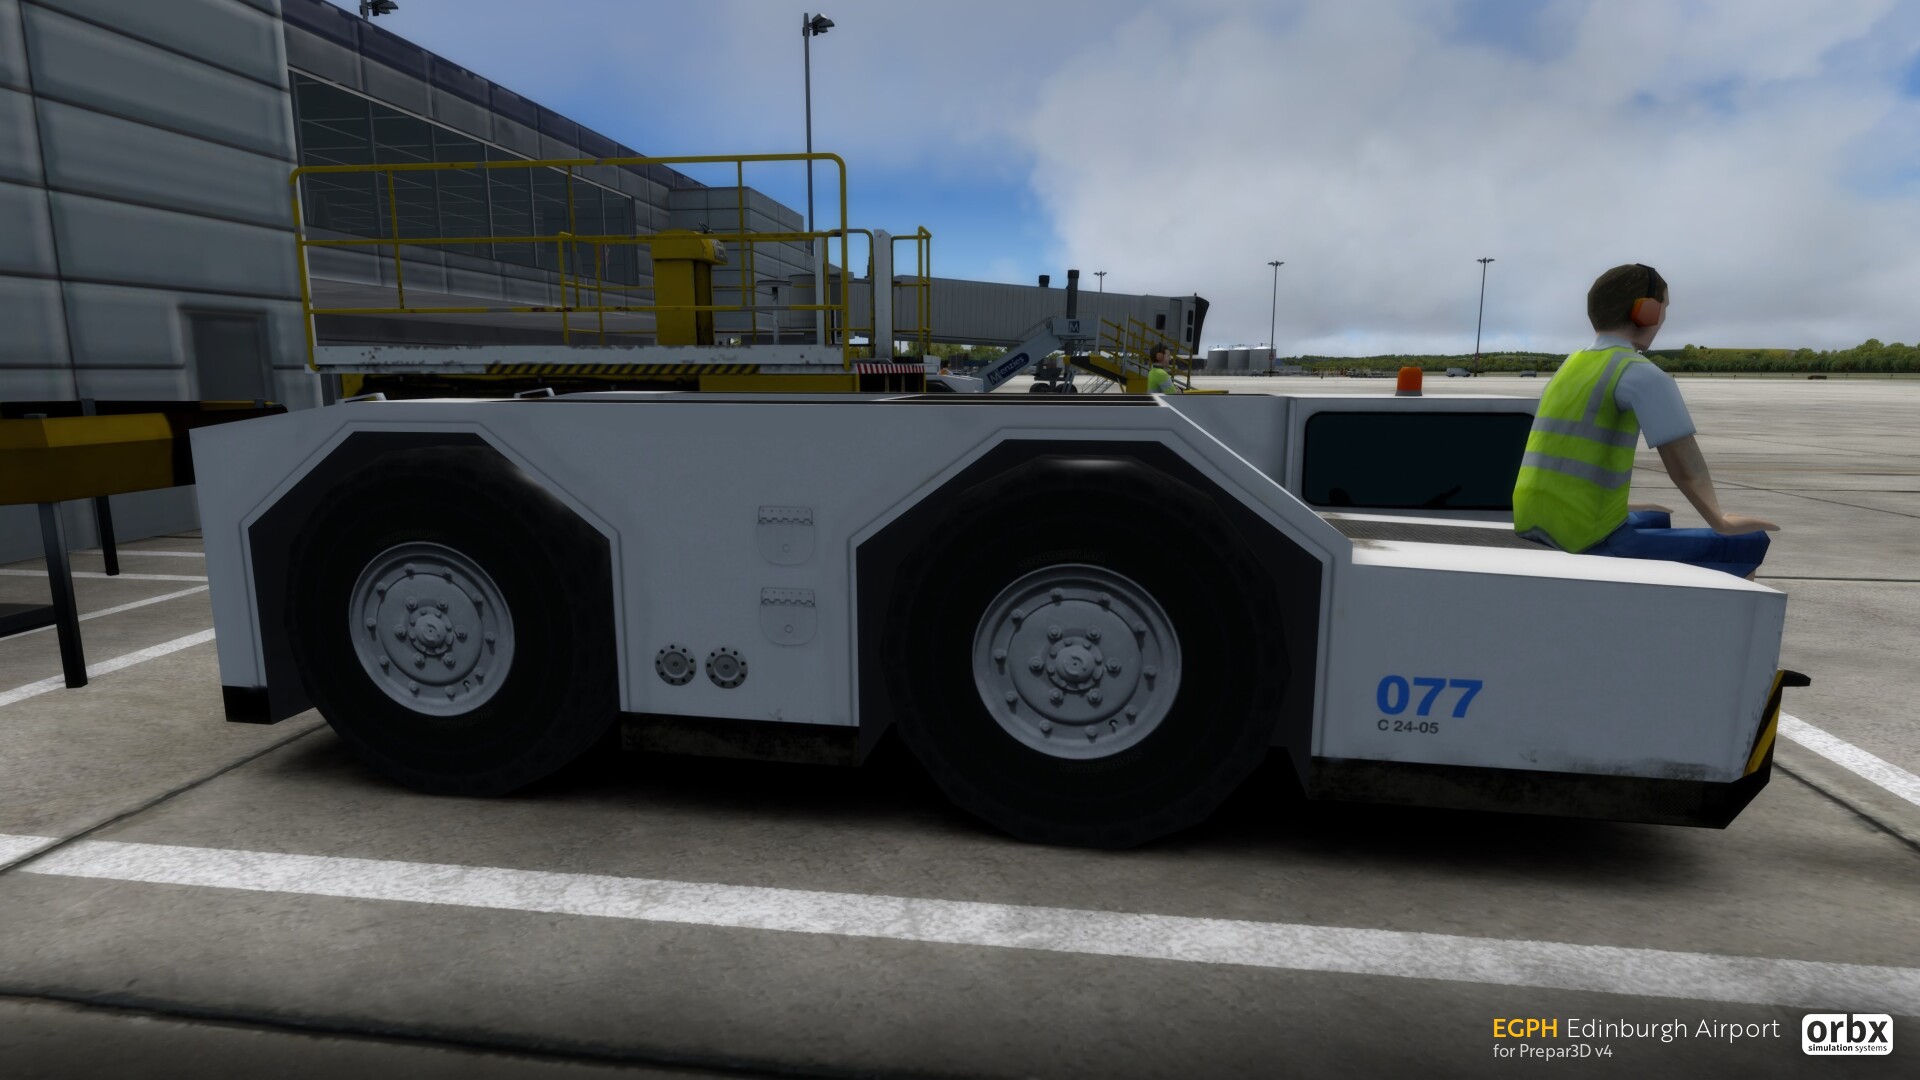
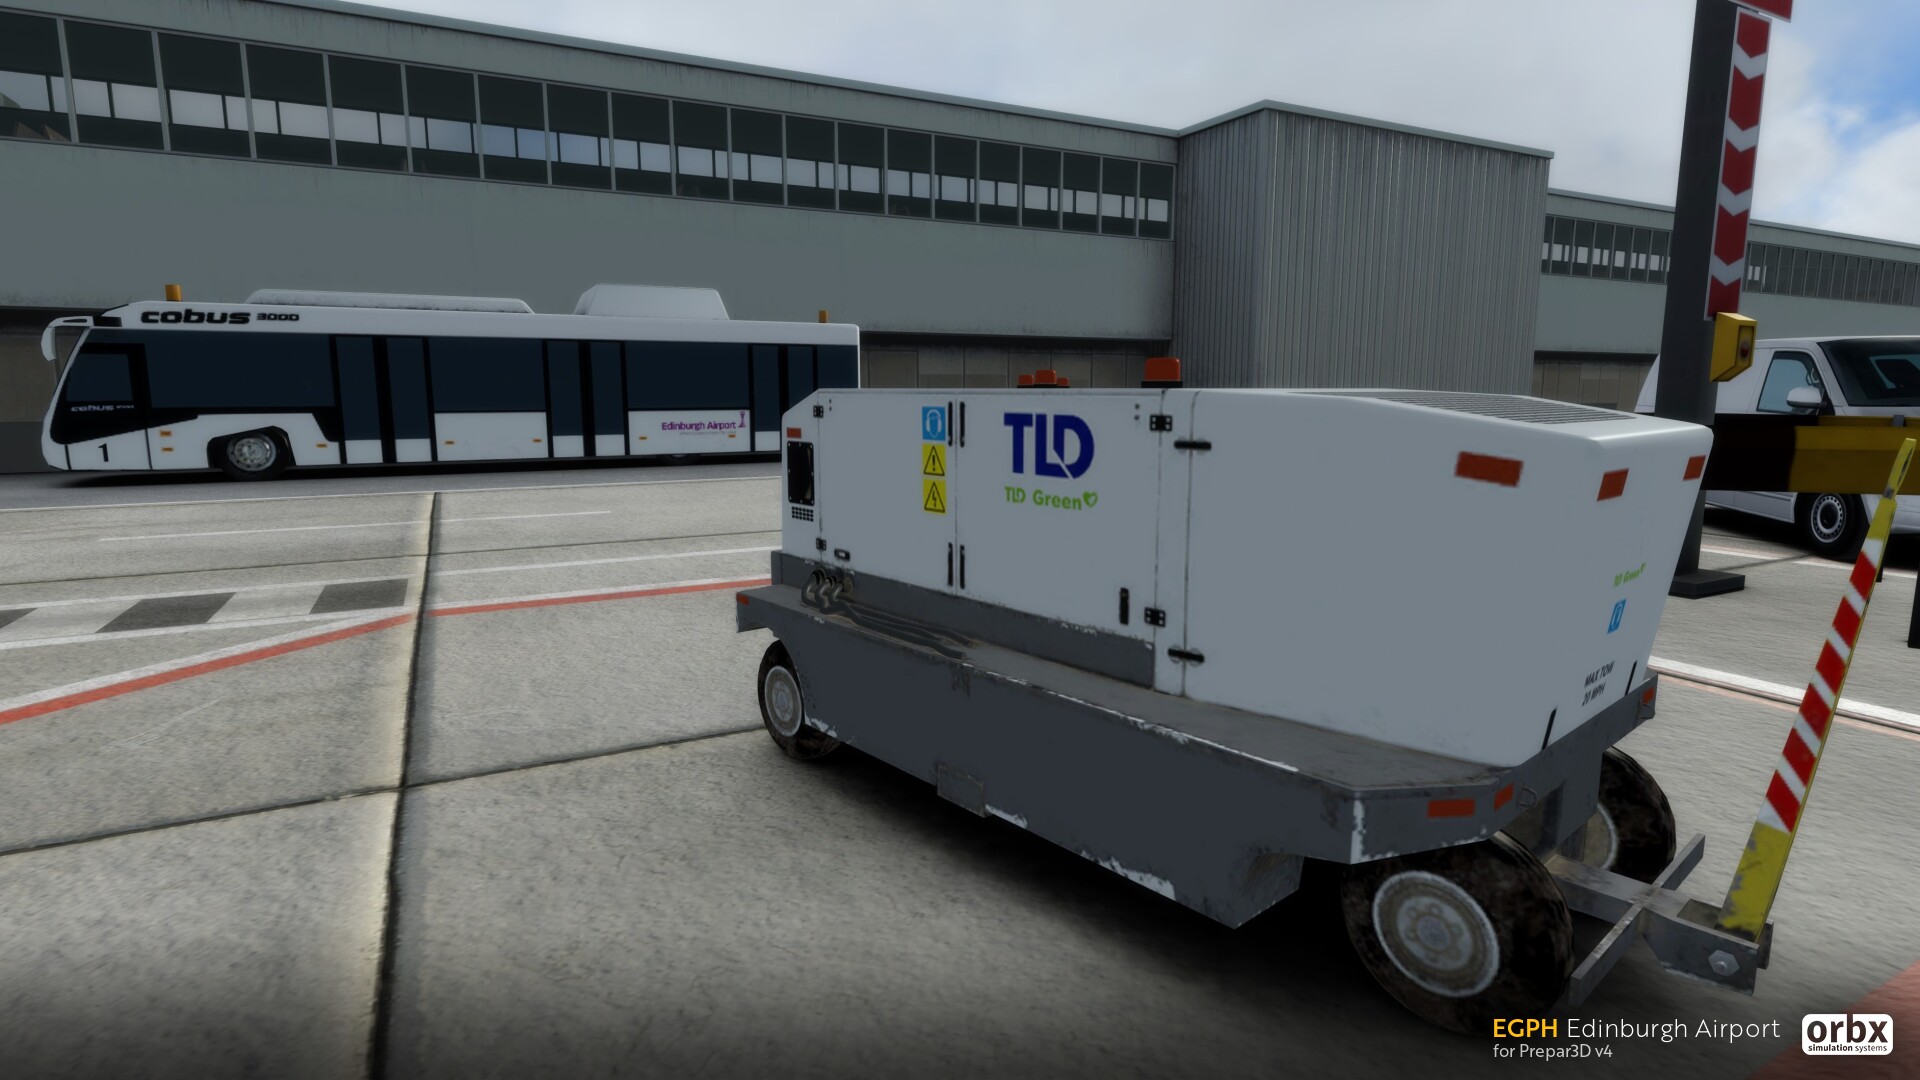
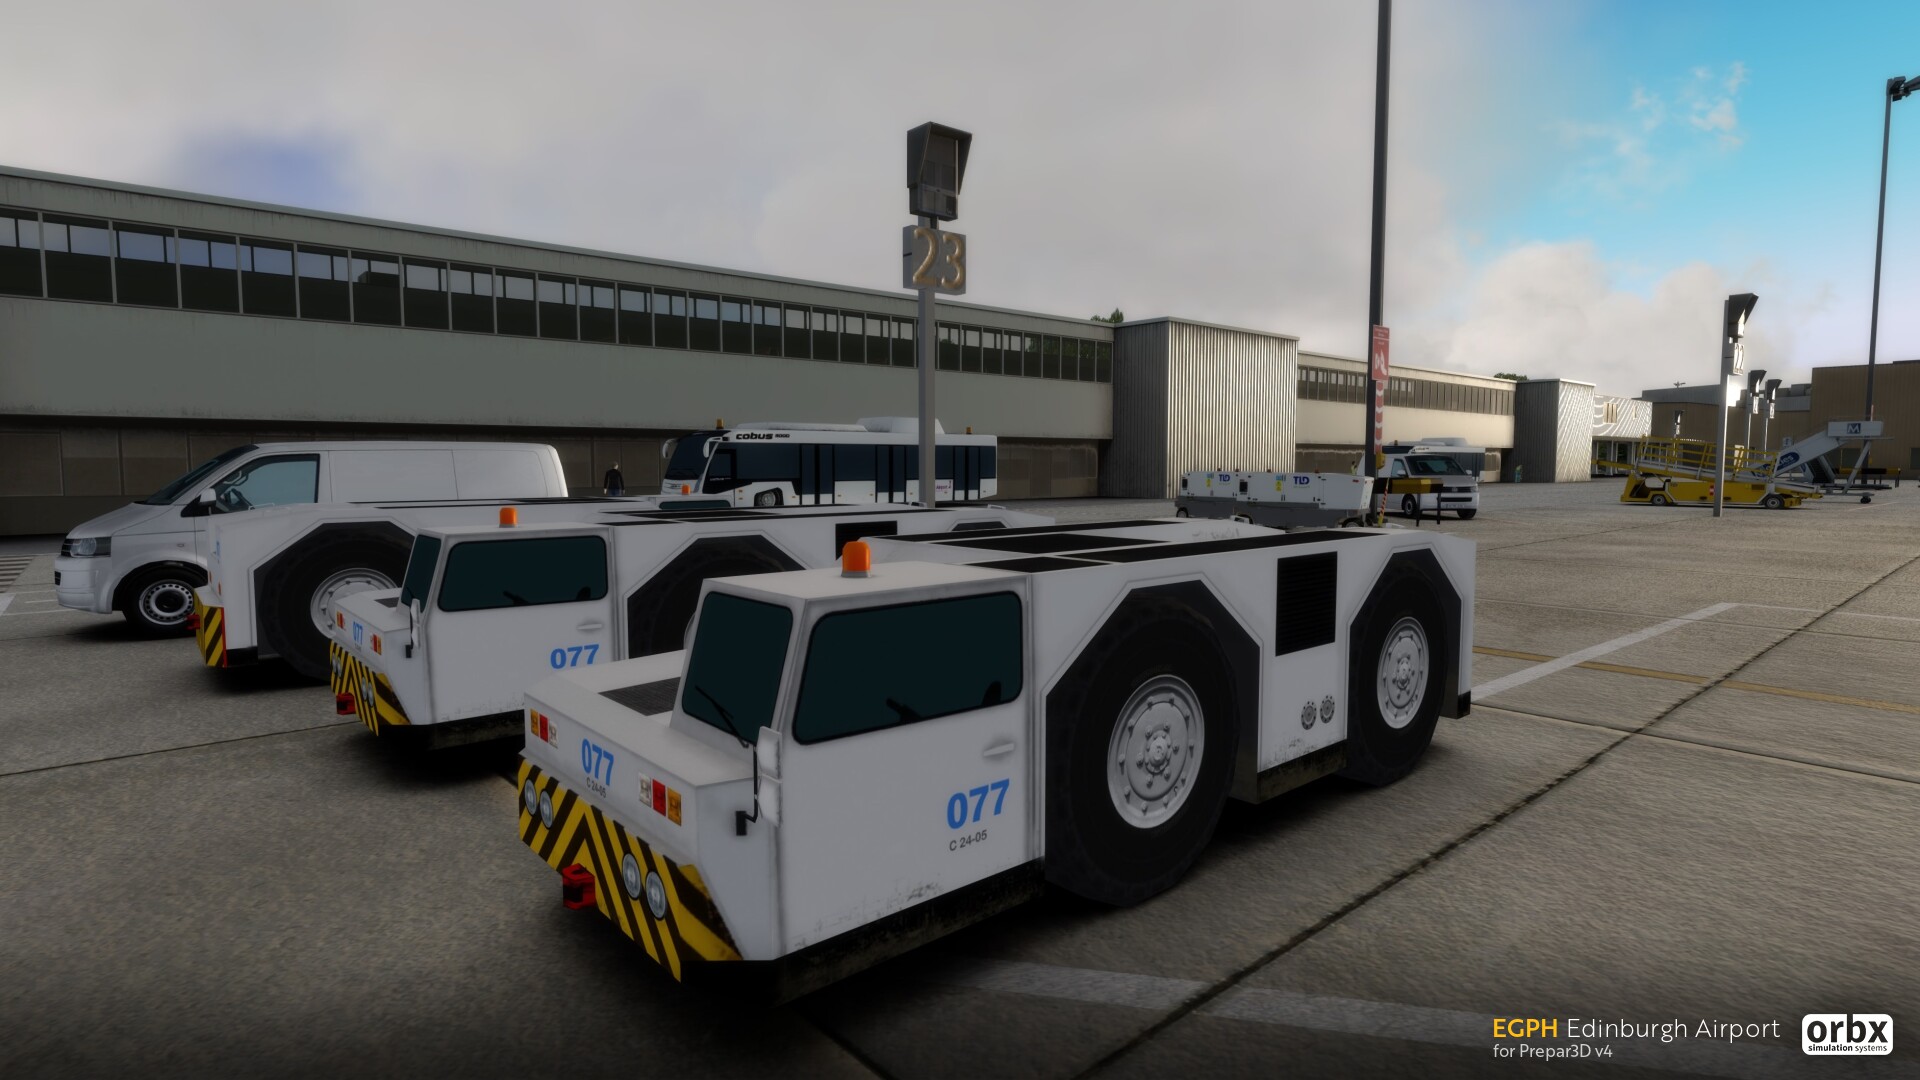
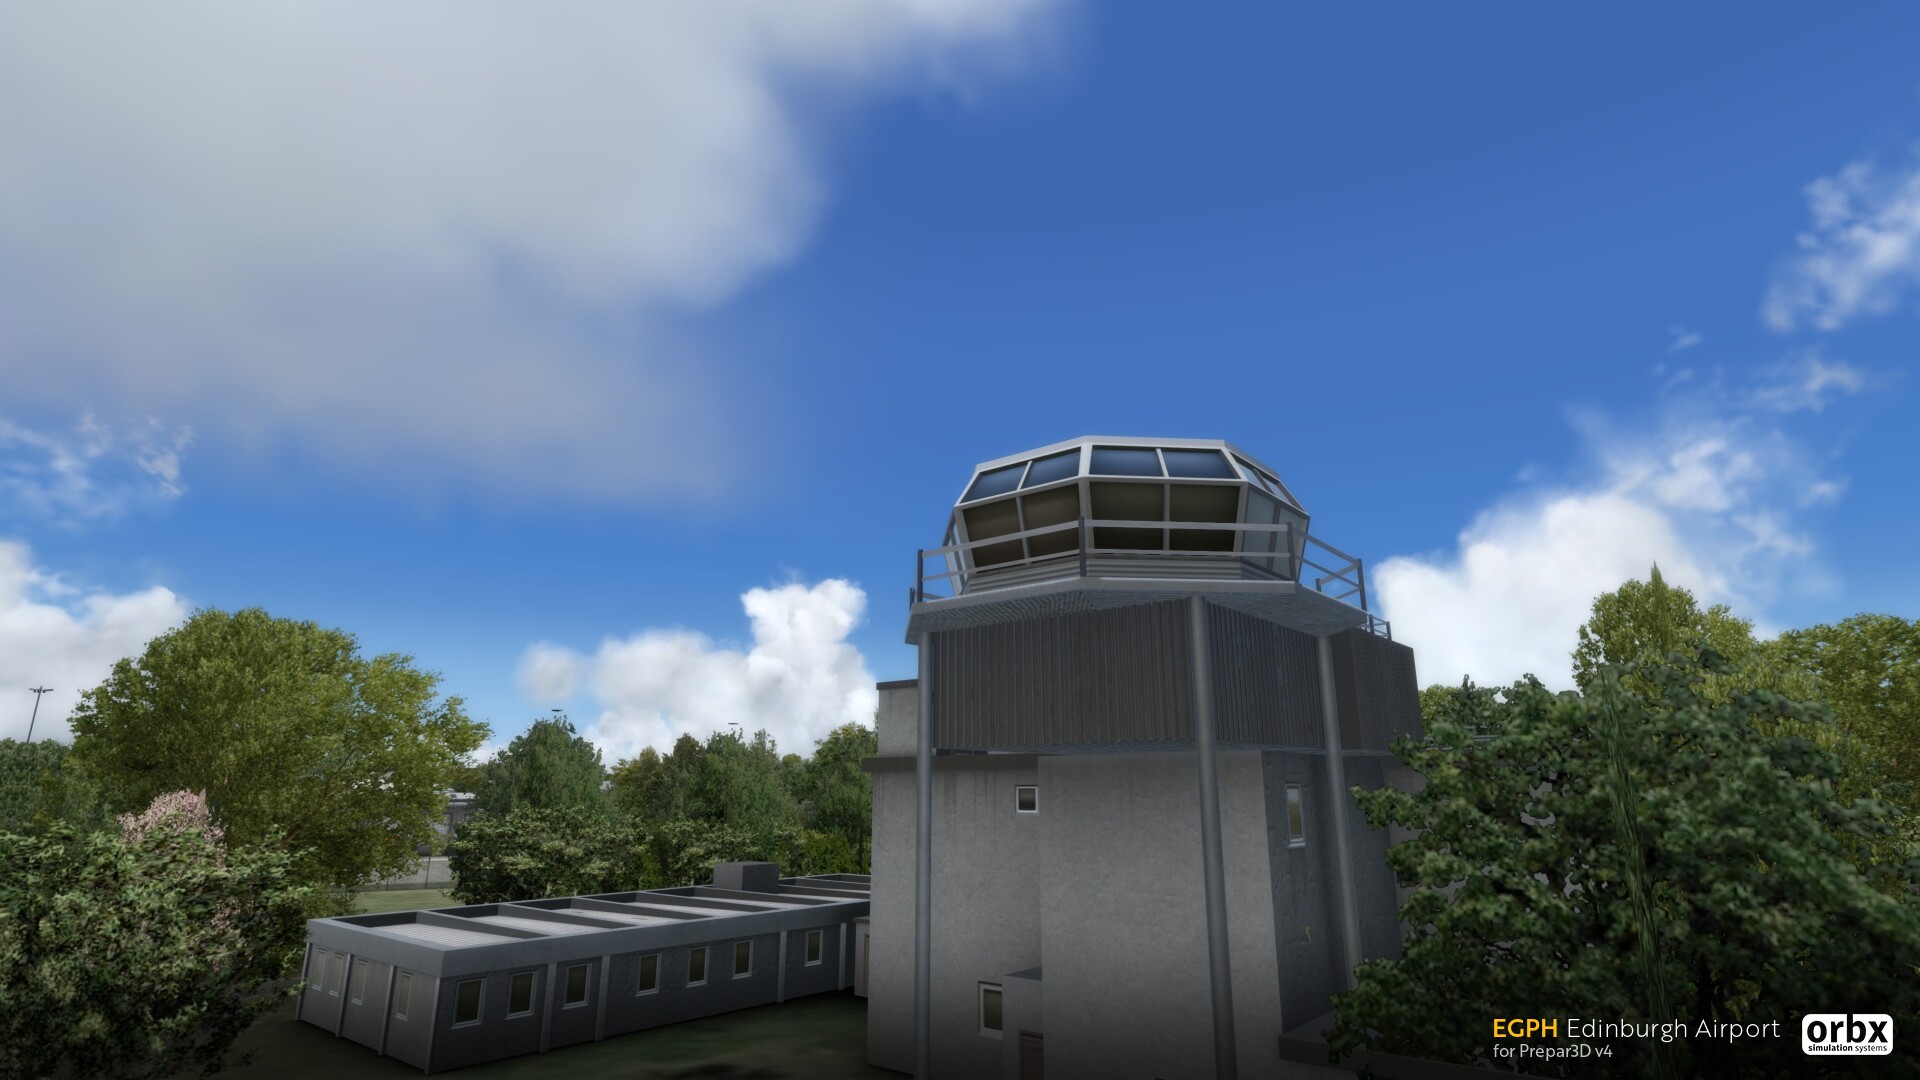
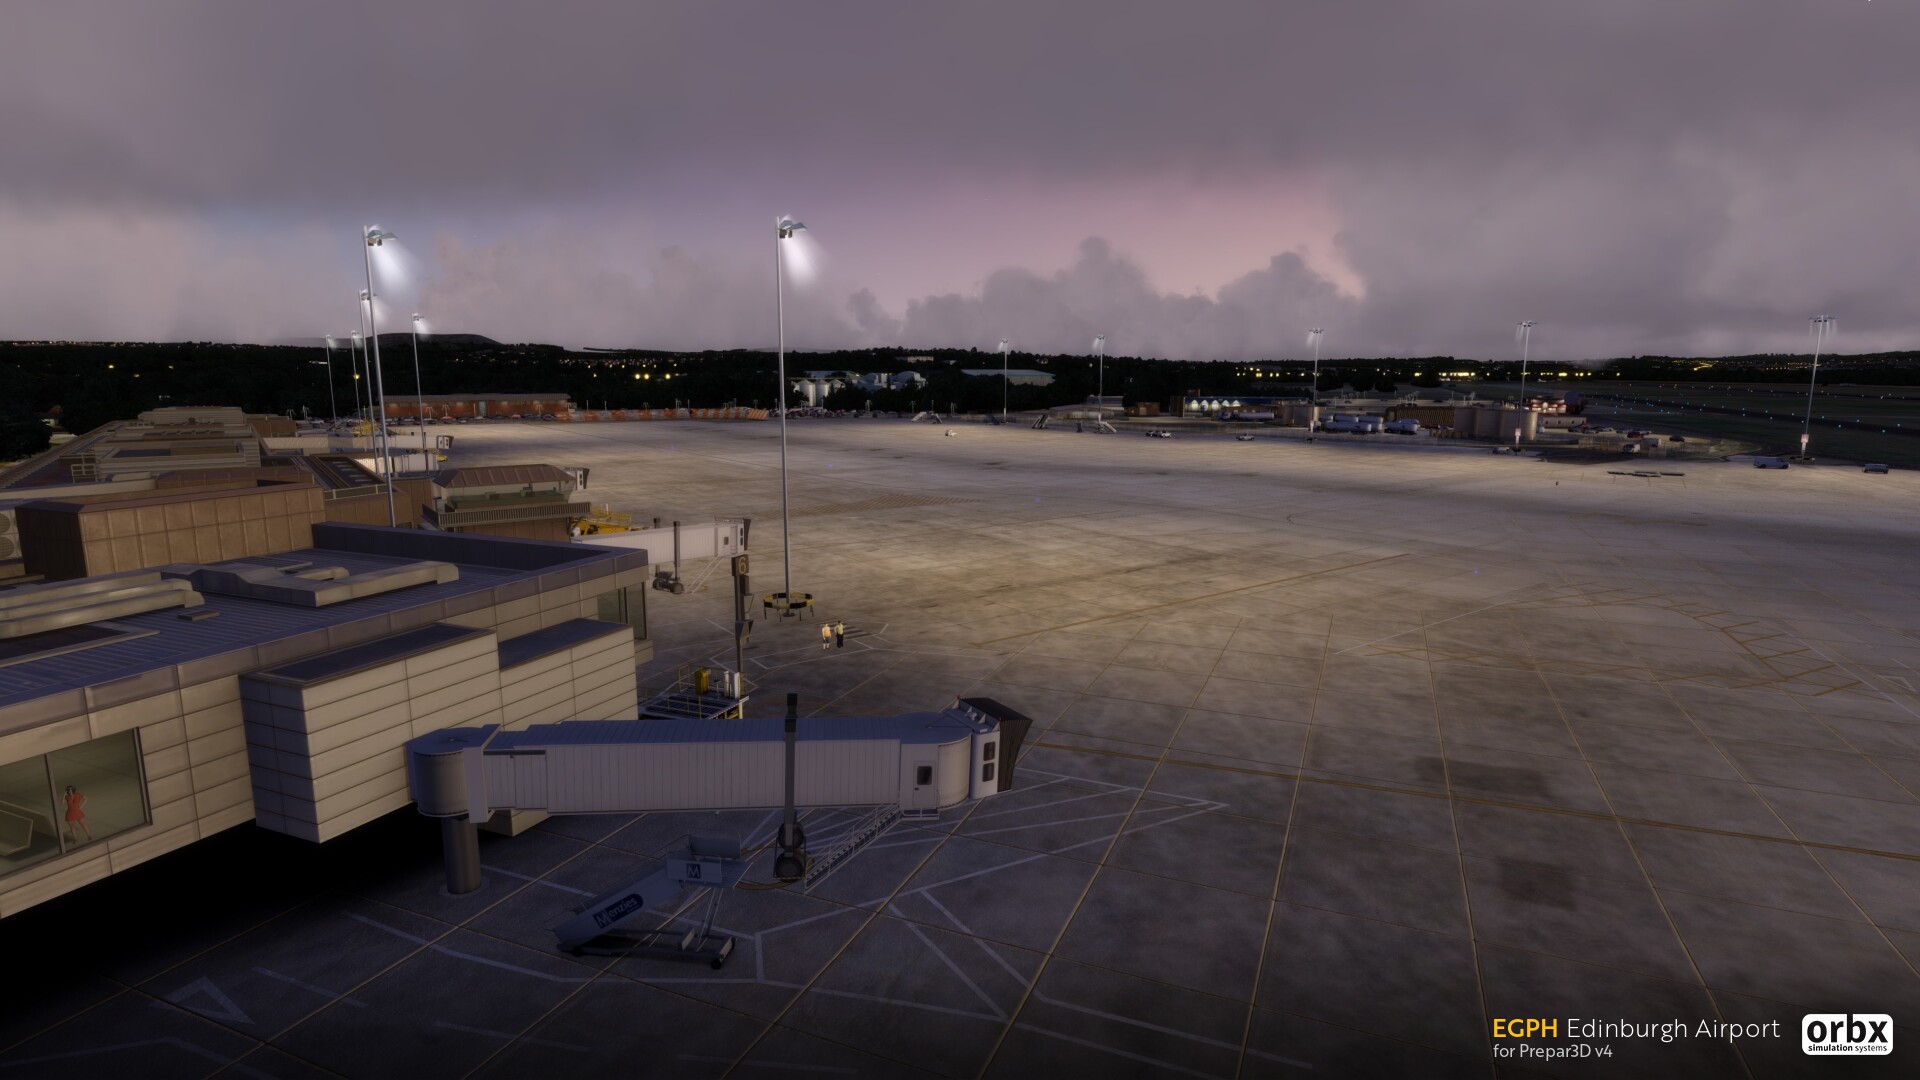
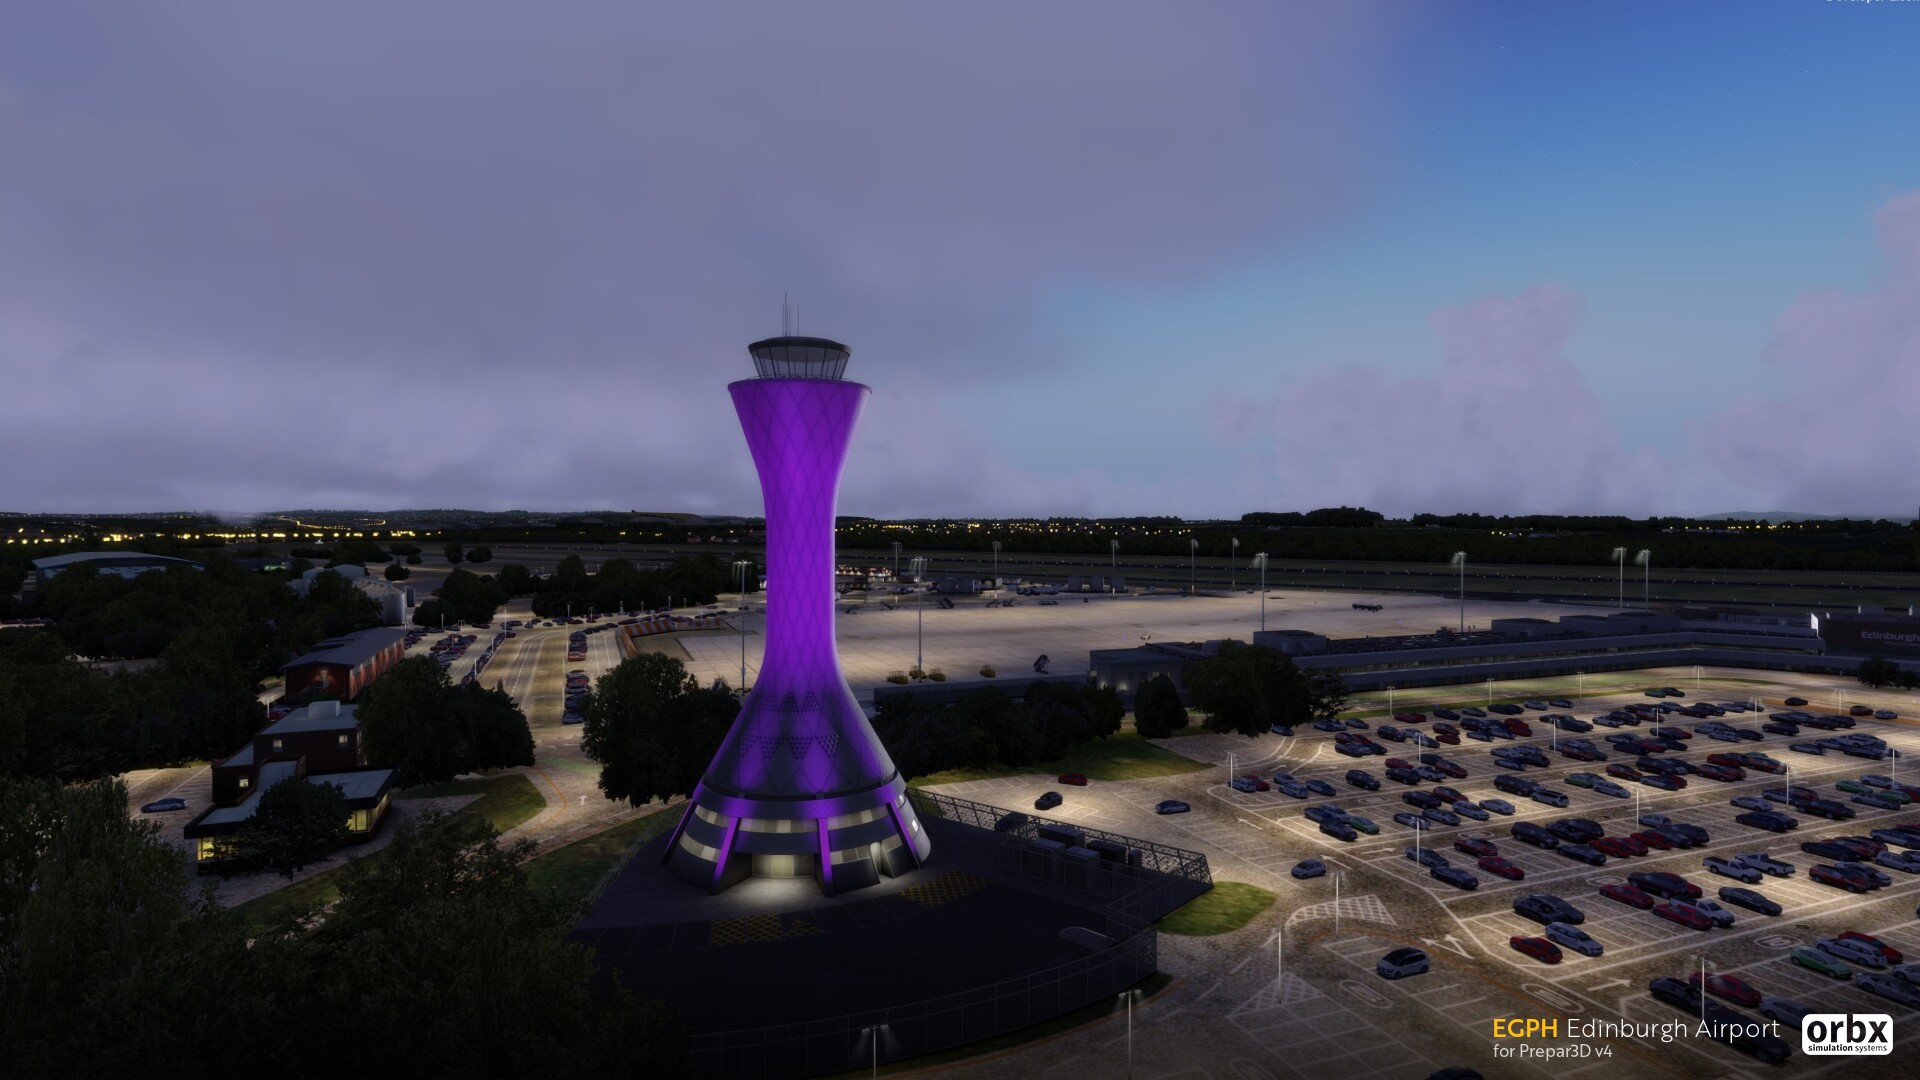
Throughout the scenery, enjoy impressive 3D custom modelling of the main terminal areas and beyond. Smaller details such as ground service equipment scatter the airport apron, which brings the airport to life.. Edinburgh’s iconic Air Traffic Control tower sits tall and mighty behind the main terminal building and has been recreated using highly detailed modelling and texturing. As the sun sets, be sure to see the ATC tower lit up with its powerful purple tones.
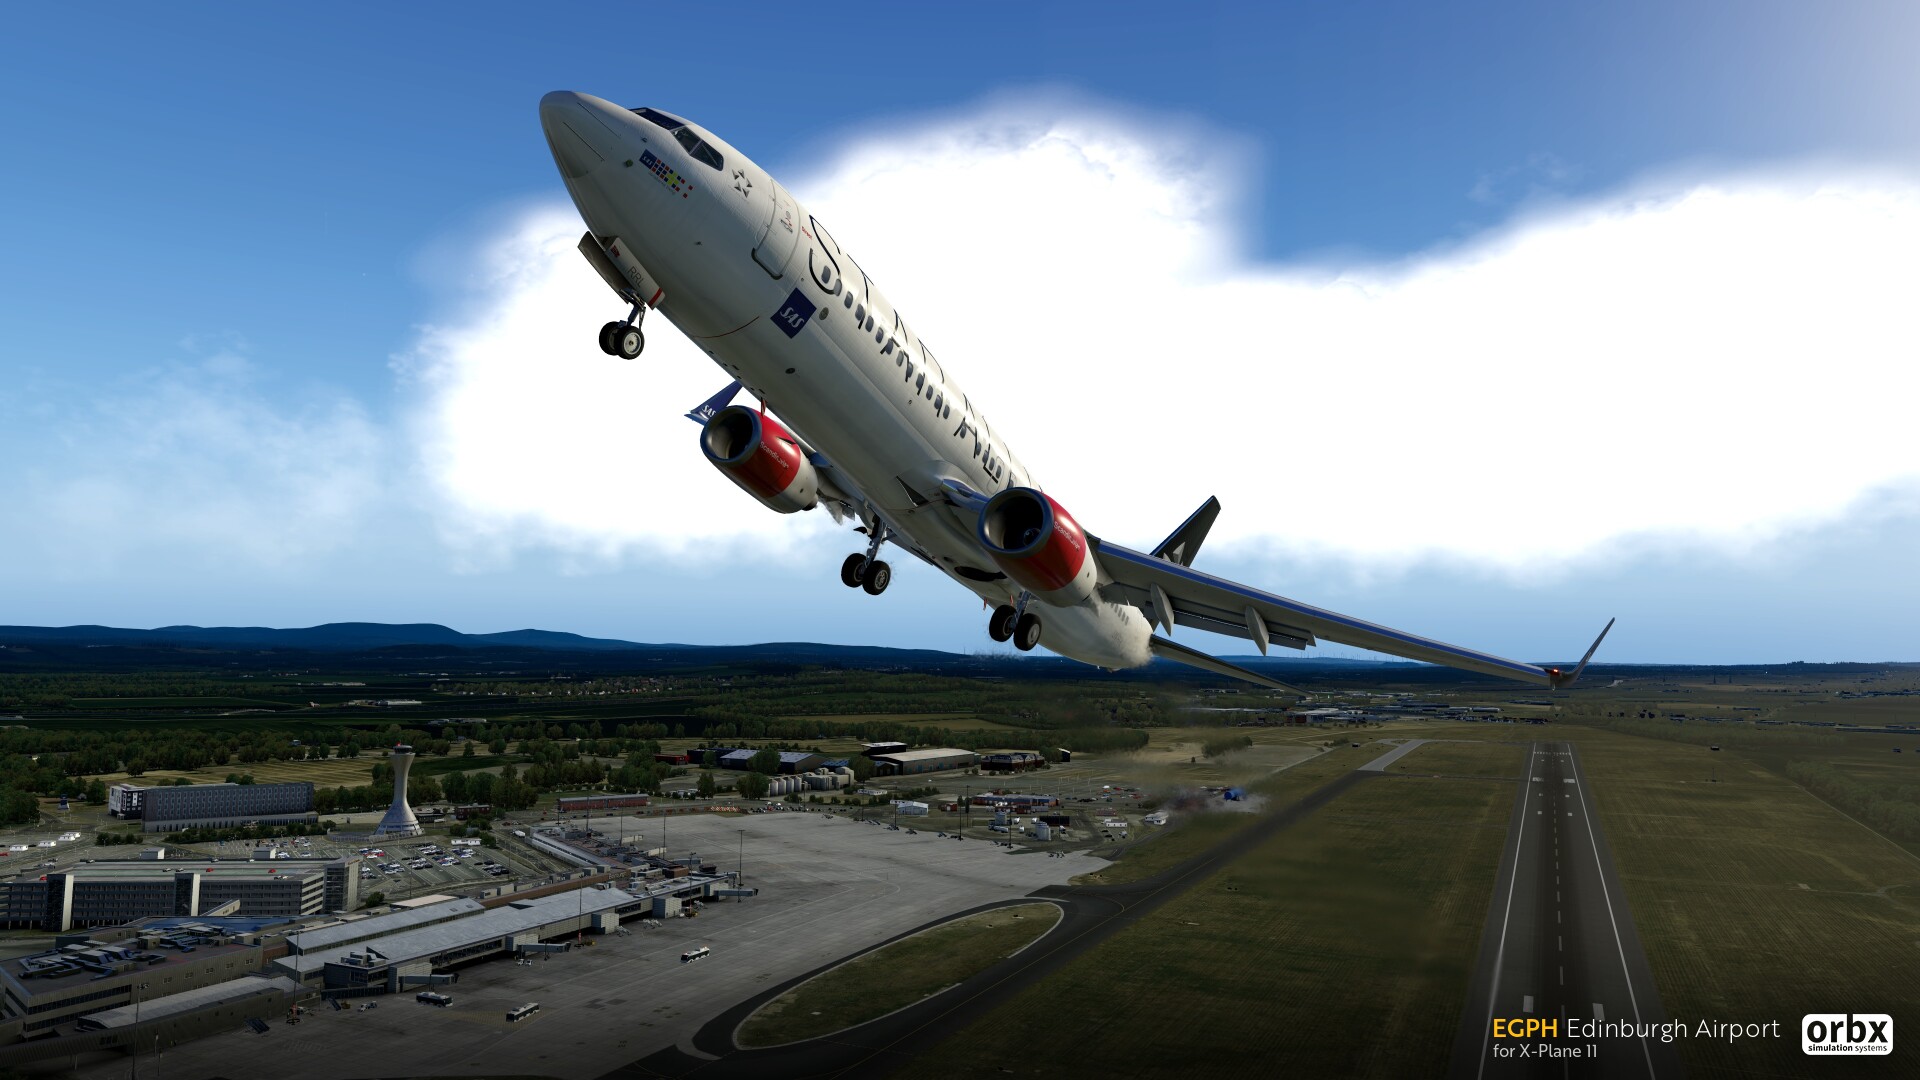
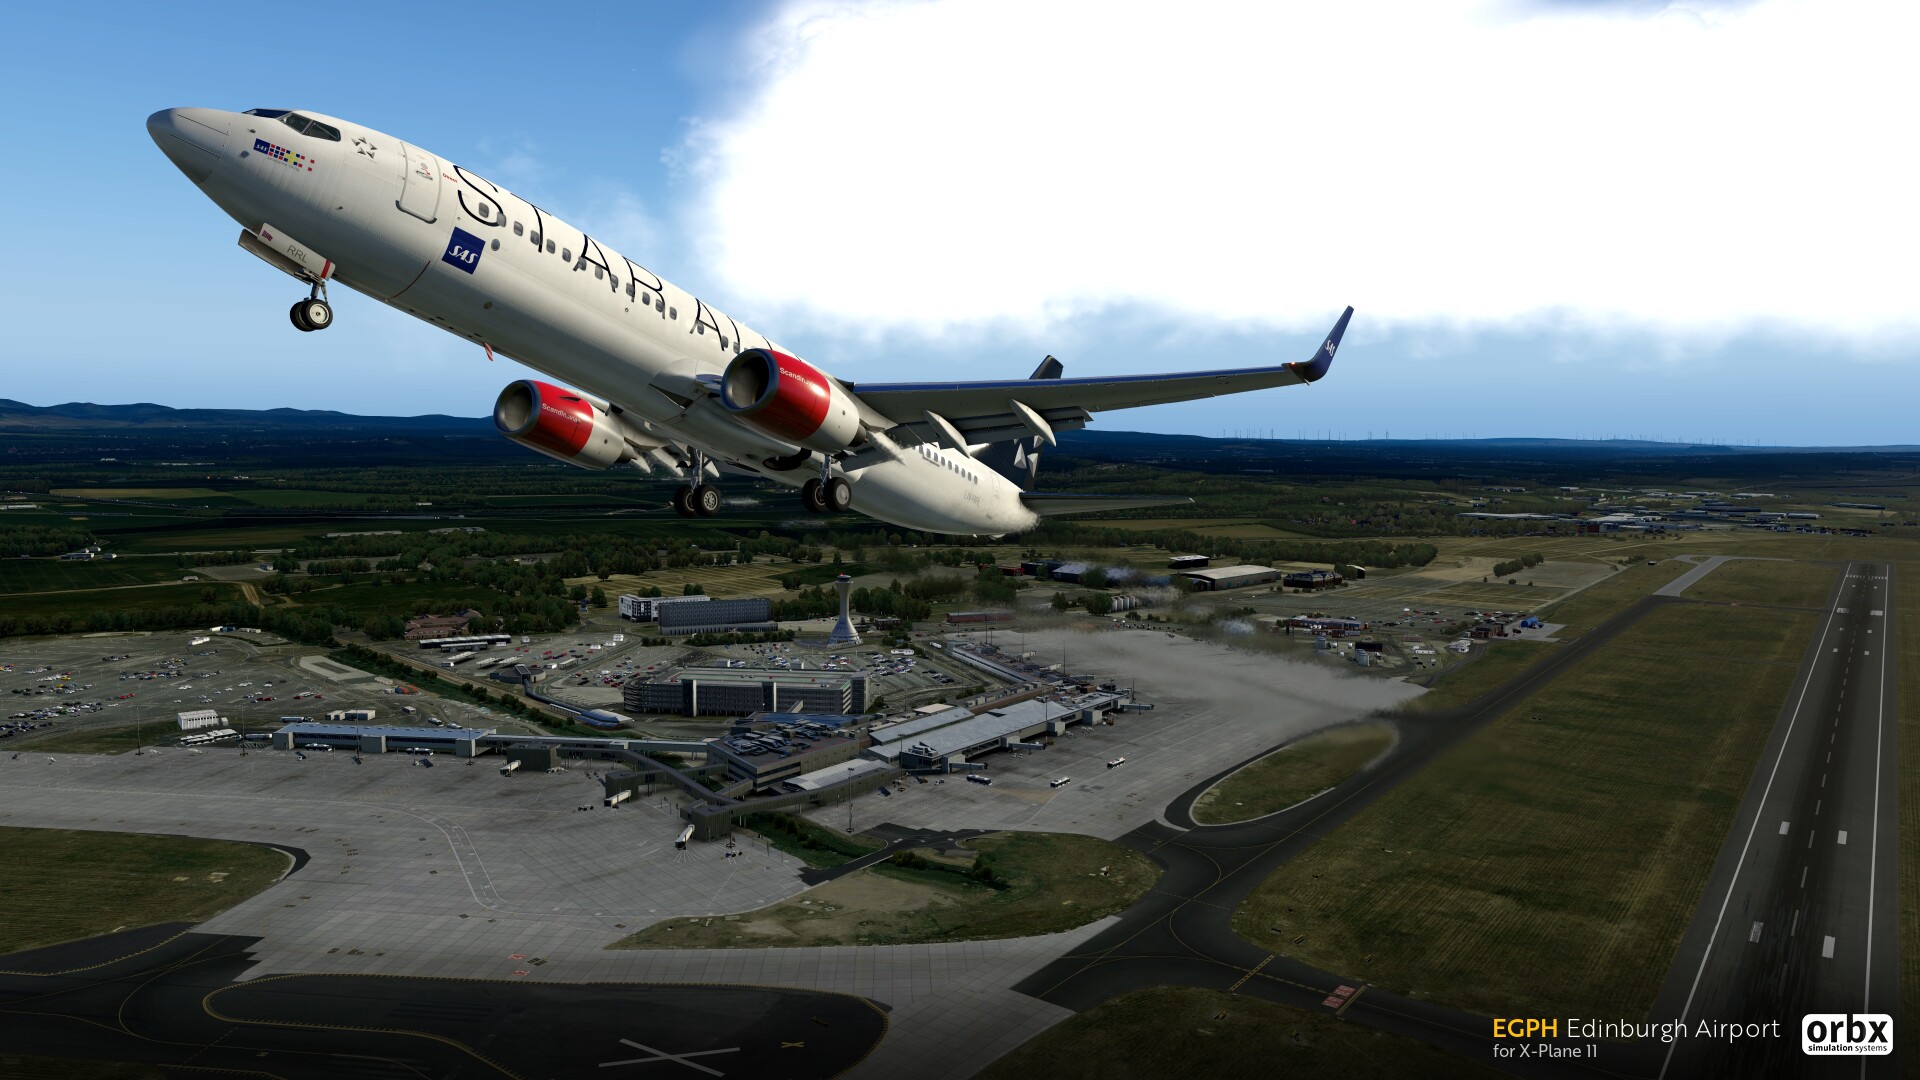
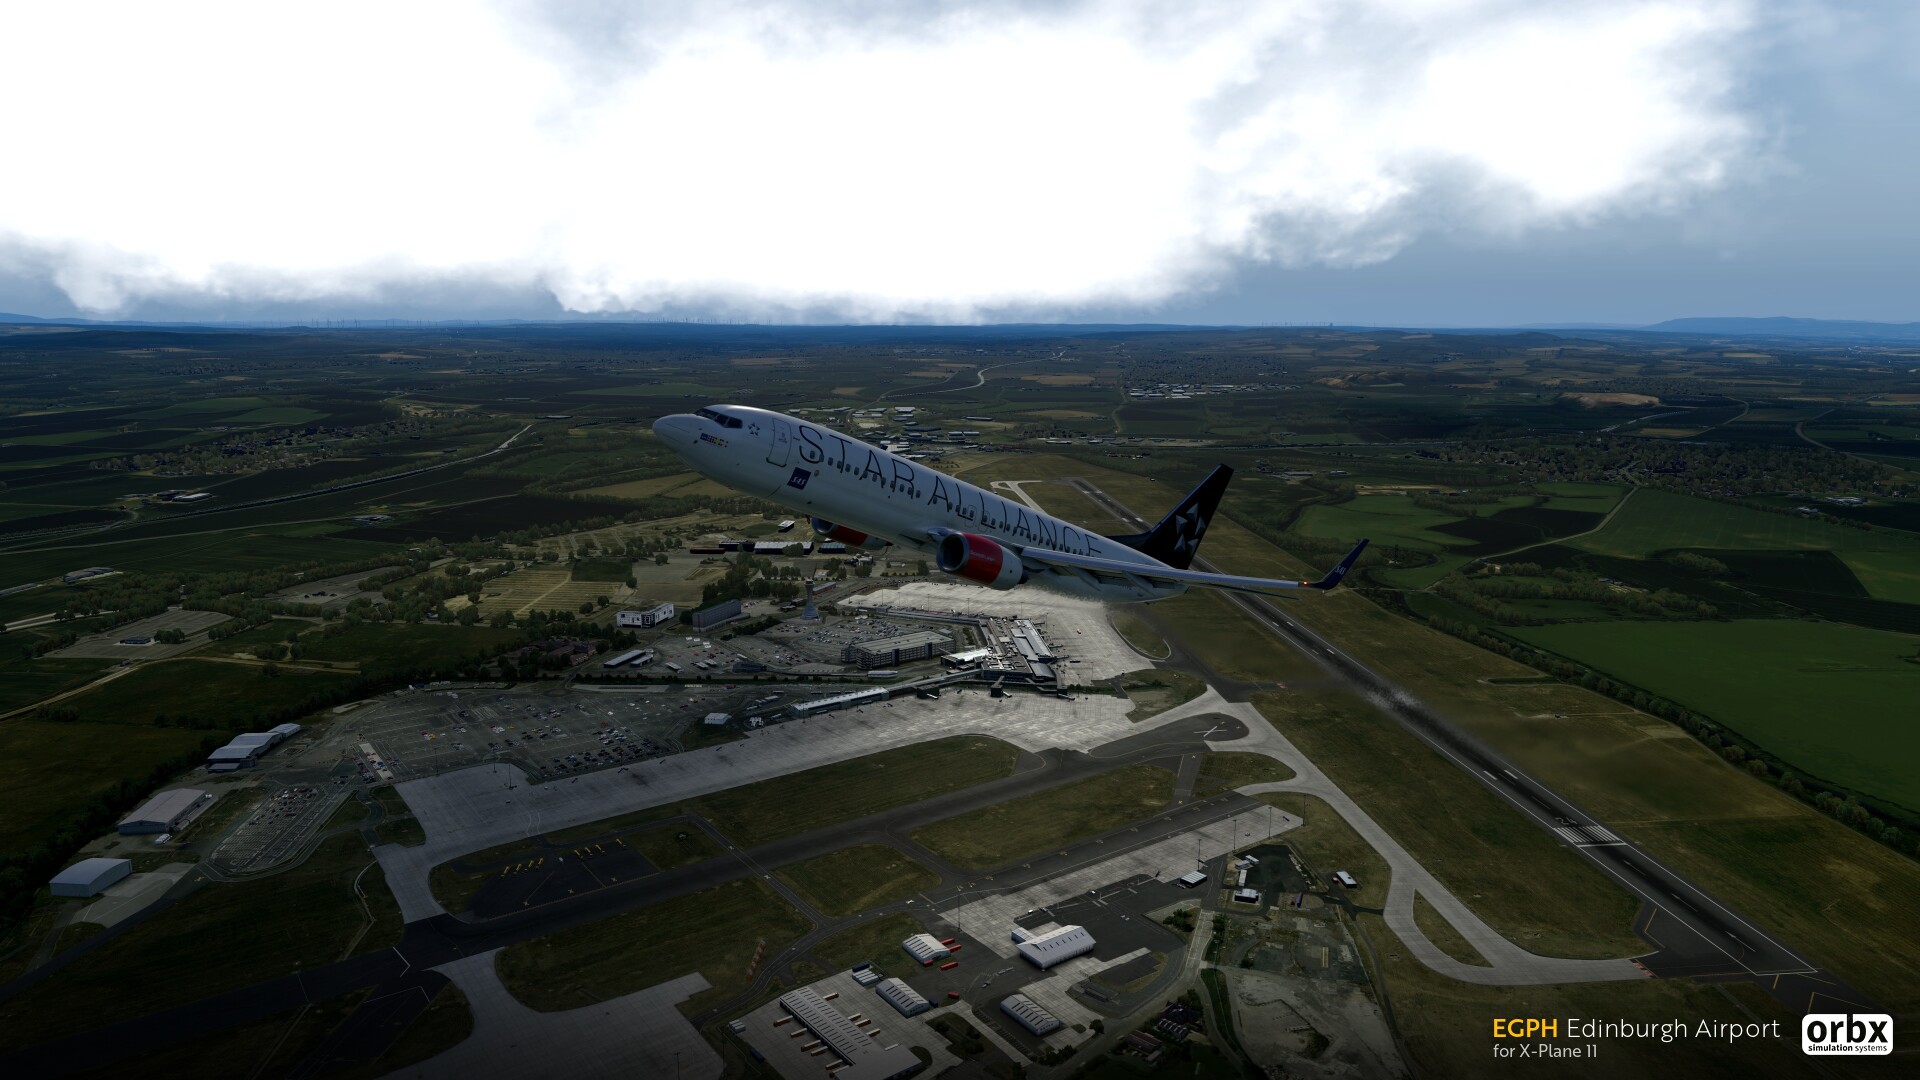
As Scotland’s busiest airport, Edinburgh airport is an all-purpose airport with vast connections to major cities and destinations around the world. The airport’s official tagline of “where Scotland meets the world” certainly rings true as whether you want to fly a local carrier or travel further afield, the airport will keep you entertained for hours to come. Long-haulers can enjoy trips down into the Middle-East, whilst those who prefer those shorter flights can easily reach exciting European destinations.
Taking full advantage of the features X-Plane 11 has to offer, you can enjoy the impressive night lighting illuminate beautifully on the apron and also a range of animated traffic inside and outside the airport perimeter. Firetrucks, fuel trucks, buses and more will make Edinburgh airport come to live. Full PBR material and high-resolution imagery also come as standard with Edinburgh airport, along with the easy installation process through Orbx Central.
Designed to blend in with TrueEarth GB North, you can enjoy approaching the airport from any direction to enjoy approaches that lead you right over the cultural city. Be sure to spot historic landmarks such as Edinburgh Castle or Arthur's Seat as you arrive or depart.
Excitingly, Edinburgh begins paving the way for simultaneous releases on both Prepar3D and X-Plane platforms. Whichever simulator you choose to fly into Edinburgh Airport, you will enjoy an immersive experience for Scotland’s busiest airport.
Quick fun fact: Now the 6th biggest airport in the UK, Edinburgh airport started life as the most northerly British air defence base during the first World War.
AT A GLANCE
- Realistic rendition of Edinburgh airport based on our licensed 2016-2017 imagery
- High-resolution photoscenery surrounding the airport
- Detailed and performance-friendly 3D modelling for the airport and beyond
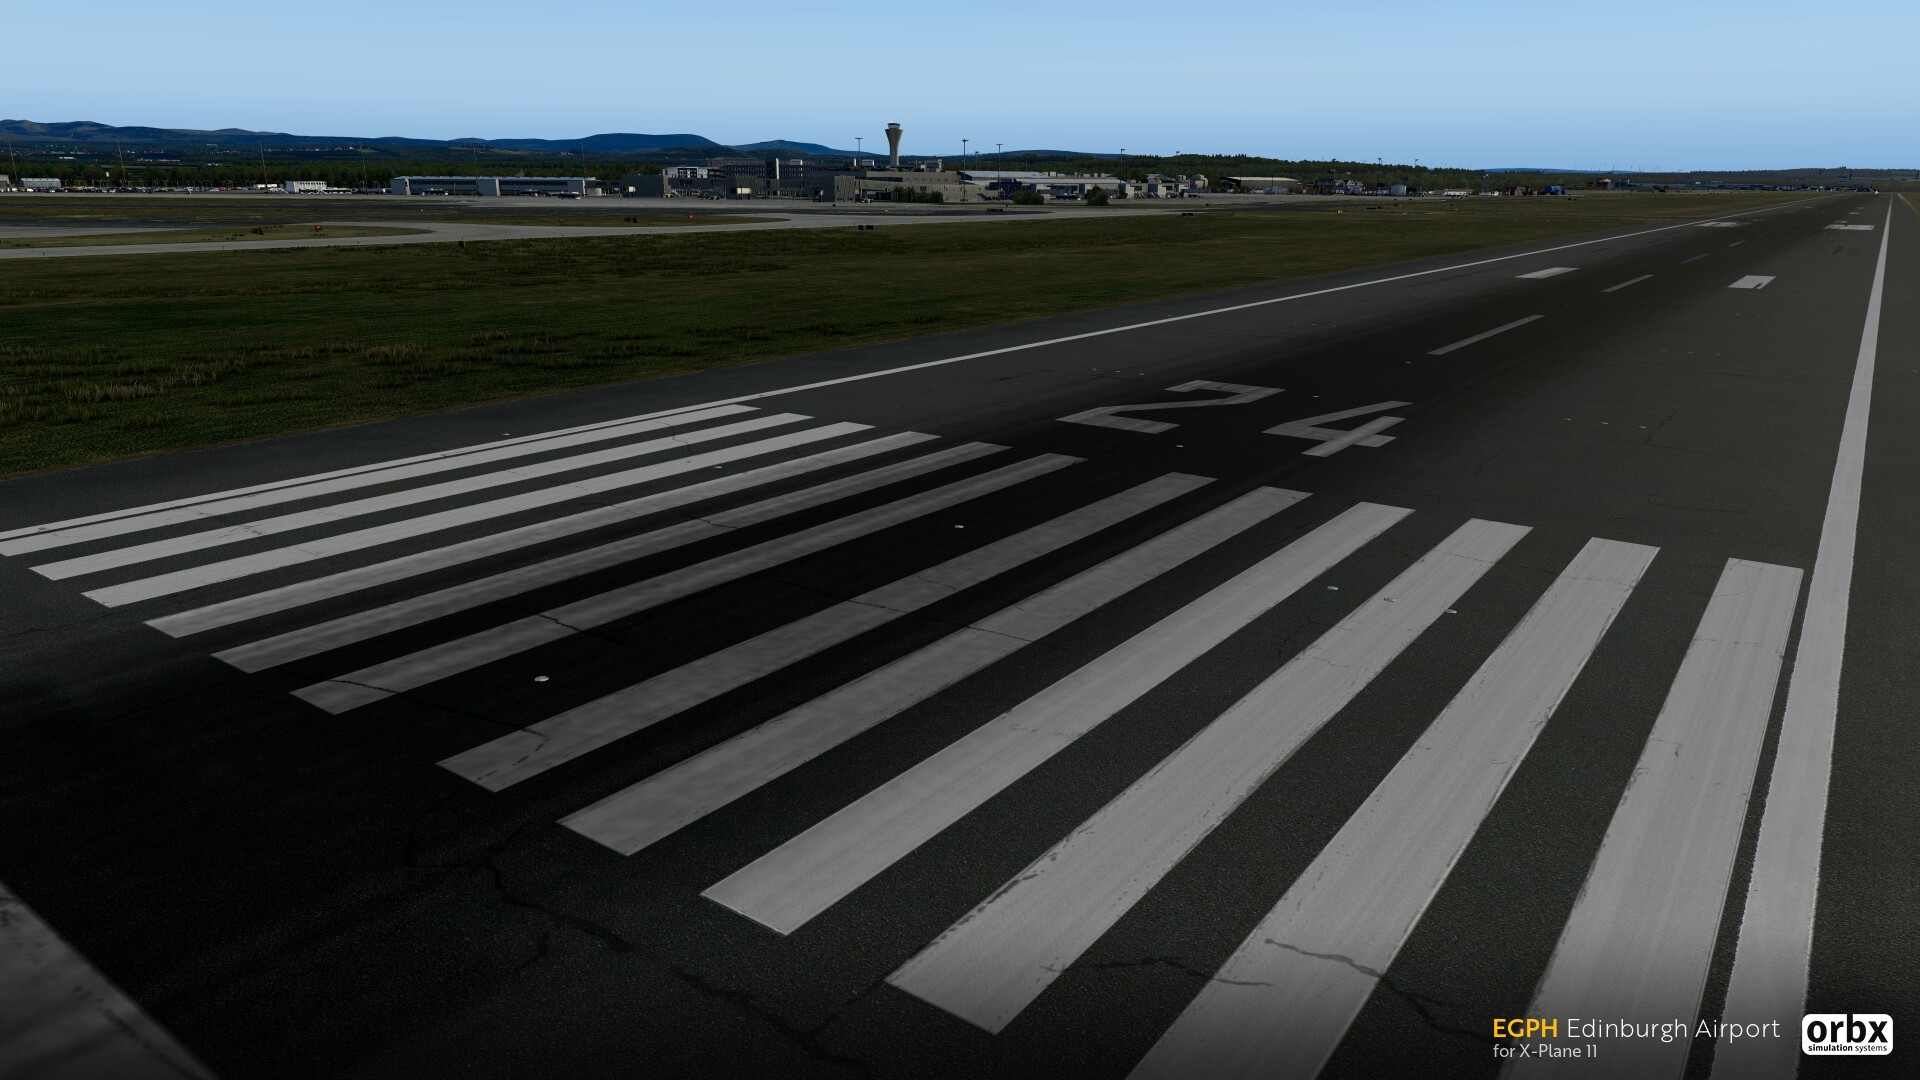
- Superb ground textures with environmental wear-and-tear for that realistic effect
- Fire station, hotels and offices all fully modelled with impressive detailing
- Dynamic lighting across the whole airport bringing the airport at night to life
- Impressive rendering of the iconic ATC tower at Edinburgh complete with accurate lighting during night
- Edinburgh comes to live with a range of animated traffic including firetrucks, fuel tankers and more
- SAM jetways to make it easy to connect to your aircraft at aircraft stands
- Developed by GayaSimulations, known for their challenging Courchevel Airport


EGPH Edinburgh Airport for X-Plane 11 is now in late beta testing and will be released soon, on the same day as the Prepar3Dv4 version. More screenshots from the team to follow!
-
9
-
- Popular Post
The historic capital of Scotland awaits.
Orbx continues to develop exciting new locations within the world of flight simulation, with the imminent release of EGPH Edinburgh Airport for both Prepar3D V4 and X-Plane 11.
In-House team Gaya Simulations has faithfully recreated the busy airport using the latest techniques and features to give you the most realistic experience possible. Using HD PBR textures to provide an unprecedented level of detail throughout - in particular on the airport apron. Explore the fully modelled fire stations, hotels and office buildings that surround the airport, or watch as the airport comes to life with animated traffic throughout.
This version of the airport takes into account many of the airport’s recent changes, including the old Runway 12/30, which closed in March 2018. Note that our airport depicts all ground areas based on our licensed imagery from 2016-2017. We may look into an update to add new aircraft parking areas in the future.
Throughout the scenery, enjoy impressive 3D custom modelling of the main terminal areas and beyond. Smaller details such as ground service equipment scatter the airport apron, which brings the airport to life in conjunction with Orbx PeopleFlow. Edinburgh’s iconic Air Traffic Control tower sits tall and mighty behind the main terminal building and has been recreated using highly detailed modelling and texturing. As the sun sets, be sure to see the ATC tower lit up with its powerful purple tones.
As Scotland’s busiest airport, Edinburgh airport is an all-purpose airport with vast connections to major cities and destinations around the world. The airport’s official tagline of “where Scotland meets the world” certainly rings true as whether you want to fly a local carrier or travel further afield, the airport will keep you entertained for hours to come. Long-haulers can enjoy trips down into the Middle-East, whilst those who prefer those shorter flights can easily reach exciting European destinations.
In Prepar3Dv4, you will also experience effective dynamic lighting and also the use of SODE jetways to give you an immersive experience.
Designed to blend in with EU Scotland, enjoy approaching the airport from any direction to enjoy approaches that lead you right over the cultural city.
Excitingly, Edinburgh begins paving the way for simultaneous releases on both Prepar3D and X-Plane platforms. Whichever simulator you choose to fly into Edinburgh Airport, you will enjoy an immersive experience for Scotland’s busiest airport.
Quick fun fact: Now the 6th biggest airport in the UK, Edinburgh airport started life as the most northerly British air defence base during the first World War.
AT A GLANCE
- Edinburgh airport based on our licensed imagery from 2016-2017.
- High-resolution orthoimagery surrounding the airport
- Detailed and performance-friendly 3D modelling for the airport and beyond
- Superb ground textures with environmental wear-and-tear for that realistic effect
- Fire station, hotels and offices all fully modelled with impressive detailing
- Dynamic lighting across the whole airport bringing the airport at night to life
- Impressive rendering of the iconic ATC tower at Edinburgh complete with accurate lighting during night
- PBR materials used across the airport, with wet texture appearance during rainy weather
- SODE jetways to make it easy to connect to your aircraft at aircraft stands
- Developed by GayaSimulations, known for their EGNX East Midlands Airport


EGPH Edinburgh Airport for Prepar3Dv4 is now in late beta testing and will be released soon, on the same day as the X-Plane 11 version. More screenshots from the team to follow!
-
10
-
I’ve added the names below the photo now.
-
1
-
2
-
-
The ballroom before we begin setting up ...

-
7
-
1
-
-
- Popular Post
- Popular Post
Hello all,
This weekend we have no fewer than 18 Orbx staff flying in from all over the world to participate in FS Expo 2019 in Orlando. To give you an idea of the cumulative 250,000+ air miles the team has flown, here are the home airports we departed from: EGLC, EGHI, YMML, YPPH, CYYJ, KDAL, KRDD, LSZH, and KDFW.
Some snaps from our journeys:


We’ll use this pinned topic to post up some photos of the conference over the weekend.

-
12
-
1
-
You don't need to buy tools to edit the water.
Using VMI-Twick VR you can set the water sliders in real-time and store four different setups: https://forums.x-plane.org/index.php?/files/file/46918-vmi-twick-vr/
I have a guide for it here:
-
OK I have now moved this into the public XP Tips forum. After using this for a month I cannot fly XP without it now, it is just so powerful and flexible.
I hope this will provide some benefit to people.
-
3
-
1
-
-
Great tip!! Gave me a bunch of FPS back.
Thanks for the HU
-
I always just install the latest nvidia drivers when the update notification arrives. Mostly the differences in drivers are specific bug fixes for AAA titles such as Battlefield etc, so I just keep the latest one installed.
-
Nice result Nick!
-
Hello all,I have spent many months with XP11 trying to tune it for smooth performance, especially when using 4K monitors and also in VR with my Oculus Rift. Despite doing extensive research and trying a lot of tools that claimed to offer miracles, nothing seemed to really offer a substantial benefit, until I stumbled across this very good LUA script over at X-Plane.org by VmaximlVMI-Twick VRDownload from here - https://forums.x-plane.org/index.php?/files/file/46918-vmi-twick-vr/ - I actually think 'twick' is a typo of 'tweak', since the author is not a native English speaker by his own admission. Still, it sounds cute
FlyWithLua NGYou will also need the latest FlyWithLua plugin also available from here: https://forums.x-plane.org/index.php?/files/file/38445-flywithlua-ng-next-generation-edition-for-x-plane-11-win-lin-mac/ - At the time of writing the zip I used was FlyWithLua_NG_v2.7.9_Lin_Mac_Win.zip. Just extract the contents of this ZIp into your X-Plane 11\Resources\plugins\FlyWithLua\ScriptsWithout exaggeration, this VMI-twick VR script alone will improve your performance with XP11.3x unlike anything else you may use. Let's first cover off the basics of having the best Windows environment before you begin using this tool.Preparing Windows (assuming Windows 10)1. Disable Windows 10 Defender. Just turn it off completely, it's a resource hog - https://www.wikihow.com/Turn-Off-Windows-Defender-in-Windows-102. Close all other running apps - download Process Lasso for a better task manager, and set it to run at peak performance - https://bitsum.com/3. Remove all bloatware from Windows 10 using this simple script - https://geekylifestyle.com/remove-windows-10-bloat-with-this-amazing-script4. Get the latest nVidia drivers5. Overclock your CPU within safe limits (my i7-8700K is clocked to 4.8Ghz even though it can go to 5.0Ghz. I just want more life out of my CPU )
Set your XP11 slidersSet your sliders as follows. Yes, you can enable shadows on scenery! My Desktop PC specs as shown in my signature. Be sure to leave Reflections set to zero. I use modest AA with my 4K screen. Setting high AA levels kills FPS and also stresses out your GPU and will shorten its life. For 1080p I would use 4xSSAA+FXAA maximum, and for 1440p I would just stick with 2xSSAA+FXAA.
 Installing FlyWithLuaAs I said above, get the latest version - FlyWithLua_NG_v2.7.9_Lin_Mac_Win.zip. Just extract the contents of this ZIP into your X-Plane 11\Resources\plugins\ folder - nothing more to do.Installing VMI-Twick VRJust extract the VMI-twick VR.zip into your X-Plane 11\Resources\plugins\FlyWithLua\Scripts - you will see this in your Scripts folder:
 If you want to follow this guide and use my settings, I have attached a ZIP file to this post which contains my saved settings folder. Just place the VMI-tick VR Settings folder into your FlyWithLua\Scripts folder, and choose to overwrite.Now run X-Plane 11 (I am using the 11.32 beta release) - you will see a small green box at the bottom left side of your XP window:
 Press this, and you will see the interface window with my settings applied (Set 1):IMPORTANT! - Set the interface to [ USER mode ] - this will give you complete control which is needed to get this script to work properly.I'll go through each section in turn in more detail now.FPS ControlThis is a very important screen.
- Set desired FPS to 45, which is the target for smooth VR flying, and can be generally used as a target for general non-VR flying as well. Don't be tempted to set this to 60, as it will adversely affect the results. Just keep it at 45.
- Do NOT set [Auto LOD] on, keep this off. Instead, set the slider to 90% - DO NOT SET ABOVE 90% - This is a huge FPS killer! Anywhere from 80-90% still gives you fantastic visuals and world objects but improves your FPS massively.
- Do NOT set [Auto CLOUDS] on, keep this off. Instead, set the slider to 54%
- The other two sliders are usually taken care of by Ultra Weather XP (UWXP). If you are not using UWXP, set them to 38% and 0% respectively
VR
If you are flying in VR, all you need to do is load one of your saved presets from slots (1-4) and press press [ AUTO Mode ] - that will dynamically keep your FPS at 45 at all times which means you can easily set Oculus for example to use SuperSampling 1.3 and disable ASW altogether.
 Lights MenuI did not play with this menu extensively, other than to show brighter stars at night. These sliders do not really affect performance.
 Shadows MenuThis menus is where some hidden delights of this script are found! I now have super-sharp cockpit shadows both inside and outside the cockpit, and there is little FPS impact. If you set the sliders to the same values as I have below (or use my save settings file below), then you will be very happy with how cockpit shadows look now.
 Objects of world menu
- Set Quantity of Cars to 2 - max value is 5, but XP11 puts far too many cars on the road. 2 is more natural and saves you about 5FPS. For very low end PCs you can disable road vehicles altogether by setting this to 0.
- I maxed out the quantity of aircraft because I like seeing AI flying around. Set this to 0 to disable AI traffic, or if you are using the new Live Traffic beta.
- Reflections in water. This is an amazing tweak that allows me to set maximum reflections on the water without having any FPS impact when using VR in my Oculus Rift (or none that I can see). When using XP normally on your monitor there will be an FPS hit but much, much less than using the default sim setting slider. I also found that using this reflections slider inside this VMI-twick fixes the flickering reflections bug in XP 11.30. Setting the slide to 0 disables reflections altogether. EDIT: I found that you need to set reflections to max in the XP settings screen to get the best quality reflections
- For all the other wave parameters, set them to the values show to get a nice balance wave pattern without an repetition and with lovely reflections.
Waves editing
The beauty of this screen is that you can test wave parameters in real-time! With XP 11.32 they upgraded the water shaders, so I edited my waves to see great reflections in the water whilst still having good wave heights in the water to add that "noise". Try my preset 2 to see how this worked. I have posted some screenshots here:
The key sliders are Wave Height - 1 and Wave Period 1. Those two alone make most of the difference. With enough practice you will be able to make great waves without seeing any repeating patterns at all. Again, try my preset 2.
 Weather MenuThis menu is like a built-in xVision shader, because it provides tonal controls for each type of weather condition (Mountain, Clean, Hazy, Foggy, Soaked). I think the author's lack of English skills come into play here but I was able to have bright, saturated ground terrain during sunny days and also have a rich look to the terrain during overcast days, instead of the default overly-gloomy effect. Try my settings here (or load my attached profile) to see how you like it.I can imagine people spending some time on this screen to tweak their weather. It's very powerful.
 Atmo MenuThe atmo (atmosphere) menu gives you control over the Raleigh Scattering effects and the tones used. The last three sliders are RGB for the horizon colour, where I have it set for blue to dominate, but others may want a more subtle colour (in which case, pull back the last Scatter raleigh -b (blue) slider)
 Settings MenuAt the "Settings" screen you can save to your own preset (Set 1 / 2/ 3 / 4). My settings are saved to Set 1 (Great Peformance) and Set2 (Eye Candy) (ZIP file attached below). Using the load/save function you can potentially have up to four profiles which you can use for normal operations, VR operations, city flights or rural flights.VR ModeAlways keep this on! If you untick this box it seems to lock the FPS down to 20fps, which is not good! If you are using VR ith this box ticked these menus can be displayed in a floating window inside the cockpit as you fly. In this way you can tweak right inside your VR googles without taking them off! You can leave VR mode checked even if not using VR. To bring up the menu in VR you have to right-click the mouse inside the cockpit and then drill down to the FlyWithLUA scripts to pull up the VMI-twick VR menu.Ultra Weather XP (UWXP) UsersImportant! If you are using UWXP then VMI-twick is 100% compatible with it. Just tick the [x] UWXP box. This will grey out and disable any sliders in the interface which UWXP normally takes care of.Enable FPS graphThis is a handy moving real-time display to show how close to your goal of 45FPS your settings are. Not essential to keep this after you are finished tweaking. It actually saves an FPS or two by turning it off.Enable TooltipsWhen clicking an option box, click and hold the mouse button to see a pop-out tooltip window displayed.Enable quick switch settingsI would disable this. This enables switching profiles just by clicking on Set 1 through to Set 4. This is dangerous since if you have forgotten to save your 'perfect' settings it will lose all changes. I prefer to use the manual LOAD and SAVE buttons for surety.
 Hopefully that has covered off all the tweaks in this amazing free script, but of course YMMV and I am sure you will be playing with some of the sliders.But try my settings first to see if you have an improvement.Let me know your results!

-
3
-
1
-
1
-
Stop asking the same question for every release, it’s getting tiresome...
-
I've created a pinned topic in the FTX Central forum for those customers having issues downloading the TE GB series.
This fix also works for those trying to download the cross-platform ZIP files.
-
Please be aware that whilst many people run the latest public beta builds of X-Plane 11 on their PCs, Orbx does not provide official support for XP11 beta builds. Laminar Research makes their beta builds public for the purposes of getting bug reports from their customers. They also caution against using beta builds for general X-Plane flying.
Whilst our airports and regions may run on XP11 betas, we only release product for the last stable full release. At the time of writing this was XP11.26
If you post support topics for issues caused by an XP11 beta build, our support staff and moderators reserve the right to refuse support or lock the topic.
-
Be sure your scenery_packs.ini order is correct.
QuoteSCENERY_PACK Custom Scenery/Global Airports/
SCENERY_PACK Custom Scenery/KSEA Demo Area/
SCENERY_PACK Custom Scenery/LOWI Demo Area/
SCENERY_PACK Custom Scenery/X-Plane Landmarks - Chicago/
SCENERY_PACK Custom Scenery/X-Plane Landmarks - Las Vegas/
SCENERY_PACK Custom Scenery/X-Plane Landmarks - London/
SCENERY_PACK Custom Scenery/X-Plane Landmarks - Sydney/
SCENERY_PACK Custom Scenery/Orbx_A_GB_South_TrueEarth_Custom/
SCENERY_PACK Custom Scenery/Orbx_B_GB_South_TrueEarth_Overlay/
SCENERY_PACK Custom Scenery/Orbx_C_GB_South_TrueEarth_Orthos/
SCENERY_PACK Custom Scenery/Orbx_A_GB_Central_TrueEarth_Custom/
SCENERY_PACK Custom Scenery/Orbx_B_GB_Central_TrueEarth_Overlay/
SCENERY_PACK Custom Scenery/Orbx_C_GB_Central_TrueEarth_Orthos/
SCENERY_PACK Custom Scenery/Orbx_OrbxlibsXP/Place the Central A B C folder below the South ones, or below the X-Plane Landmarks folders.
-
- Popular Post
Hello everyone,
We are happy to announce that TrueEarth GB Central is now available for X-Plane 11!
PLEASE READ ALL INSTRUCTIONS BELOW
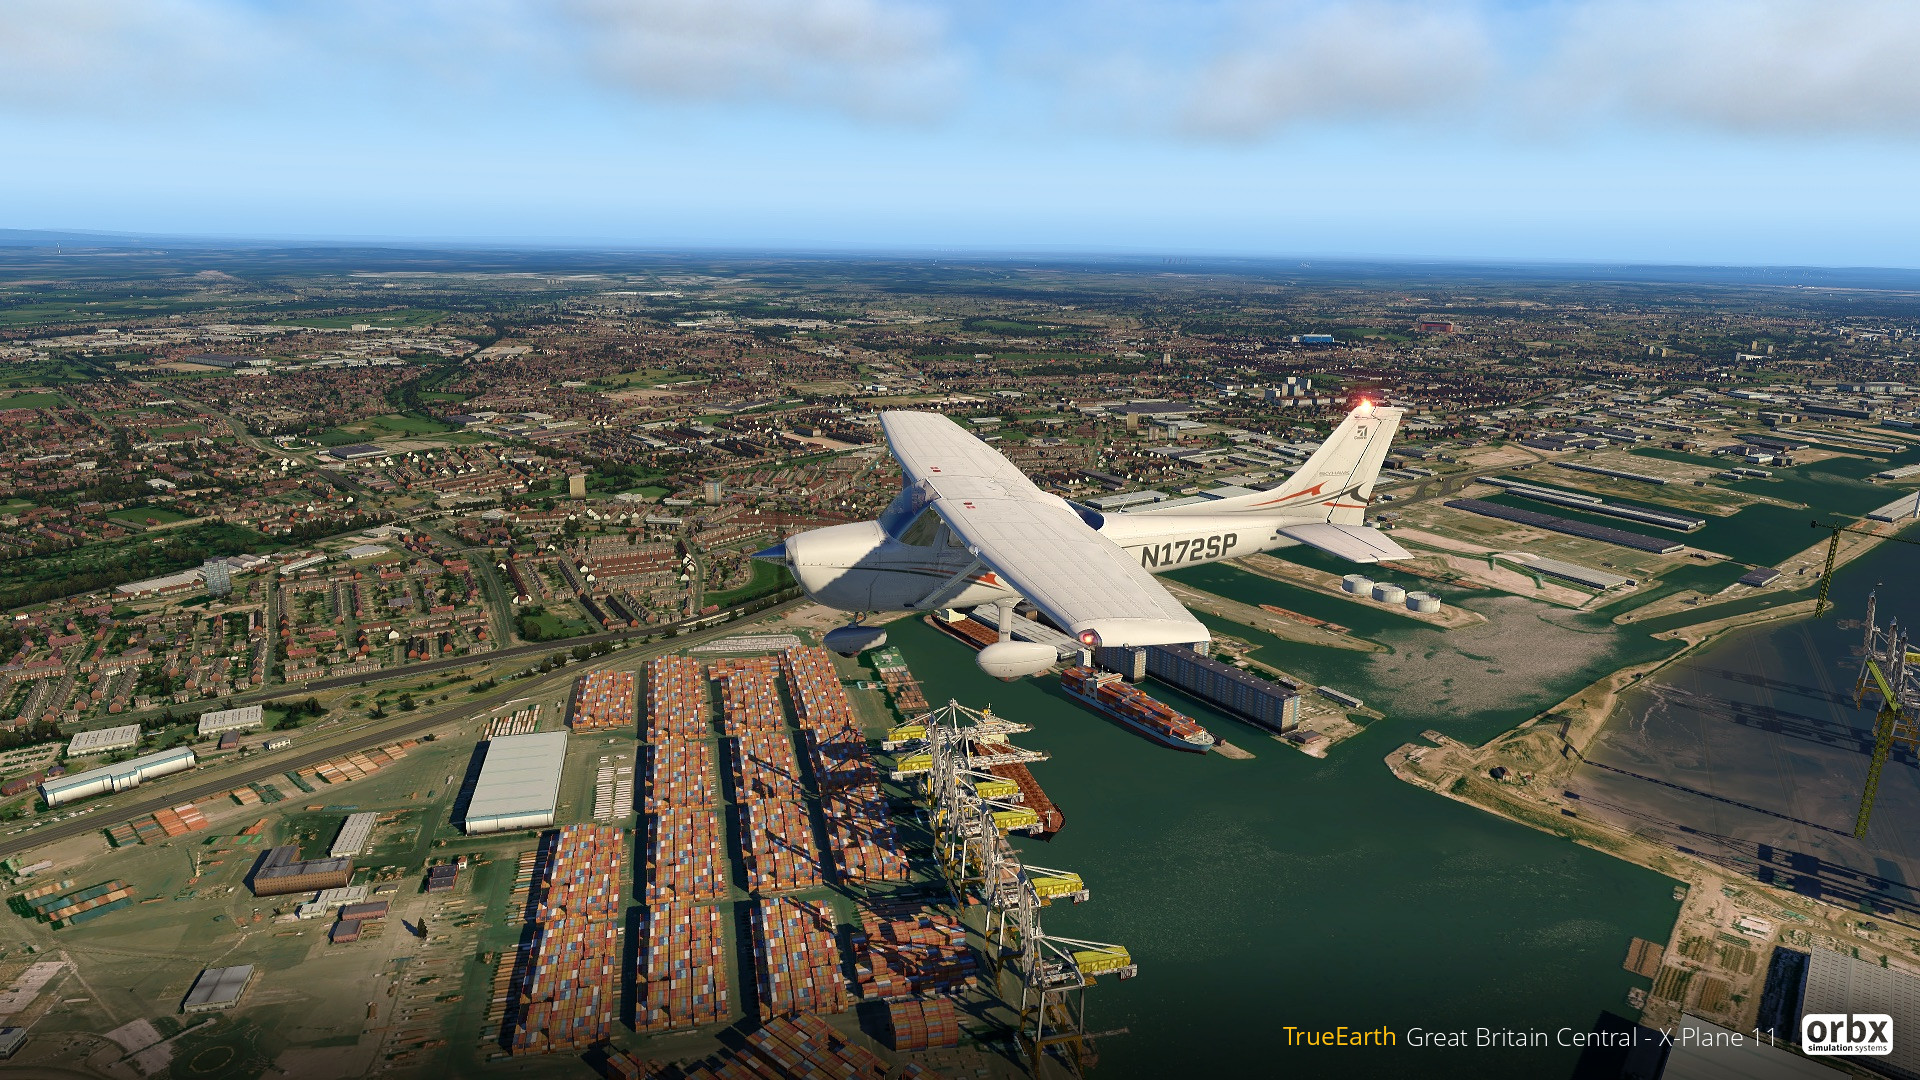
TrueEarth GB Central covers a massive area of 59,383km2 of hand corrected imagery covering the entire central region as shown below in the coverage map. Of particular note are metropolitan areas such as Liverpool, Manchester, and Newcastle. We have also faithfully recreated scenic areas such as the Lake District, the Peak District, Snowdonia National Park, the North Yorkshire Moors, and the North Wales Coast/Llandudno. If you like castles and cathedrals, then you'll be excited about the hundreds of POIs, especially around Bangor, Caernarfon, Cumbria, Northumbria, and Yorkshire.
Features:
- 37,000 square miles (59,383km2) of hand corrected, crisp, color-matched aerial imagery
- New autogen technology developed specially for X-Plane 11, allowing thousands of UK-themed houses to be placed at a realistic height with minimal impact on performance
- 72.5 million individually placed trees, ensuring maximum accuracy in forest areas
- Well over 4 million buildings at the correct height and location
- VFR landmarks such as masts, wind farms, churches, power lines, and lighthouses are all accurately placed.
- Hundreds of custom-modeled 3D POIs
- Hand-placed and custom modeled landmarks placed throughout the scenery such as bridges, skyscrapers, castles, piers, stadiums and monuments – this is especially noticeable in city areas such as Liverpool, Manchester, and Newcastle.
- Sharp and detailed 10-meter mesh brings out stunning detail in natural features such as hills and beaches
- Superb water masking along the entire coastline
- Accurate road and rail network blended into the aerial imagery with moving left-hand drive traffic.
- Control Panel option to use photoreal major roads/motorways or synthetic X-Plane ones.
- Summer season only with full night-lighting supported
We have also added a new built-in decompression feature in FTX Central to greatly reduce the download size ensuring an efficient installation process.
In addition to these features, users will get free service packs for life as well as more POI models in future updates.
TrueEarth GB Central is now available to purchase from OrbxDirect for AUD $54.95 (approx. USD $39.55 / €33.95 / £30.60), but you can save 10% until 1st January 2019 at 01:00Z!
Please note that there is no cross-grade discount from the landclass-based FTX England, Wales or Scotland regions.
** IMPORTANT!! ***
Please update to FTX Central v3.3.2.2 before installing. Run FTXC, wait about 20 seconds, then you will see the blue Apply FTX Central Update button. Please run the update before installing TE GB Central.
THIS PRODUCT INSTALLATION HAS A DECOMPRESSION STAGE - The TrueEarth Great Britain Central download size is a compact 16GB to save on download time, but we are using a new installation system where we decompress the ortho textures using FTX Central. This expands the total installation to around 77.3GB of drive space. The texture conversion process of 7,188 files can take between 1 to 2+ hours, depending on your CPU speed and the number of cores it has. It is normal during this process for the cooling fans to speed up on your PC.
After the download stage is complete, you will still see "Downloading", but the STATUS will change to "Converting" and a countdown of the number of texture files remaining:

DO NOT ABORT OR INTERRUPT THE INSTALLATION DURING ANY STAGE! Wait for the tick to appear and the text "Product Installed".
Also, Nick has created a support topic for customers who have any installation issues:
Roads Control Panel
We forgot to add control Panel option to disable the default XP11 roads. We will patch that in via FTX Central soon, but if you can't wait for the patch, copy the attached control_panel.xml into Custom Scenery\Orbx_A_GB_Central_TrueEarth_Custom and it'll appear in FTX Central after a re-start.
Mac Users
There is an error in the 1_mac_conversion script which causes much slower conversion. Please use the attached ZIP to replace the conversion script. If you get a permission error just chmod 777 the file.
-
16
-
1
-
3
-


")


Neil Hill is no longer with us
in The Neil Hill Memorial Lounge
Posted
Thanks for dropping in Wendy. Neil was a much respected and loved member of the ‘Orbx family’ and we miss him too. His contributions to the hobby are being enjoyed by tens of thousands of people worldwide so his legacy very much lives on. All our best wishes to you and your family.